
Previously we saw how to set up a Unity project to work with Oculus Passthrough API and how we can create an augmented interactable object. If you haven’t checked out the first two parts of this series, we highly recommend checking it out as the API will not work without the right settings and the knowledge from previous parts are required here as well.
In this blog post, we’ll learn how to customize the passthrough layer. There are various ways to customize passthrough. It could be through styling or composite layering or by surface-projected passthrough implementation. Our focus, for now, is going to be on styling, where we will write a script that will allow us to change the brightness, contrast, alpha and posterize values of the passthrough.
1. Creating UI Canvas
Let's start by creating a canvas with four sliders. The values from these sliders will later be used to change the brightness, contrast, alpha and posterize values of the passthrough.
- Right-click on the Hierarchy window and select
UI→Slider. - Select the
CanvasGameObject and rename it as PassthroughStyler → change the Render Mode toWorld Space→ adjust its position and scale, I have considered the position as (0,0,0) and the scale as (0.01, 0.01, 0.01) → for the EventCamera, drag and drop theCenterEyeAnchorGameObject from theOVRCameraRig GameObjectinto that field.
- Select the
SliderGameObject → adjust its position and scale. - Duplicate the
SliderGameObject thrice and name them as BrightnessSlider, ContrastSlider, AlphaSlider and PosterizeSlider → adjust its position such that there is a sufficient gap in between them.

- Right-click on
PassthroughStylerGameObject and selectUI→ selectText - TextMeshPro→ click onImport-TextMeshPro Essentials, that popup will be seen if you don't have it imported already, as seen in the gif→ reduce the Font Size and Center align the text. - Duplicate the
Text(TMP)GameObject thrice → adjust their position from top to bottom and name them as Brightness, Contrast, Alpha and Posterize respectively. - Copy and paste the same names into the respective Text Input field.
- Select the
PassthroughStylerGameObject and move it in front of the camera. - Disable the
CubeGameObject
2. Making UI Interactable
At this current state, we’ll be just able to view the UI canvas but not interact with it. To make it interactable we need to add a few components and helper prefabs to our scene.
- From the Hierarchy window delete the
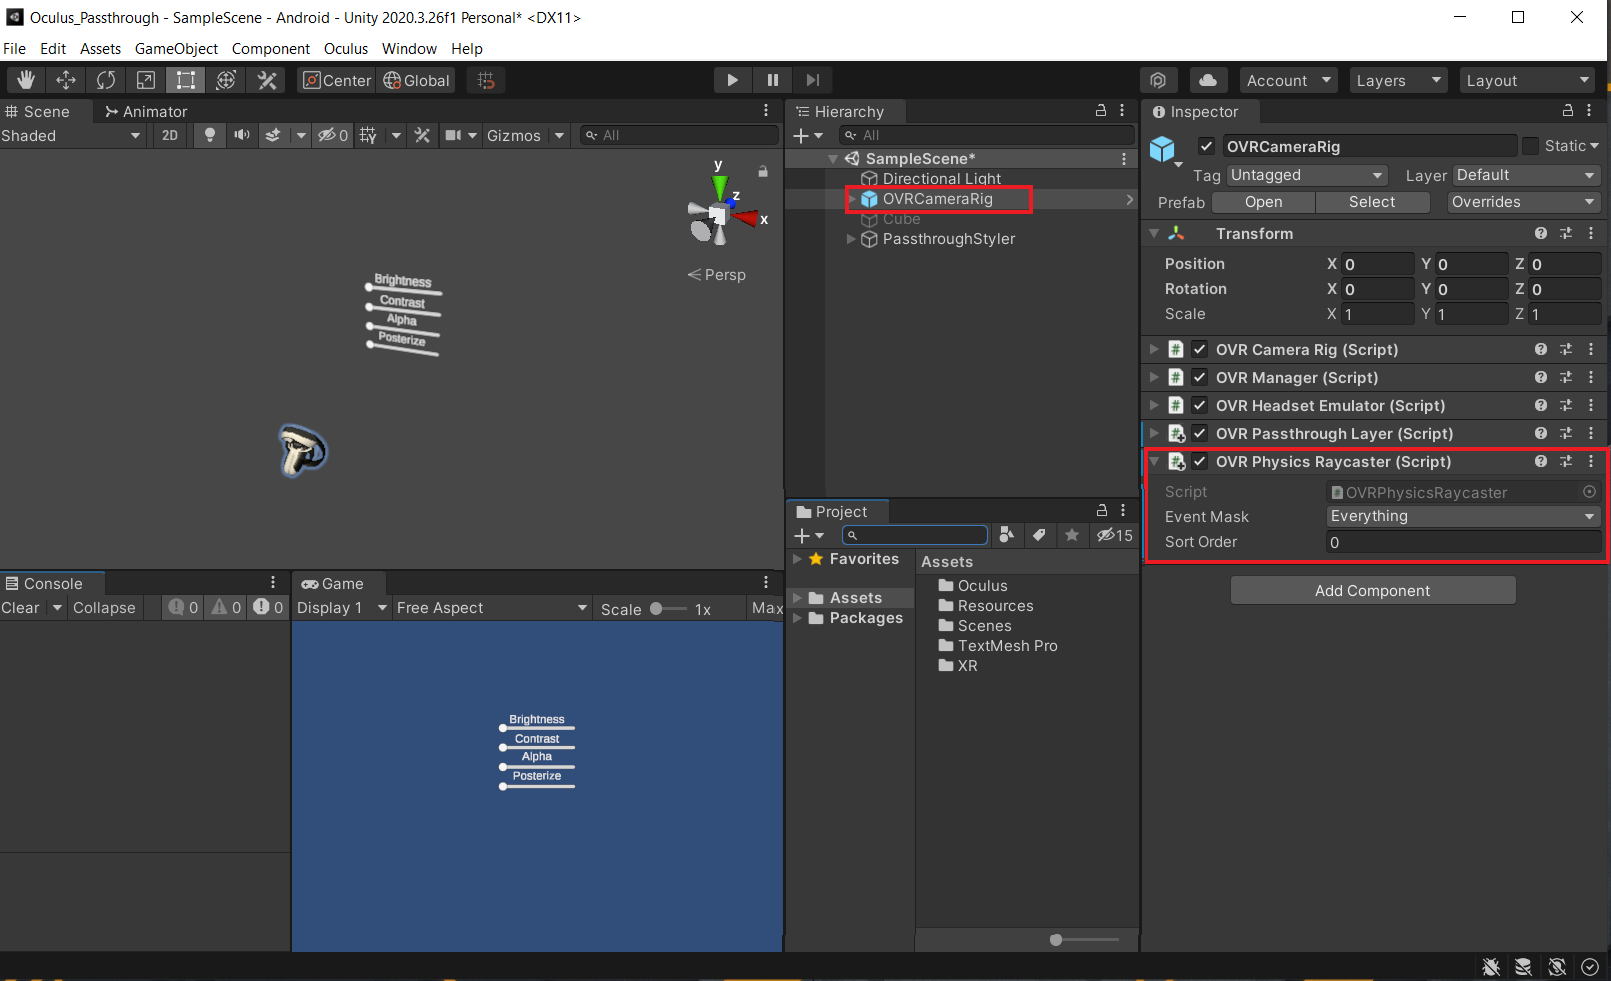
EventSystemGameObject. - Select the
OVRCameraRigGameObject and add theOVR Physics Raycastercomponent.
- In the Project window, search for UIHelpers → drag and drop the
UIHelpersprefab into the Hierarchy window. - Open the
UIHelpersprefab’s children→ select theLaserPointerGameObject → enable theLineRenderercomponent.
- Select the PassthroughStyler GameObject → remove the Graphic Raycaster component → add the OVR Raycaster component.
- With this, we should be able to use the UI with the controller. But when you test it, you’ll not be able to interact with the UI. The reason is that the Canvas of the individual text is big and it's placed in front of the sliders. So to rectify that by:
- Right-click on
PassthroughStylerGameObject and selectUI→ selectCanvas. - Name it as TextCanvas.
- Select the four GameObject
Brightness,Contrast,AlphaandPosterize, and move them into theTextCanvasGameObject.
- Right-click on


3. Scripting
3.1 Code
3.2 Code Breakdown
| Variable Name | Type | Use |
|---|---|---|
| passthroughLayer | OVRPassthrough Layer | To assign the OVRPassthroughLayer component and use its properties. |
| setBrightness | float | To store the value between 0 and 1 from the slider. The value will determine the brightness of the passthrough layer. |
| setContrast | float | To store the value between 0 and 1 from the slider. The value will determine the contrast of the passthrough layer. |
| setPosterize | float | To store the value between 0 and 1 from the slider. The value will determine the posterize of the passthrough layer. |
| setEdgeColor | Color | To store the alpha Color of the rendered edges. |
The UI sliders have an event called On Value Changed which gets called when the value of the slider changes. The event can send the current value as a float type dynamic argument. So by making use of that feature we can change the Passthrough Layer’s fields dynamically using public methods.
When the OnBrightnessChanged method is invoked by the On Value Changed event of the slider, it passes the slider values as float parameters to this method. Which then sets the Passthrough filter’s brightness to that value.
Other methods OnContrastChanged, OnAlphaChangedwork and OnPosterizeChanged work in the same way as well. The only then we need to be care full about is to assign the right method to the right slider
Customizing the Passthrough Layer
In this section, we’ll see how to set up the OVRPassthroughLayer component. We’ll also see how to assign the StylingPassthrough component’s methods to the slider's events.
- In order to customize the Passthrough Layer, we need to enable the Layer’s control map. To do that, click on
OVRCameraRigGameObject → under theOVRPassthroughLayercomponent, select the Color Map asControls.
- Add the
StylingPassthroughcomponent to thePassthroughStylerGameObject by dragging and dropping the script on the GameObject. - To add the parameter for Passthrough Layer , drag and drop the
OVRCamraRigGameObject into the field. As the OVRPassthroughLayer is attached to the OVRCamraRig, it will automatically assign that to the field. - Select all the four sliders and click on the plus ➕ button to add to an action to the event list → drag and drop the
PassthroughStylerGameObject into the event field. - Click on
BrightnessSliderGameObject→ choose the functionStylingPassthrough→ under Dynamic float, selectOnBrightChangedmethod*.* Similarly*, s*elect one slider at a time and assign the respective function under Dynamic float for the rest of them.
Conclusion
