As you might know already, there are 3 types of extended technologies: AR, VR, and MR. Looking at the accessibility of these technologies right now, AR is the most accessible as it works with our smartphones and almost everyone has it. It is affordable as well. The VR tech is not as easily accessible as AR but compared to MR tech it is. Meta’s Quest 2 is currently the best affordable headset and I believe most of the VR developers have it. Now coming to MR tech, it's the least accessible one. The Hololens, the Snapchat Spectacles, and other devices in the market are very expensive and it’s not easy to get hold of one as well. But personally, I feel MR has more application than the other two. So at this point in time what's the best alternative we have to develop and learn MR? I would say the Mata Passthrough API. Yes! It does mean you need to have a Quest 2 device with you in order to learn and develop this API.
1. What is a Passthrough?
The API takes the camera feed and processes it through a filter called a passthrough. So that output you see on the display is not the actual environment as it but a processed one. We will not have access to the actual images or videos of a user’s physical environment.
Since the output is rendered from a filter, we will have some flexibility to tweak the filter to get a certain output. As of now, there are only 3 ways.
First is Styling, which lets us colorize the passthrough feed, highlight edges, and perform image processing effects such as contrast adjustment and posterizations of the image, stair-stepping the grayscale values.

The second is Composite layering, which lets you specify the placement of the passthrough layer relative to virtual content (overlay, underlay) and how it should blend with the virtual content. Using alpha masking, you can specify where on the screen Passthrough shows up.
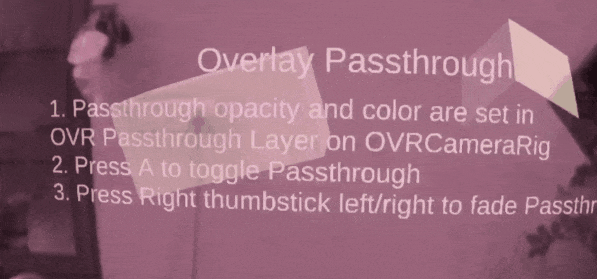
And the last one is Surface-Projected Passthrough, which lets us define the geometry onto which Passthrough images are projected. This approach leads to a more stable rendition of Passthrough in cases where parts of the user’s environment are known to the application.
Before we can start customizing the passthrough filter, we need to set up our Unity project for passthrough. So in this blog, we’ll be focusing on all the setup that is required to make passthrough work on your device.
2. Prerequisites
Before we begin with the setup and implementation, make sure to have the following requirements met:
- The headset should have Oculus OS version 34 and above.
- Latest Oculus PC app.
- Latest Oculus Integration package.
- A minimum Unity version of 2019.4 LTS
3. Setting up Oculus PC App for passthrough
You can either connect your machine with Quest2 via Link Cable or via Airlink, the choice is yours. Once you have the Quest2 connected:
- On the Oculus PC app, go to
Settings→Beta→ Toggle the button for theDeveloper runtime feature. - After that, you will be able to see the
Passthrough over Oculus link, toggle that button for that as well.
- Next, you need to set Oculus as active OpenXR Runtime. So, on the Oculus PC app, go to Settings → General→ click on the Set Oculus as active. If you have it enabled already the options would have greyed out as seen below.

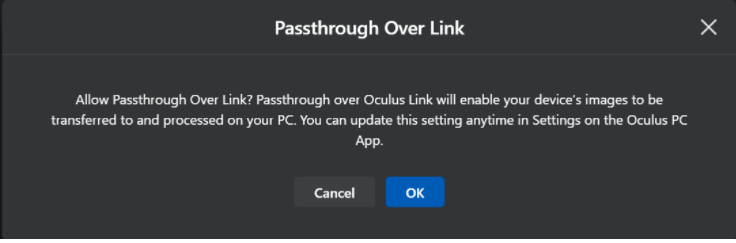
- When you wear your headset after making these changes, you will get the following popup if you are using Passthrough for the first time, just click on OK.
Do not worry if you are not getting this popup immediately after making the changes above, you might get it later when you test the developed scene.
💡Note: If you already had the Unity project open while you made changes to the above settings then restart it.
4. Downloading and Installing Oculus Integration
The Oculus Integration package comes with a few example scenes and resources, those scenes are set up for 3D Render Pipeline. So while choosing the render pipeline for your project, you can stick with 3D render pipeline if you want to test the example scene or if you want to use the resources, or else you can use URP as well.
- Open new Unity project, I am using Unity 2020.3.26f1 with the 3D render pipeline.
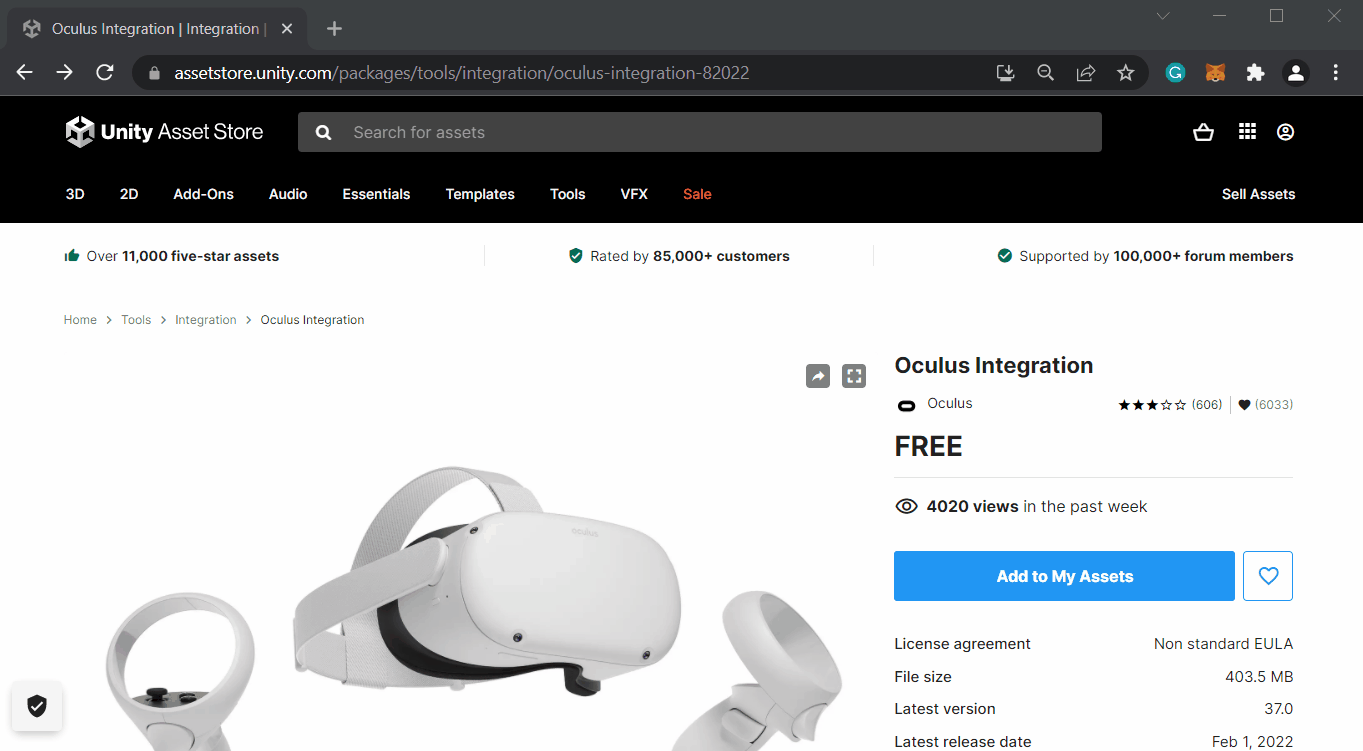
- On your web browser, go to the Unity Asset Store → search for Oculus Integration → click on
Add to My Assets→Open in Unity→ you will get a popup asking if you want to open the Unity Editor, click onOpen Unity Editor. This will open your Unity project and the Packager Manager window.
- In the Package Manager window, look for Oculus Integration and click on Import → click on Import once again.
- Once the package gets imported, you will get a series of pop-ups as follows:
- If you want to enable the latest version of the OVR plugin → click
Yes. - If you want to use OpenXR backend → click
Use OpenXR. - Notification that OVRPlugin with OpenXR backend will be activated by default → click
Ok. - Notification that OVRPlugin has been updated and Unity has to be restated → click
Restart. - If you want to update the Spatilizer Plugin → click Update.
- Notification that Spatilizer Plugin has been updated and Unity has to be restated → click
Restart.
- If you want to enable the latest version of the OVR plugin → click
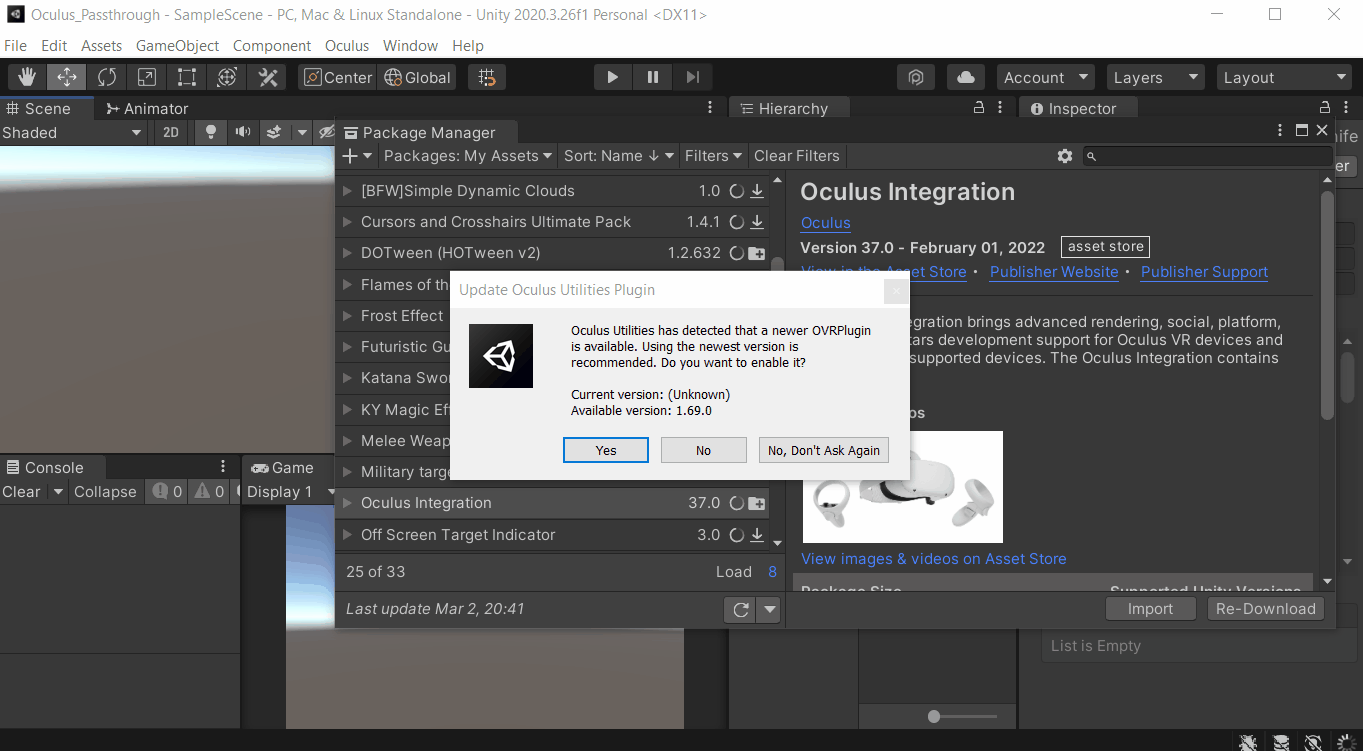
Wait for the Unity project to reopen, with that we have successfully imported the Oculus Integration package with the latest Oculus plugins.
5. Unity project Setup
This section tells you about the custom settings that are required to run Passthrough API on your Quest2 when you test it or build it.
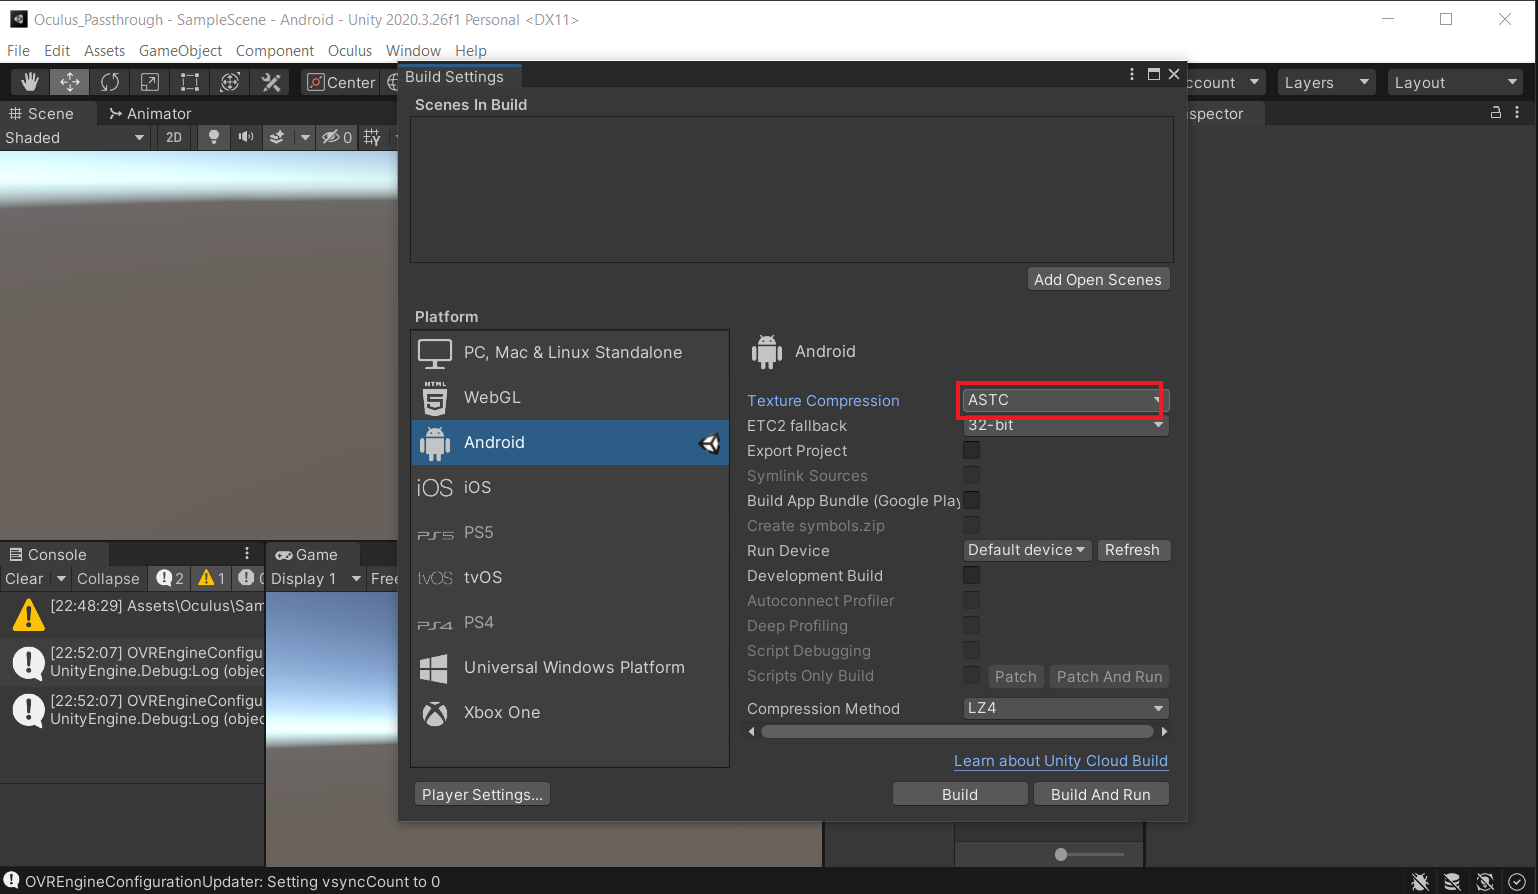
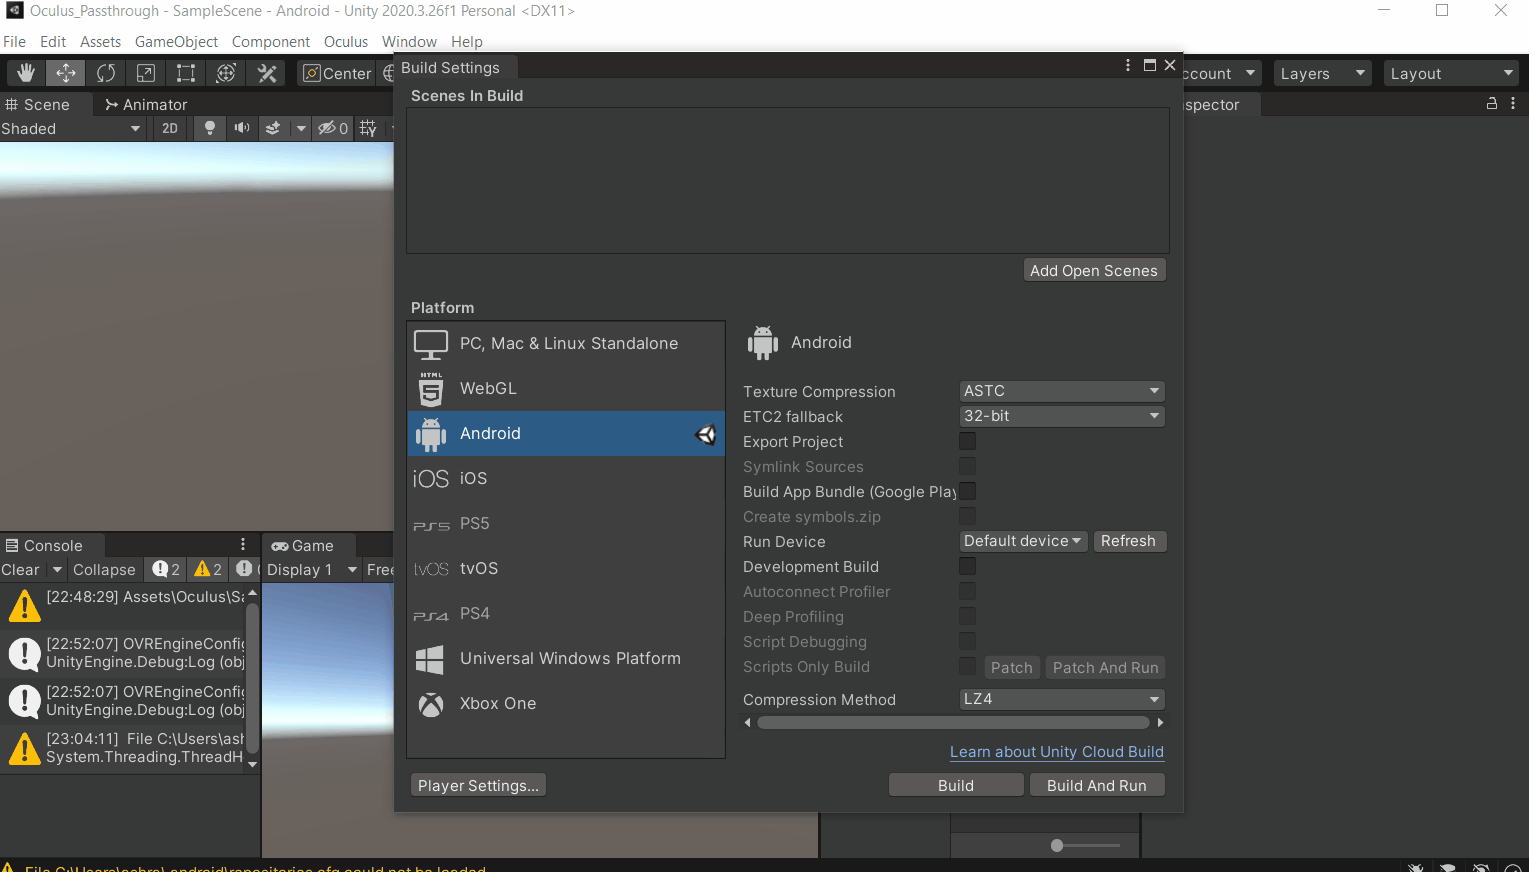
- Click on
File→Build Settingsand under Platform selectAndroidand click onSwitch Platform.
- On the same window, set Texture Compression to ASTC. It might take a few minutes for this change to happen.
- On the same window, click on
Player Settingsand do the following:- Enter the Company Name, Product Name, and Version
- Under Rendering, change the color Space to
Linear. - Under Graphics, API remove
Vulkan. - Under Identification, change the Minimum API Level to
API Level 23. - Under Configuration, select the Scripting Backend as
IL2CPPand select Target Architecture asARM64
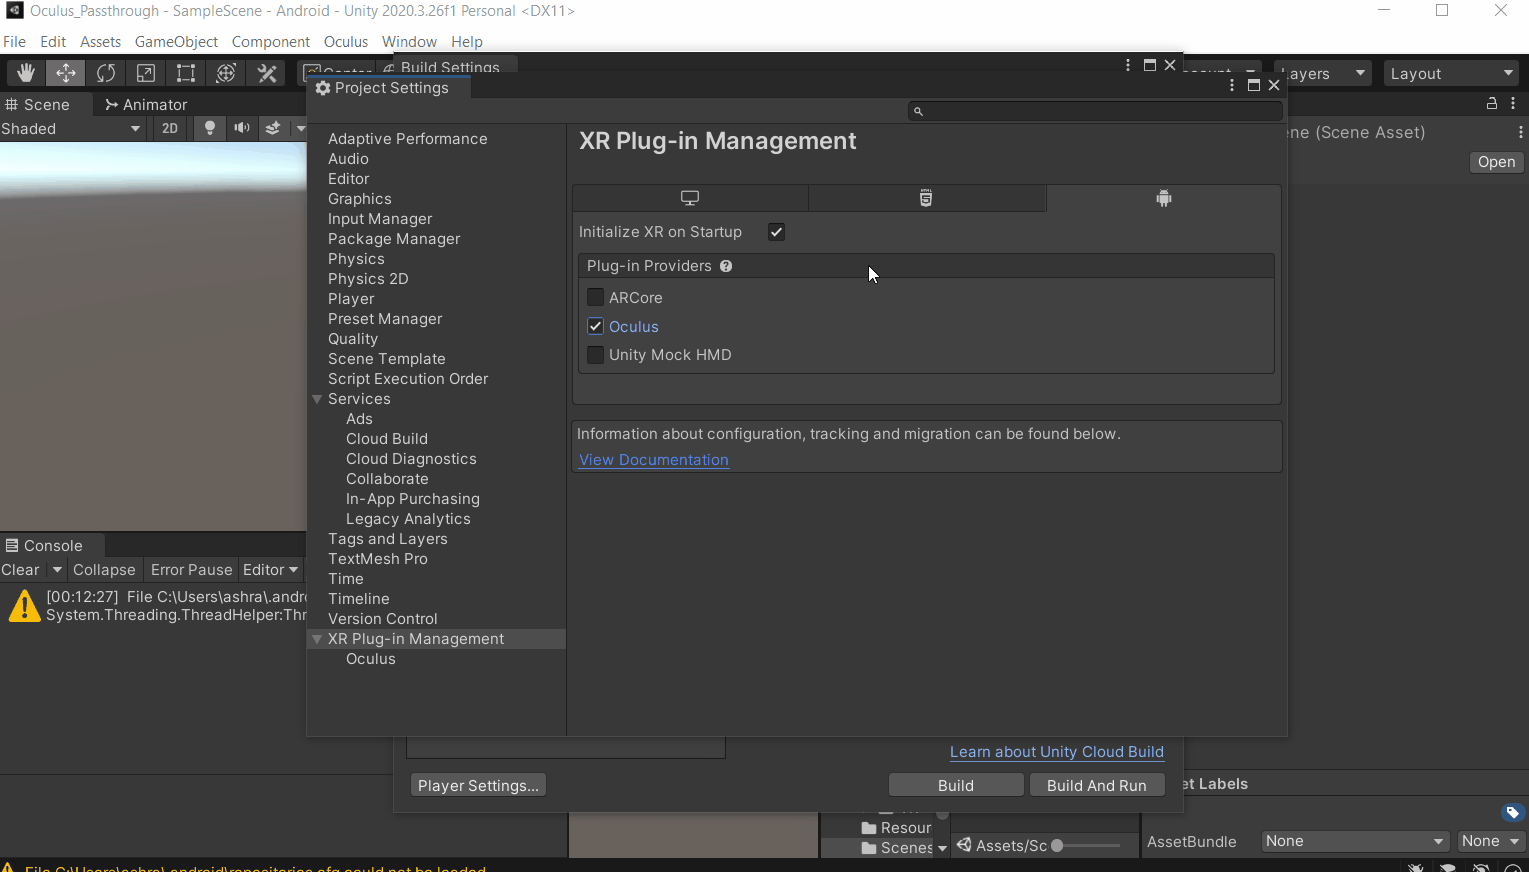
- To install the Oculus XR plugin
- Click on the
XR Plugin Managementtab → click onInstall XR Plugin management - Select the Android tab and select ✅ Oculus
- Select PC tab and select ✅ Oculus
- Click on the
Now with these settings, we’ll be able to test Passthrough via the Unity editor as well as Build it to Quest2 once the scene is ready.
6. Testing
To see if we can use passthrough via the link cable:
- Make sure you have connected the Quest2 to your machine via Link.
- In the Project folder, search for Augmented Object and open the AugmentObjects scene

- Hit the play button and you should be able to see augmented objects in your environment
💡 Note: Currently, there is no way to capture the output when you are testing the Passthrough API via link. However, it's possible to capture by building the APK and streaming the output using SIDEQUEST
Conclusion
We have learned how to set up the Oculus PC app, download and install the Oculus Integration package and set up the Unity project such that we can test passthrough via Oculus Link. The set-up is also such that we can easily build the APK into Quest2 as well.
In the next part, we’ll learn how to create a simple scene from scratch to implement a passthrough.

Created with