
This blog is the continuation of the previous one where we've learned about adding hand interactors and adding interactable objects that can be manipulated using just one hand or two hands. We also learned how to add physics to those objects. If you haven’t checked out the first two parts of this series, we highly recommend checking them out.
In this blog, we’ll learn about two more things. To create an object that can be rotated about an axis and to record and use hand poses.
Rotate Transformer
Let’s see how to create an object that has a rotational type of interaction like opening a door or opening a treasure chest.
- Create an empty GameObject and name it Door → Create a 3D Cube GameObject as a child, rename it as DoorModel and scale it accordingly.
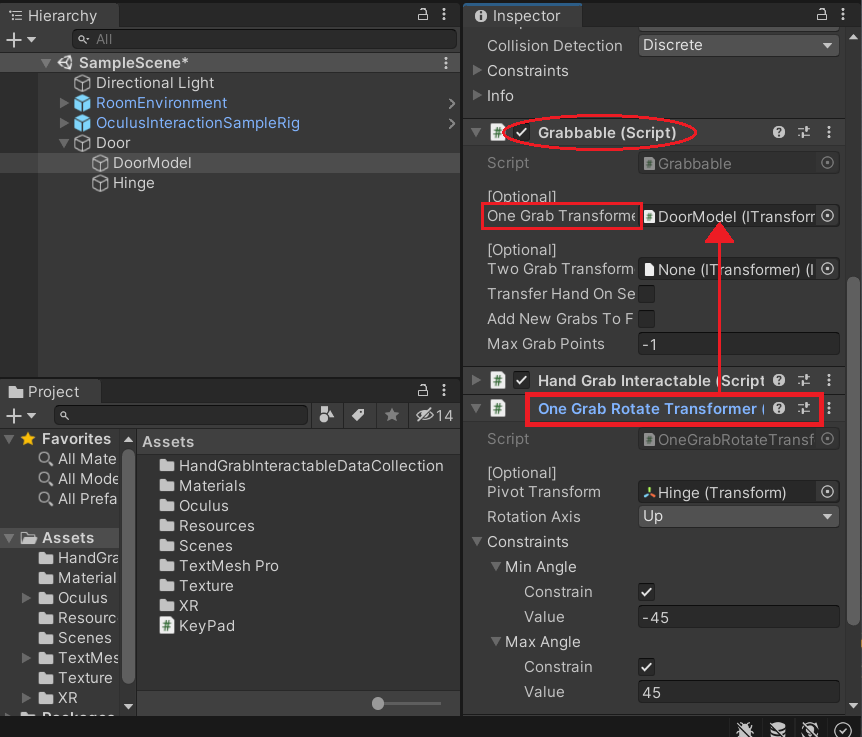
- Select the DoorModel and add a Rigidbody, a Grabbable and a Hand Grab Interactable component to it → make sure to check the box for Is Kinematic parameter of the Rigidbody component.
- Create an empty GameObject as a child of Door and call it Hinge → align it to match one of the edges of the DoorModel. The position of the Hinge is very important as its transform will act as a pivot about which the object will rotate around. The best way to align it would be using the vertex snapping → while pressing the ‘Alt’ key, drag the Hinge GameObject over the DoorModel until it snaps perfectly into the edge of your choice.
- Select the
DoorModel, add the One Grab Rotate Transformer component and,- Drag and drop the
HingeGameObject into the Pivot Transform parameter of the component. This transform will act as the axis along which the rotation will happen. - As we want the door to rotate about the y-axis of the
HingeGameObject. We’ll choose theUpfor the parameter Rotation Axis. - Finally, we’ll constrain the angle between a minimum of -45 deg and a maximum of 45 deg or any angle of your choice.
- Drag and drop the

- Drag and drop the One Grab Rotate Transformer component into the One Grab Transformer parameter of the Grabbable component.
Recording Hand Pose
By default, there are only two ways of grabbing an object, one is by pinch and the other is by making a fist. These types of grab interactions might work for simple 3D objects. But when there are complex objects like mugs, bottles, phones, etc. pinching to grab them looks unnatural. So what’s the best way to do it? By recording hand poses. We can record all the possible ways in which an object can be grabbed and when the user grabs it, the closest hand pose point gets detected and the recorded pose is seen. Also to make things clear, we still have to pinch to grab but in VR the recorded pose is seen. So let’s see how that’s done.
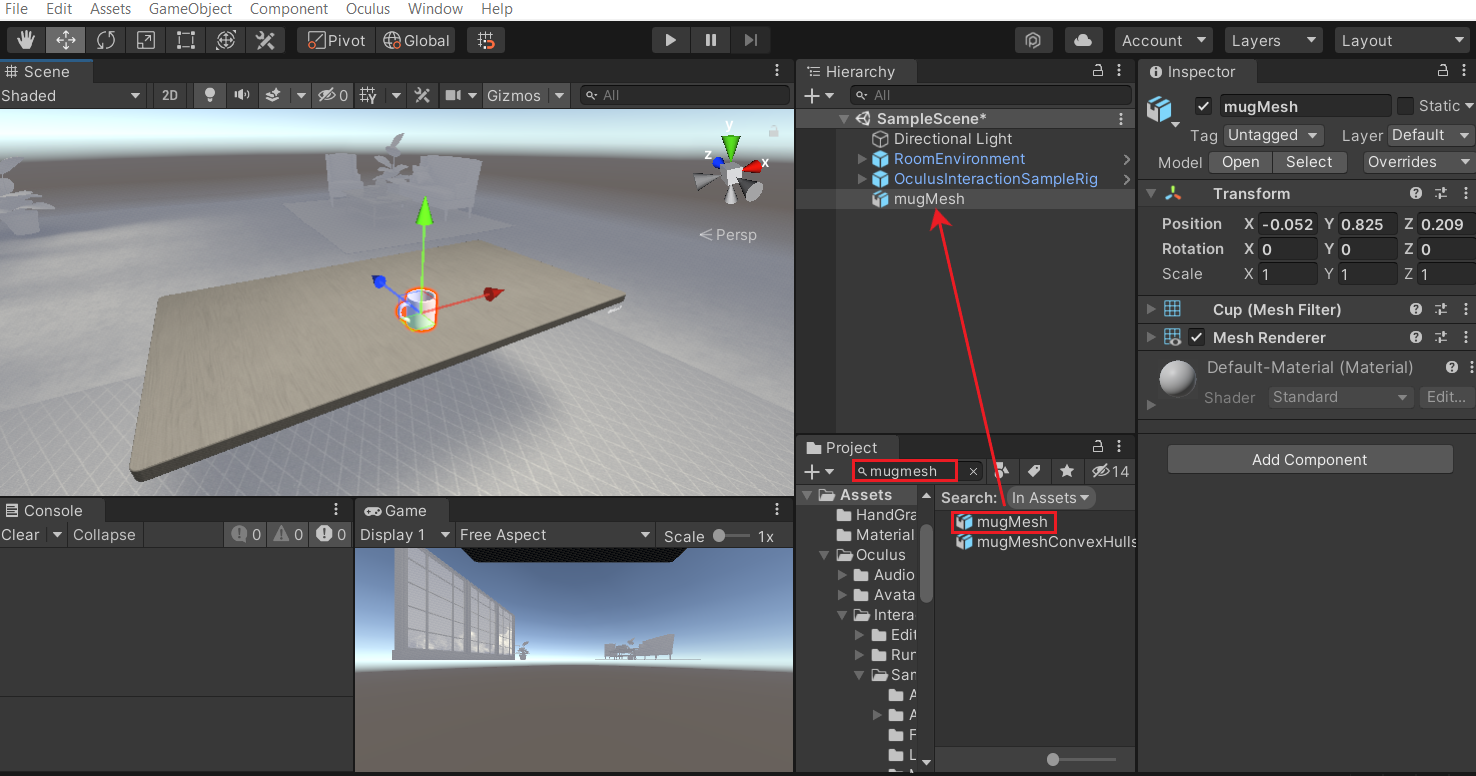
- On the project window, search for mugMesh → drag and drop it into the scene and adjust its position accordingly.
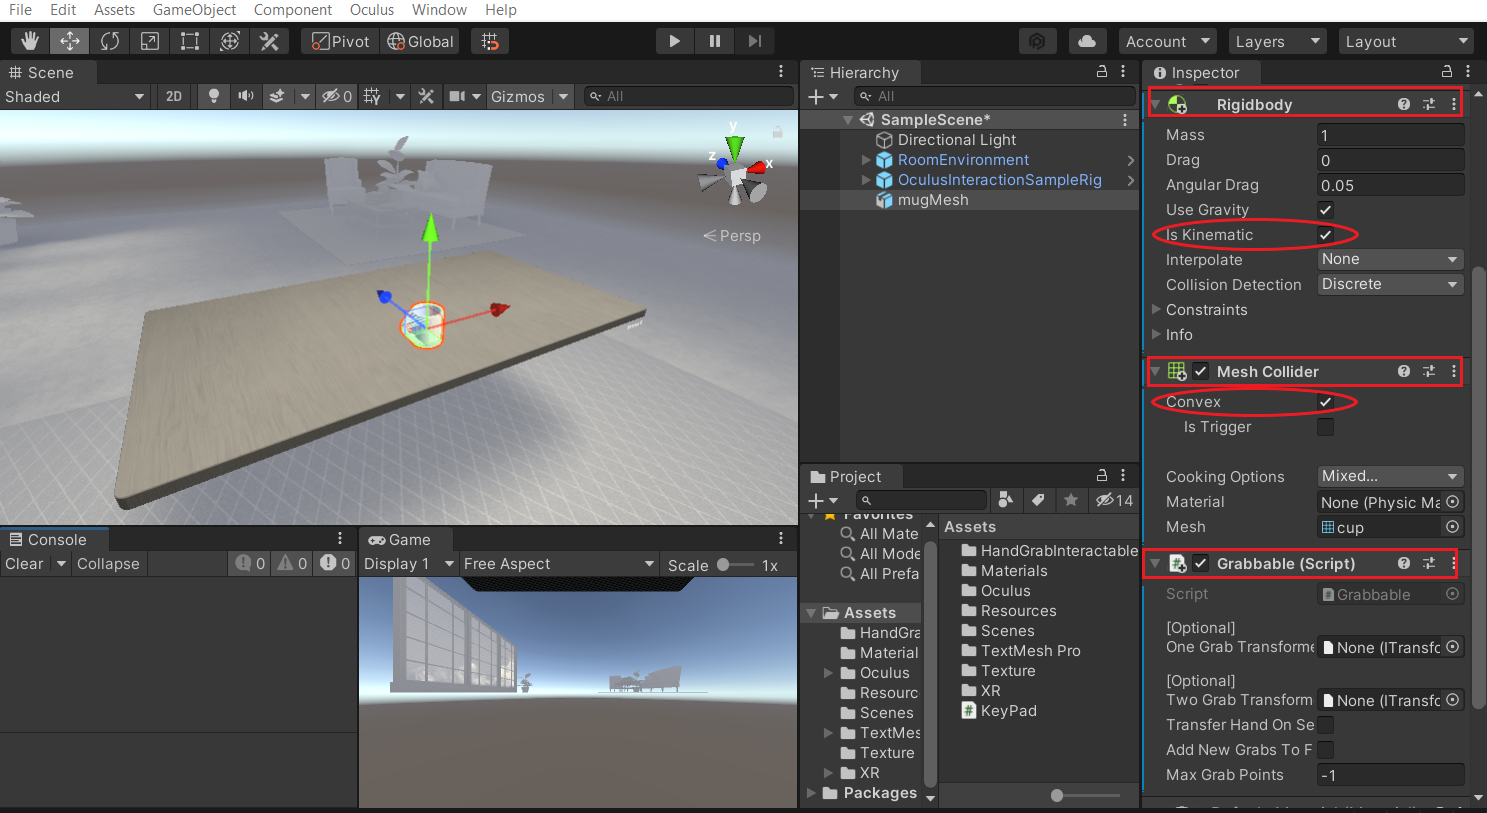
- Add a Rigidbody, a Mesh Collider and a Grabbable component to it → make sure to check the box for Is Kinematic parameter of the Rigidbody component and also the check the box for Convex parameter of the Mesh Collider component.
- To record the hand pose:
- On the taskbar, select
Oculus→Interaction→Hand Pose Recorder. This will open up the hand pose recorder window. - Drag and drop the
mugMeshGameObject into the Recordable parameter of the hand pose recorder. Basically, the object for which we are recording a hand pose should be set as a Recordable. - To be able to see the hand pose once it’s recorded we’ll have to add a ghost provider. To do that, click on the button next to the Ghost Provider parameter and select
GhostProvider. - Now hit the play ▶️ button → add a grab interactor by clicking the button next to select the Hand Grab Interactor parameter and select the interactor of your choice (left hand or right hand).
- Imitate grabbing the object with a hand pose of your choice and click on the
Record Posebutton. - We can capture multiple hand poses as well.
- Before exiting the play mode, click on the
Store Posesbutton.
- On the taskbar, select
- To load the recorded hand pose on the mug, select the mugMesh GameObject and click on the Load Poses button. The poses will be added as child of the mugMesh GameObject.
- Now to get the perfect pose, we can select the Hand interactable and adjust the poses using the UI on the Scene widnow. If you not able to seem them, then make sure the Gizmos are enabled in the scene view.
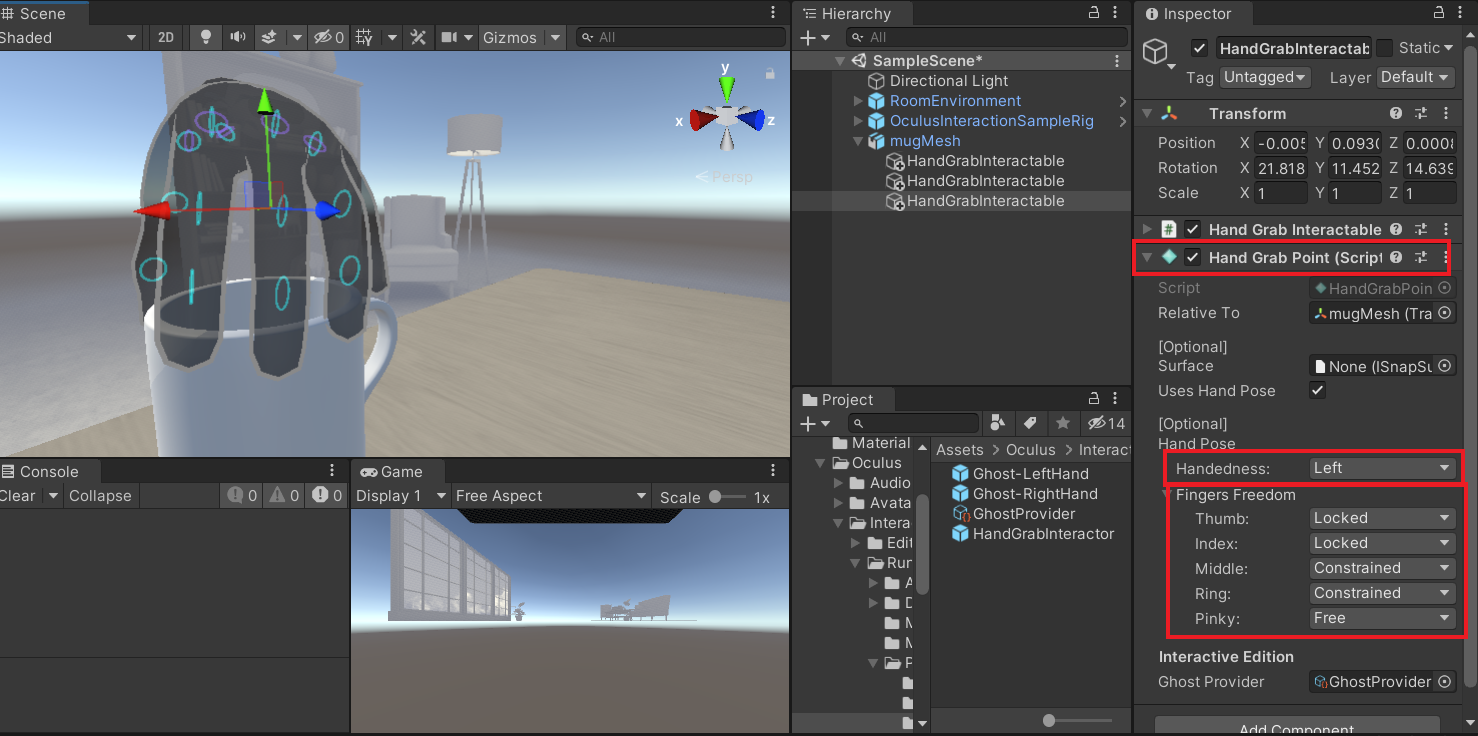
- You might notice that the
HandGrabInteractableGameObject will have a Hand Grab Point component attached to it.- The Handedness parameter determines which hand pose will get detected. Either left hand or right hand.
- The parameter Finger Freedom has three options, Locked, Constrained and Free. Locked indicates that the finger in VR will remain fixed even if we move it in the physical world. Constrained indicates the finger will have slight movement and Free indicates that finger will not be fixed in VR and follow the movement our finger makes in the physical world.
- We have recorded poses for the left hand, what about right hand? Do we have to record it all over again? No! All we need to do is select the HandGrabInteractable GameObject→ click on Create Mirrored HandGrabInteractable button in the Hand Grab Interactable component.
- Before we test this out, we need to add synthetic hands to the OculusSampleRig.
- In the project window, search for
LeftHandSynthetic→ drag and drop it on theLeftHandGameObject. Similarly, search forRightHandSynthetic→ drag and drop it on theRightHandGameObject. - Disable the
LeftHandVisualandRightHandVisualGameObject. - Open the
LeftHandSyntheticGameObject → select theHandModifierGameObject → add the Hand Grab Interactor Visual component → drag and drop theHandGrabInteractorLeftGameObject into the Snappers parameter → drag and drop theHandModifierGameObject into the Synthetic Hand parameter. - Drag and drop the
LeftHandGameObject into the DataModifier parameter of the Synthetic Hand component. - Do the same for
RightHandSyntheticGameObject as well.
- In the project window, search for
- Now we can finally hit play and test this out.
- If we want to perform additional tasks when the object is grabbed, released, hovered over, etc.
- Select the
mugMeshGameObject → add the component Interactable Group View. - Lock the Inspector window → select all the
HandGrabInteractableobjects → drag and drop them inside the Interactables parameter of the Interactable Group View component. - Then, add the Interactable Unity Event Wrapper component → drag and drop the Interactable Group View component into the Interactable view parameter.
- Select the

- Now we can make use of those events to perform additional task like playing audio effects or visual effects or anytime else.
Conclusion
