In this blog post, we’ll learn about selective lighting using a passthrough layer. With that, we’ll be able to create an amazing mixed reality experience where the user will be able to see the real world using a virtual flashlight.
Previously, we've learned about Passthrough and how it is set up, about implementing Passthrough and we saw how to customize the passthrough layer. Later, we've also learned about surface project passthrough and selective passthrough. If you haven’t checked it out yet, we highly recommend checking it.
💡 Make sure you have a Unity project with version 39 of the Oculus Integration package imported.
Scene Setup
In this section, we’ll set up our scene to work with passthrough.
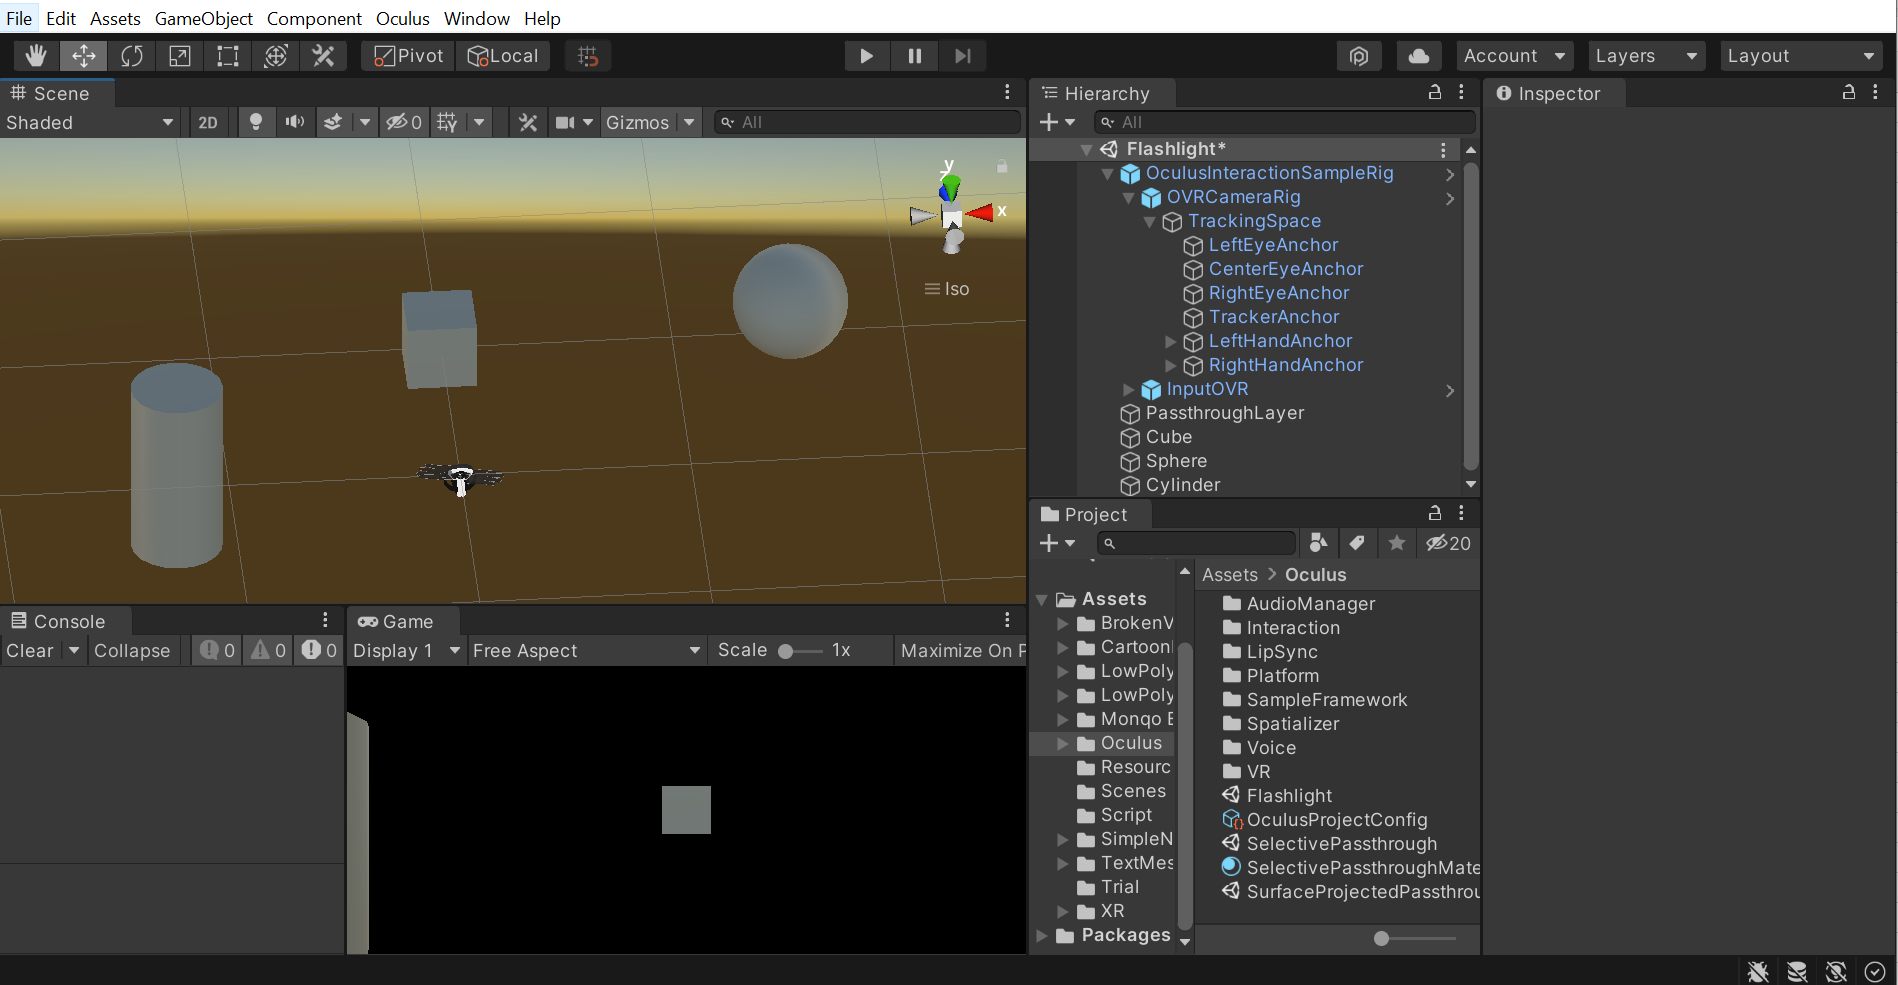
- We’ll start by creating a new scene. Right-click on the Project window → Create → Scene → name it as Flashlight → Open The scene.
- Delete the Main Camera from the Hierarchy window.
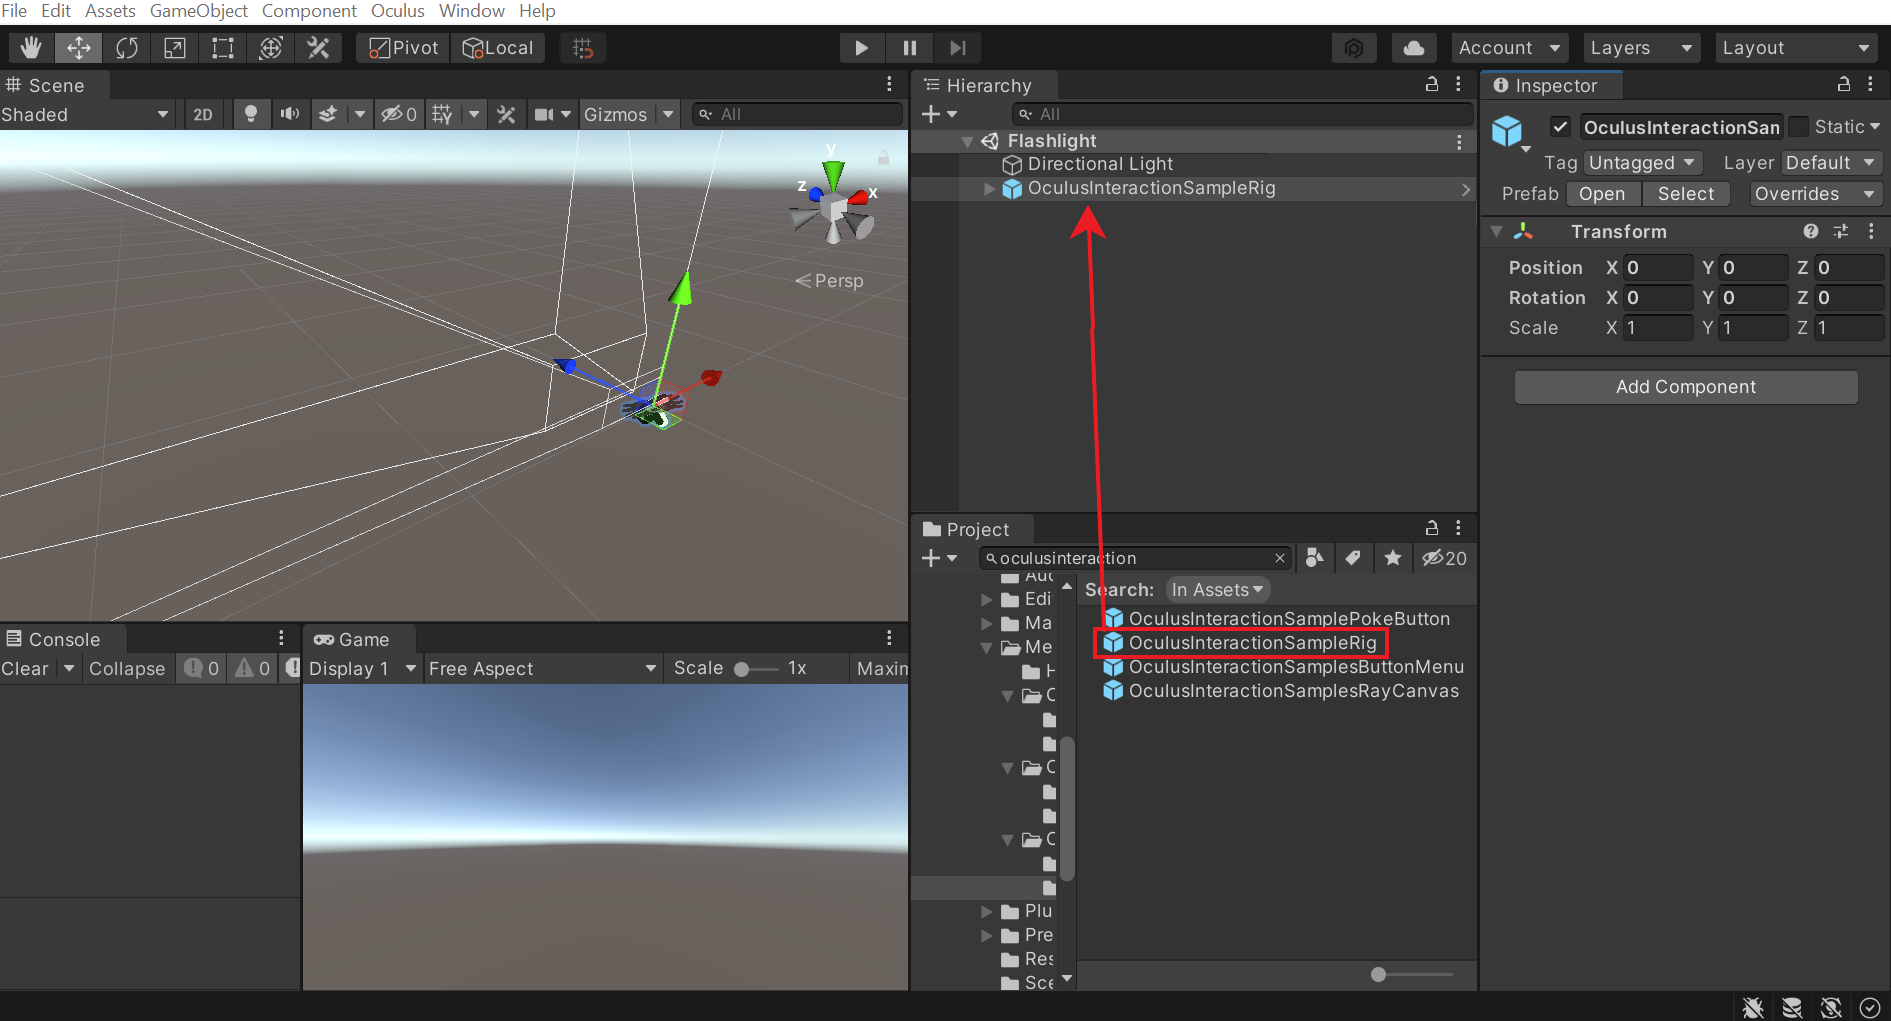
- Search forOculusInteractionSampleRigCameraRig in the Project window → drag and drop it in the Hierarchy.
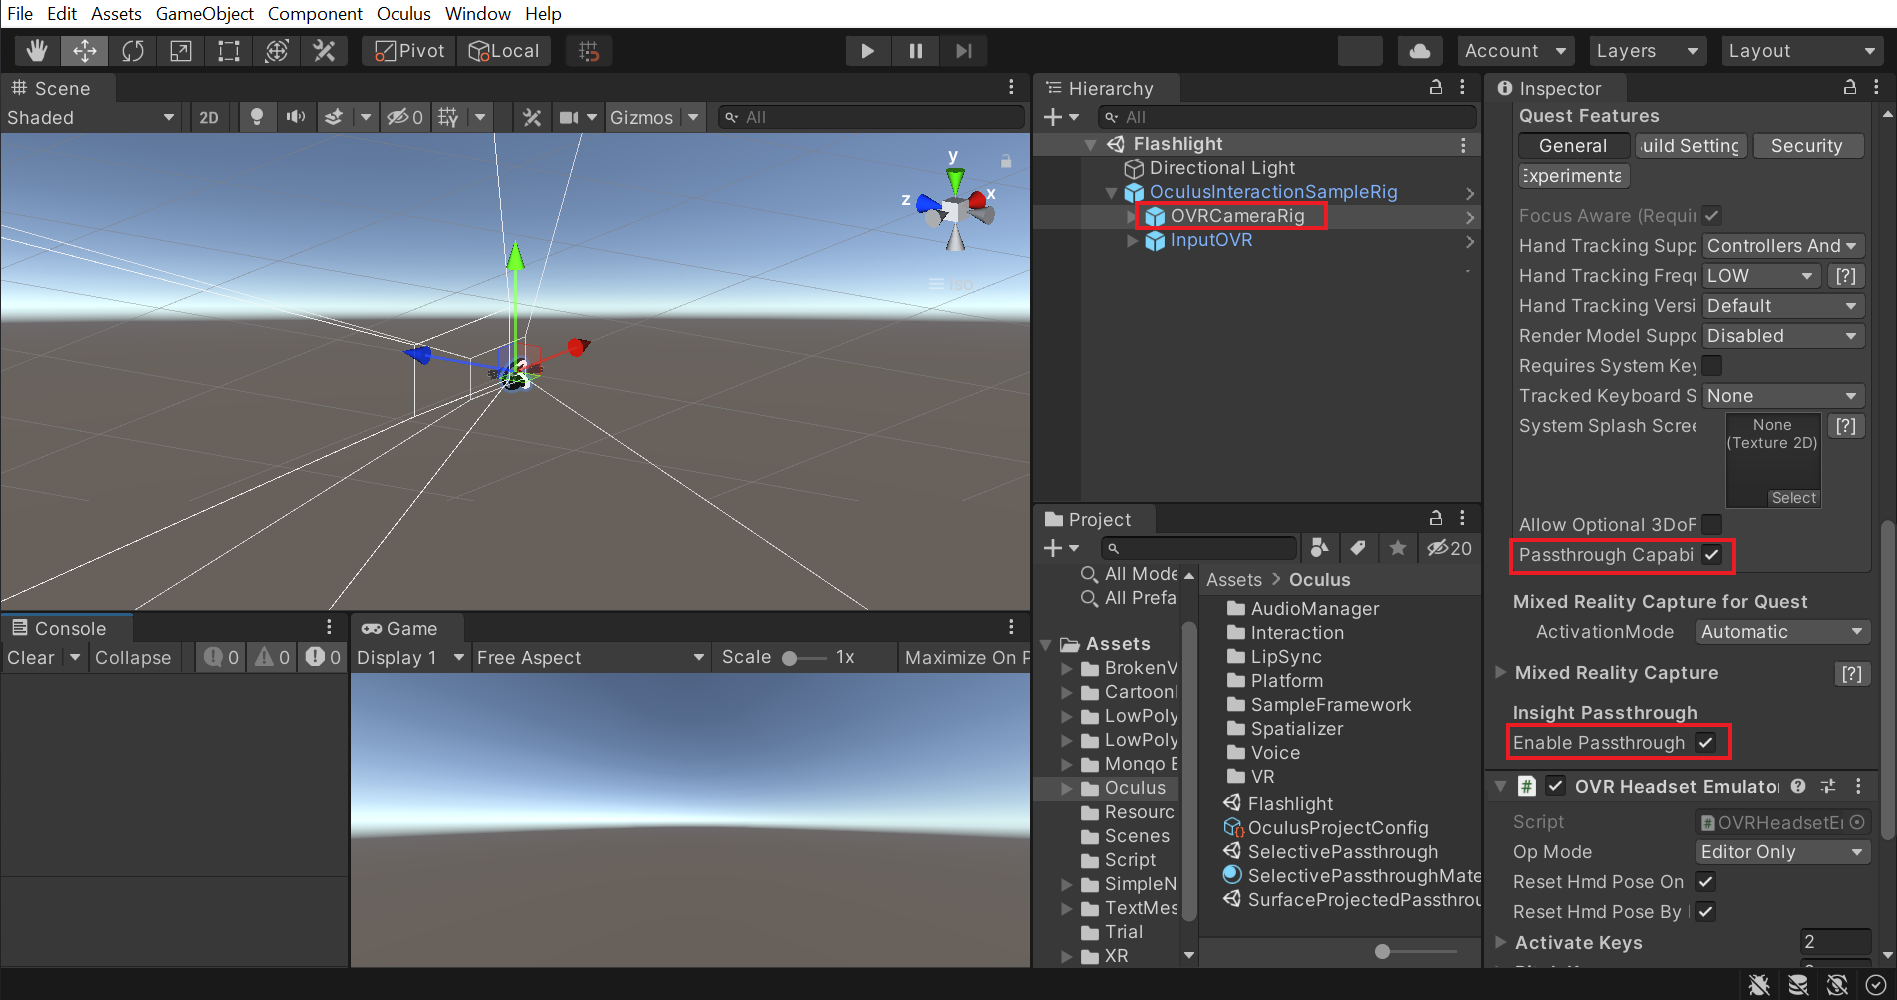
- Select the OVRCameraRig GameObject and make sure the Passthrough Capability and Enable Passthrough parameters of the OVR Manager component are checked.
- Open the child objects of OculusInteractionSampleRigCameraRig GameObject and select the CenterEyeAnchor GameObject → select the Clear Flags parameter as Solid Color → click on the Background parameter, change its color to black and adjust its alpha value to 255 so that the color is opaque.
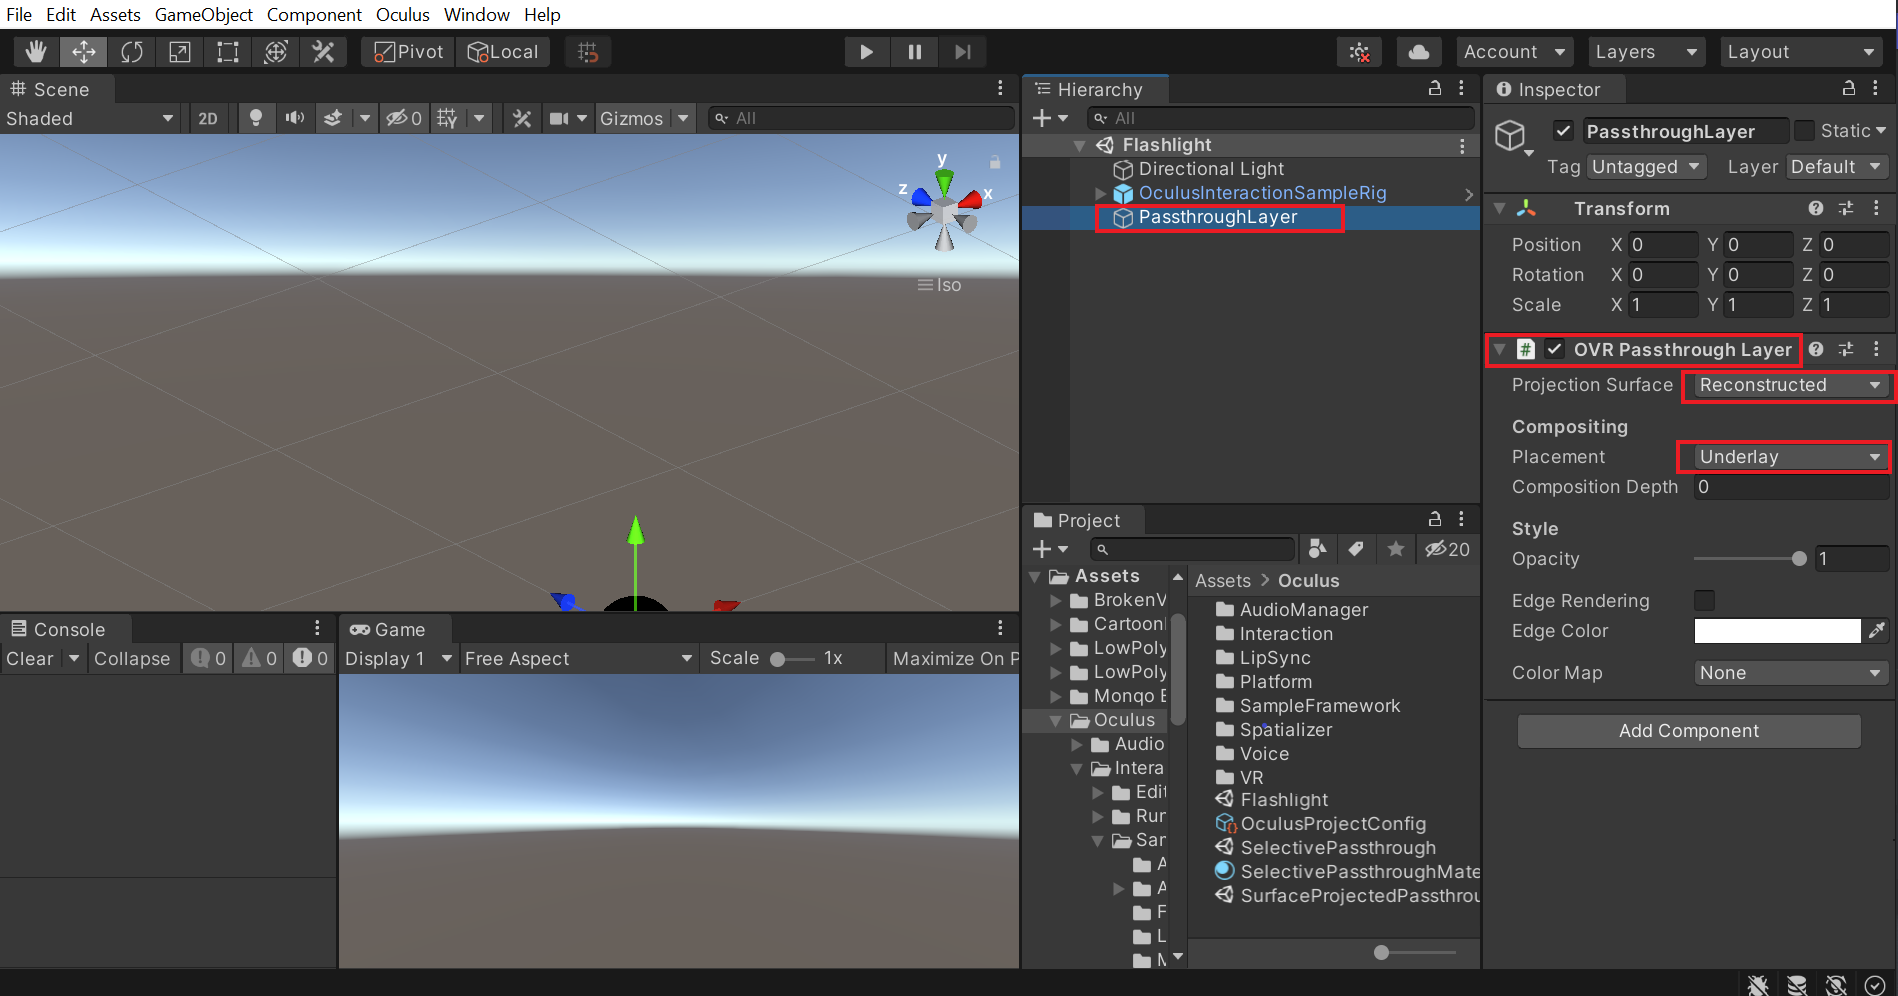
- Create an empty GameObject and name it as PassthroughLayer → add the OVR Passthrough Layer component → make sure the Projection Surface parameter is Reconstructed → set the Placement parameter as Underlay.
Now let’s add a few 3D objects to our scene and place it at different positions:
- Right-click on the Hierarchy window → 3D Objects → Cube → scale it down and place it at a random position.
- Add two more 3D Objects, scale them down and place them at a random position as well.
- As we want the scene to be dark, let’s delete the Directional Light GameObject from the Hierarchy window.
Creating Flashlight Model
Now let’s create a simple flashlight model using the 3D objects. If you have a different 3D model, feel free to use it and skip to the next section.
- Create an empty GameObject and name it Flashlight.
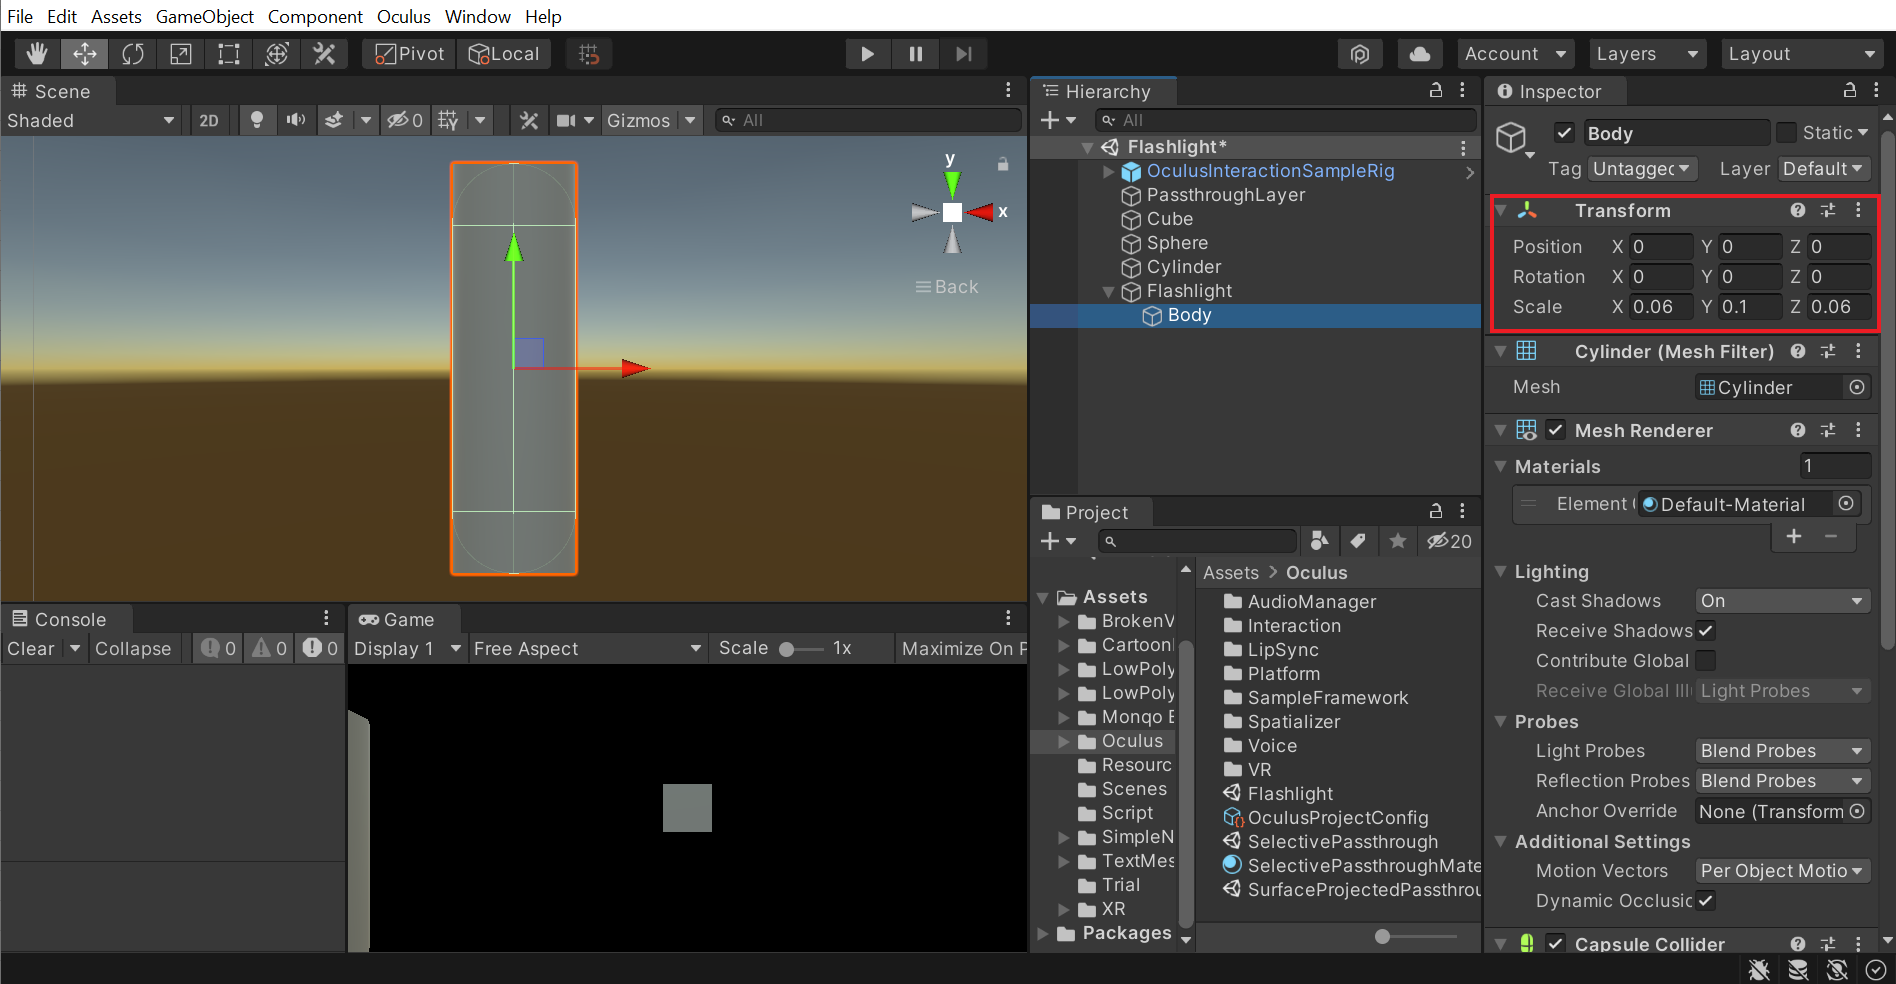
- Create a 3D Cylinder and name it Body → scale it down.
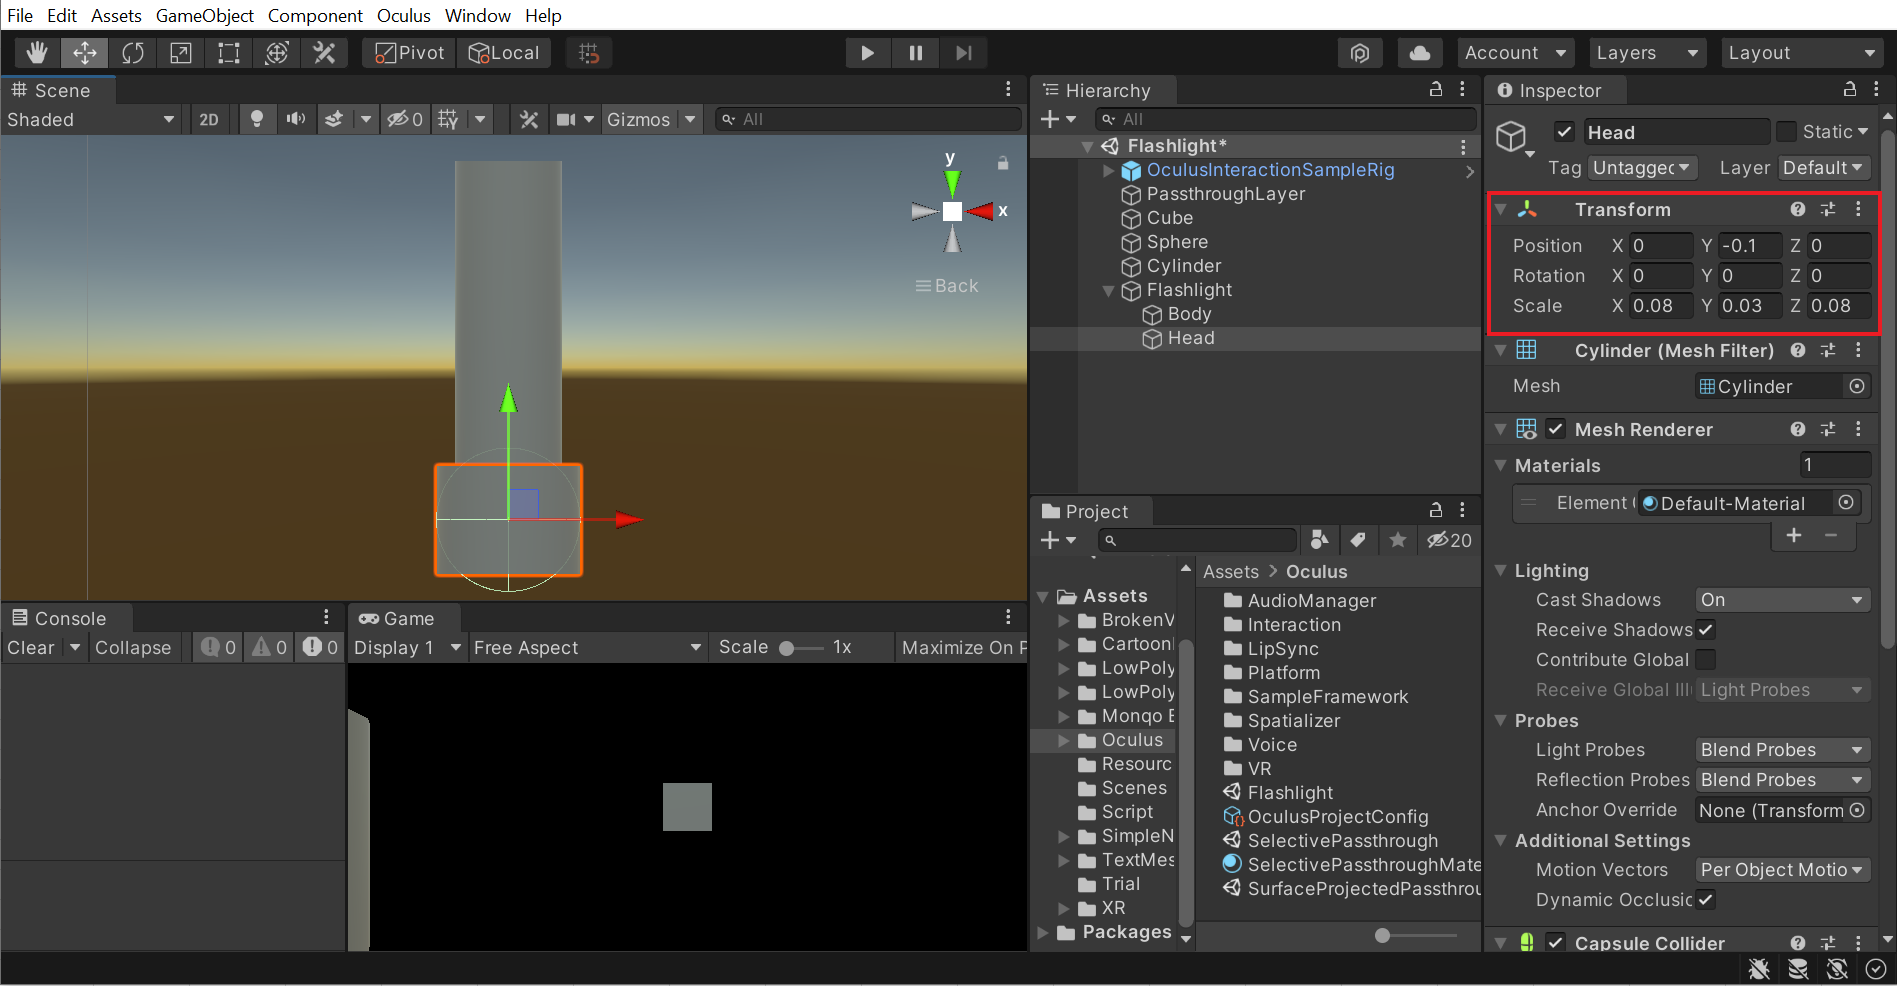
- Duplicate the Body GameObject → name it Head → scale it and place it at the bottom.
- Duplicate the Head GameObject → name it Face → scale it and place it slightly below the Head GameObject → change the material to WhiteUnlit.
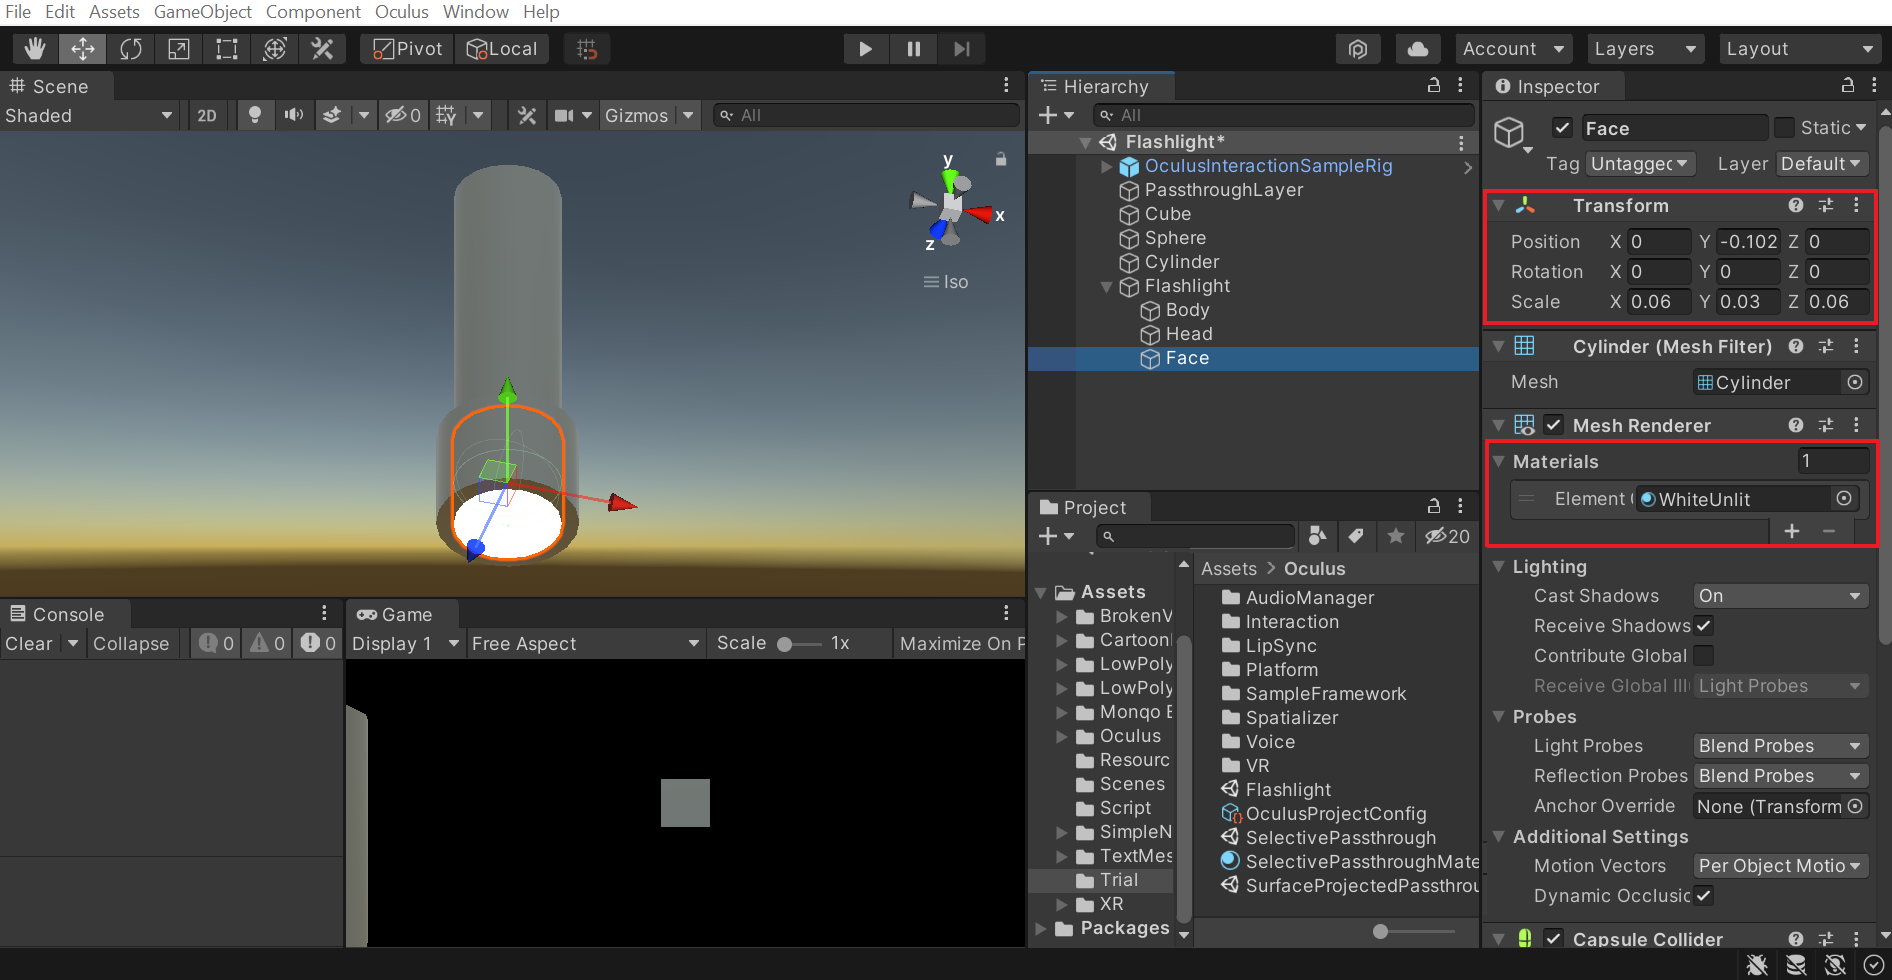
With that, we have the Flashlight model ready.
Making the Flashlight Grabbable
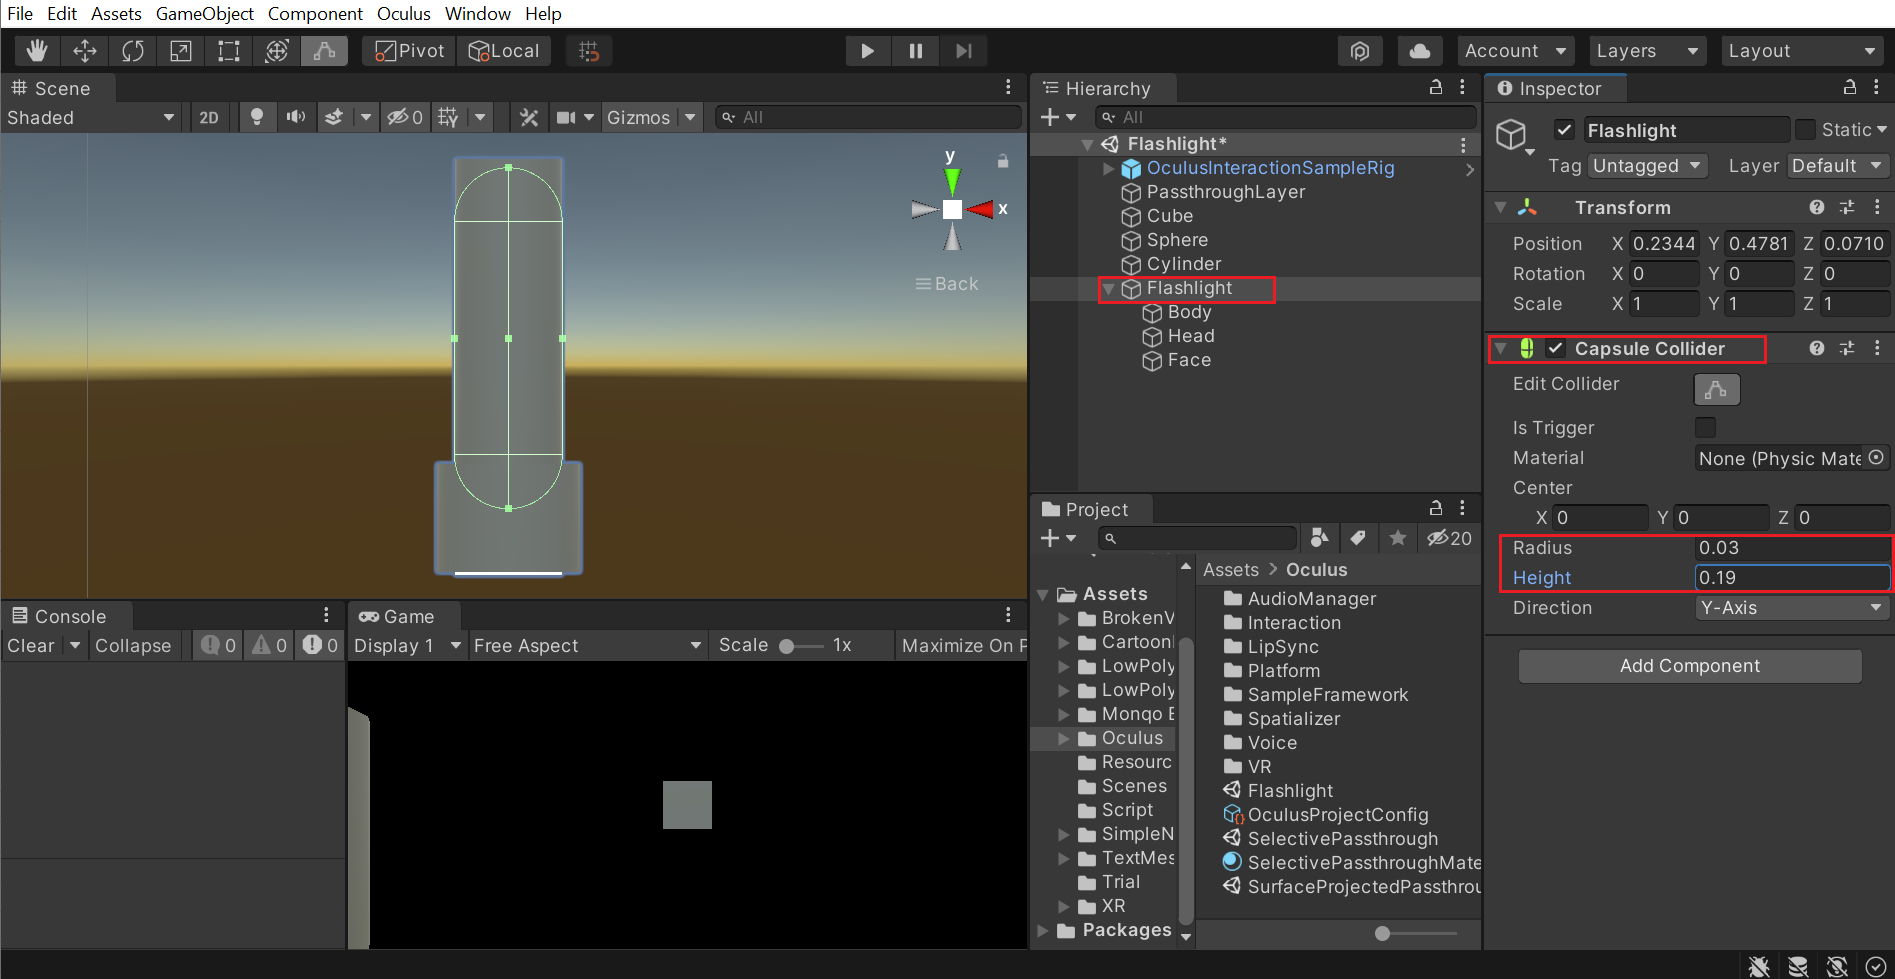
- Select the GameObjects Body, Head and Face → remove the Capsule Colliders.
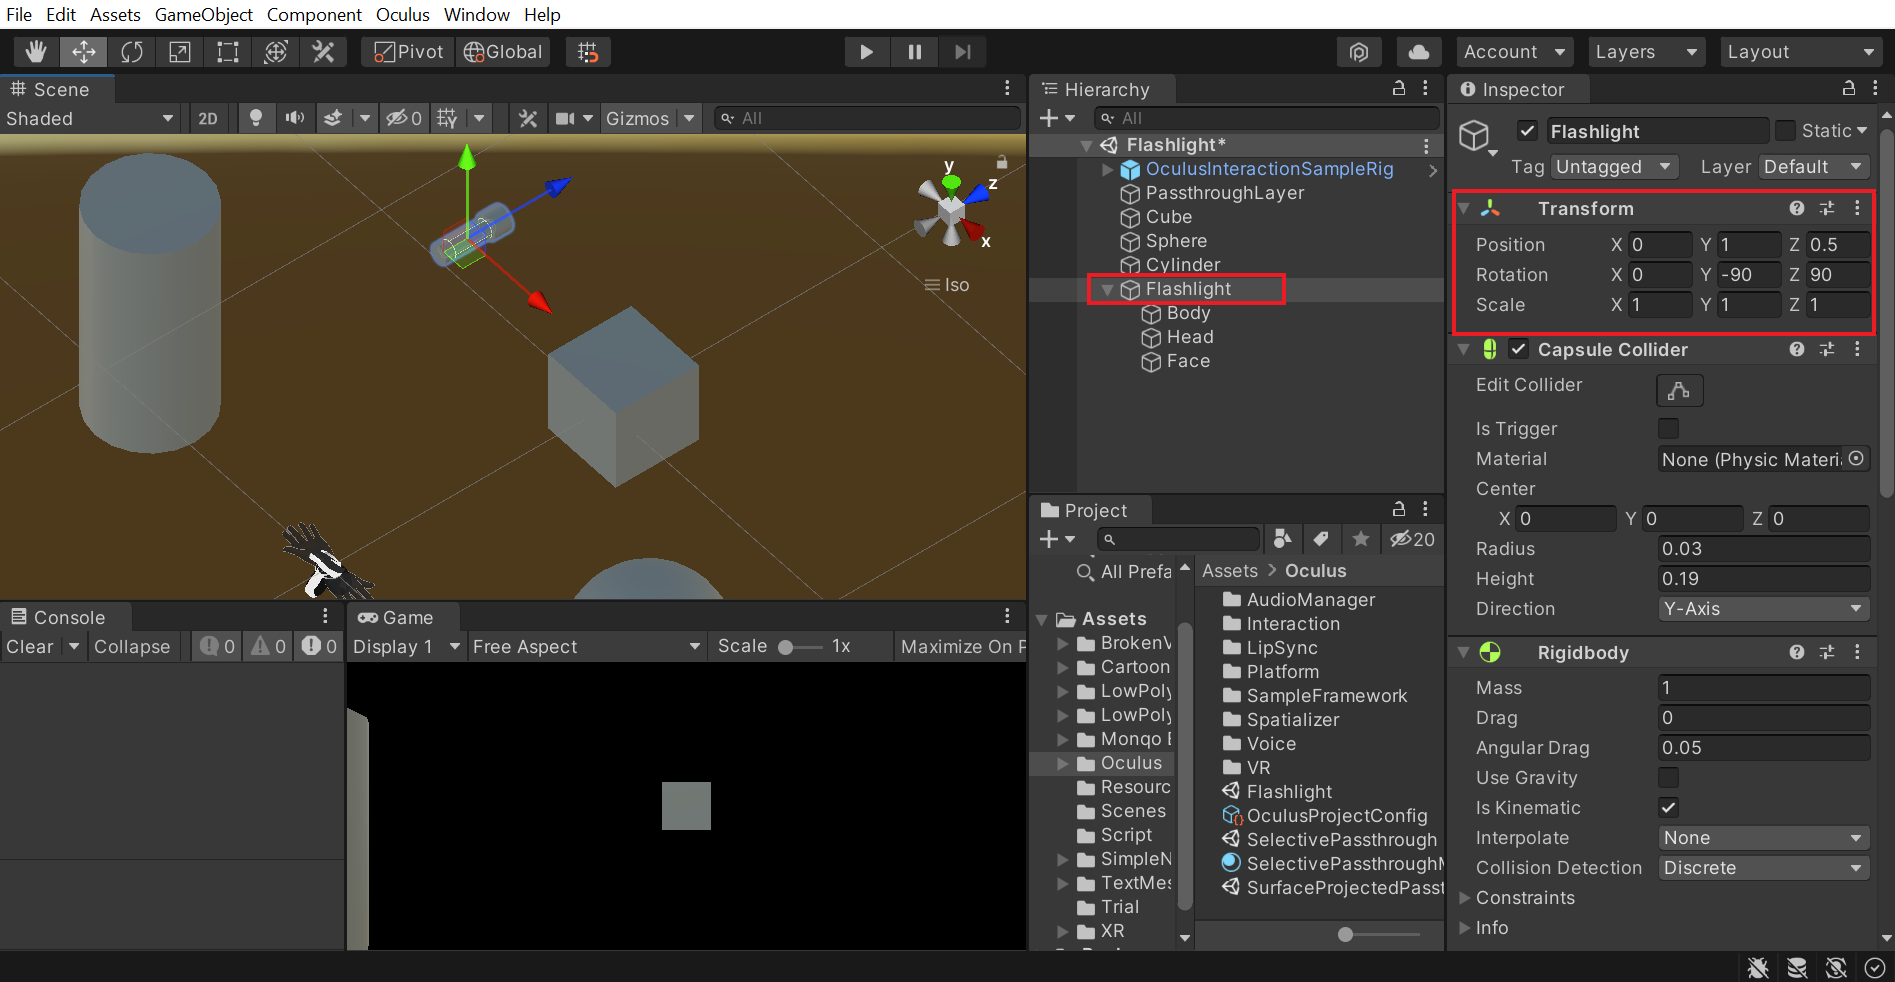
- Select the Flashlight GameObject → add the Capsule Collider component → adjust the collider’s size to match the Body.
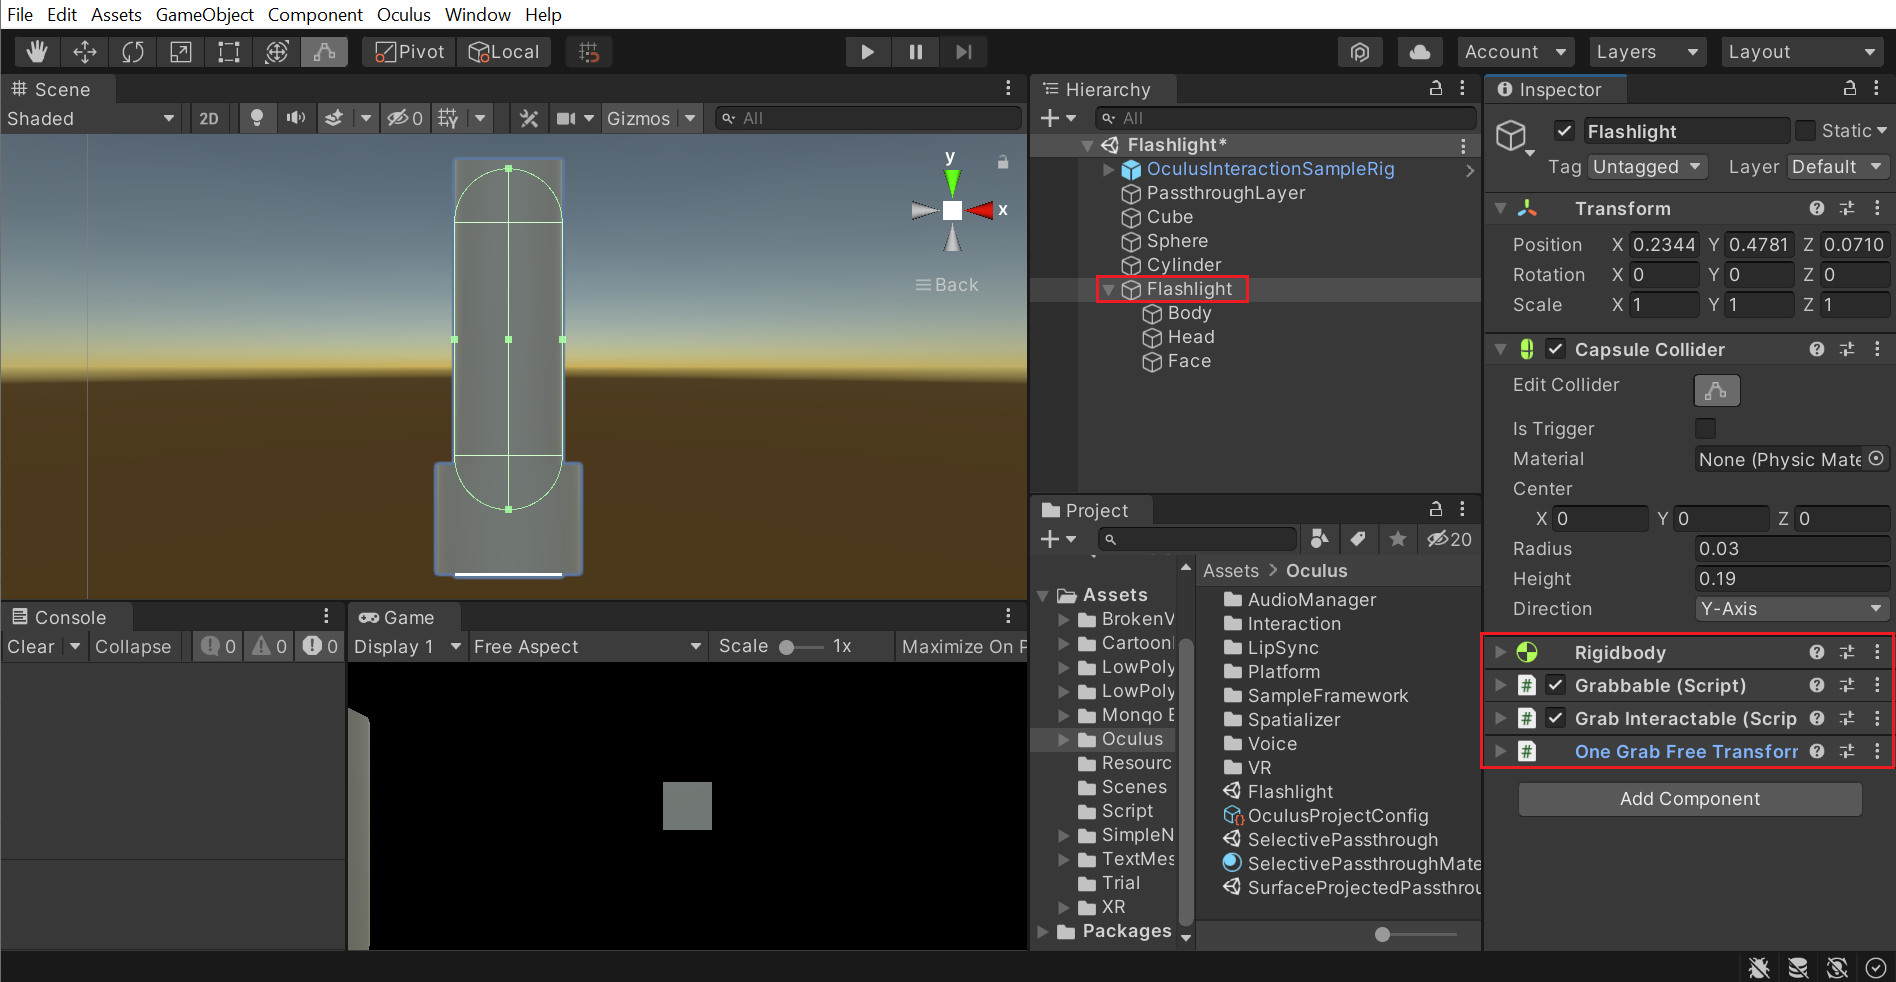
Add the components below:
- Rigidbody
- Grabbable
- Grab Interactable
- One Grab Free Transformer
Now we’ll set up those components:
- Rigidbody: Disable the Use Gravity parameter and enable the Is Kinematic parameter.
- Grabbable: Drag and drop the One Grab Free Transformer component into the One Grab Transformer parameter.
- Grab Interactable: Drag and drop the Grabbable Component and Rigidbody component into the Pointable Element and Rigidbody parameters respectively.
- Reposition the Flashlight GameObject so that it’s easily grabbable.
Now, we should be able to grab the Flashlight but if you play the scene and try to grab it, you’ll not be able to do it. Do you know why?
If you said “it’s because we don’t have an interactor” then, you are right. We need the Grab Interactor for us to be able to grab the Flashlight. For now, we’ll enable grabbing only with the right hand.
- Select the OculusInteractionSampleRig GameObject and open its child objects.
- In the Project window search for ControllerGrabInteractor → drag and drop it into the ControllerInteractors child GameObject of the RightController GameObject.
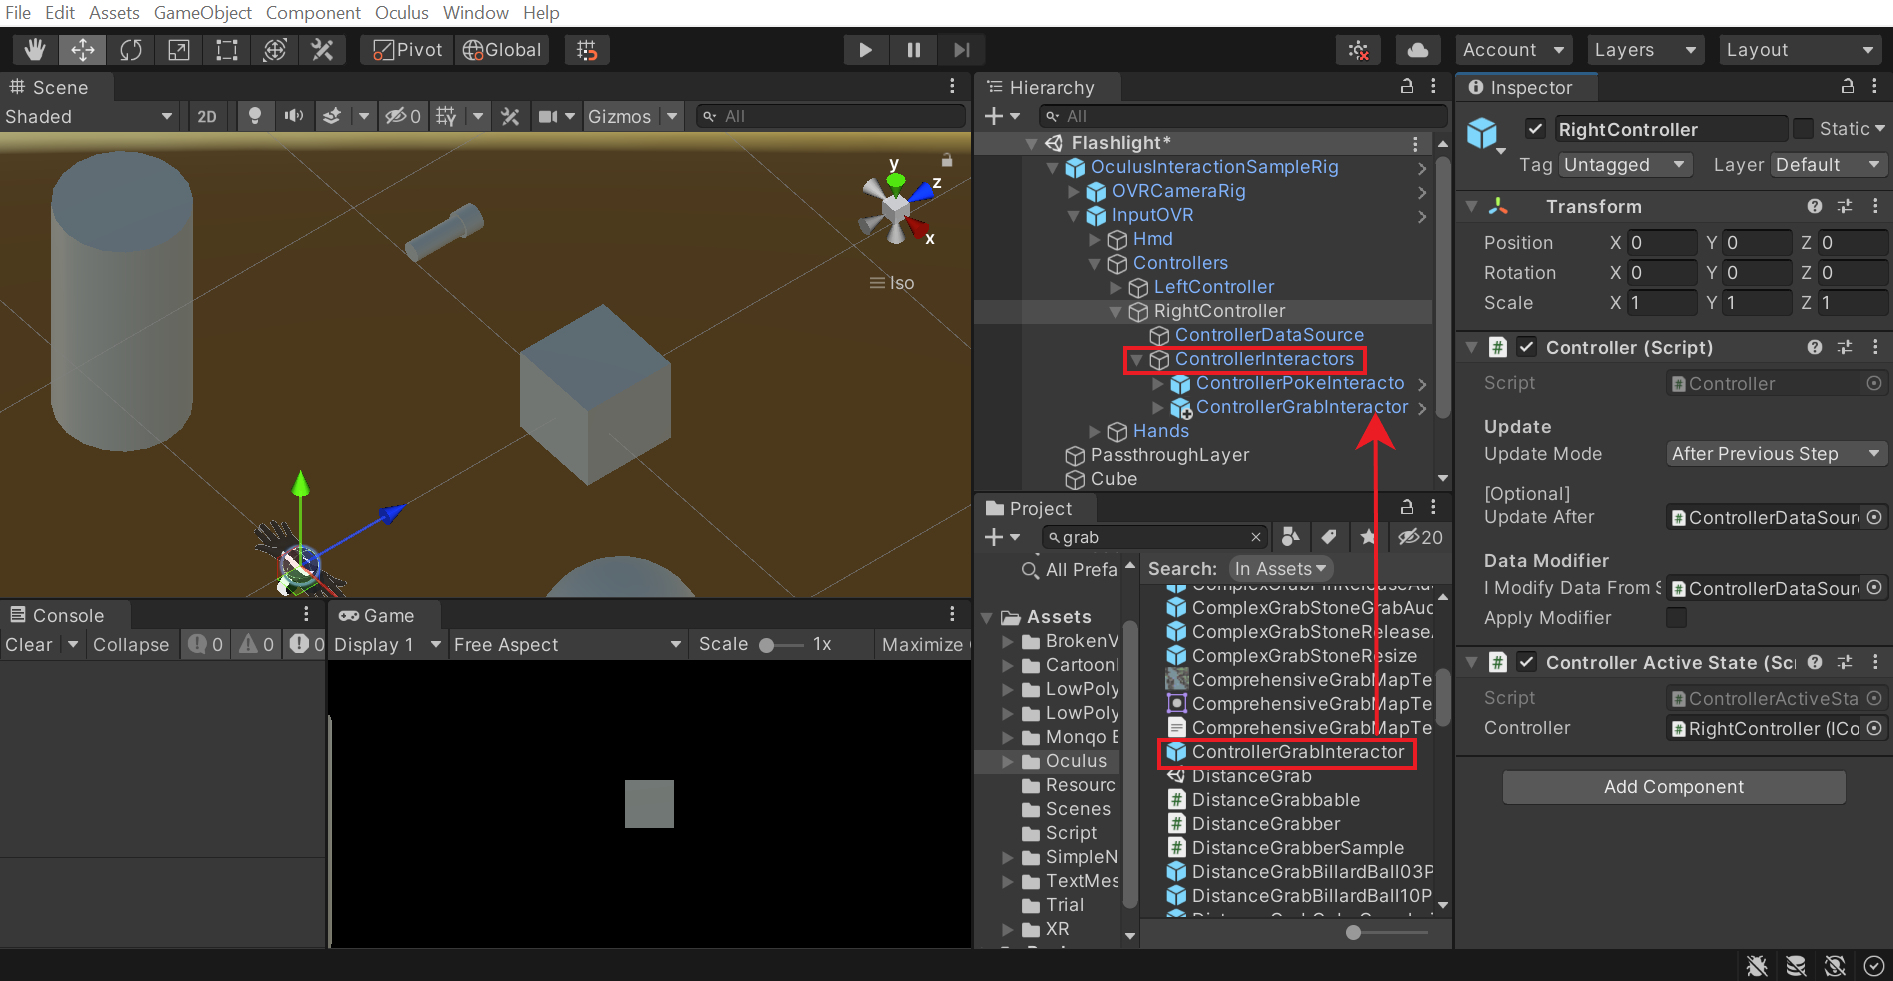
- Select the ControllerInteractors GameObject → drag and drop the ControllerGrabInteractor GameObject into the Interactors parameter list.
- Select the ControllerGrabInteractor GameObject → drag and drop the RightController GameObject into the Controller parameter of the Controller Ref component.
With that, we have successfully made the Flashlight grabbable
Adding the Light Source
Now we’ll add a light source to the Flashlight.
- Select the Flashlight GameObject → right-click and select Lighting→ Spotlight. This will create a new GameObject called Spotlight with a Light component.
- Increase its angle by 50 units.
- Make sure the Mode parameter is Realtime.
- Set the Shadow Type parameter to Soft Shadows.
- Adjust its Transform to match the forward direction of the Flashlight GameObject.
- Now press play and test the scene. You’ll be able to hold the Flashlight and shine the light on 3D Objects.
Creating Lighting Volume
We’ll now create the lighting volume using 3D Quads and the selective passthrough material.
Selective Passthrough Material
If you are not sure how to create a selective passthrough material, feel free to check out the ‘Creating Selective Passthrough Material’ section of our Surface and Projected blog post. However, for this case, we want to add a circular texture and also we want the passthrough material to be rendered before all other materials. To do that:
- Create a Selective Passthrough Material and name it LightVolumeMaterial.
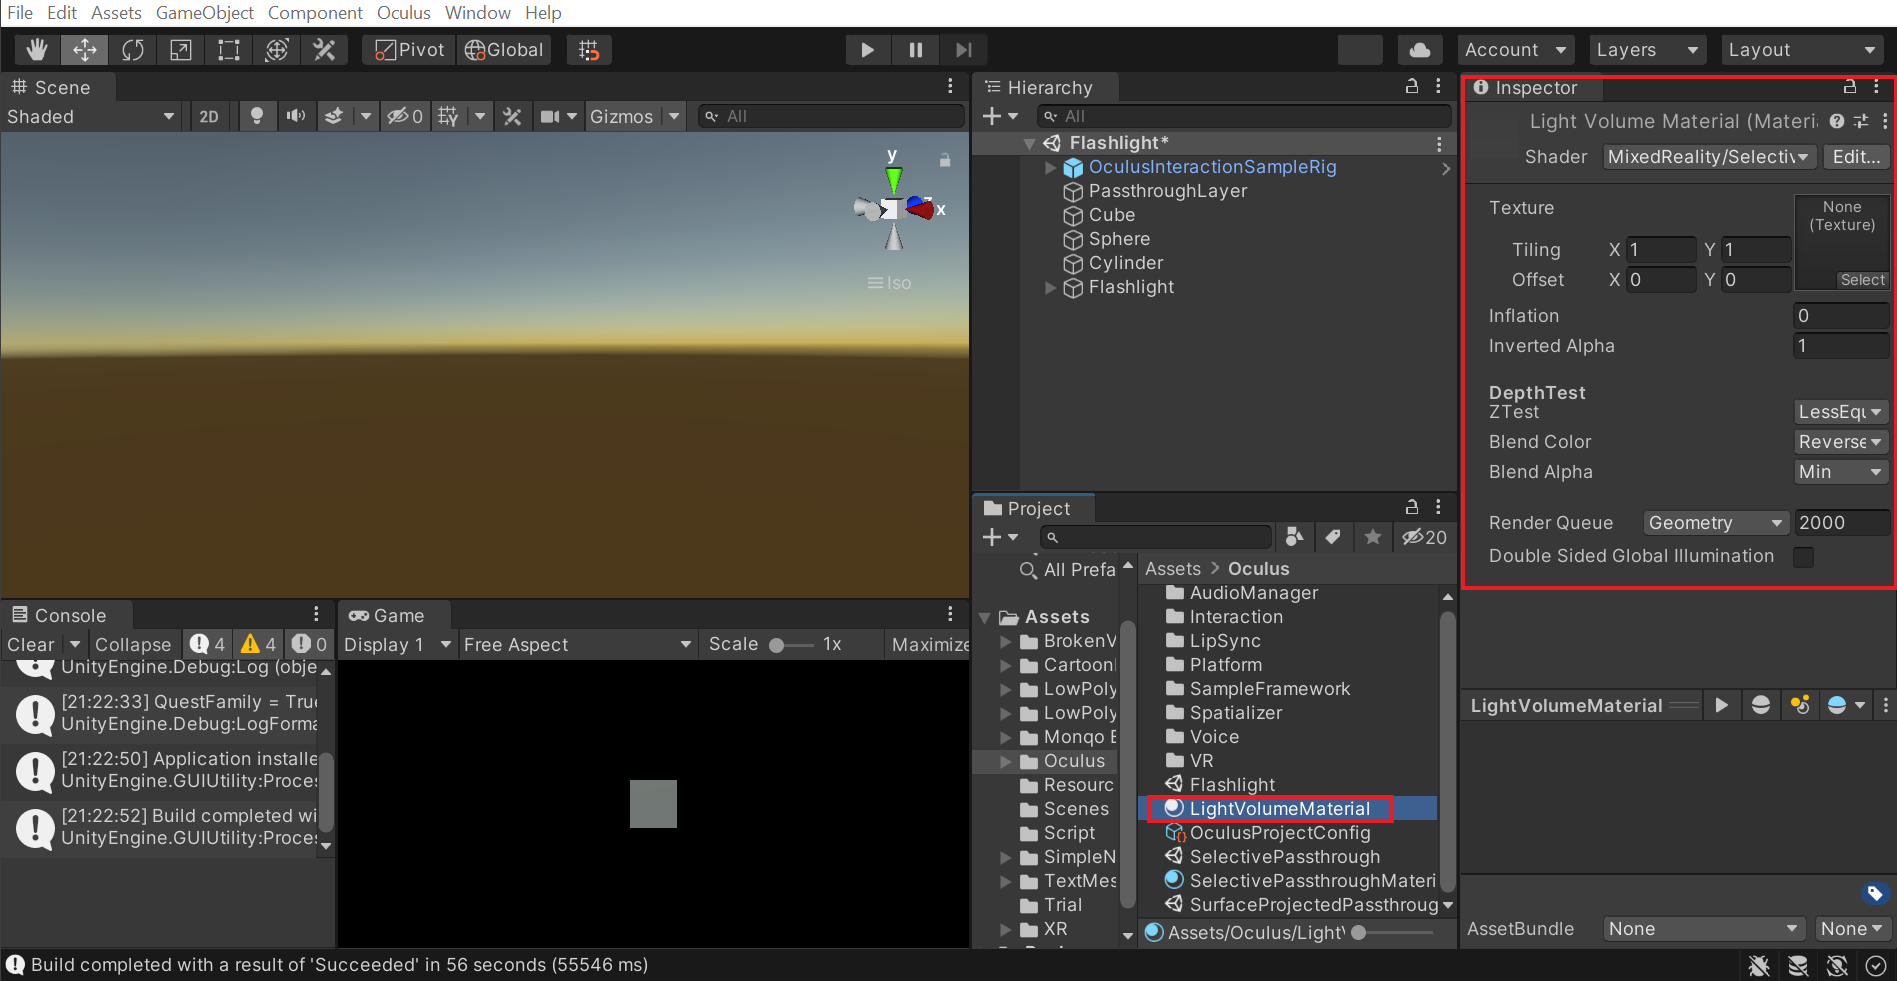
- Add the Default Particle as the texture.
- Set the Render Queue to 1999.
💡 The Render queue sets the priority/order of the material being rendered. The higher the number, the later it gets rendered. All the default materials have a render queue of 2000, so by setting the Render Queue of passthrough material to 1999, it will ensure that the passthrough gets rendered before all other materials are done rendering.
Light Volumes
We’ll create the Light Volumes using 3D quads and then add the material we just created.
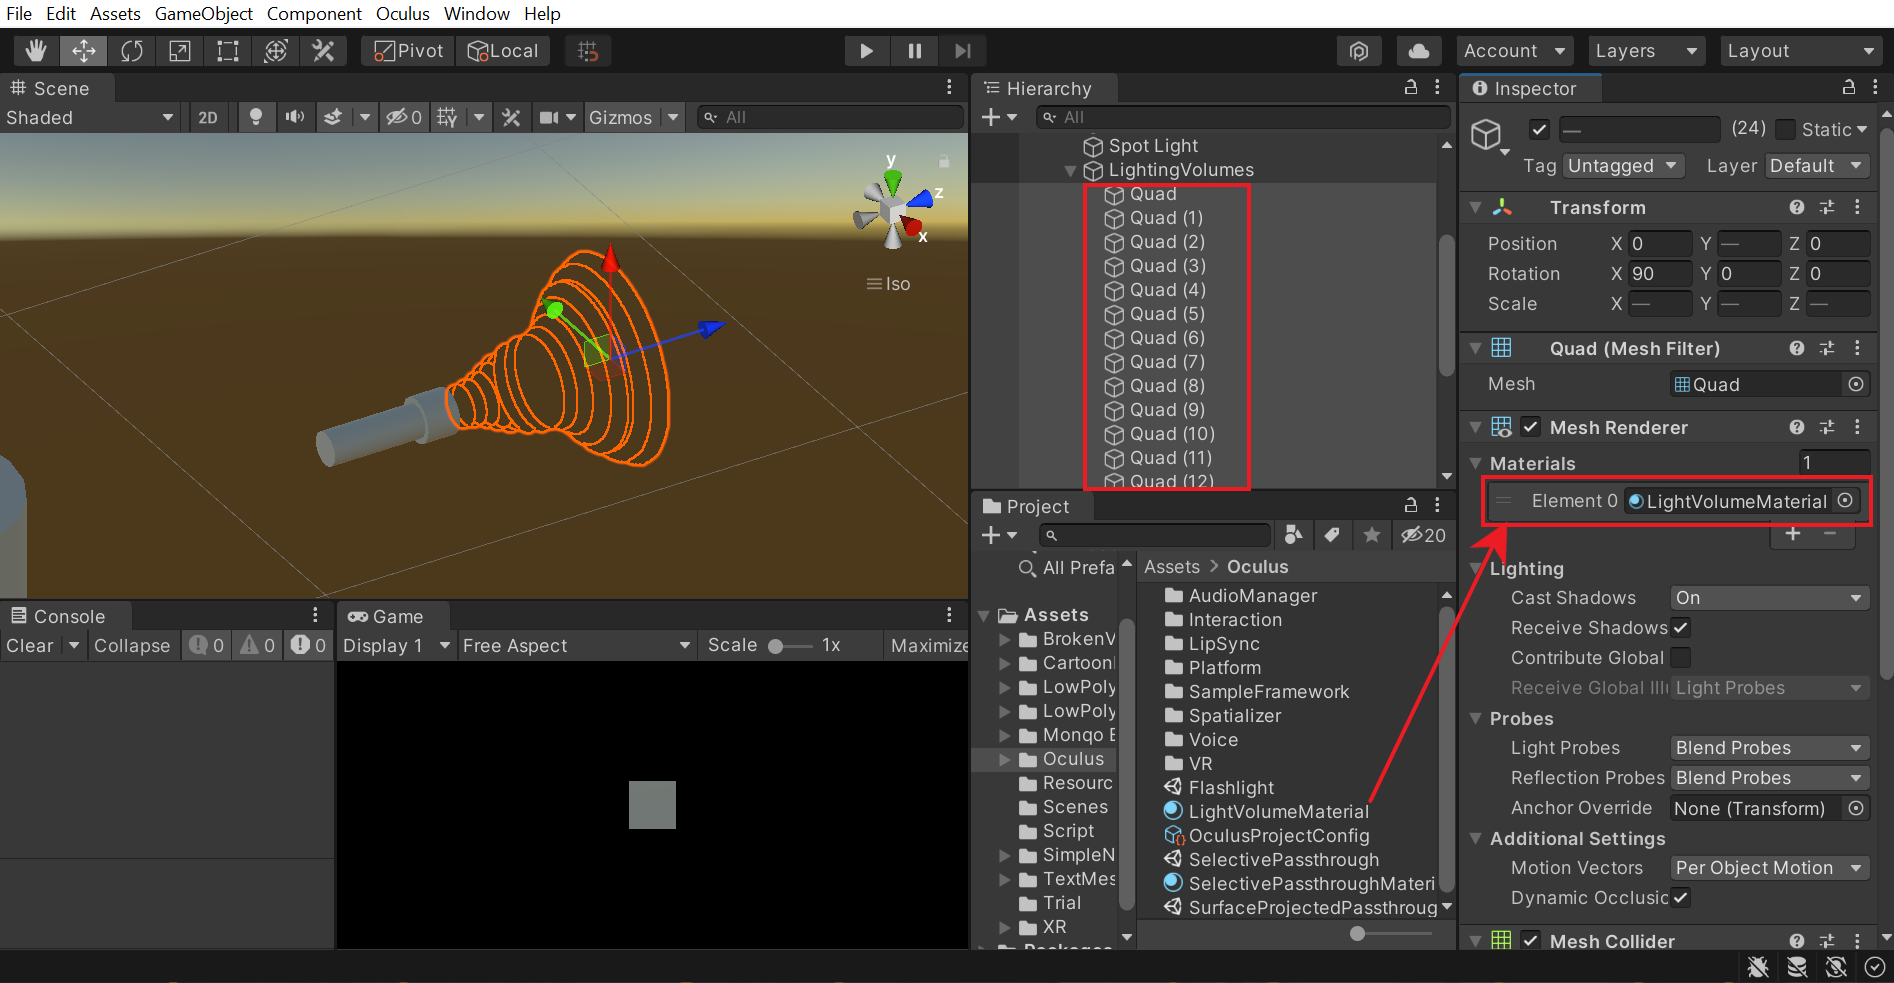
- Select the Flashlight GameObject and create an empty GameObject → name it LightingVolumes.
- Select the LightingVolumes GameObject, right-click on it and select 3D Objects → Quad → position it in front of the flashlight and scale it down to match the lighting boundary.
- We’ll repeat the above step several times until it reaches a certain distance.

- Select all the Quad GameObjects and add the LightVolumeMaterial material.
- Now you can play the scene and test it out. You’ll notice that when the flashlight is seen from sideways we’ll be able to see the gap between the quads. That feels unnatural and so the next step would be to make sure the quad is always facing the camera.
Managing Flashlight Behavior
Here we have two things to address, one is the gap between the Quads and the other is turning the light on and off with the press of a button. For that, we’ll write a little script which will add this functionality:
- In the Project window create a new C# script and name it FlashlightBehavior.
- Copy and paste the following code:
- Drag and drop this script on top of the Flashlight GameObject.
- Drag and drop the Spot Light and LightingVolumes GameObjects into the Spot Light and Light Volume parameters respectively.
- Then, disable the Spot Light and LightingVolumes GameObjects so that it starts turned OFF.
- Now, add the Interactable Unity Event Wrapper Component and:
- Drag and drop the Flashlight GameObject into the Interactable View parameter. This will automatically assign the Grabbable component to that parameter.
- To add to the list of events, click on the plus ➕ button of the parameters When Select() and When Unselect() → drag and drop the Flashlight GameObject into the empty fields.
- To set up the When Select() parameter, select FlashlightBehavior → FlashlightGrabbed() from the drop-down. So now when the Flashlight gets grabbed this parameter gets invoked and we’ll be able to turn the lights on and off on a button press.
- To set up the When Unselect() parameter, select FlashlightBehavior → FlashlightReleased() from the drop-down. Here, when the flashlight gets released this parameter gets invoked and we’ll no longer be able to modify the light state by pressing the button.
- Now we can finally hit play and test it.
Conclusion
In this blog post, we saw how to make use of passthrough and lighting to create this amazing experience. You can extend this experience by adding visual effects, sound effects and even changing the color of the object when it gets detected using the flashlight.

Created with