In the previous blogs, we saw how to set up hand tracking, we learned about grab interaction and poke interaction. In this blog, we’ll see how to interact with canvases using ray interaction. We’ll also see how to create an interactable curved canvas.
Prerequisites
Before we start:
- Make sure you have a Unity project with version 39 of the Oculus Integration package imported.
- A scene with the OculusInteractionRig setup for hand tracking.
Adding Ray Interactor
The first thing we need to do here is to add the ray interactor prefab to our hands.
- Search for HandRayInteractor → drag and drop the prefab as a child of HandInteractorsLeft GameObject→ rename it as HandRayInteractorLeft.
- To reference the left hand to the Interactor, drag and drop the Lefthand GameObject into the Hand parameter of the Hand Ref component.
- Next, select the HandInteractorsLeft GameObject → drag and drop the HandRayInteractorLeft GameObject into the Interactors parameter of the Interactor Group component.
- Repeat the same steps above to add the Ray Interactor for the right hand as well.

With that we have added the Ray Interactors, next we’ll create a canvas with UI.
Creating UI Canvas
In this section, we’ll create a very basic canvas with different types of UI.
- Create an empty GameObject and name it as RayInteractableCanvas.
- Create a canvas as a child of RayInteractableCanvas GameObject.
- Set the Rendering mode of the canvas to world space. Adjust its position, scale, width and height.
- Right-click on the Canvas → UI → Image, name it as Background → press and hold the alt key and stretch it to fit the entire canvas → reduce its Alpha value to make it transparent.
- Add UI button, slider, toggle and scroll view by right-clicking on the Canvas → UI and selecting the respective UI element.
- Adjust the size and position of each of the added UI elements.
- Adjust the position of the RayInteractableCanvas GameObject and play the scene to test it out.
When you test the scene you will notice that you will be able to see the canvas but not interact with it. To make it interactable we’ll have to set up a few more things. So let’s see how that’s done.
Making Canvas Interactable
To make the canvas interactable we’ll need to add a Ray Interactable component and a few other components.
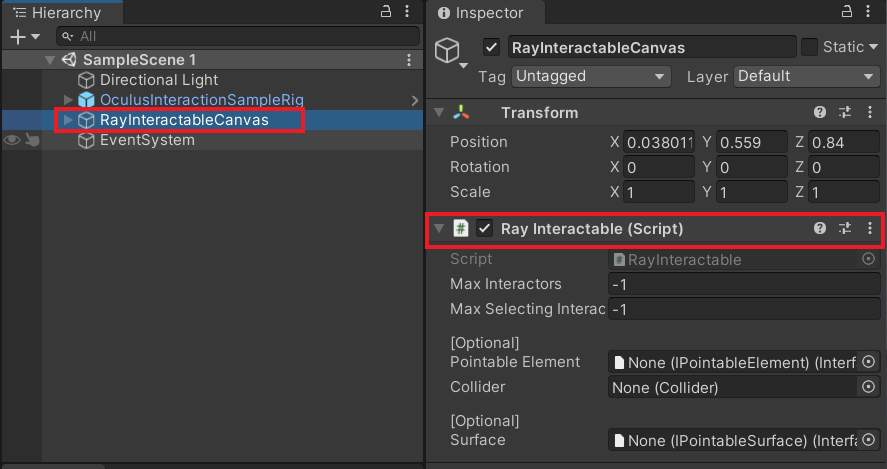
- Select the RayInteractableCanvas GameObject and add the Ray Interactable component to it. We’ll add the parameters to this component later on.
- The ray can’t interact with the canvas directly but instead through a render texture. So, select the canvas and add the Canvas Render Texture component to it → click on the Auto-Fix buttons. The auto-fix makes sure the canvas is not rendered twice by changing the layer of the child objects of the Canvas to UI and also unchecks the UI from the culling mask of the CenterEyeAnchor GameObject. Also, set the Pixels Per Unit value to 1000 or else the canvas when rendered will look blurry.
- For the ray to collide with the canvas render texture we need a collider. So, create an empty GameObject as a child of the RayInteractableCanvas GameObject → name it as Collider → add a Mesh Collider component to it.
- Select the RayInteractableCanvas GameObject and add the Canvas Rect component → drag and drop the Canvas GameObject into the Canvas Render Texture parameter → drag and drop the Collider GameObejct into the Mesh Collider parameter.
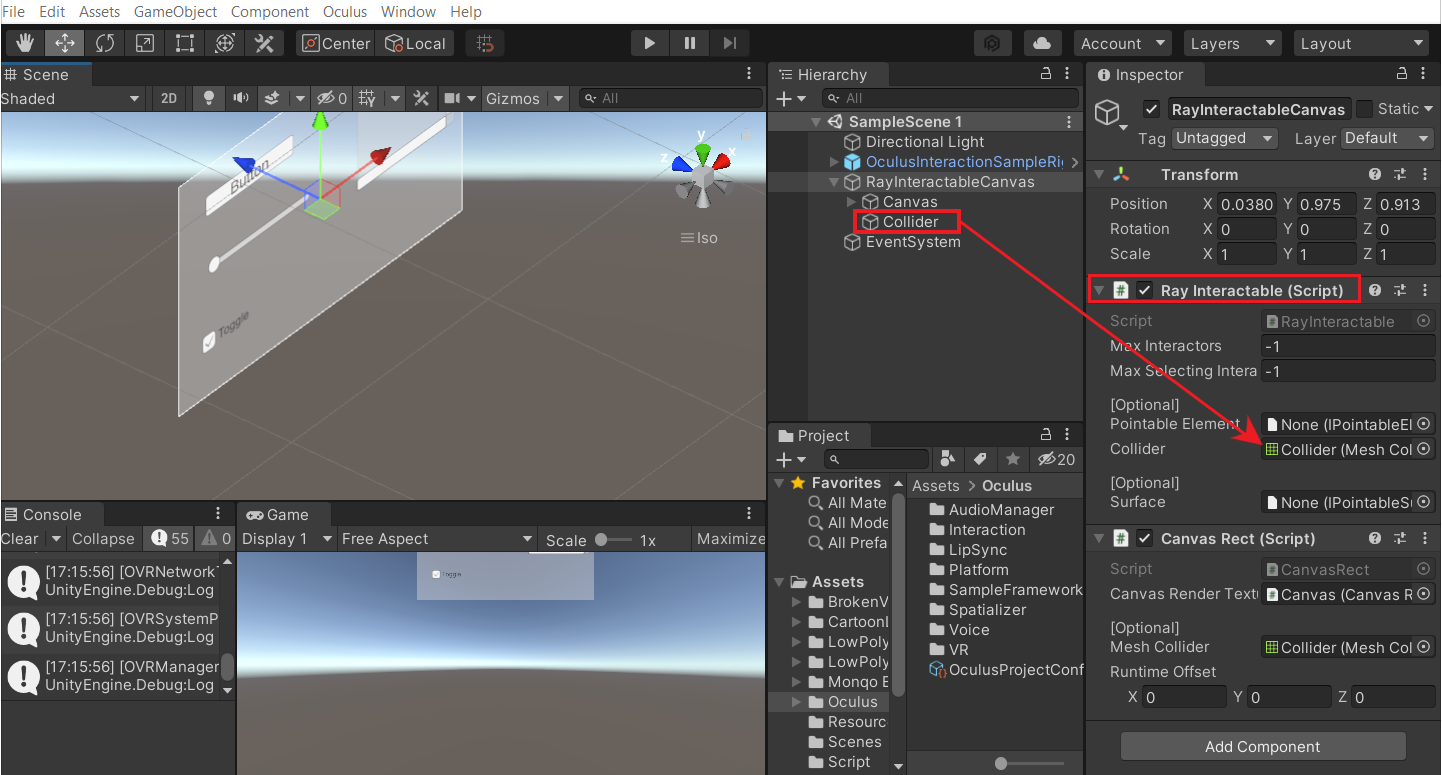
- The Ray Interactable Component also requires a collider, so drag and drop the Collier GameObject into the Collider parameter.
- At this point, if we try to play the scene and test it, we will notice that the ray collides with the canvas but we’ll not be able to interact with the UI. So to make the UI interactable we’ll need two more components:
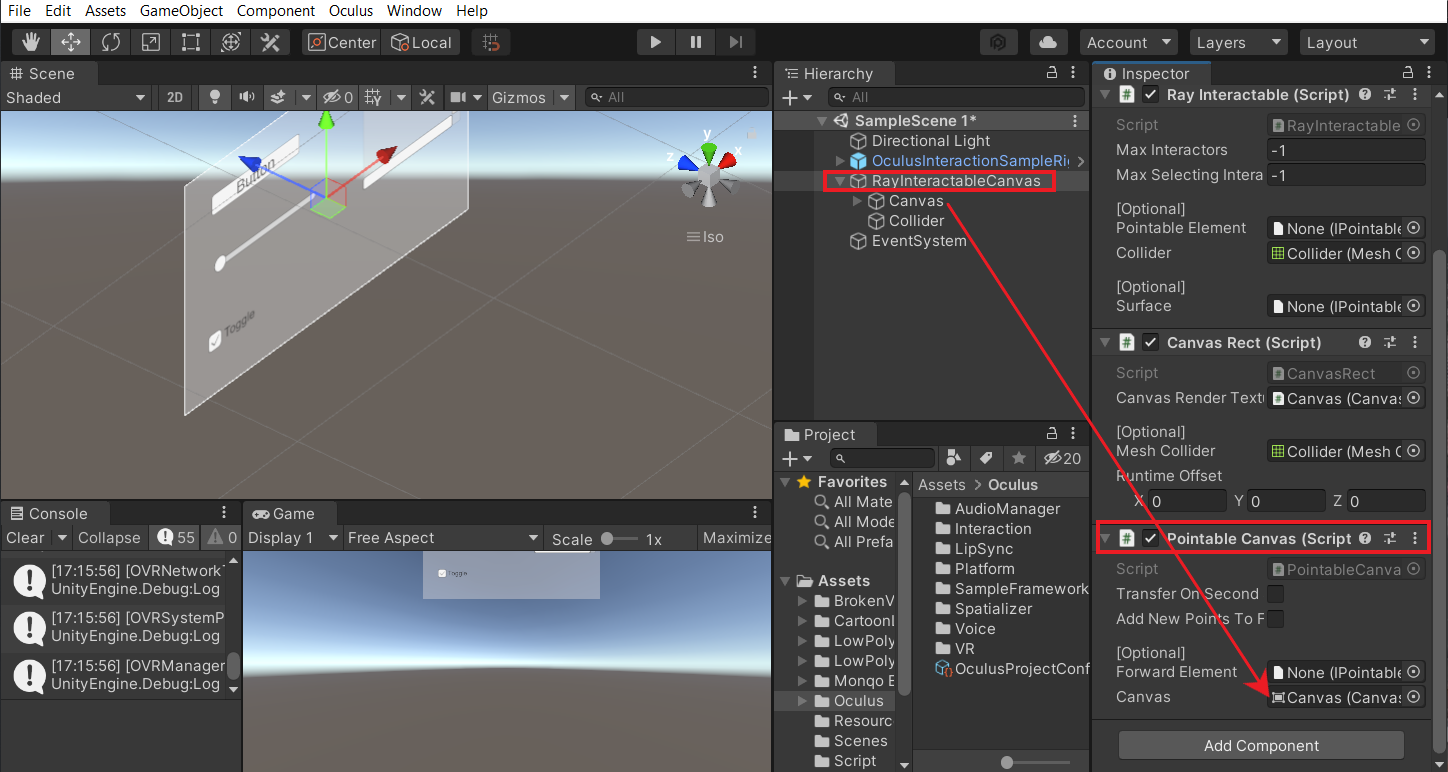
- Select the RayInteractableCanvas GameObject and add the Pointable Canvas component → drag and drop the Canvas GameObject into the Canvas parameter.
- Select the EventSystem GameObject → remove the Standalone Input Module component → add the Pointable Canvas Module component.
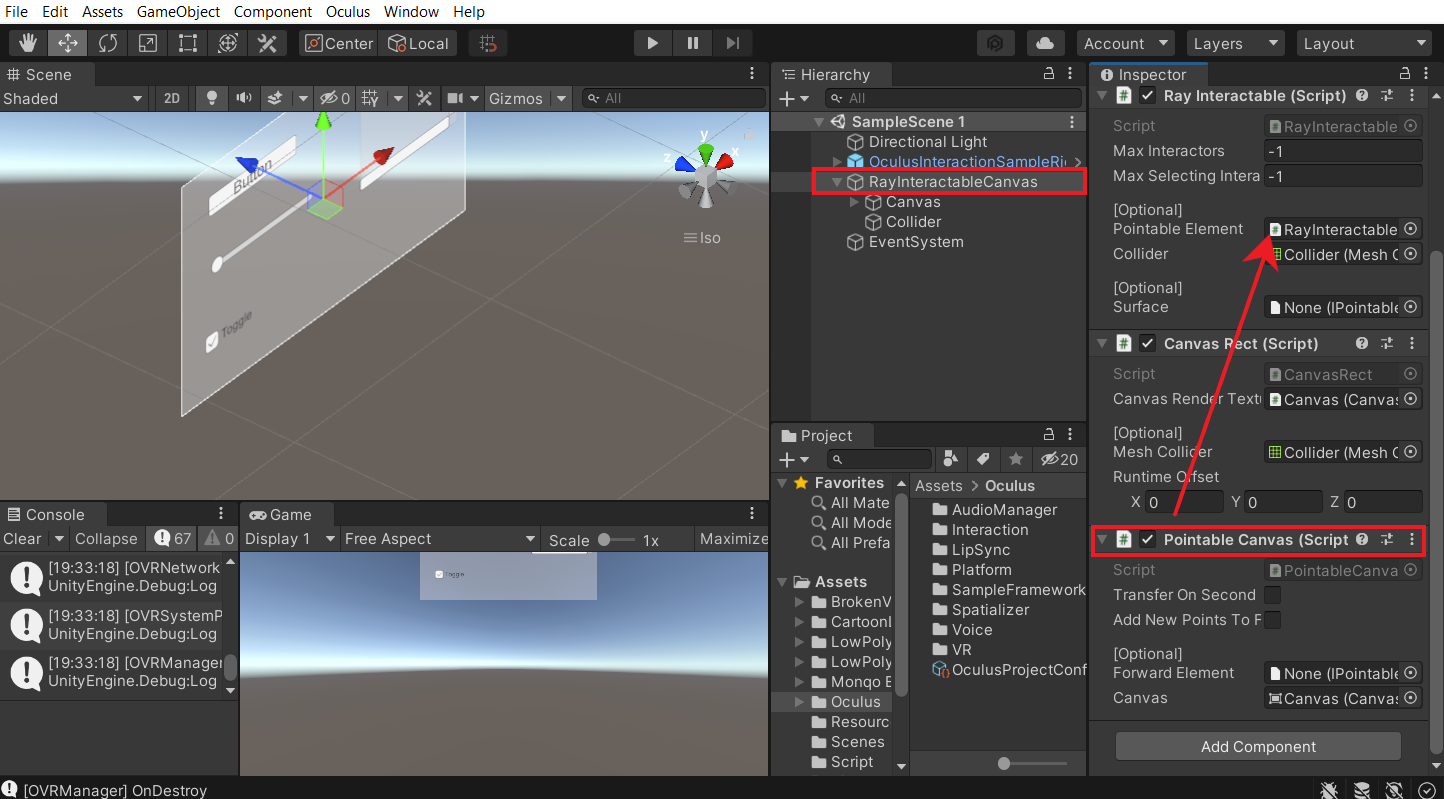
- The one last step would be to, select the RayInteractableCanvas GameObject and drag and drop the Pointable Canvas component into the Pointable Element of the Ray Interactable component.
- Now you can hit play and test the scene.
With that we have created an interactable canvas, now we’ll see how to make a curved canvas.
Creating Curved Canvas
Creating a curved canvas is almost similar to creating a rectangular canvas, it just requires a few extra components.
- Create an empty GameObject and name it CurvedCanvas → Add the components Cylinder and Pointable Cylinder.
- Drag and drop the Cylinder component in the Cylinder parameter of the Pointable Canvas component. This will create a cylinder with a given radius and height from the respective components → choose the Facing parameter as In.
- Note: The Pointable Canvas component has a parameter called Facing with three options: Any, Inand Out.
- When the option Any is chosen: The raycast hit will register on the outside or inside of the cylinder, whichever is hit first.
- When the option In is chosen: The raycasts will pass through the outside of the cylinder and hit the inside wall.
- When the option Out is chosen: The raycast hit will register against the outside wall of the cylinder. In this mode, raycasts with an origin inside the cylinder will always fail.
- Duplicate the RayInteractableCanvas GameObject → drag and drop it inside the CurvedCanvas GameObject → make sure its position is set to (0,0,0) → Disable the existing RayInteractableCanvas GameObject.
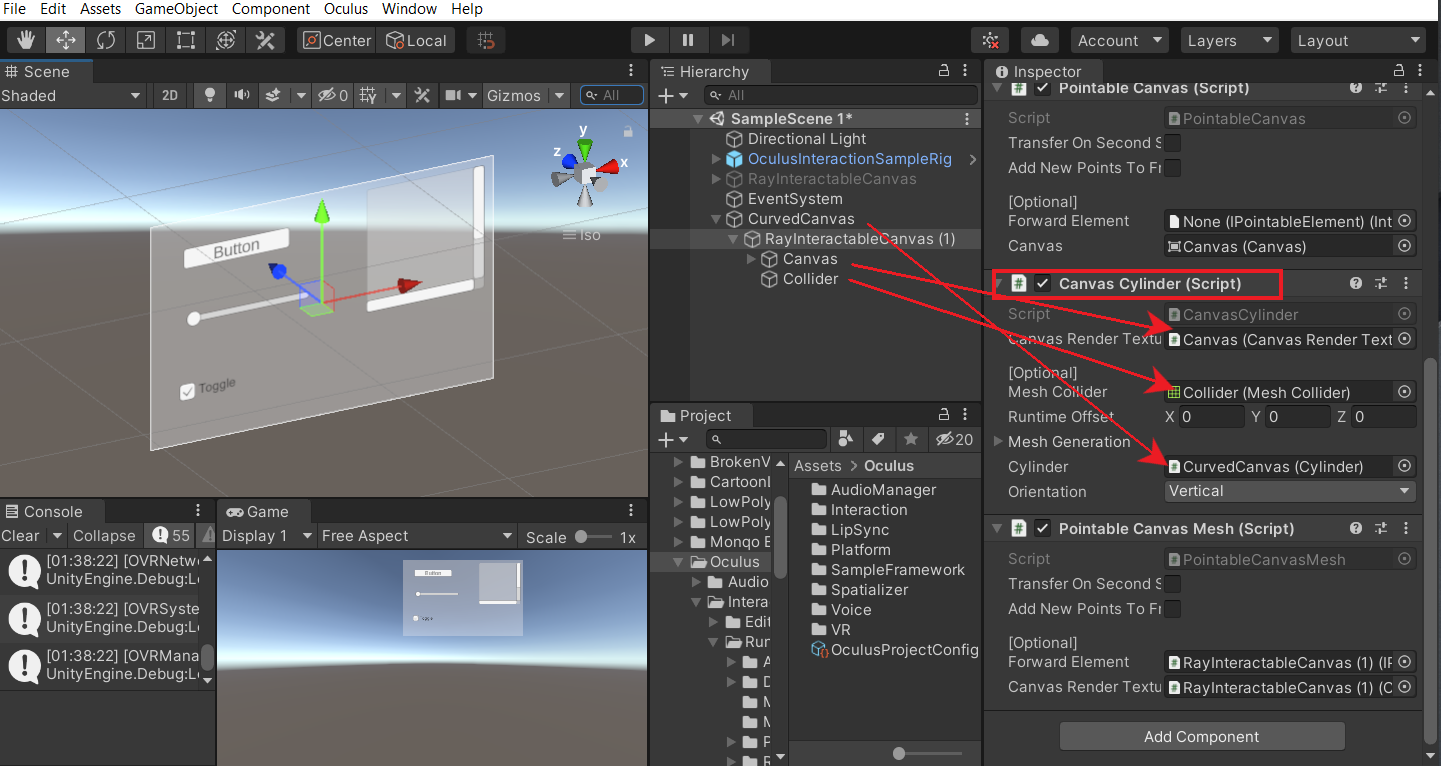
- Select the RayInteractableCanvas GameObject, remove the Canvas Rect component → instead add the components Canvas Cylinder and Pointable Canvas Mesh → assign the required parameters as shown below.
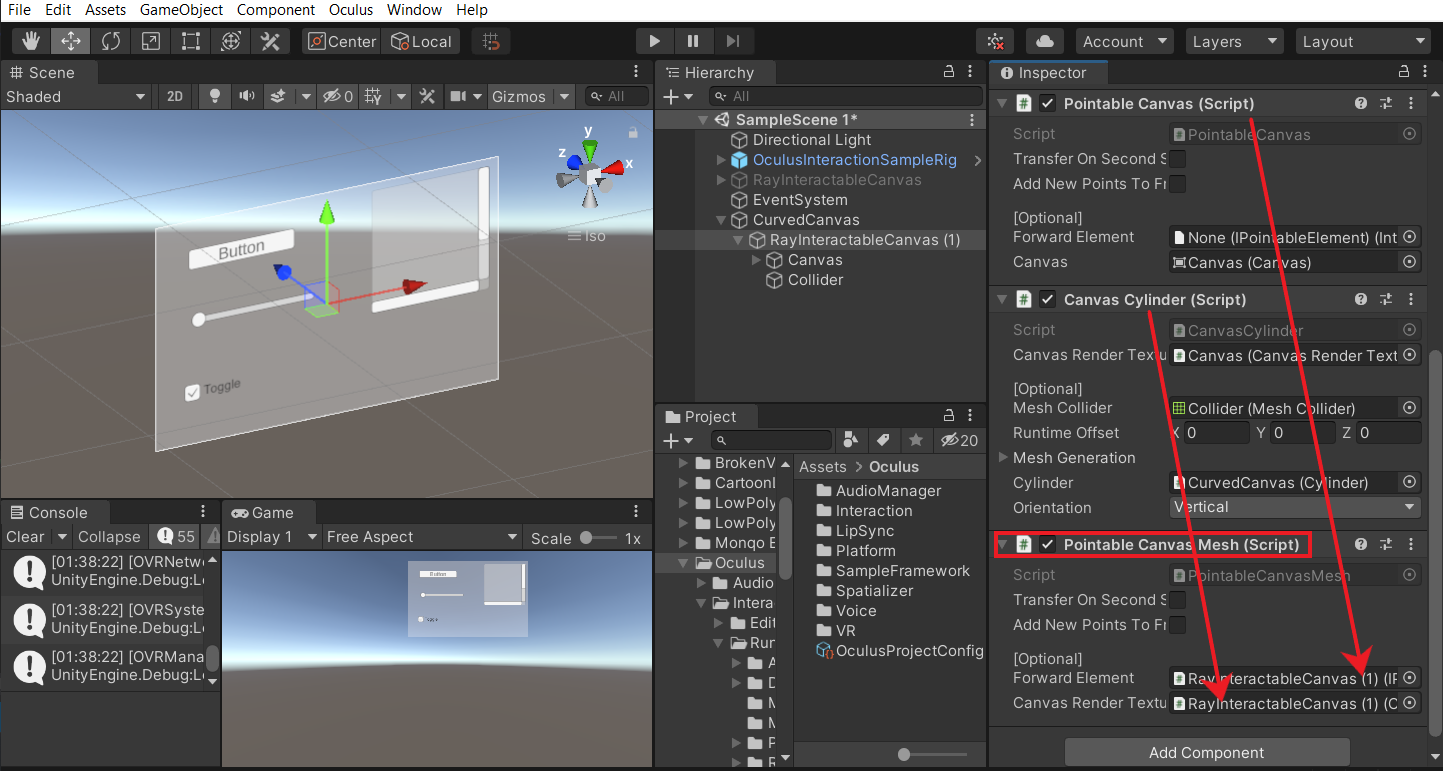
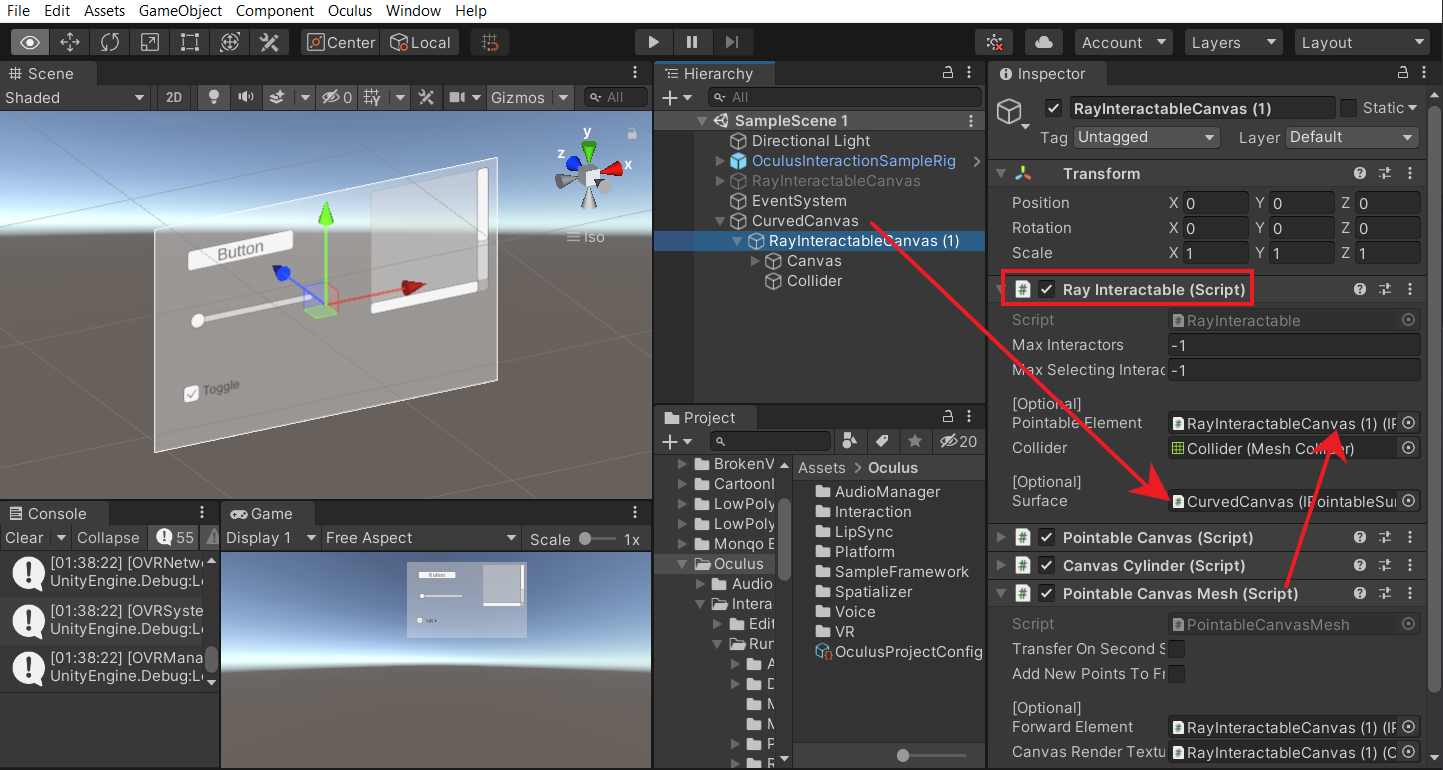
- Next, drag and drop the Pointable Canvas Mesh component into the Pointable Element parameter of the Ray Interactable component. Then, drag and drop the CurvedCanvas GameObject into the Surface parameter of the Ray Interactable component.
- Finally, select the Canvas GameObject and set the Layer as UI → select Yes, change children.
- Now we can hit play and test the scene.

With that, we have learned to create an intractable curved canvas.
Conclusion
The best way to use the ray interaction would be to keep the ray interactors and menus disabled at the beginning. On a button press, the menu can open up and the ray interactors can be enabled. If you would like to have a more curved canvas along the same curvature, then just duplicate the child GameObject RayInteractableCanvas, make the necessary changes and place it next to the current one.
In the next blog post, we’ll see how we can detect hand poses and perform some actions of our choice when it gets detected.

Created with