In the previous blog, we learned to set up hand tracking and also learned about grab interaction. In this blog, we’ll be talking about poke interaction. As the name suggests, we’ll see how to create a VR Button that can be pressed by poking.
Prerequisites
Before we can start creating a VR button:
If you are not sure how that’s done feel free to check out the hand tracking setup blog.
- Make sure you have a Unity project with version 39 of the Oculus Integration package imported.
- A scene with the OculusInteractionRig setup for hand tracking.
- Make sure the OculusInteractionRig has a PokeInteractable prefab attached to both hands.
If you are not sure how that’s done feel free to check out the hand tracking setup blog.
Creating a VR Button
Let’s see how we can create a VR Button from scratch.
The Framework
First, we’ll create a framework and later we’ll add the required components.
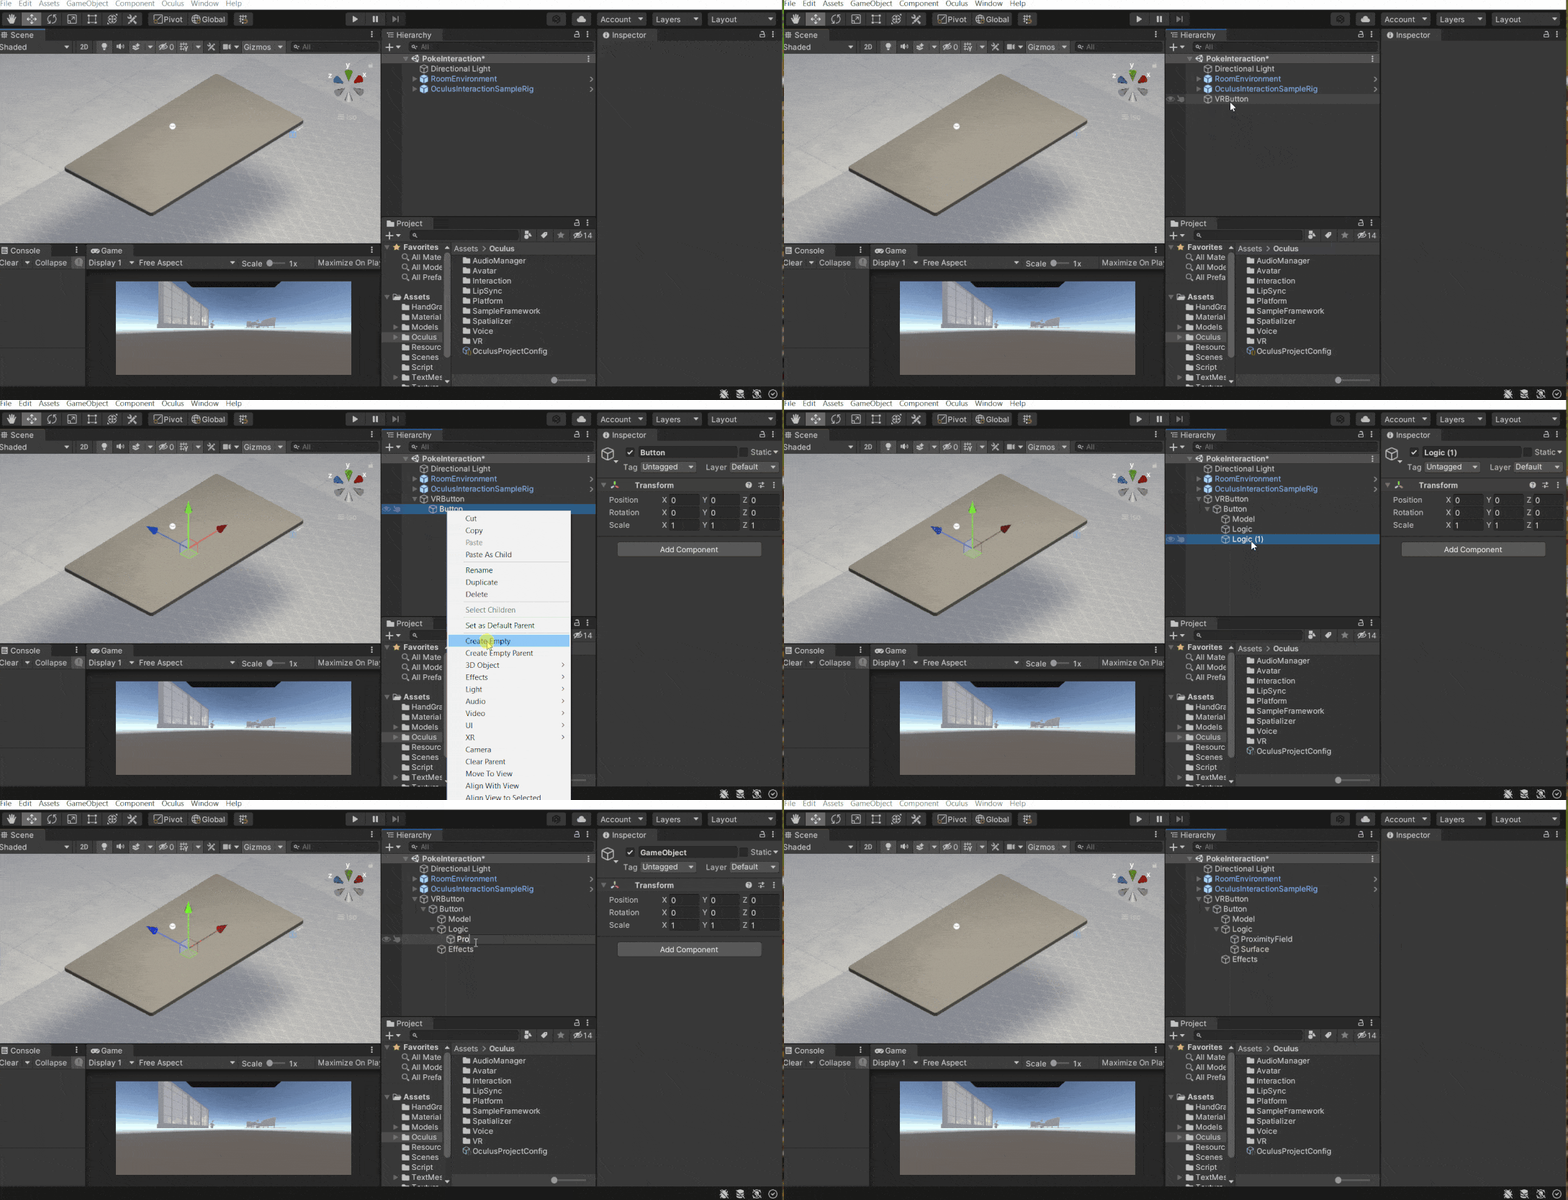
- Create an empty GameObject and name it VRButton.
- Create an empty GameObject as a child of VRButton GameObject and name it Button.
- Create three empty GameObjects as a child of Button GameObject and name them Model, Logic, and Effects.
- Create two empty GameObjects as a child of Logic GameObject and name them ProximityField and EndSurface.
Button Model
Now let’s create a button by creating a 3D object inside the Model GameObject.
- The 3D object can be a cylinder, cube, sphere, or any shape of your choice. For now, we’ll create a 3D cube → scale it to your desired size. Let us have the scale value set to (0.08, 0.06, 0.08)
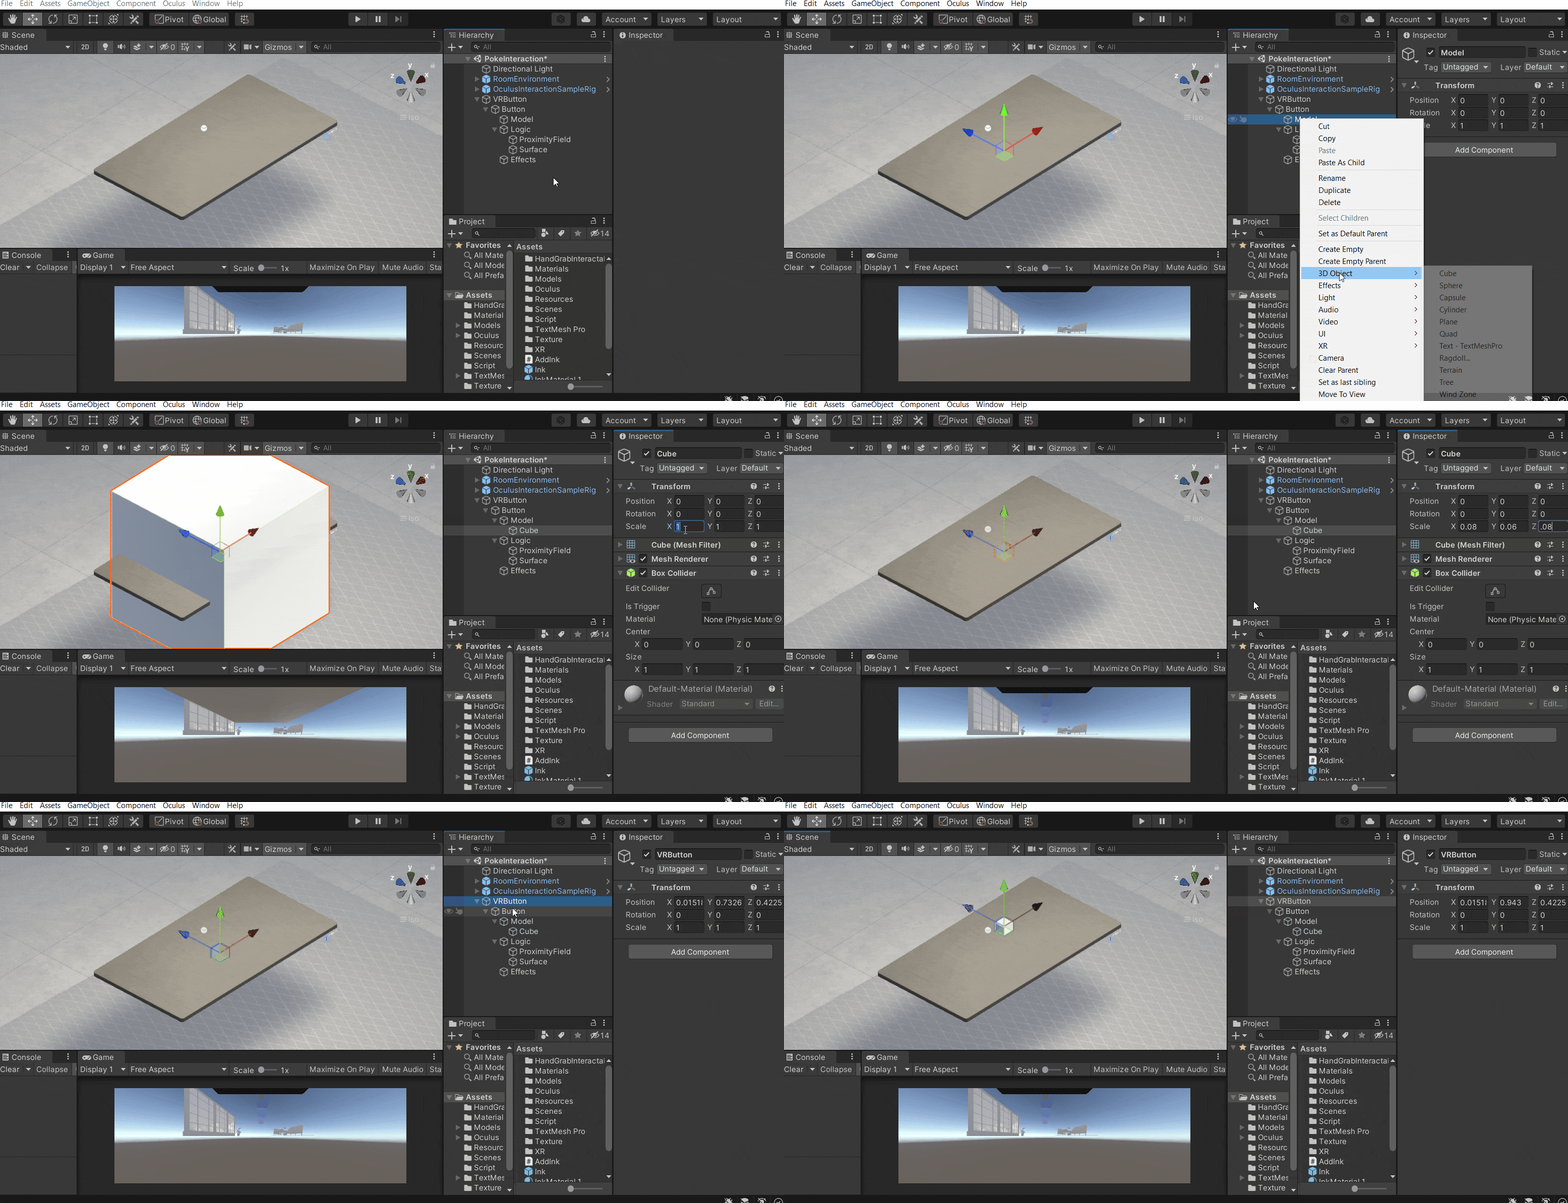
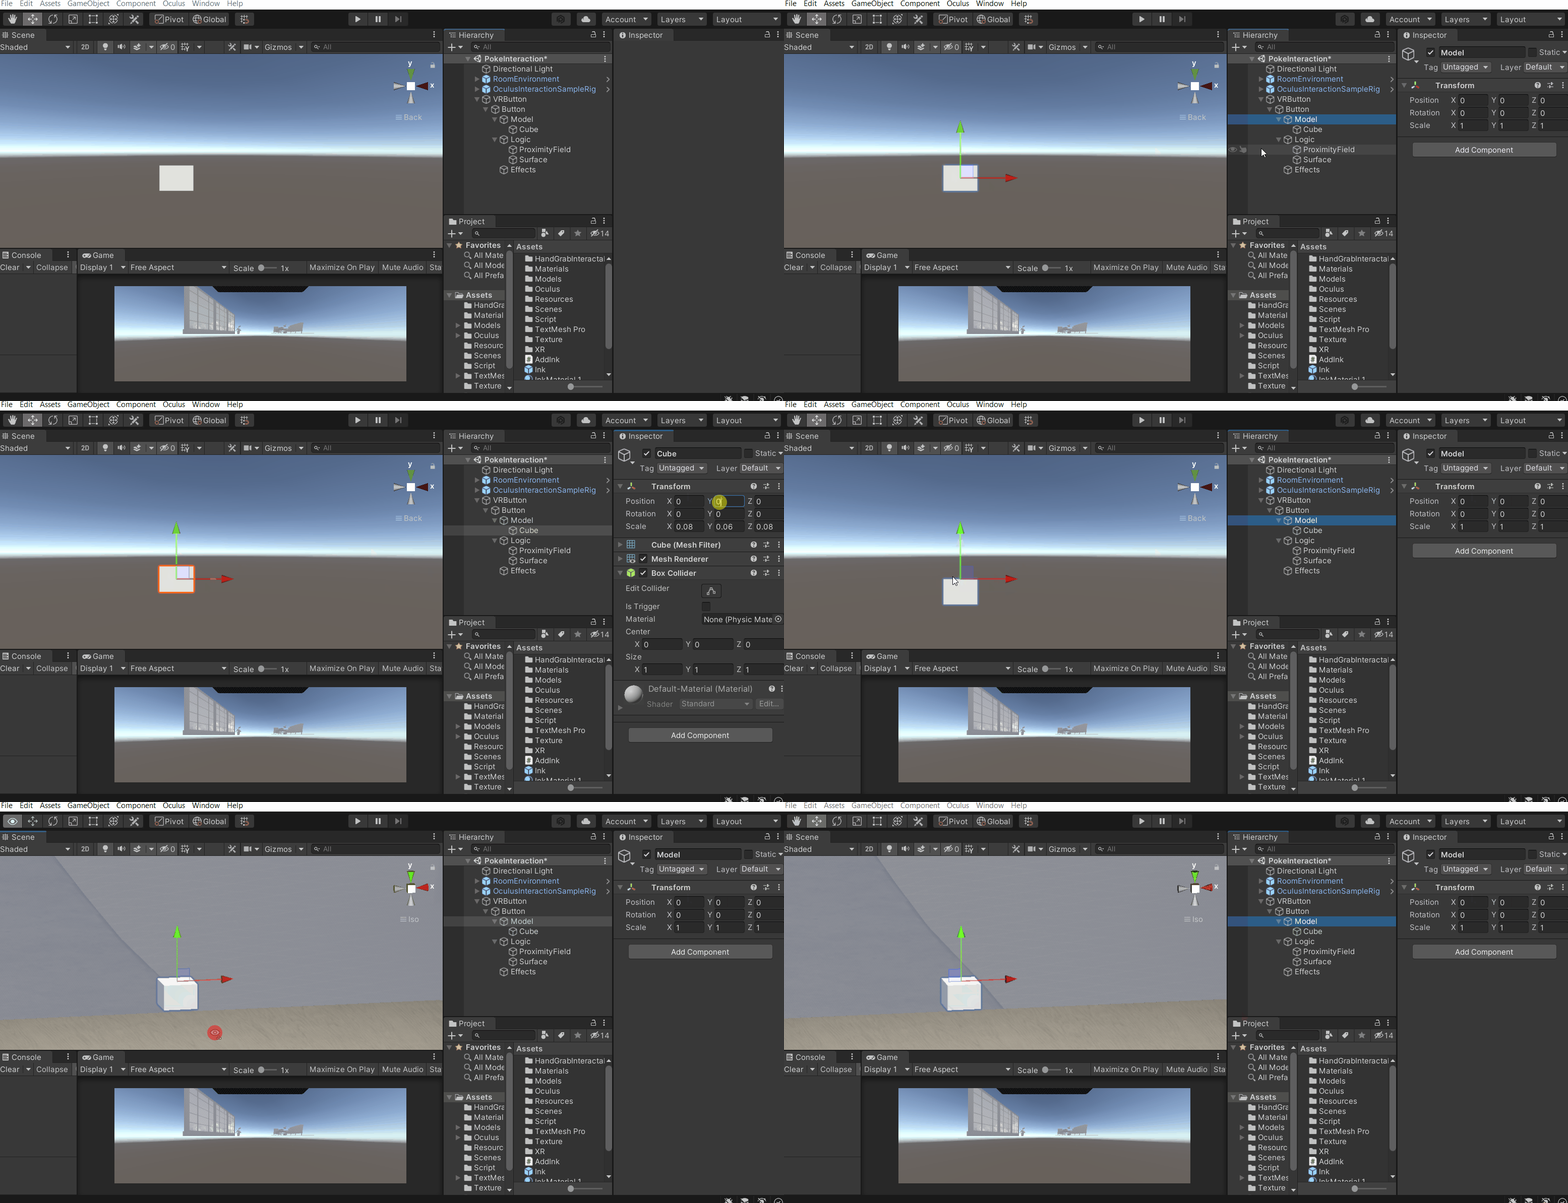
💡 The top surface of the 3D object inside the Model GameObject has to match the center transform of the Model GameObject.
- In our case, the cube has a height of 0.06 units which means, it has to be pulled down by 0.03 units. Now if you see the top surface of the cube matches the center transform of the Model GameObject.
Adding Components
To make the button work we’ll have to add some logic to it by adding the required components. What are those components? Let’s see.
- Select the Button GameObject and add Poke Interactable component. These components require two parameters one is a proximity field and the other is the surface. Before we can set those parameters we’ll have to add the component first.
- Select the ProximityField GameObject and add the Box Proximity Field component → drag and drop the ProximityField GameObject into the Box Transform parameter.
- Select the SurfaceGameObject and add the Pointable Plane component.
- Select the Button GameObject → drag and drop ProximityField GameObject into the Proximity Field parameter → drag and drop Surface GameObejct into the Surface parameter.
- When we turn on the Gizmos, we’ll be able to see a visual representation of a start point (blue circle) and an endpoint (blue X mark). From the visual representation, we can notice that the button can be pressed sideways, but we’ll like to have it from the top. So, select the Logic GameObject and rotate it by 90 units in the X-axis such that the Z-axis is facing downwards.
- Select the Button GameObject and,
- Modify the value of the Max Distance parameter to 0.04 units. By doing so we’ll be able to move the button down by a maximum of 0.4 units. The higher the value, the more will be the push distance and vice versa.
- Modify the value of Enter Hover Distance parameter to 0.04 units. By doing so we’ll be able to register the interactor(hand) just when it touches the button. The higher the value, the sooner the interactor gets detected i.e the interactor gets registered even before it touches the button. and vice versa.
- Modify the value of the Release Distance parameter to 0.04 units. By doing so the button will get released and jump back to its original position when the interactor crossed the end surface by more than 0.04 units. The higher the value, the greater will be the distance interactor would have to move for the button to get released.
- Select the Model GameObject and move it up by 0.04 units such that its surface matches the starting position represented by the blue circle.
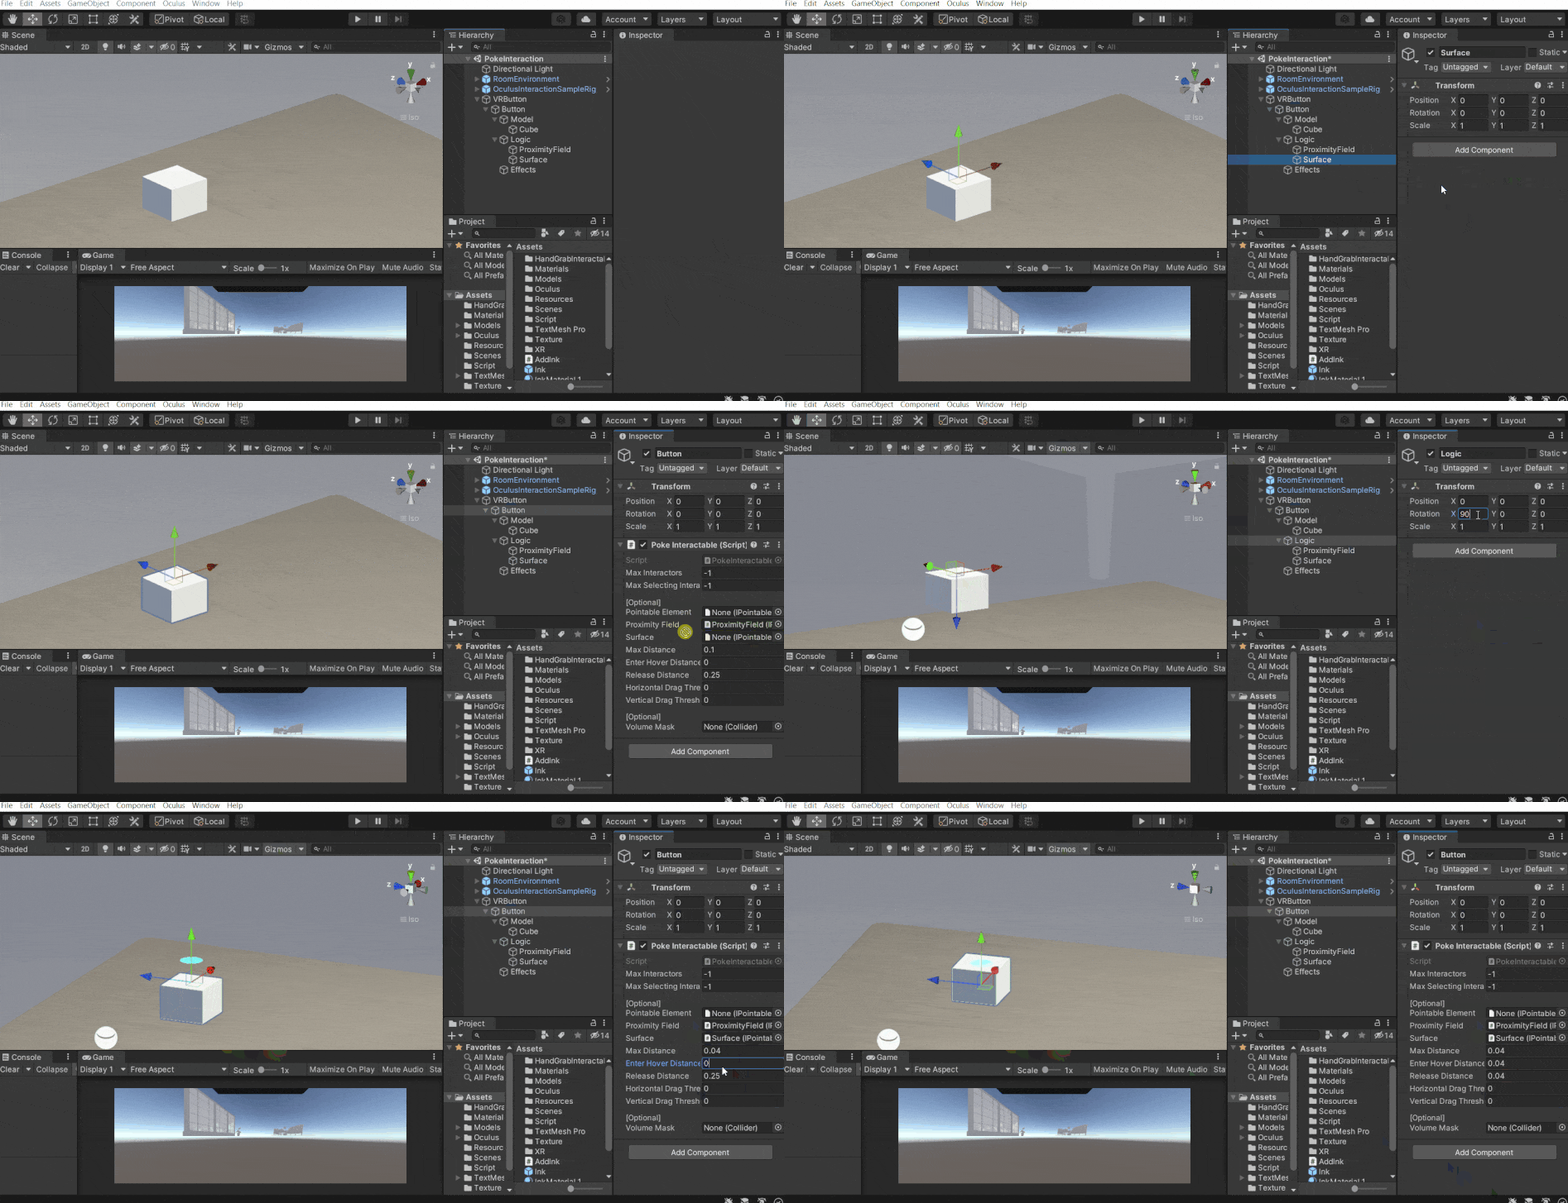
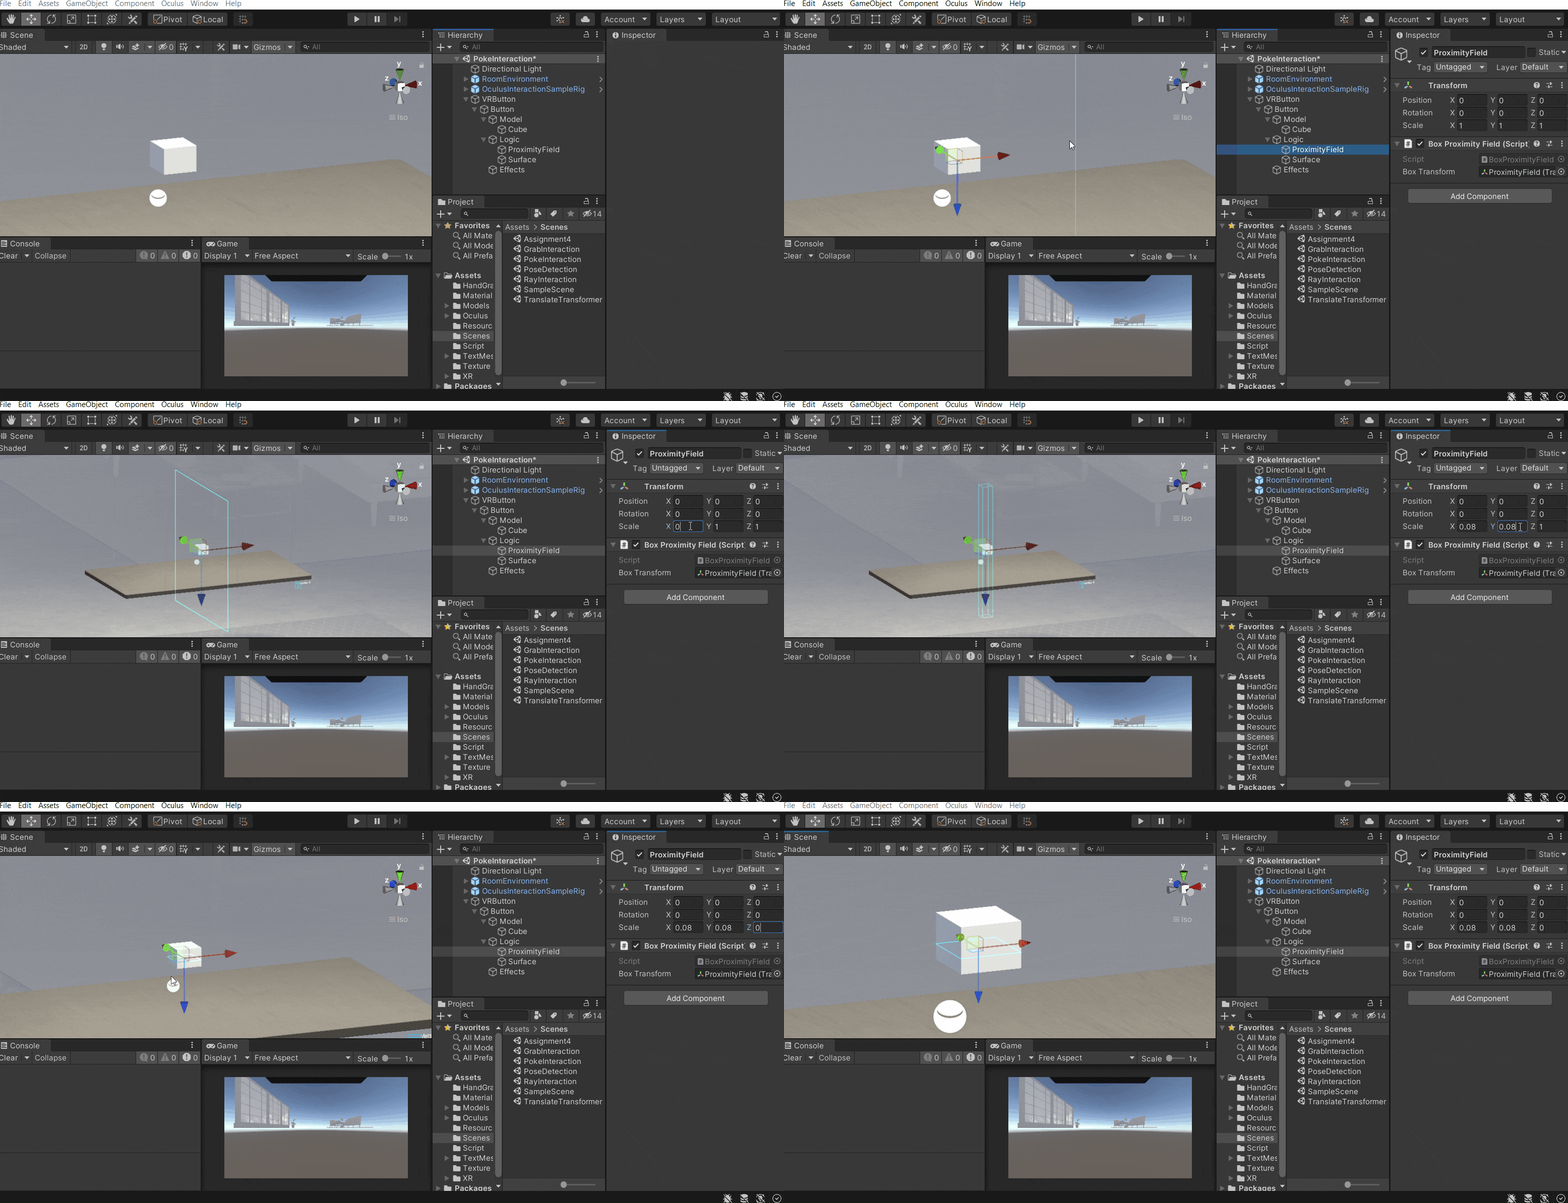
- Select the ProximityField GameObject and we’ll be able to see a blue box. If not make sure the gizmo is turned on. The Proximity field is the space in which the interactor gets registered. So scale it down to match the horizontal area of the cube.
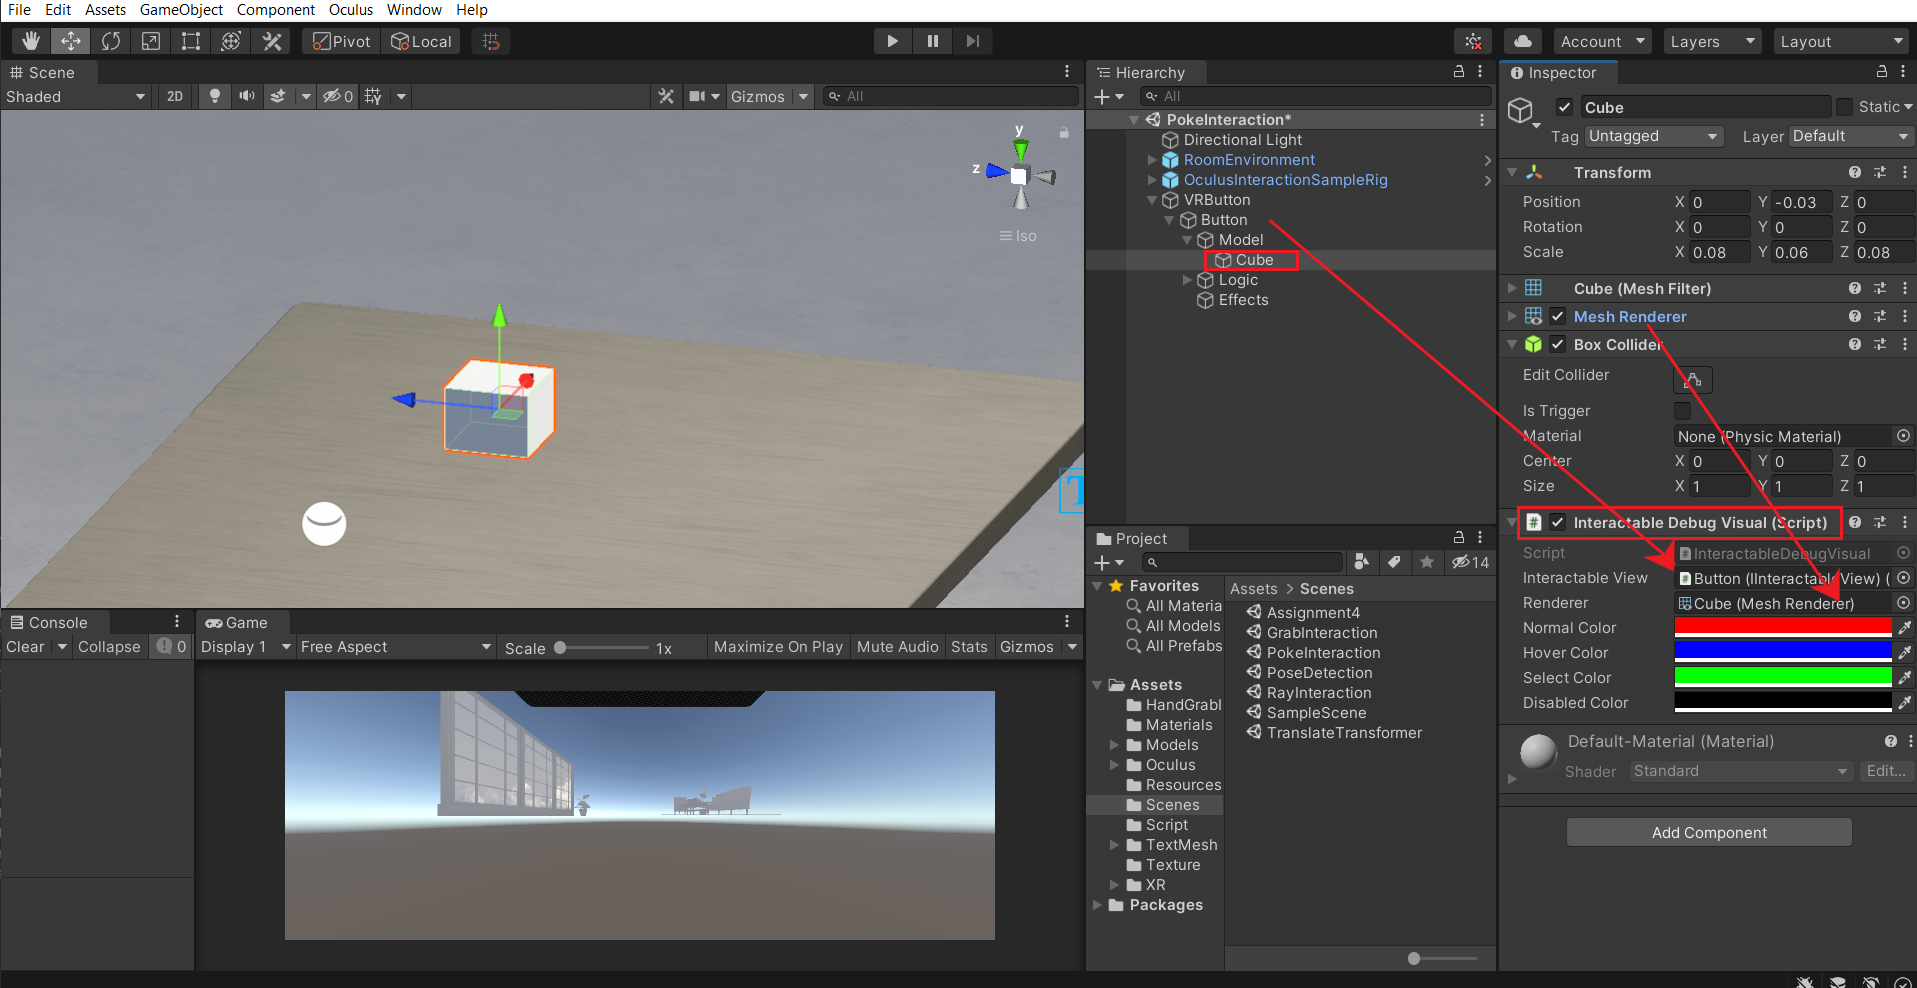
- Now to have a visual representation of the poke interaction, select the Cube GameObject and add the Interactable Debug Visual component → drag and drop the Button GameObject into the Interactable View parameter → drag and drop the Mesh Renderer component into the Renderer parameter.
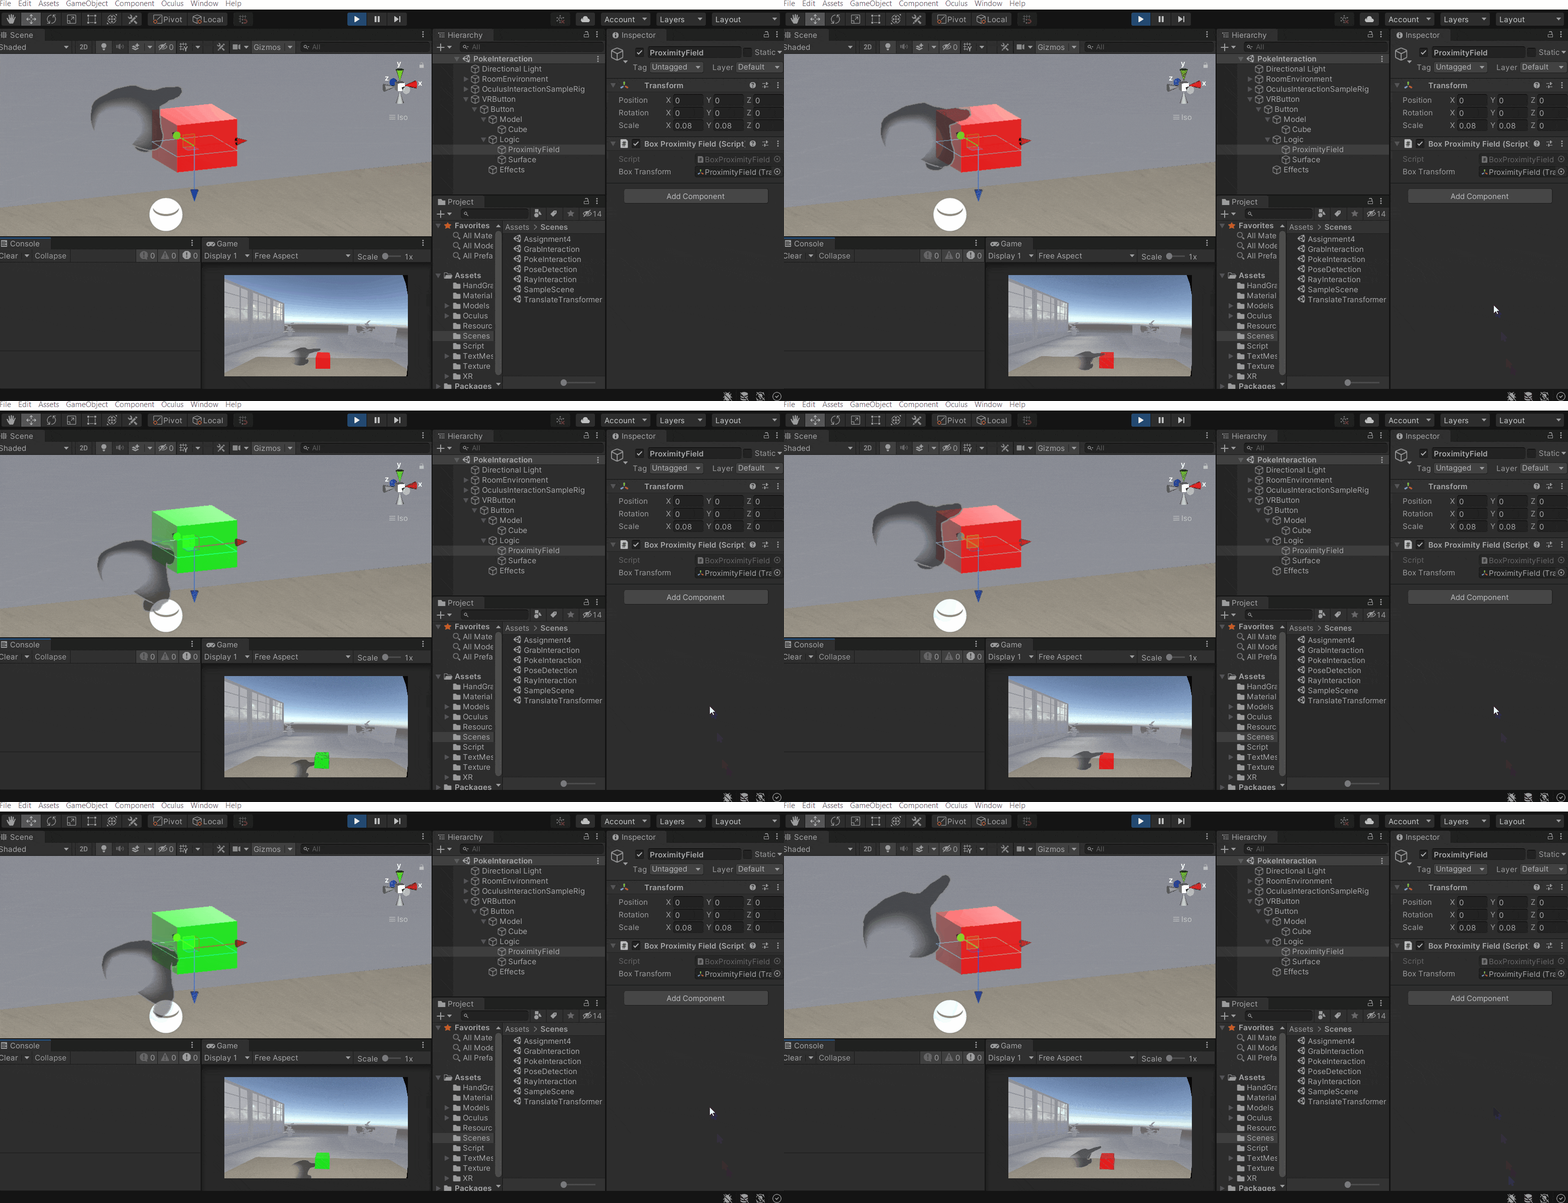
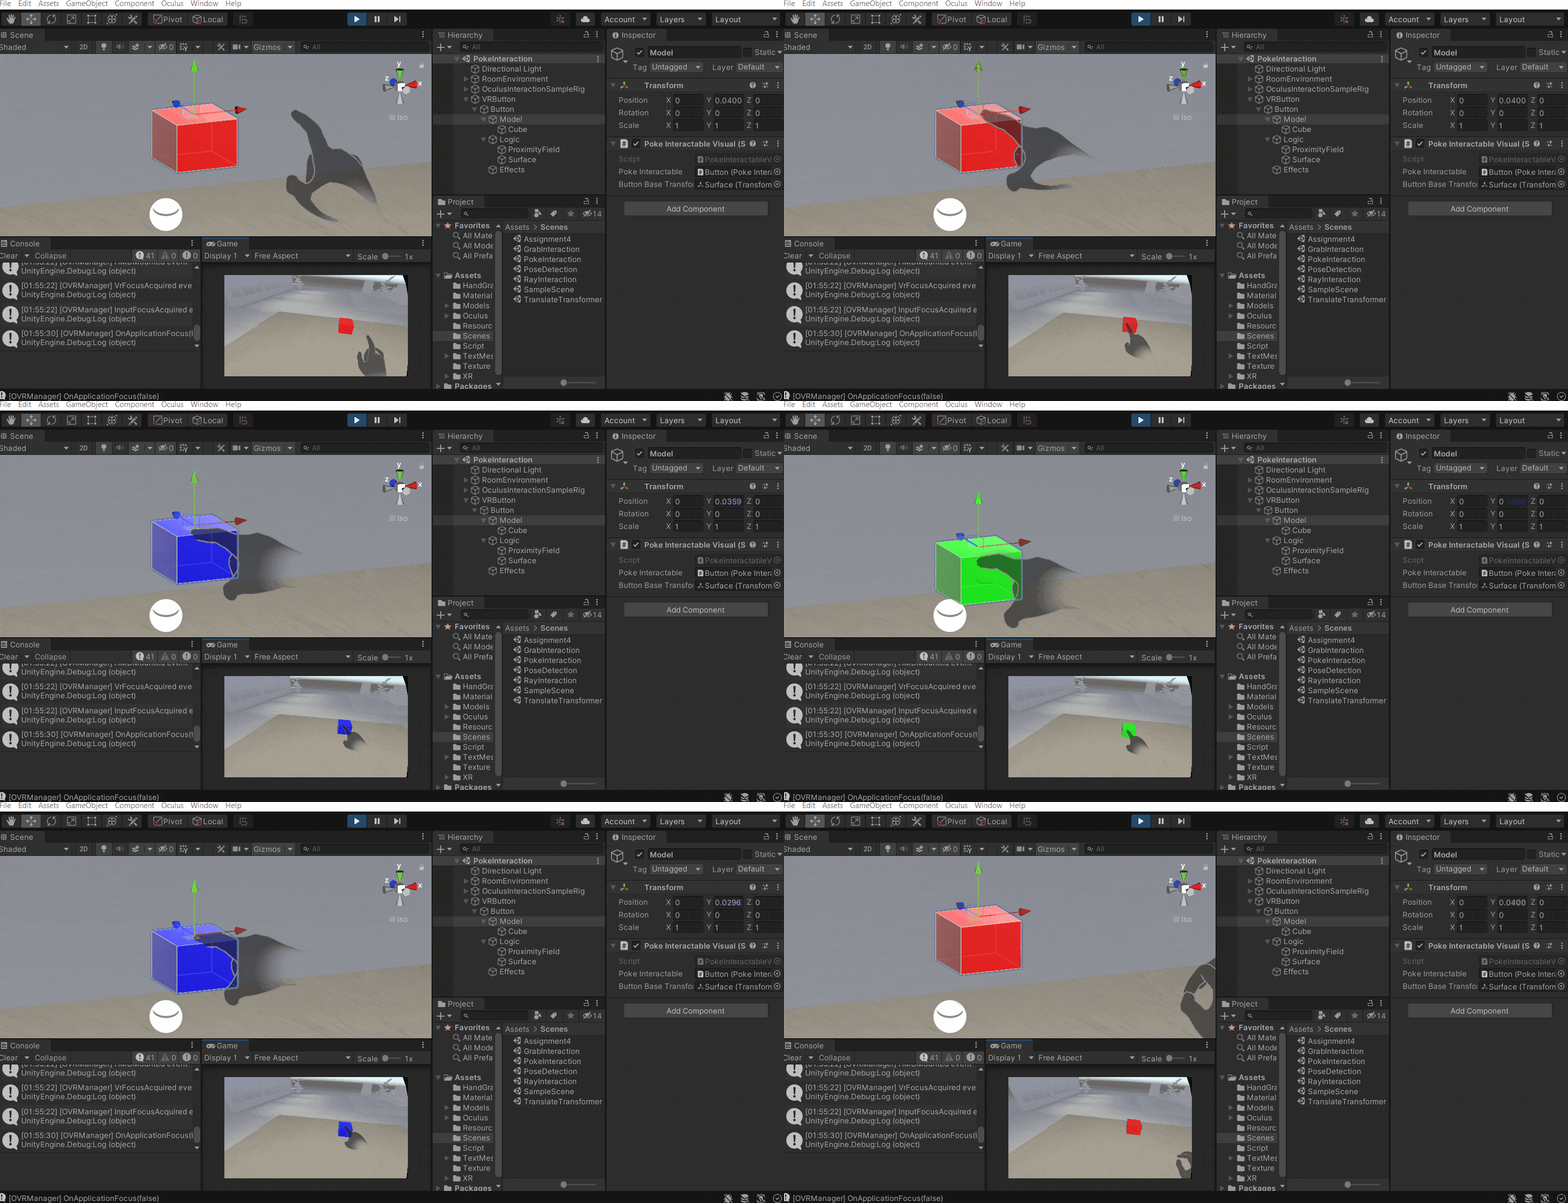
- At this stage, if you try to test the scene you will notice that the button detects the hover (blue color) and gets selected (green color) as well but the Model itself does not move down while pressing.
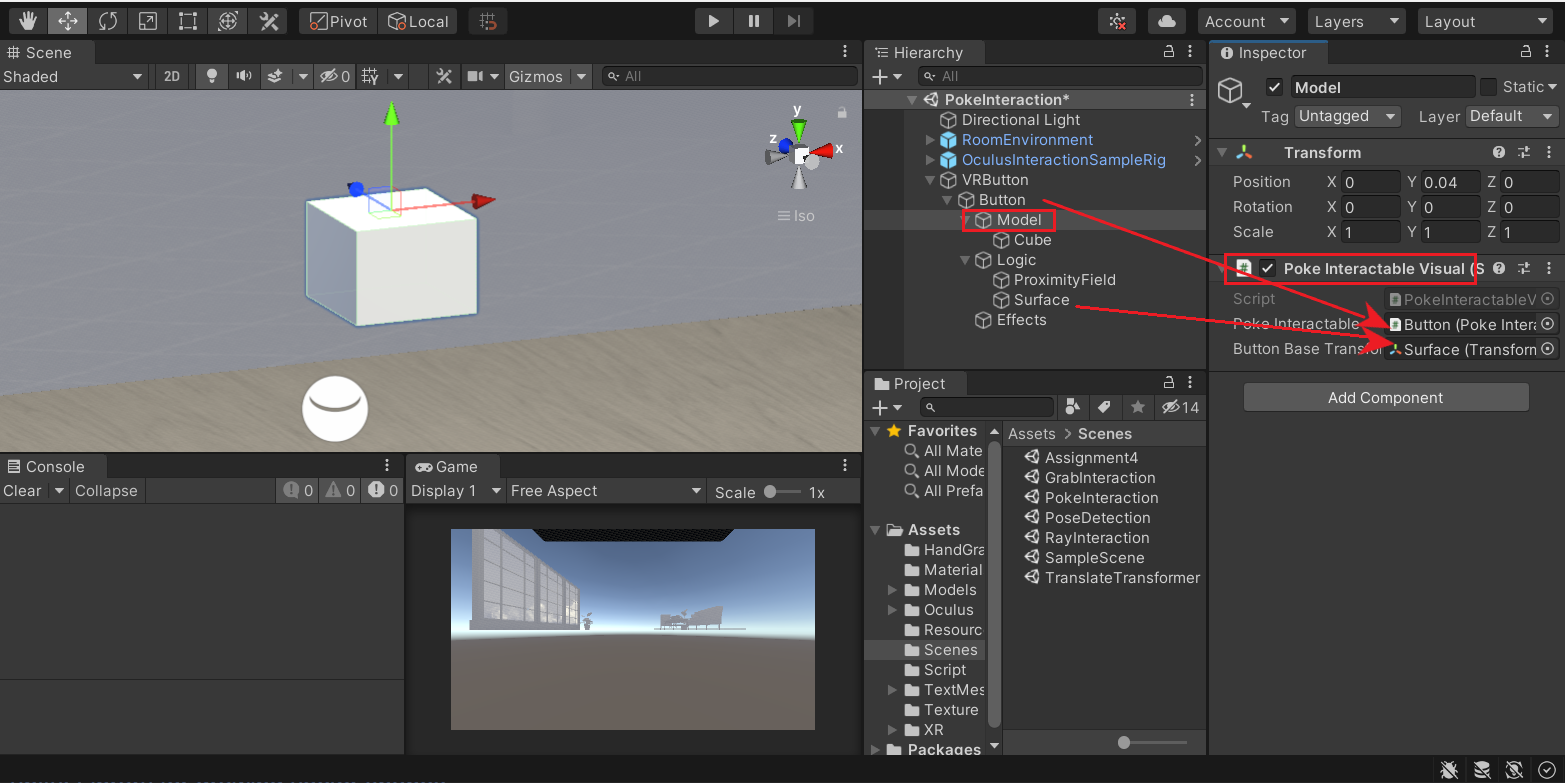
- So to visualize the downward movement of the model, select the Model GameObject and add Poke Interactable Visual component → drag and drop the Button GameObject into the Poke Interactable parameter → drag and drop the Surface GameObject into the Button Base Transform parameter.
- Now when you test the scene you can see the button moving downwards as we press it.
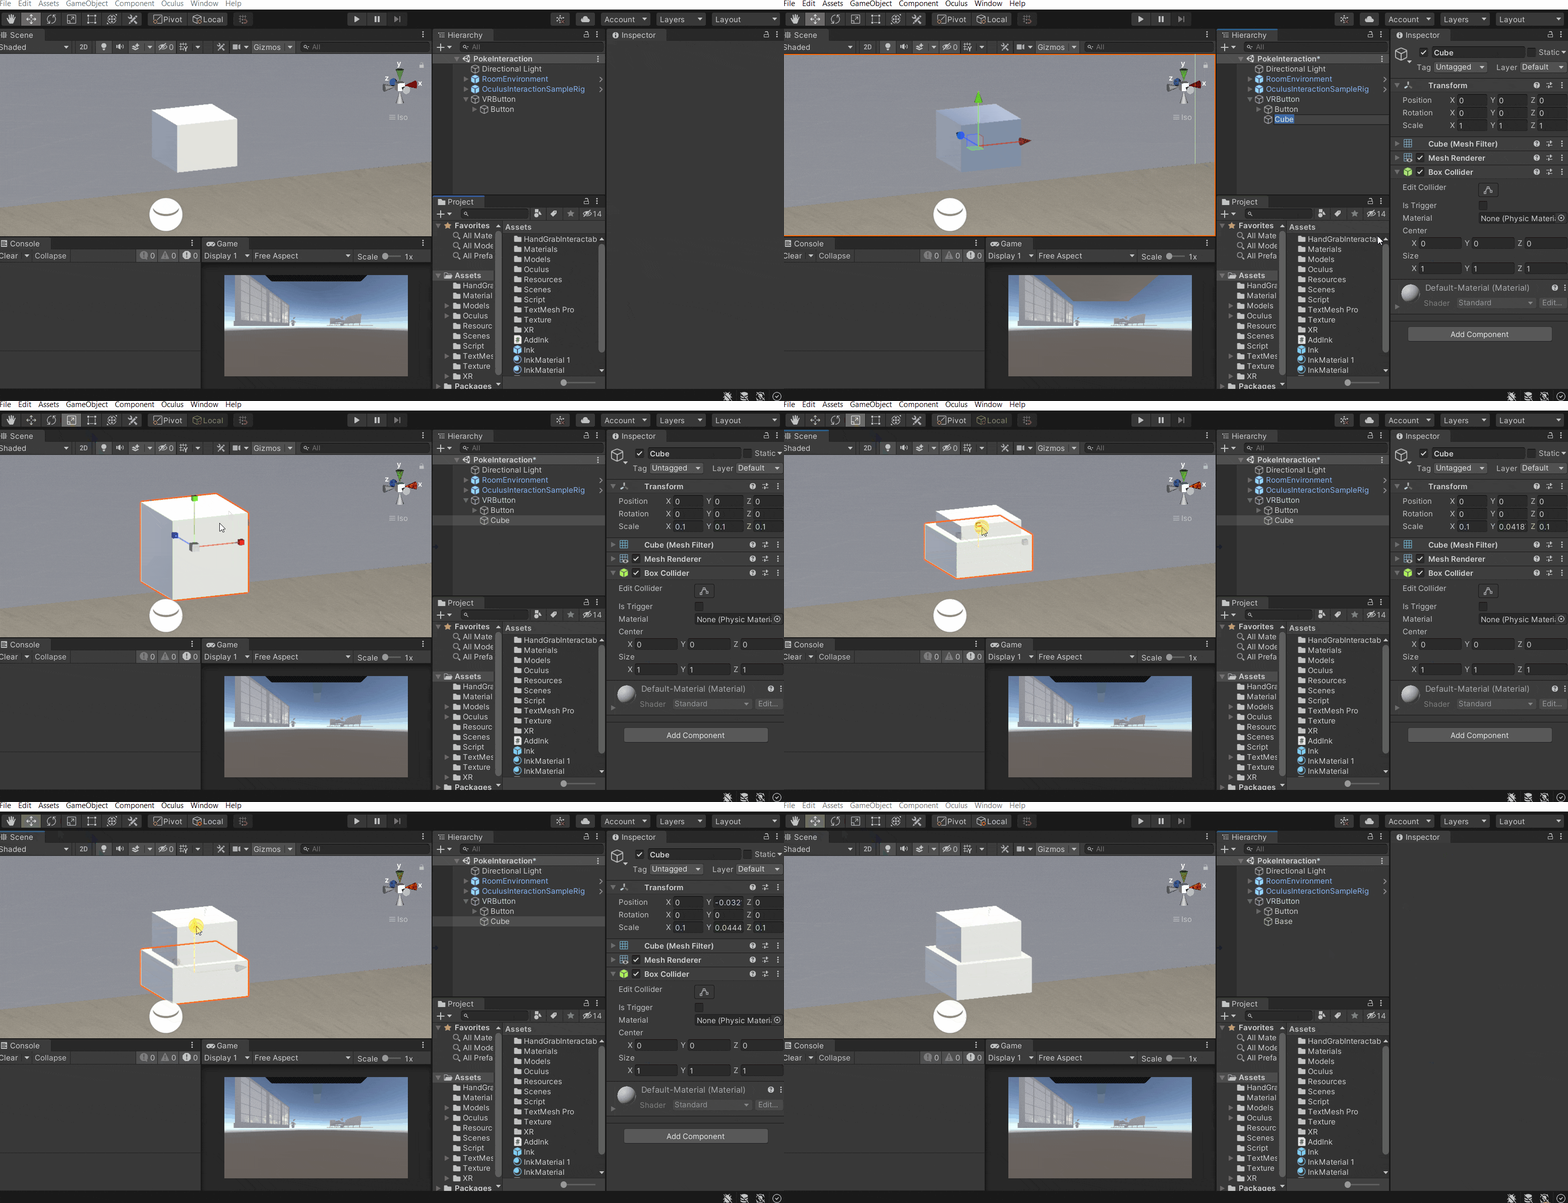
- To make the button look like a ‘button’, create a cube as a child of the VRButton GameObject → name it as Base → resize and reposition it such that it acts as a base of the button.
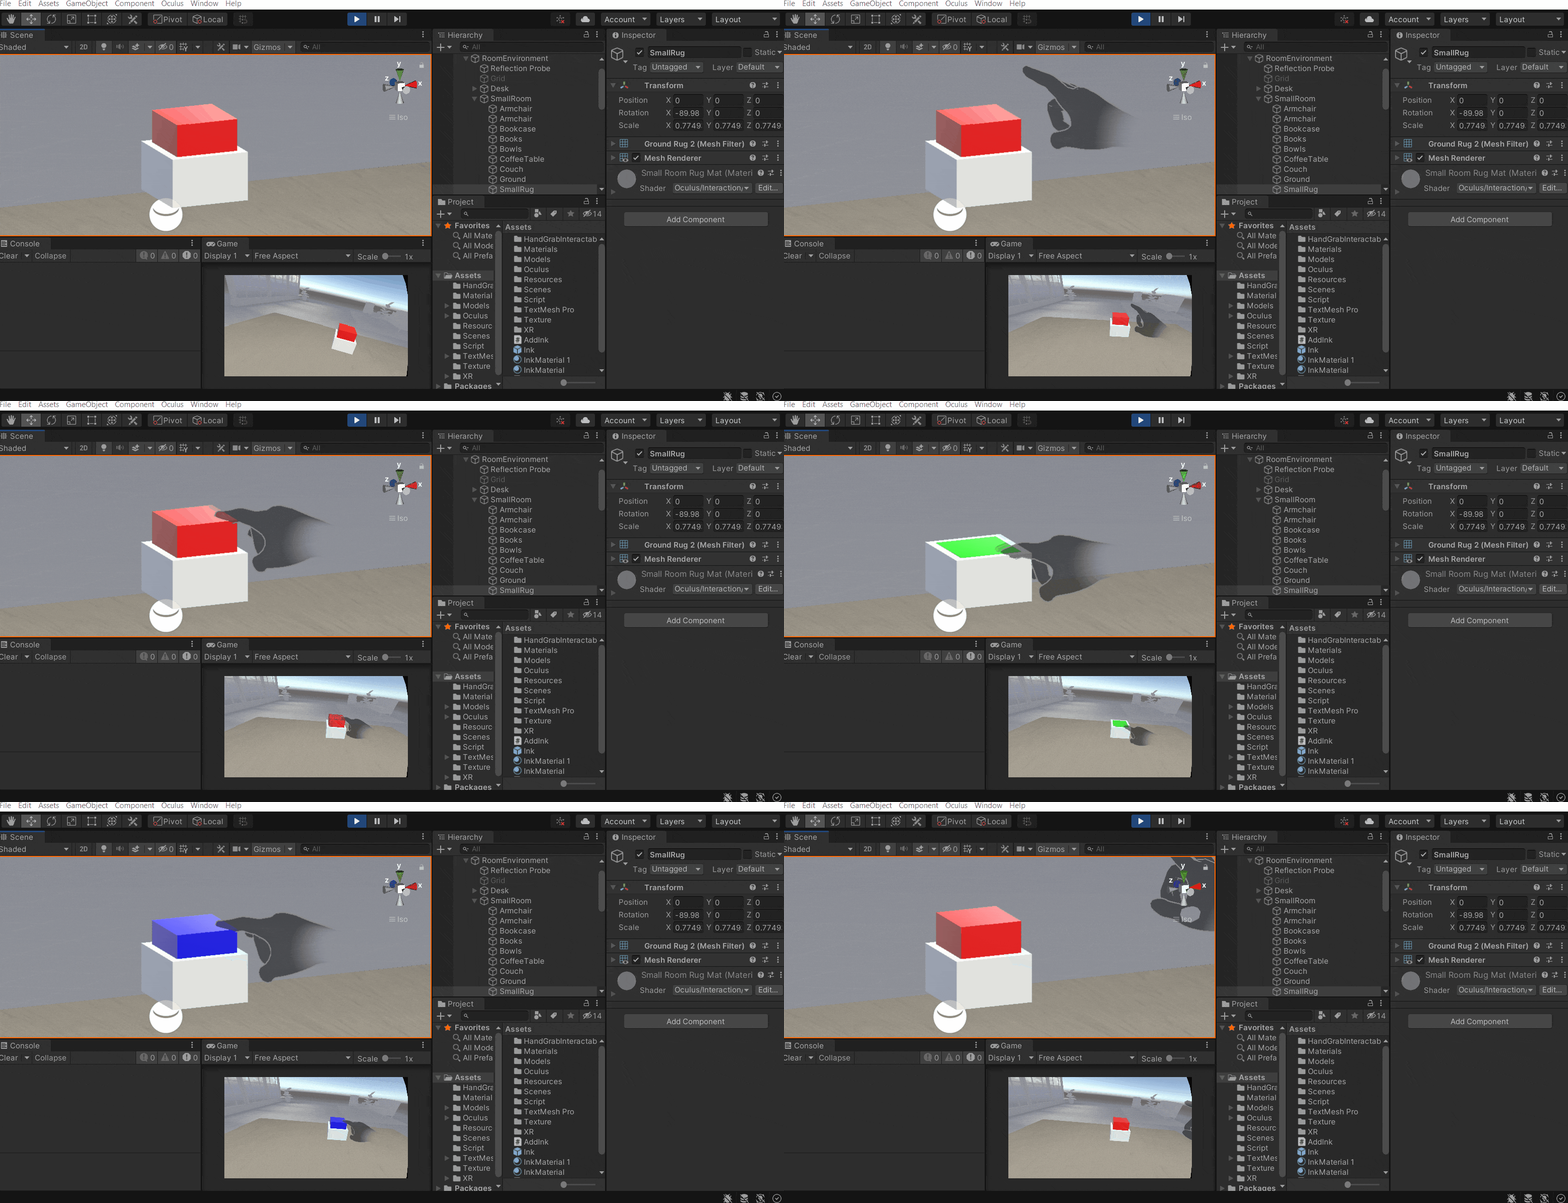
- Now we can finally test the scene and experience the VR Button
Adding Effects
We further enrich this interaction by adding audio or visual effects. For now, we’ll add audio effects, and to do that:
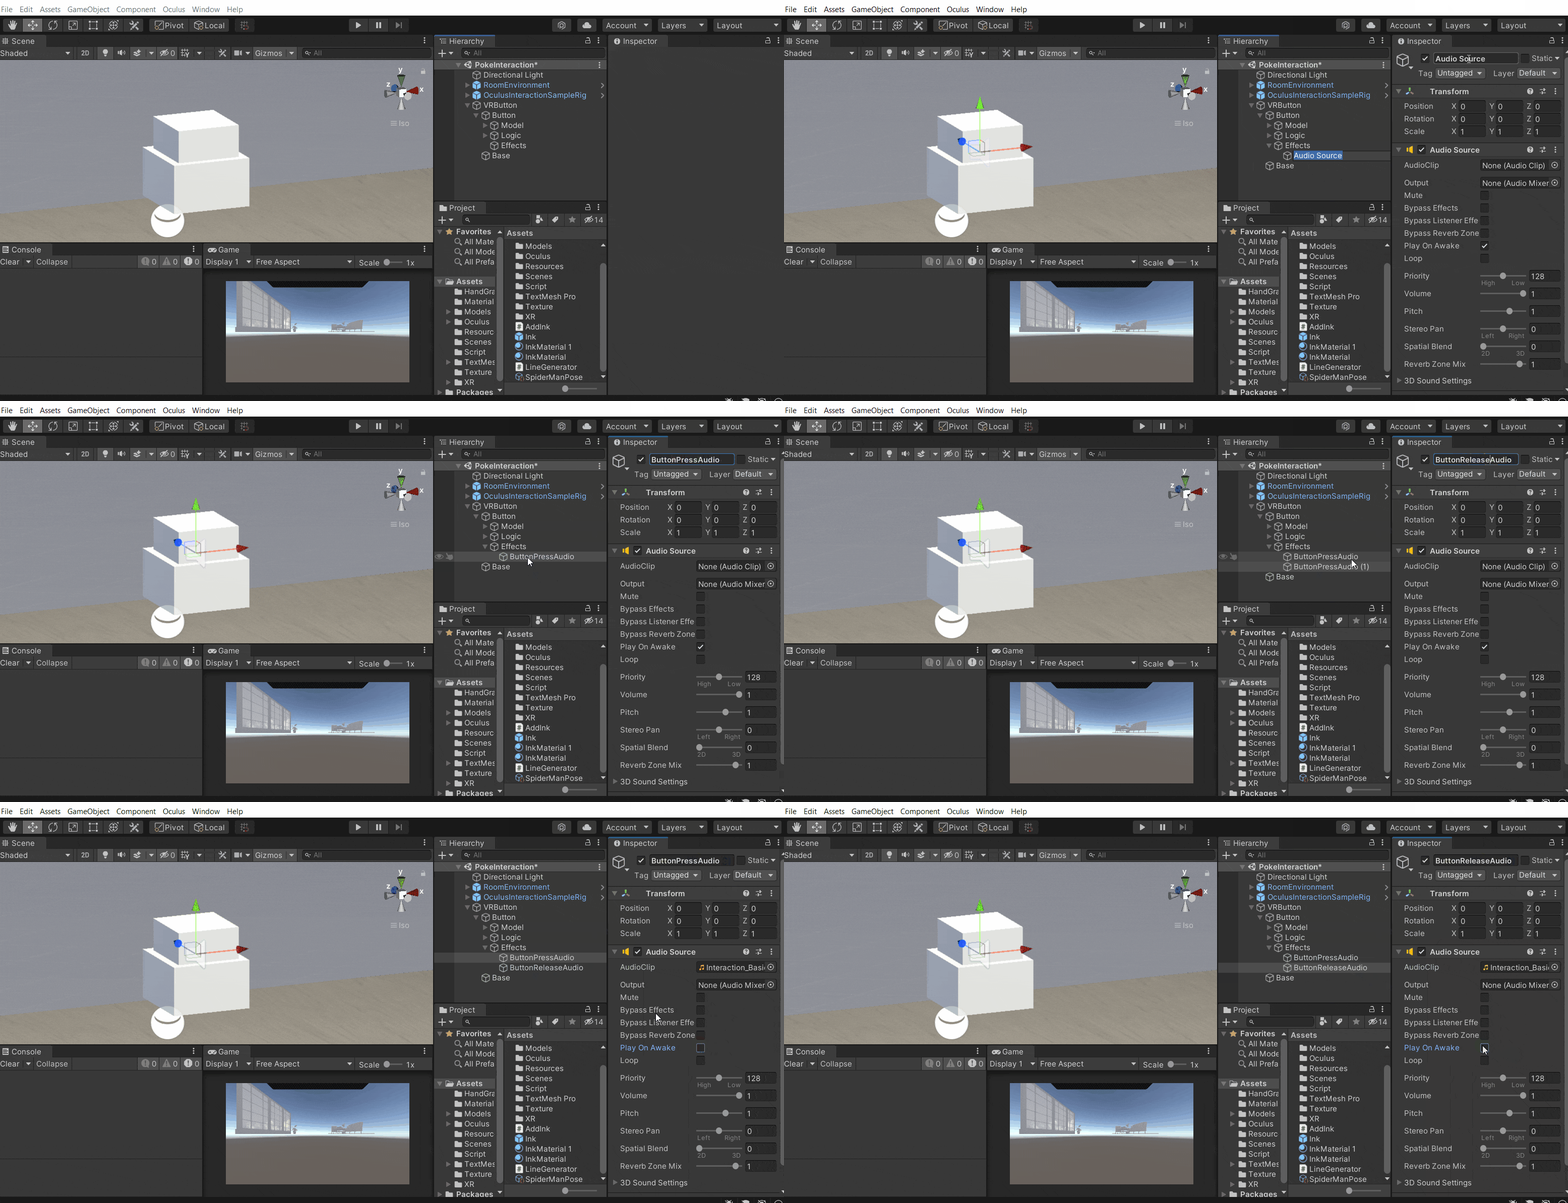
- Right-click on Effects GameObject → Audio → Audio Source → and rename it as ButtonPressAudio.
- Duplicate this GameObject and rename it as ButtonReleaseAudio.
- Add different Audio Clips to the AudioSources and uncheck the parameter Play On Awake.
- Next, we’ll select the Button GameObject and add the Interactable Unity Event Wrapper component.
- Create events under the parameters When Select () and When Unselect() by clicking the plus button.
- Drag and drop the ButtonPressAudio in the When Select() parameter → from the drop-down, select AudioSource → Play.
- Drag and drop the ButtonReleaseAudio in the When Unselect() parameter → from the drop-down, select AudioSource → Play.
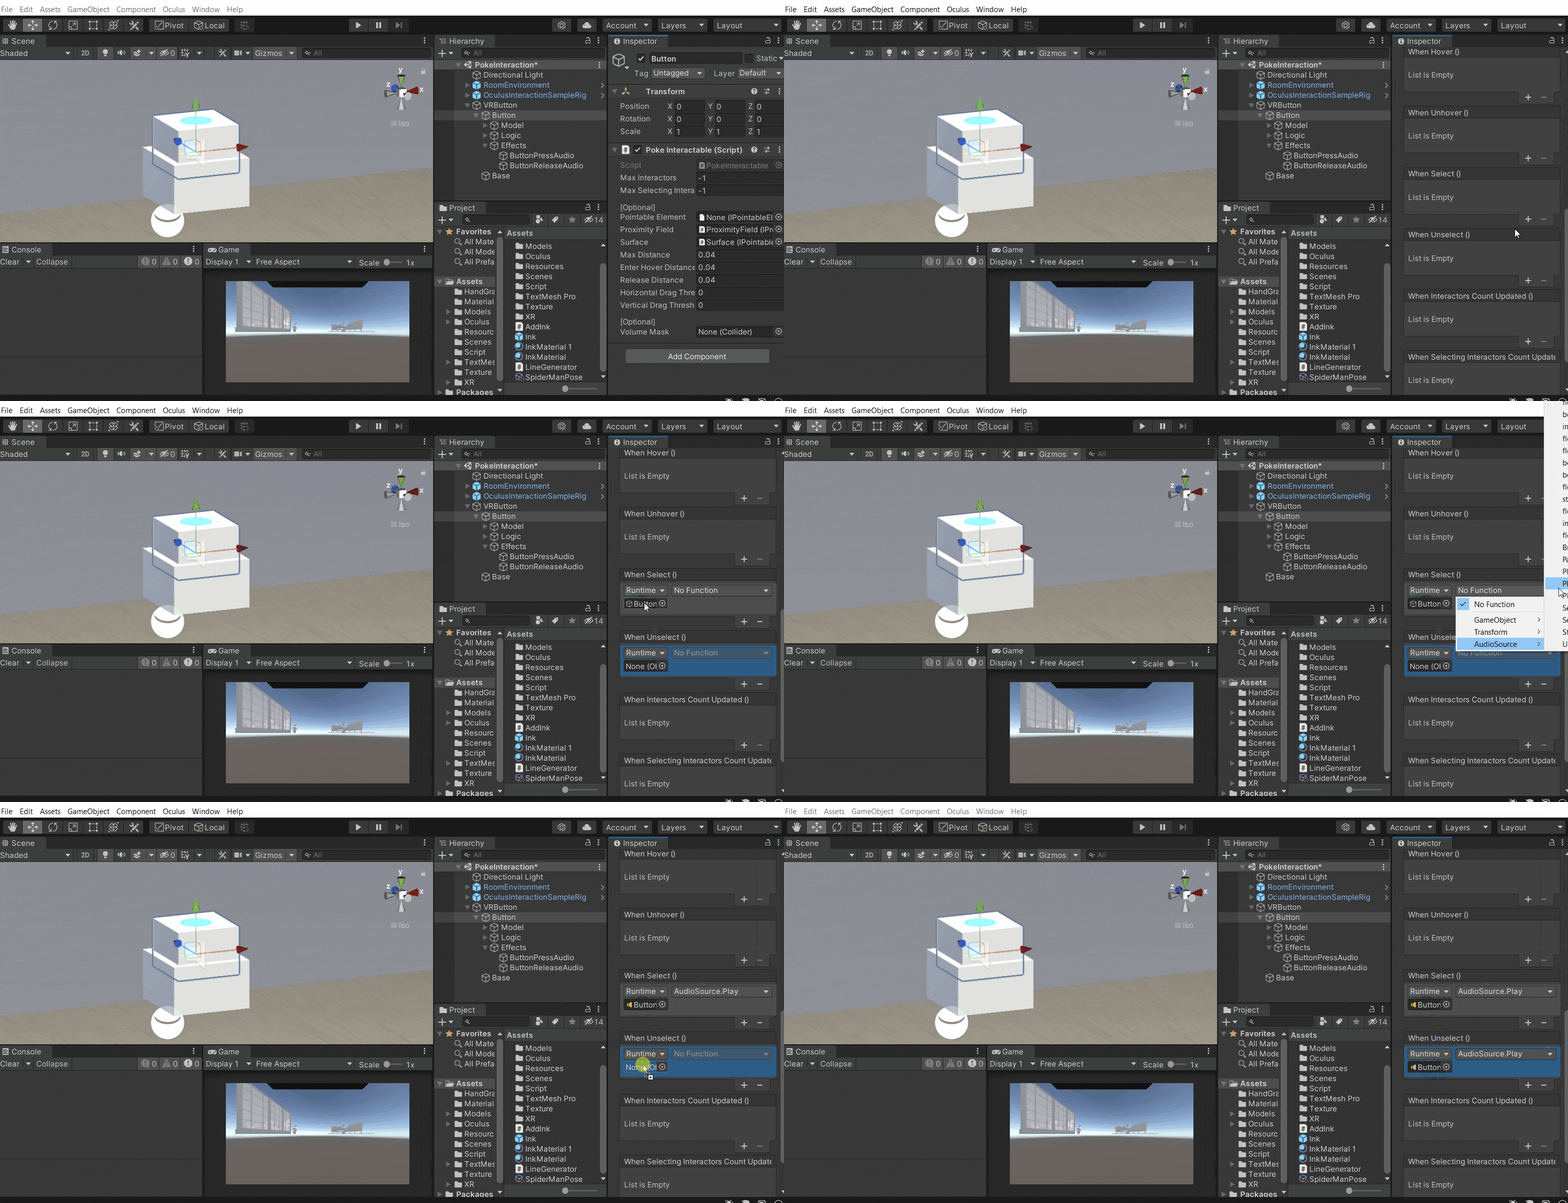
That’s it, now you will be able to hear audio when the button gets completely pressed and also when released.
Conclusion
Initially, we created a framework for the button right? If you are thinking as to how we can make use of it to create different types of buttons, then the answer is really simple. We’ll have to just change the object that’s under the Model GameObject and make sure the object’s top surface matches with the Model’s transform. Now we’ll be able to create all kinds of buttons. In the next section we’ll see how to create ray interactable canvases.


