1. Map Your Room
First, head to the Immersal Developer Portal and create a developers account. (Later, you will be using the same credentials to login inside the Immersal App and also while developing inside Unity.)
Now to create a spatial map of your environment, download the Immersive Mapper App from the Google Play Store or App Store.
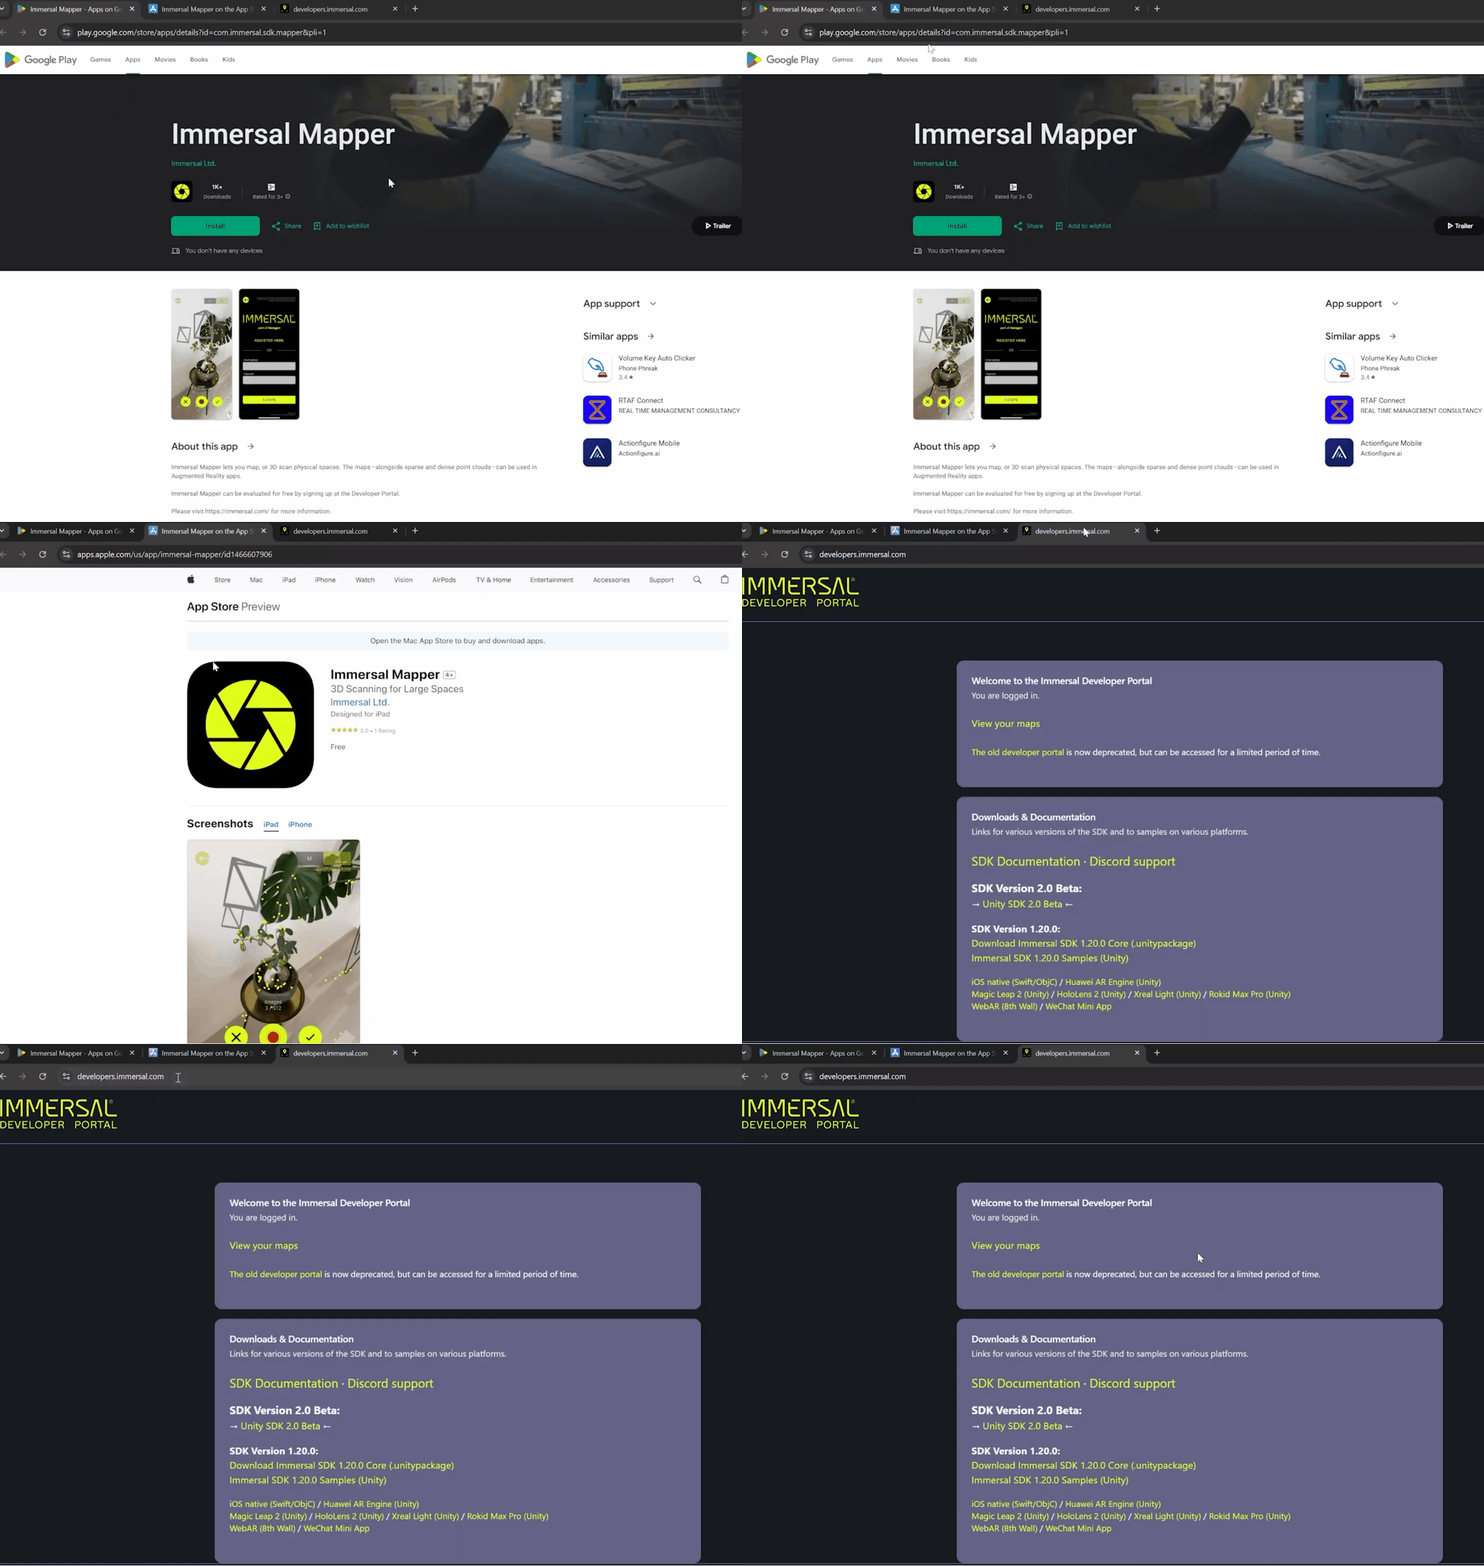
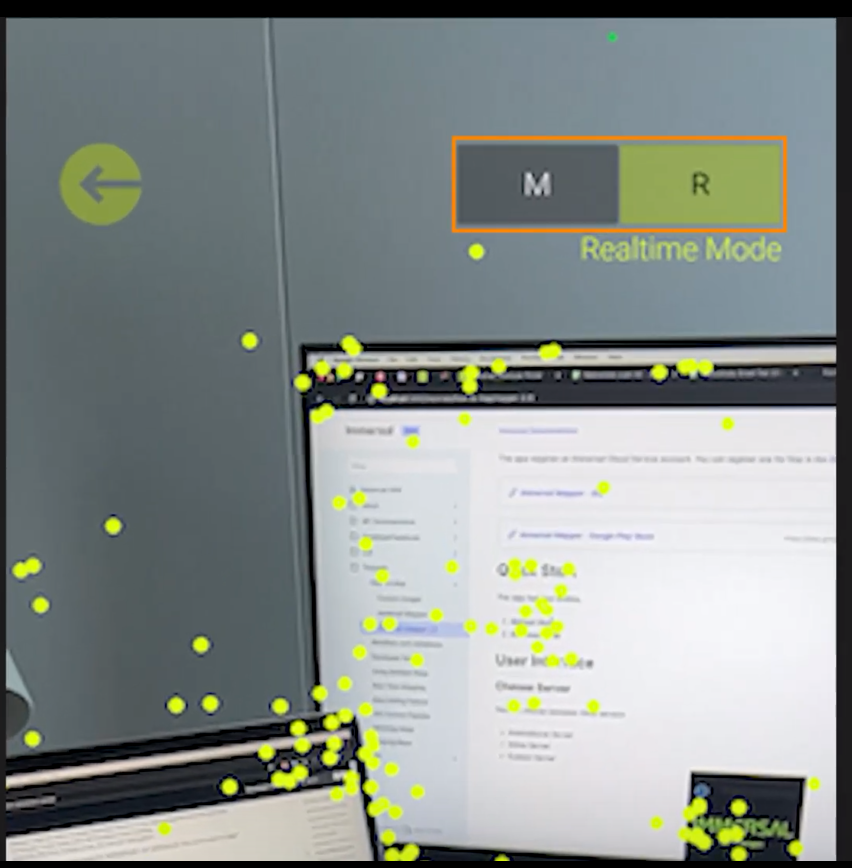
Once the app is installed, log in and create a new map by pressing the + button. On the top right corner you will be able to see two modes: the manual mode and the real time mode. So what’s the difference?
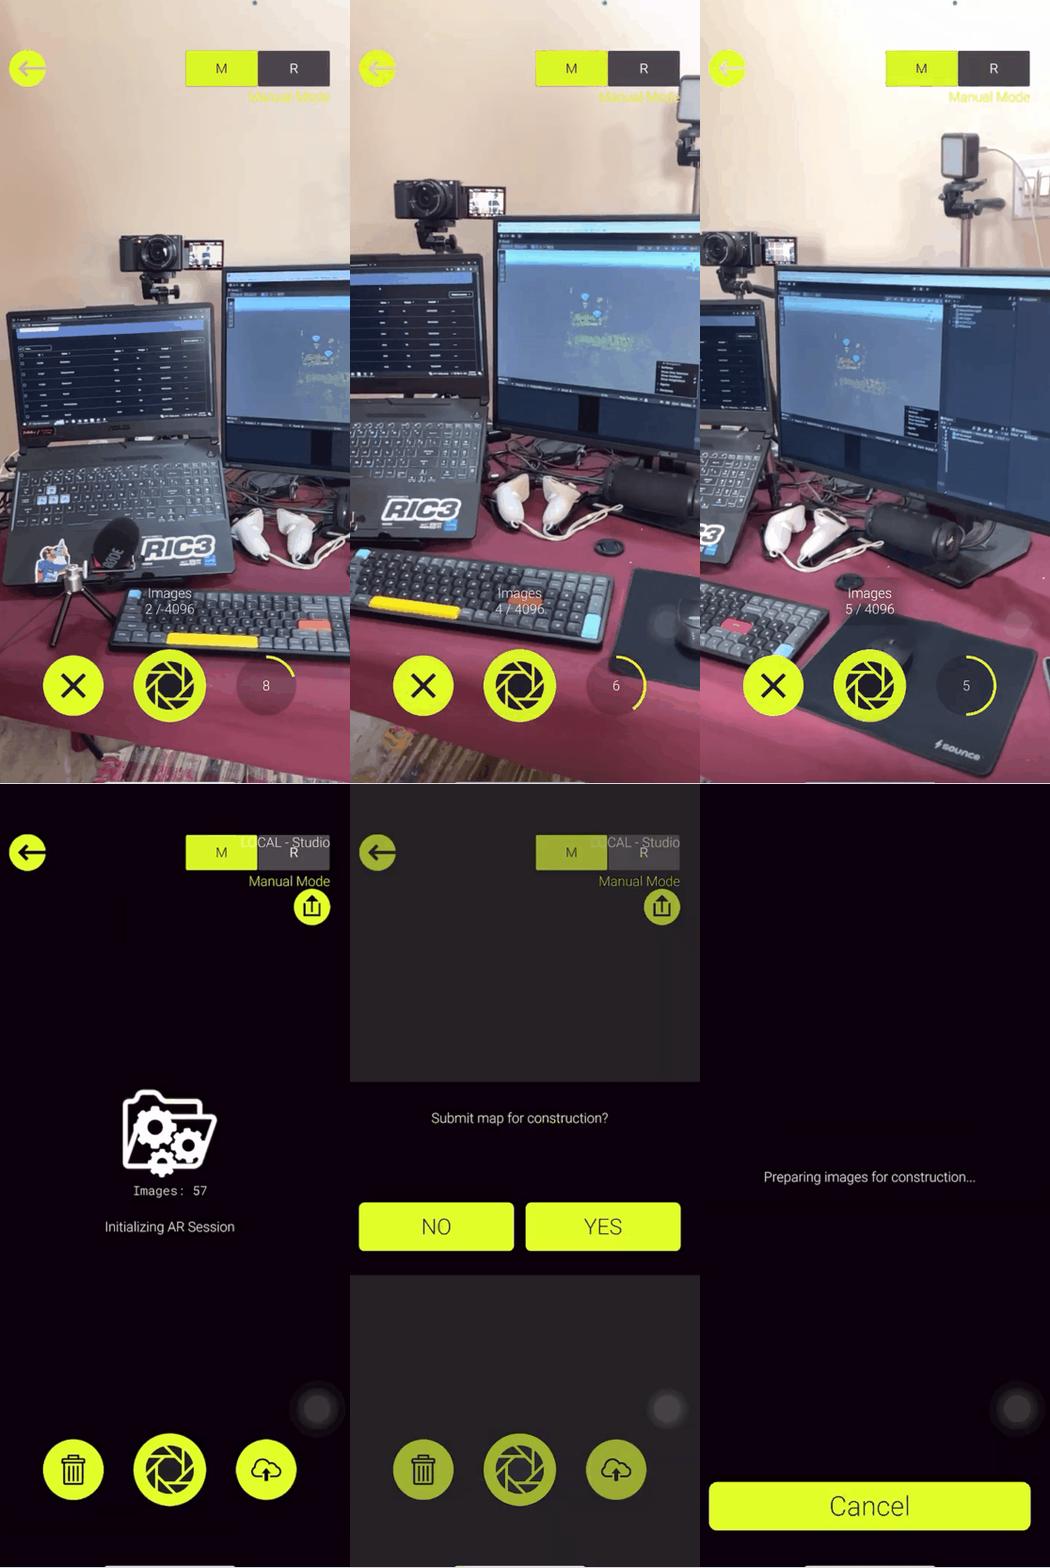
- In the Manual Mode, you will have to take the pictures of the target area by yourself from different positions and angles. Then, upload the images to the server for map construction, which
will then create the point clouds for you.
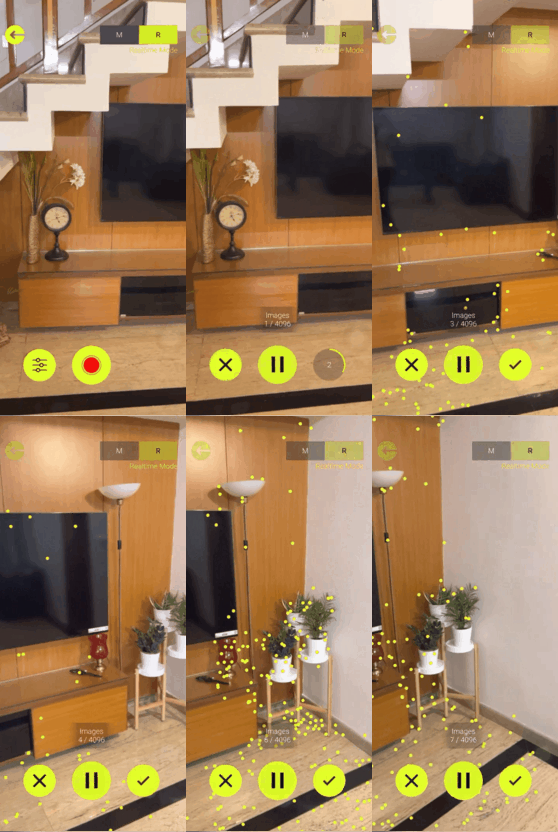
- In the Real Time Mode, you can just press the record button and move around inside the target area. It will capture the images automatically and generate the point clouds in real time.
So now the question is which mode you choose?
Well, if you are looking for a higher quality map, or if you are looking to map complex areas, then you can choose manual mode as it provides better result. However, it requires more careful mapping
as it's easy to miss certain angles or transitions.
On the other hand, you can use real time mode for testing or for mapping small areas as it generates the point clouds on the fly, but it does not save the images or generate a mesh of your environment.
In this tutorial we’ll be using Manual Mode to create a spatial map.
How to Validate Map Quality
After the map is processed, you get an option to download it and test localization in the real world. A high-quality map localizes quickly and consistently. If localization fails, adjust your mapping process to include more angles and features.
Next, you can go to the Immersive Developer Portal,
- Click on View Your Maps and it will show you a list of all the maps that you have captured.
- And then if you click on the three dots, it gives you options to view the sparse poly, the dense polygon, or the GLB.
- Now, if it gives you the option just to view the sparse poly, then it means that your map quality is not so good and it does not have enough number of feature points to generate a dense poly or a GLB.
- There could also be cases where you are able to view the sparse poly and the dense poly, but when you try to view the GLB, it says “Mesh failed”. Once again, it means that the quality of your map is not so good that it can generate a mesh.
💡 If you use real time mode to capture your environment, then make sure to upload the map to the cloud. Also, realtime mode does not generate a mesh so you’ll never get a .glb file.
2. Unity Project Setup
Create a new Unity Project (use version 2022.3 or later) with 3D core template. And now to set up the Immersive SDK:
- Navigate to
Window → Package Manager, click the + icon, and choose Add Package from GitHub.
- Paste this URL: https://github.com/immersal/imdk-unity.git and install it.
- Enable the New Input System: During installation, Unity might prompt you to enable the New Input System. Click Yes to proceed.
- Next, navigate to
File → Build Settings and switch the platform to Android (or iOS for Apple devices).
- Fix Project Settings: Open the Immersive Project Validation window and click
Fix All to apply recommended settings.
- Manually set Google ARCore as the plugin provider in XR settings.
3. Set Up Your Unity Scene For AR
Now that your Unity project is set up with the Immersal SDK, it's time to configure your scene for AR development.
- Delete the default main camera.
- Add AR Session and XR Origin:
-
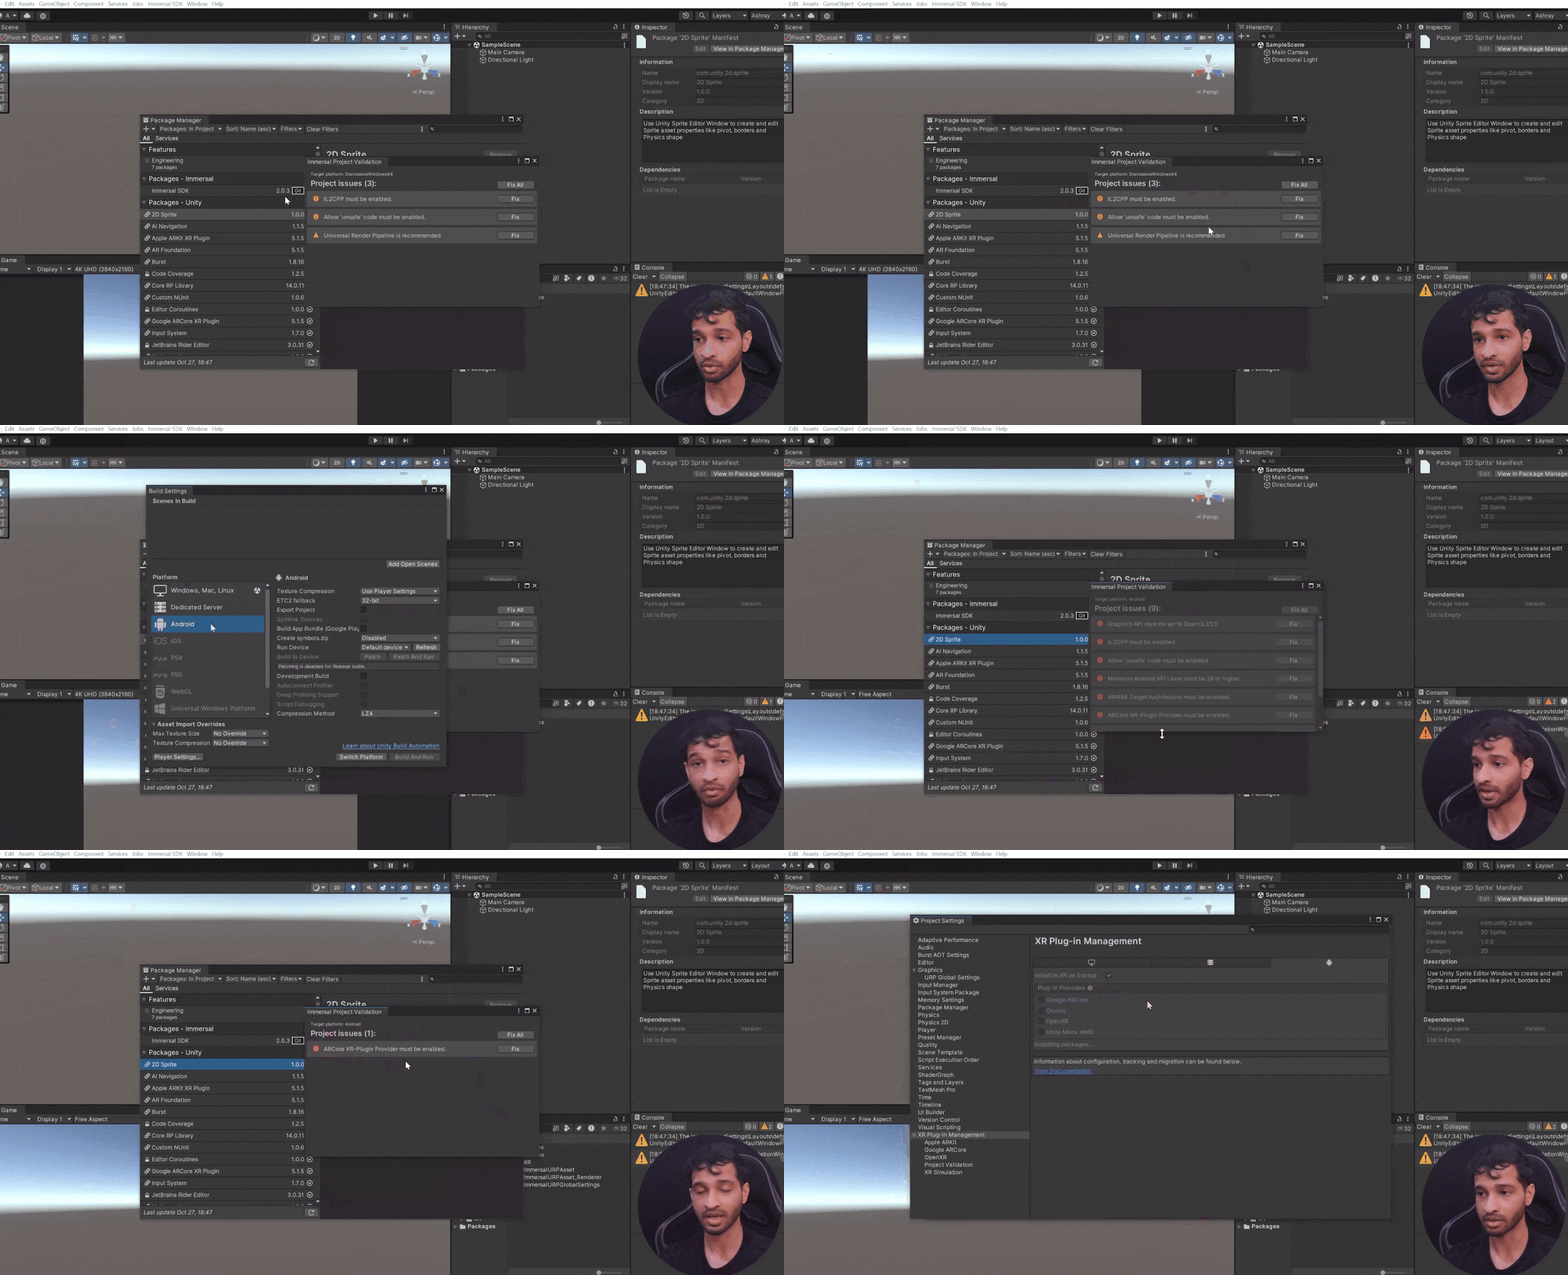
Right-click in the hierarchy, navigate to XR, and add AR Session and XR Origin.
-
The AR Session component manages the lifecycle of your AR experience, ensuring it runs smoothly on your device.
-
The XR Origin component enables device tracking and transforms trackables into Unity's coordinate system.
💡 Open the child object of XR Origin and select the main camera → Scroll down to find the Track Pose Driver component. This component is responsible for obtaining the position and rotation of your device, allowing the XR Origin to transform trackable objects and features to their final positions within the Unity scene.
4. Integrating the Immersal SDK and Setting Up VPS Features
4.1 Add the Immersal SDK Prefab
With our Unity project and scene set up fro AR, it's time to integrate the Immersal SDK and configure the VPS (Visual Positioning System) features to place virtual content.
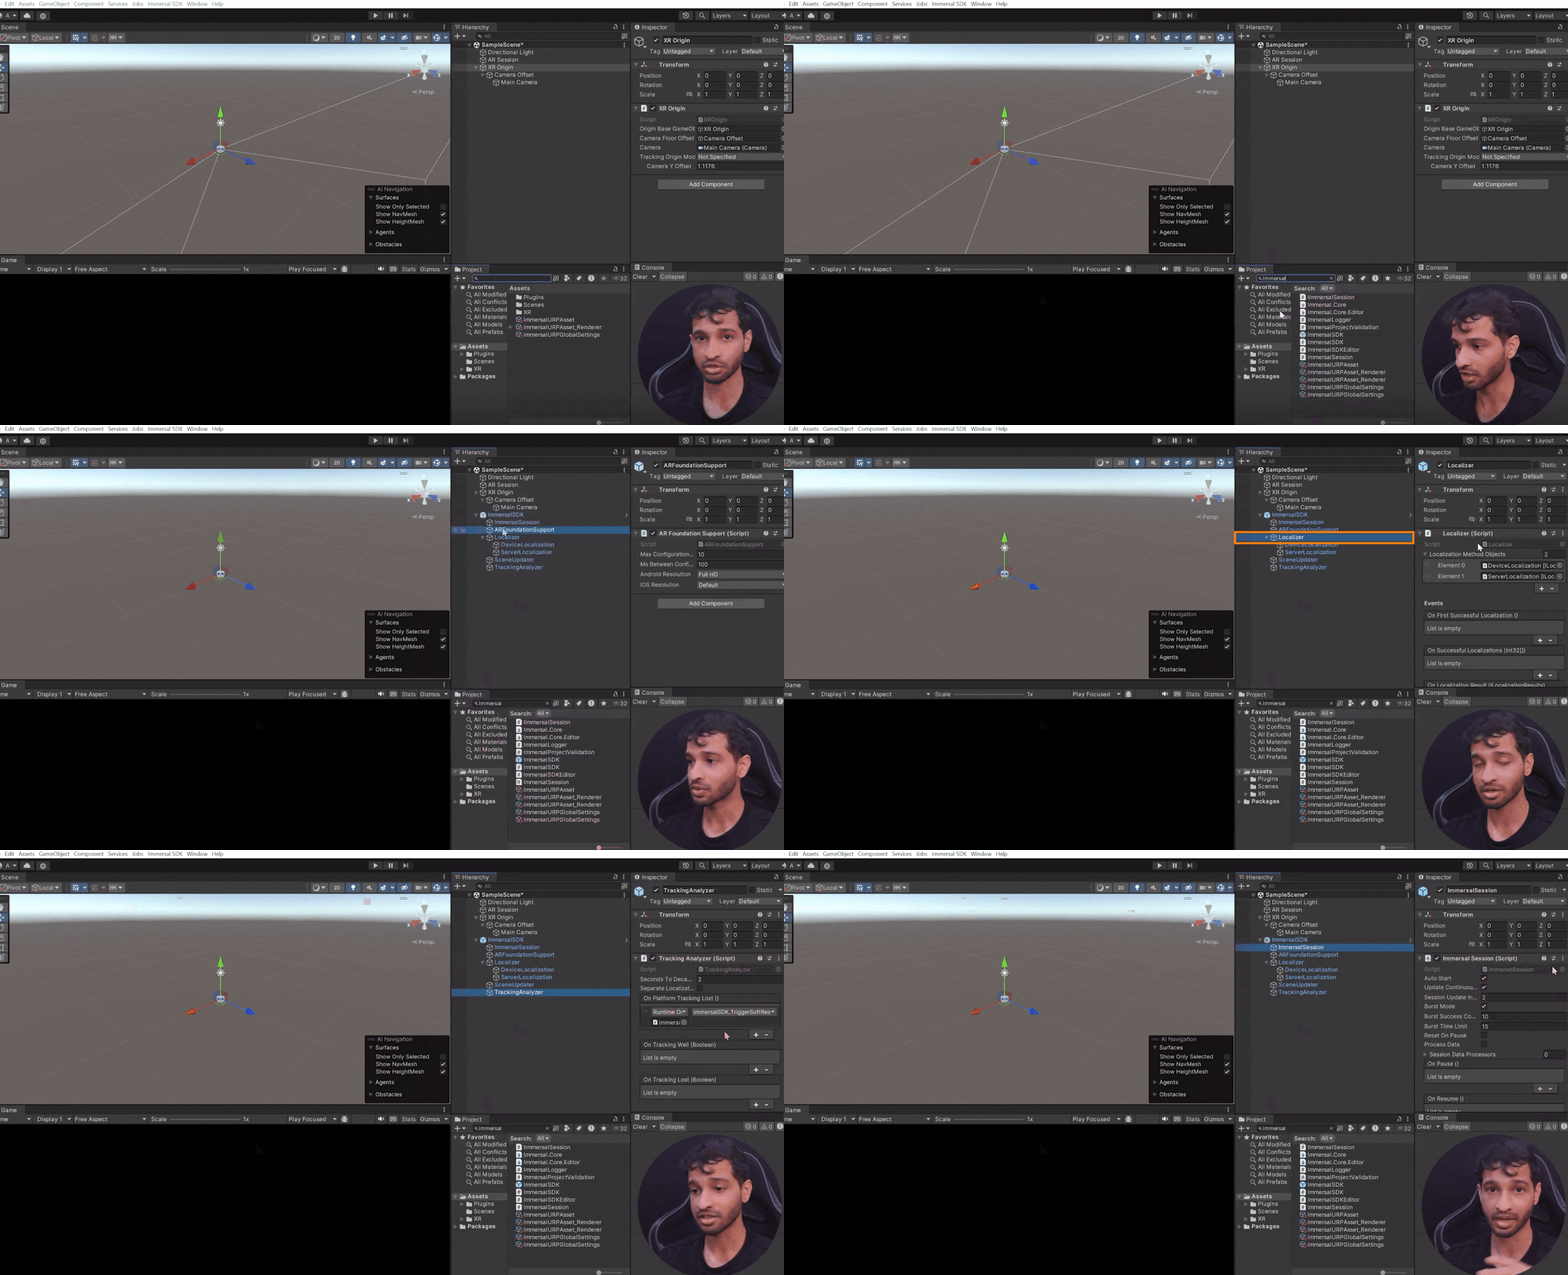
- In your project window,set the search filter to
"All" and search for "Immersal" .
- Select the Immersal SDK prefab and add it to your scene. This prefab includes AR Foundation support, which configures the device and retrieves necessary camera data.
4.2 Understand the Components of Immersal SDK Prefab
- Localization Methods: The prefab includes two localization methods that define how localization should occur.
- Localizer Component: Manages and configures the localization methods.
- Scene Updater Component: Adjusts the position from the localizer and updates the scene accordingly.
- Spatializer Component: Interprets data such as device status and localization results, constructing a tracking status to describe positioning quality.
- Immersal Session Component: Connects all components, managing a continuous loop to process data based on internal logic and configuration.
4.3 Set Up XR Space
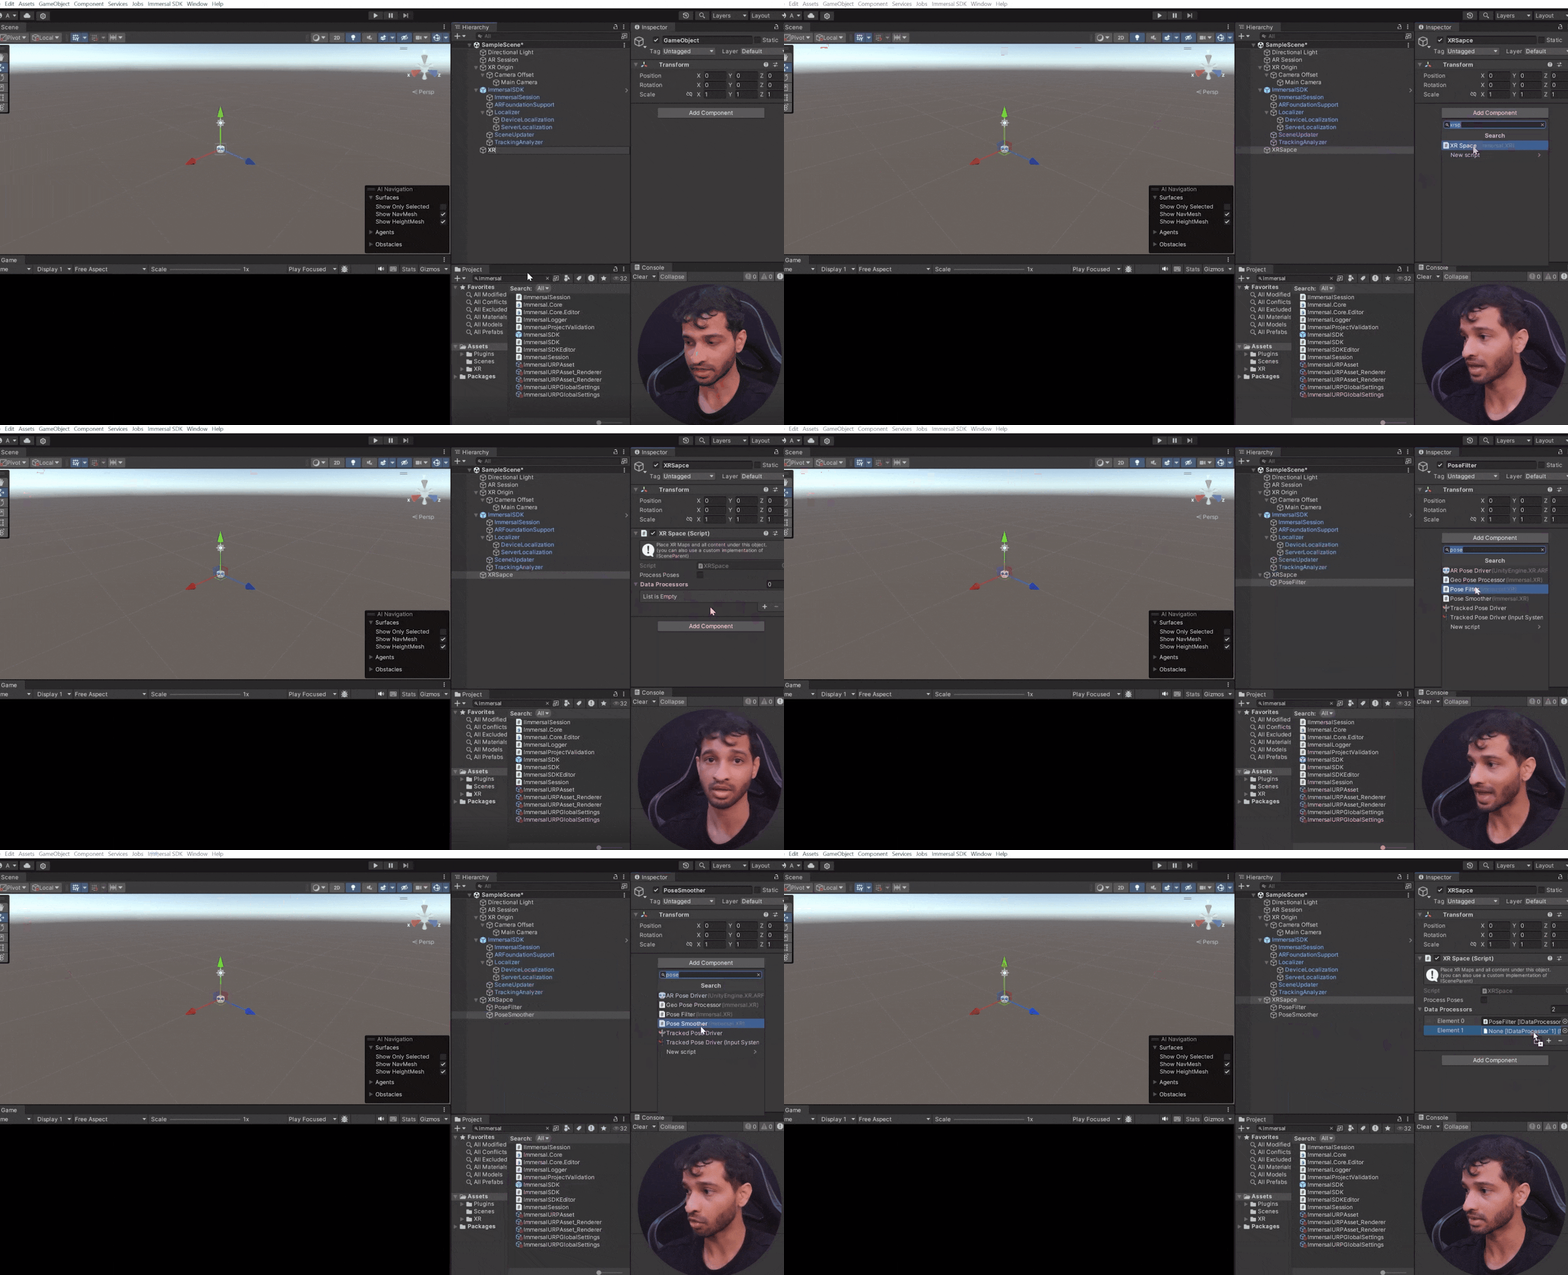
- Create an empty GameObject named "XRSpace" and add the XR Space component.
- Add Data Processors:
- Create a child GameObject named "Pose Filter" and add the Pose Filter component.
- Create another child GameObject named "Pose Smoother" and add the Pose Smoother component.
- Add both components to the XR space's data processor list.
 4.4 Download the Spatial Map
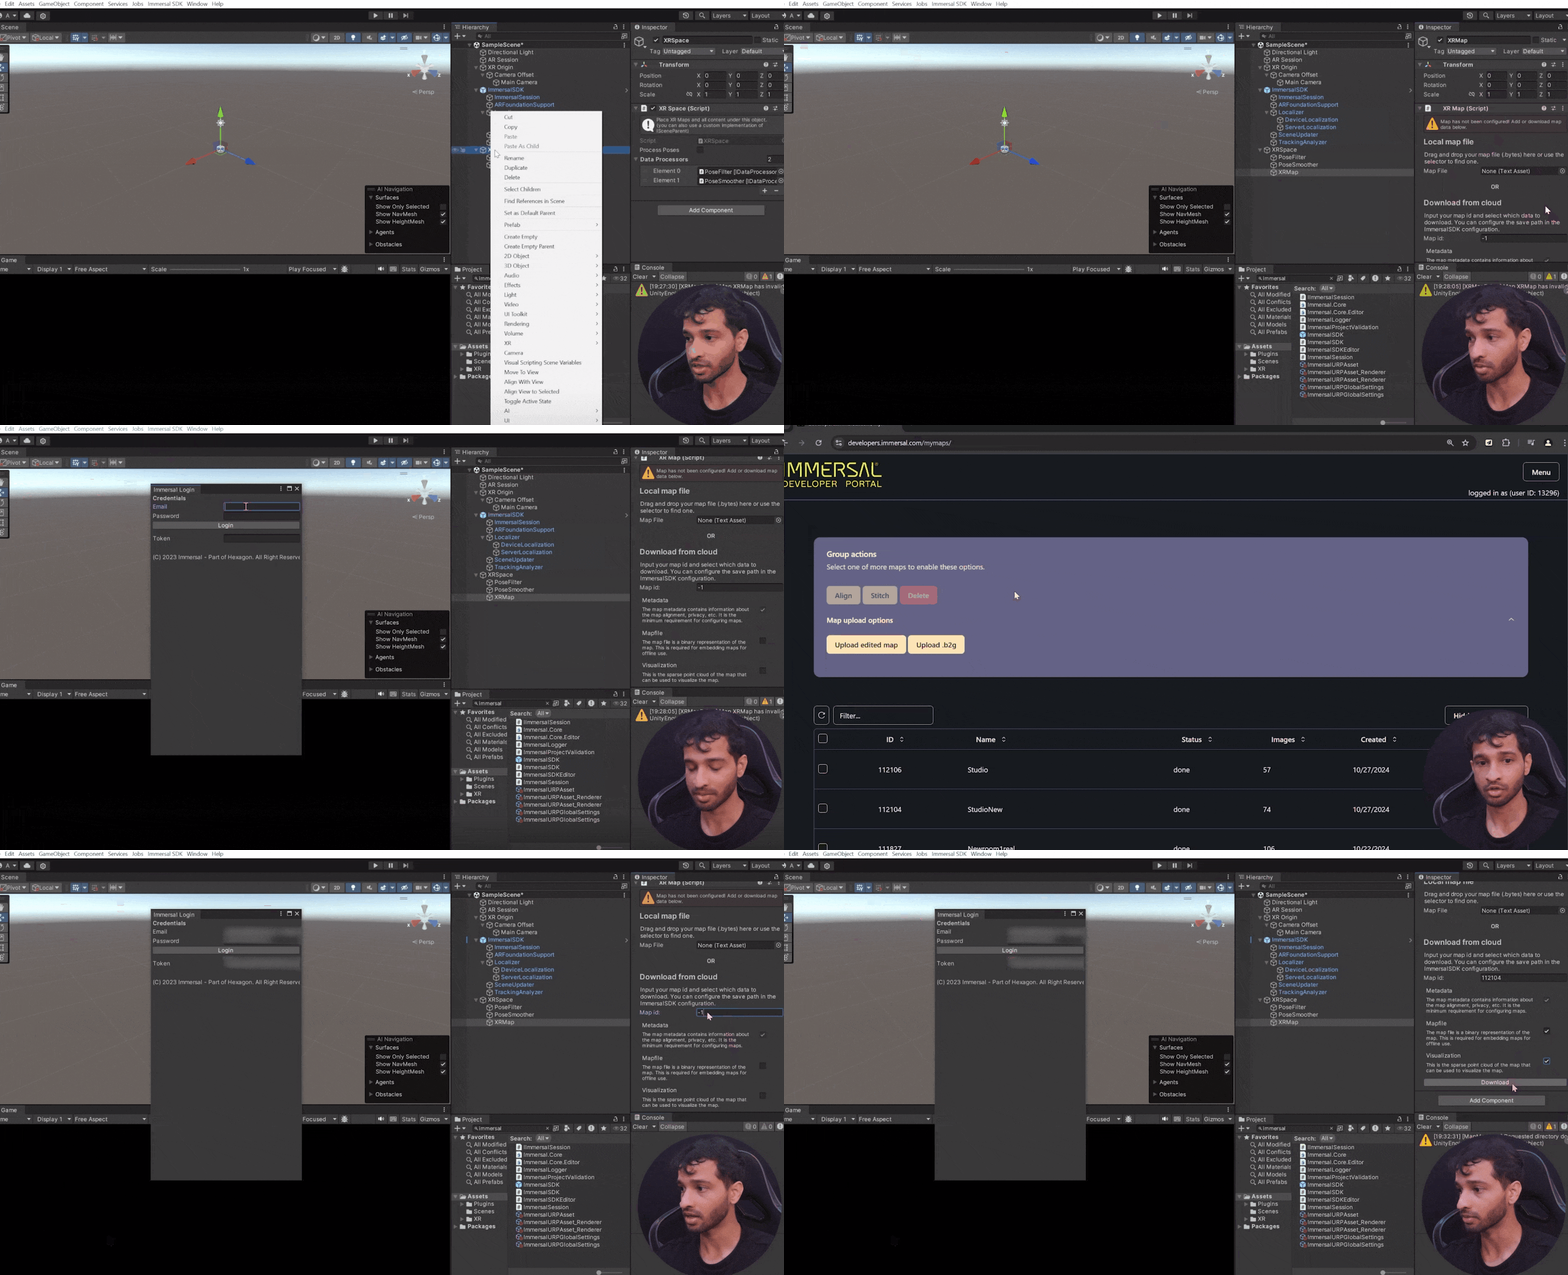
- Create an empty GameObject as a child of XR space, name it “XR Map” and add the XR Map component.
- From the toolbar, select ImmersalSDK and click on Login. Use your Immersal credential and upon successful login, you'll see a token.
- Now to download the spatial map, go to the Immersal Developer Portal and copy the map ID from the Immersal developer portal.
- Back in Unity, paste it in the map ID parameter of the XR Map component → check the box for Mapfile and Visualization and click
Download
4.5 Configuring Spatial Map
- Configure Localization: Decide if you want the localization method to be device-localized or server-localized. Similarly, choose if the map data should be embedded or downloaded.
- Render Settings: Select the XR map's child object with the XR map visualizer, choose the render mode (Editor or Runtime), and adjust point color and size as needed.
4.5 Testing Localization
Before we start placing AR Content, let’ first build and test this on to our mobile device to make sure it’s able to localize.
- Make sure to have enabled developer mode on your device and connect it to your computer.
- Navigate to
File → Build Settings, add the open scene, select your device from the dropdown, and click "Build and Run"
After launching the app, ensure the spatial map localizes correctly in your environment. The point cloud should align seamlessly with physical surroundings.
5. Adding AR Content
Now that our app can localize the spatial map, it's time to add virtual content to your AR scene.
5.1 Import Core Samples
- Navigate to
Window → Package Manager.
- Find the
Immersal SDK in the list.
- Go to the
Samples tab and import the core samples.
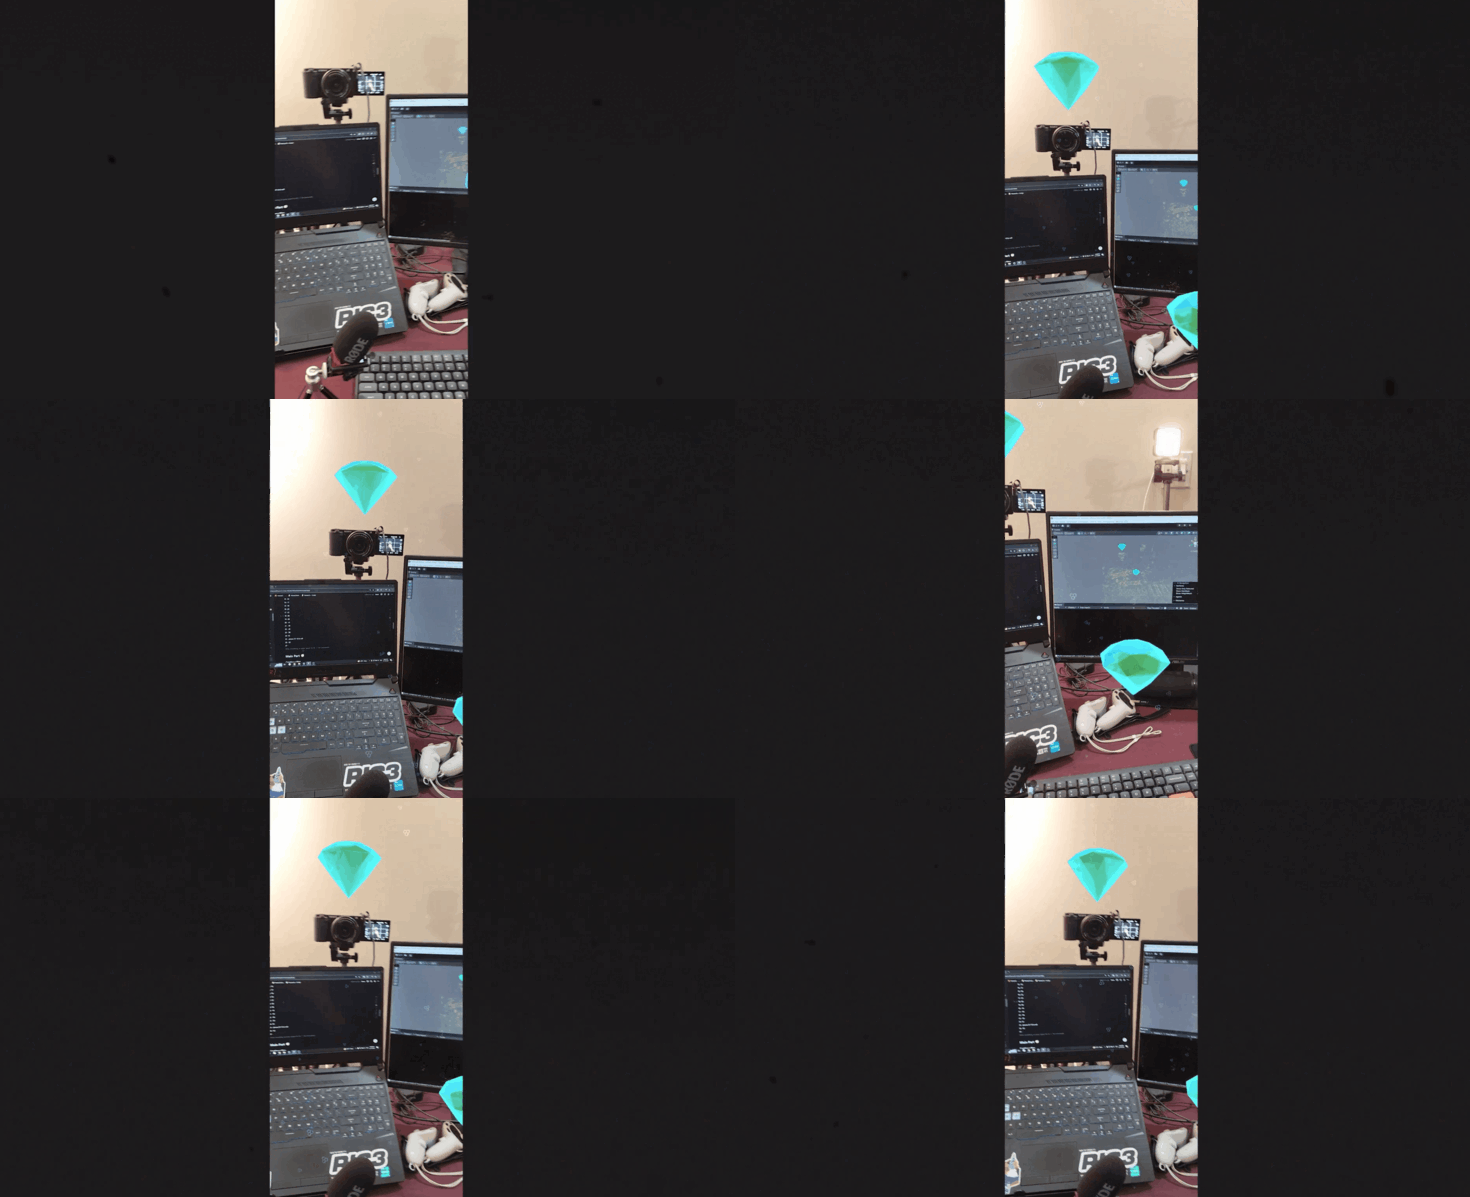
5.2 Place Virtual Objects:
- Create an empty GameObject under XR Space and name it Content.
- Inside the imported samples, navigate to
Core Samples → Prefabs → Content Placement.
- Drag and drop the AR Diamond prefab into the "Content" GameObject you created.
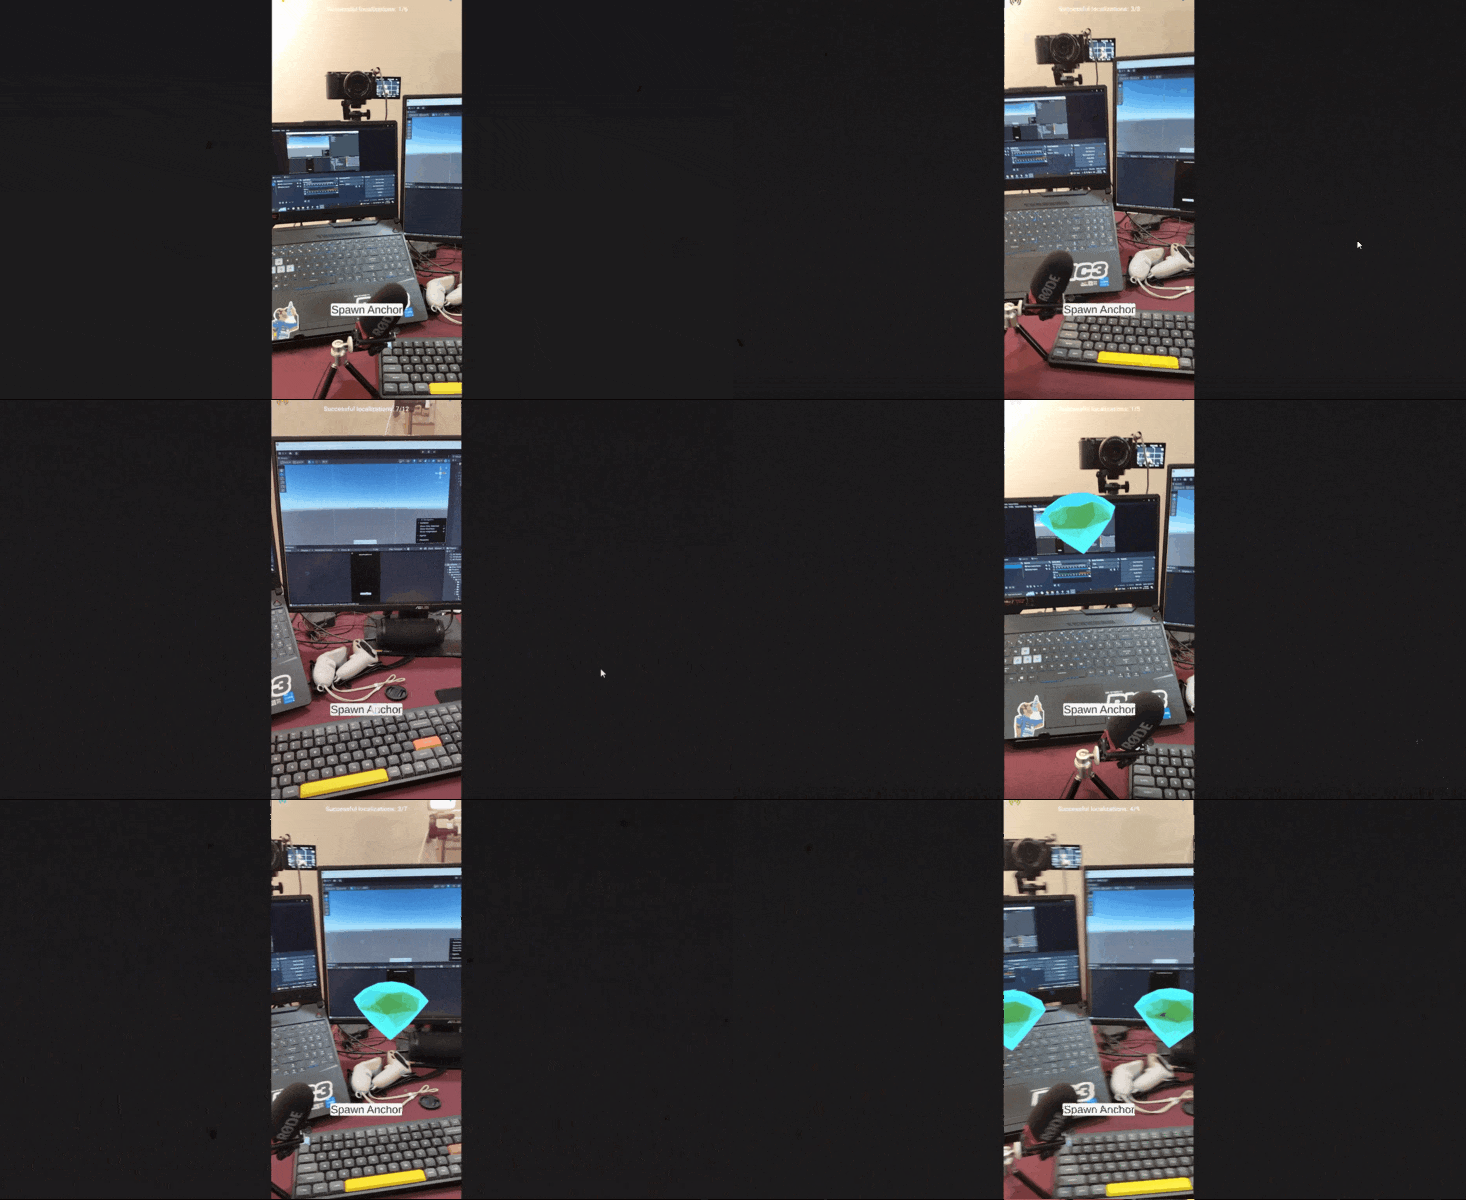
- Move and align the diamond with your spatial map. For example, we have place one diamond above a camera and another is placed another near a laptop.
- If you don't want to see the point clouds in your application, navigate to the XR map, select its child object, and set the render mode to
Editor Only.
5.3 Testing Localization
- Ensure all changes in your scene are saved.
- Navigate to
File → Build Settings, add the open scene, and build the application to your device.
After launching the app, it takes a couple of seconds to localize but once that's done, the virtual content should align seamlessly with physical surroundings.

6 Localization Status and Tracking Quality
Now it’s always good to show the Localization Status and Tracking Quality to the user. So
- Right-click in the hierarchy and create a new UI Canvas.
- Navigate to
Samples → Immersal SDK → [Version] → Core Samples → Prefabs → Utilities.
- Drag and drop the
Localization Status Text and Pose Indicator prefabs into the Canvas.
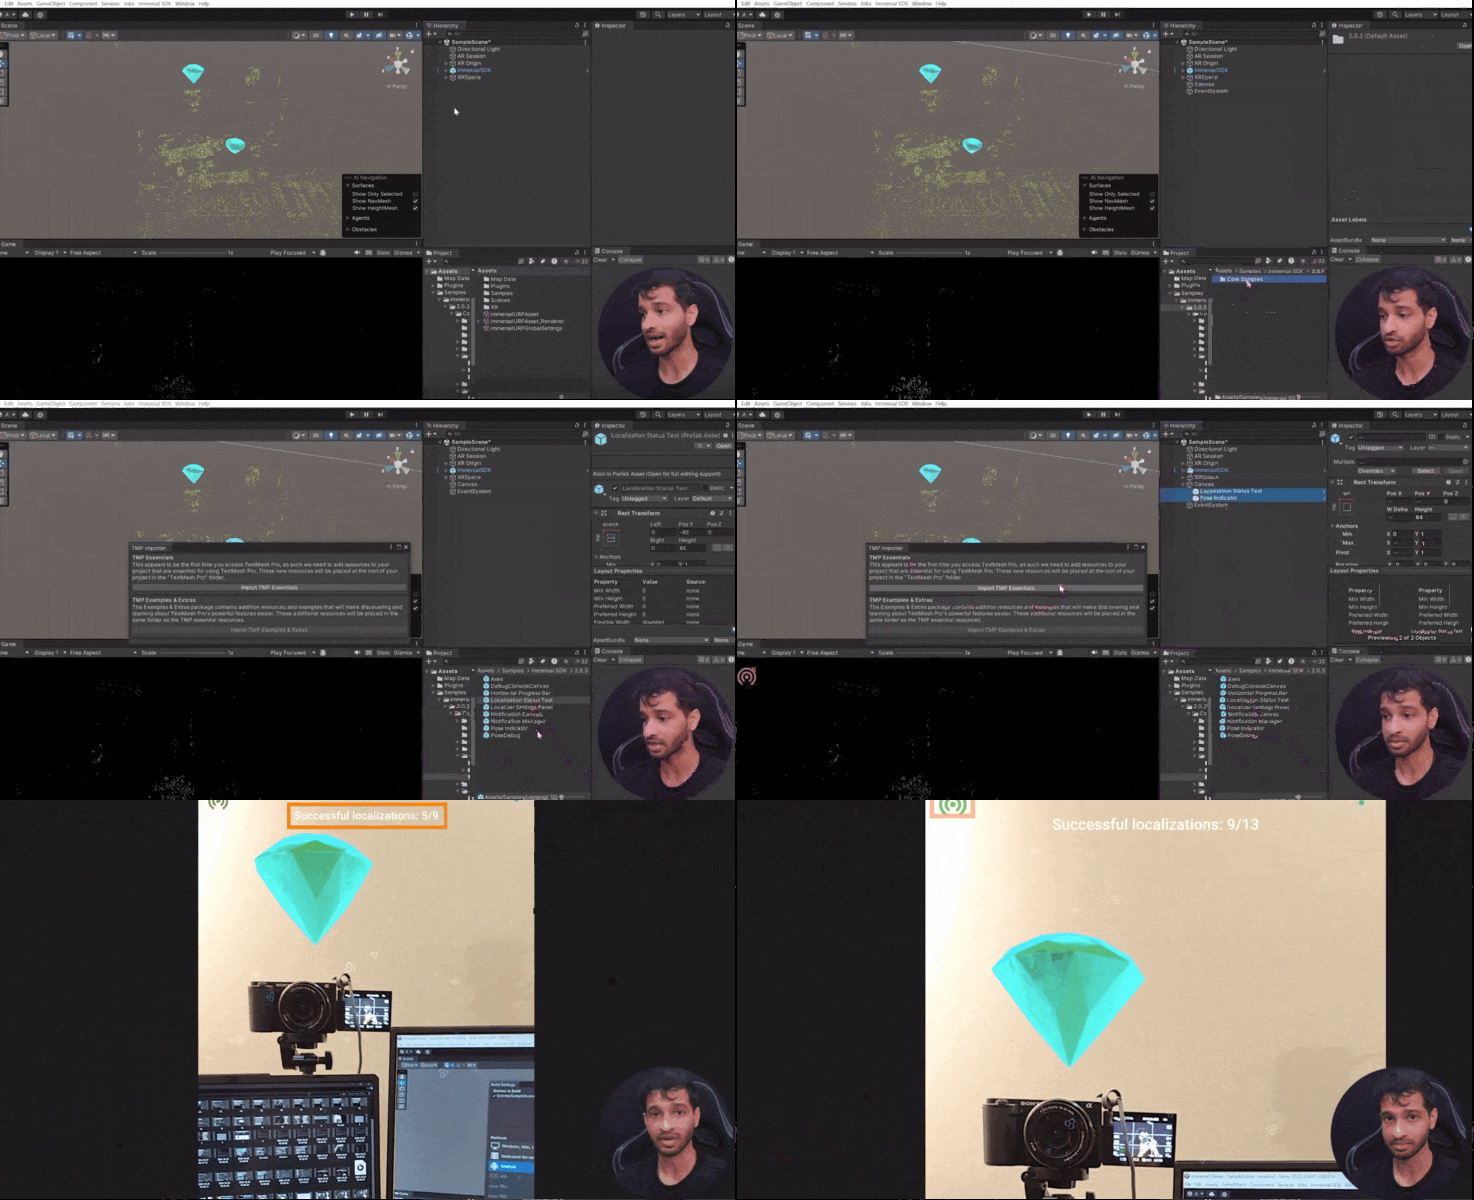
- When prompted, import the TextMesh Pro essentials.
- The UI will now show the number of successful localizations versus attempts and display tracking quality in the top-left corner.
7. Creating Spatial Anchors
Persistent spatial anchors allow virtual content to remain in the same position across multiple sessions. Here's how to implement them:
7.1 Code to Instantiate Spatial Anchor
Create a new C# script, name it as InstantiateSpatialAnchor and copy the following code:
Snippet 1: Imports and Class Definition
Explanation:
This snippet includes the necessary namespaces for handling collections, file operations, and Unity-specific functionalities. The class InstantiateSpatialAnchor inherits from MonoBehaviour, allowing it to be attached to GameObjects in Unity.
Snippet 2: Serialized Fields and Variables
Explanation:
- Serialized Fields:
anchorPrefab, cameraTransform, and xRSpaceContent are serialized fields, allowing you to assign these references in the Unity Editor.
- Anchor Data Storage:
anchorPosition and anchorRotation store the local positions and rotations of instantiated anchors.
- Save Structure:
saveFile is an instance of SaveAnchorTransform, used for saving and loading anchor data.
- File Name:
m_Filename specifies the name of the JSON file for storing anchor data.
Snippet 3: Start Method


 4.4 Download the Spatial Map


