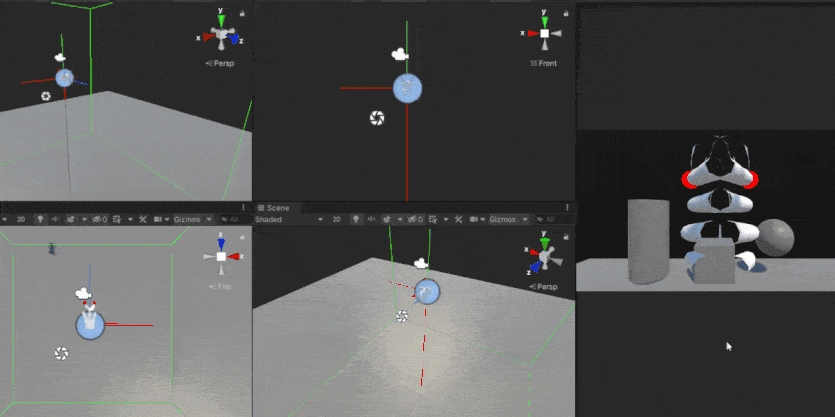
Just like how a user can move around in a room, simulators can be used to simulate those movements.
It is important to remember that when moving around using either teleportation or continuous locomotion, the entire XR Rig is moved. As the camera and hands are a part of XR Rig they move along as well.
The camera and hands are free to move inside of the rig. However, the movement of these does not move the rig.
Want to watch the video instead?
This blog post covers all the key bindings associated with XR Simulator. It is divided into five sections:
- The first section shows the key bindings associated with the selection and movement of the camera and hands. It also deals with the key binding associated with hand interaction and XR Rig movement.
- The second section covers how the camera and hands' translational and rotational motion can be achieved by using keybindings in different combinations.
- In the third section, you'll read about the XR Rig movement, e.g. teleportation, snap rotation, continuous movement, and continuous rotation.
- The next section covers grab and trigger interactions.
- The fifth and the final section shows the resetting of the camera and hand's position and rotation.
All in all, setting up and using the XR Simulator is quite easy and fast! You don't necessarily have to read this documentation from start to finish – it's more like a reference on how to use specific aspects of the simulator.
I've added a lot of different ways on how you can use the XR simulator. With that being said, enjoy! 😎
I've added a lot of different ways on how you can use the XR simulator. With that being said, enjoy! 😎
💡 This is a callout! Lorem ipsum dolor sit amet, consectetur adipiscing elit.
Prerequisite
You should know what an XR Rig is, how the XR Rig is set up, and the difference between room-scale and stationary. I am capturing the controls of a room-scale XR Rig here. Unity's documentation will help you get started with the configuration of the XR Rig and Locomotion systems.
Setting up the XR Simulator
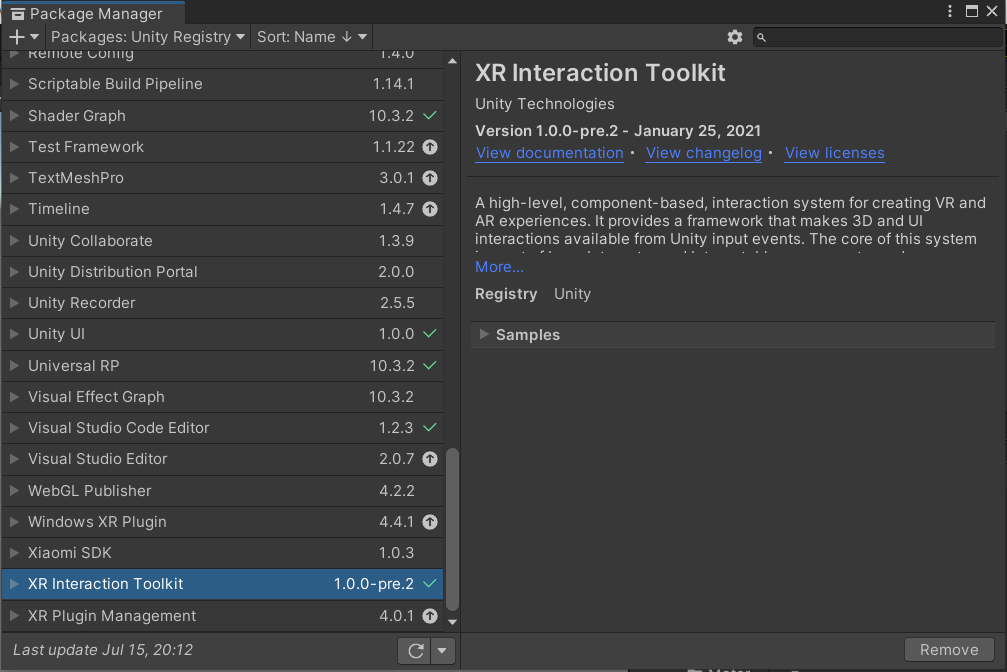
Setting up the XR Simulator is really easy. You would have already installed the XR Interaction Toolkit while setting up the XR Rig. However, the XR simulator has to be imported from the samples.
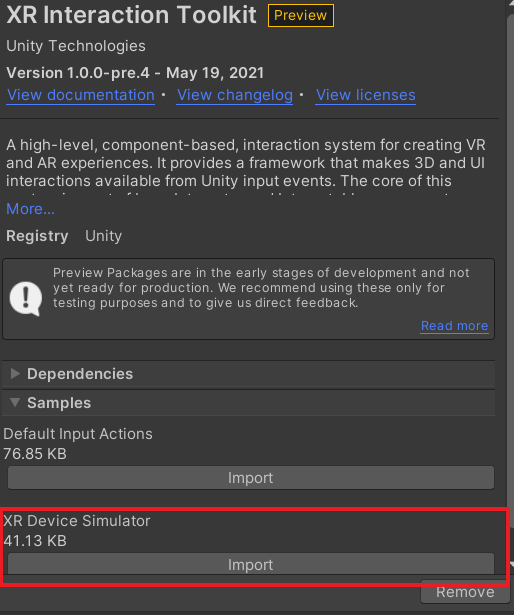
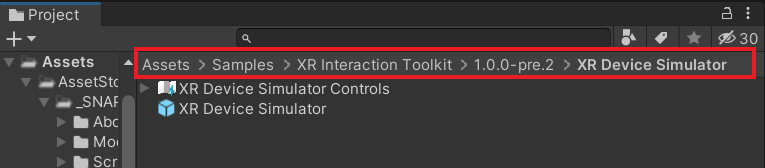
Navigate to the XR Device Simulator folder by going into Assets → Samples → XR Interaction Toolkit → (whichever version you have installed).
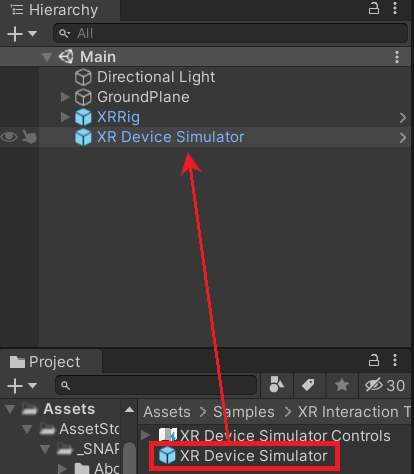
Finally, just drag and drop the XR Device Simulator into the Hierarchy.
⚠️ The XR simulator will function only if the XRRig has been correctly set up.
Key bindings
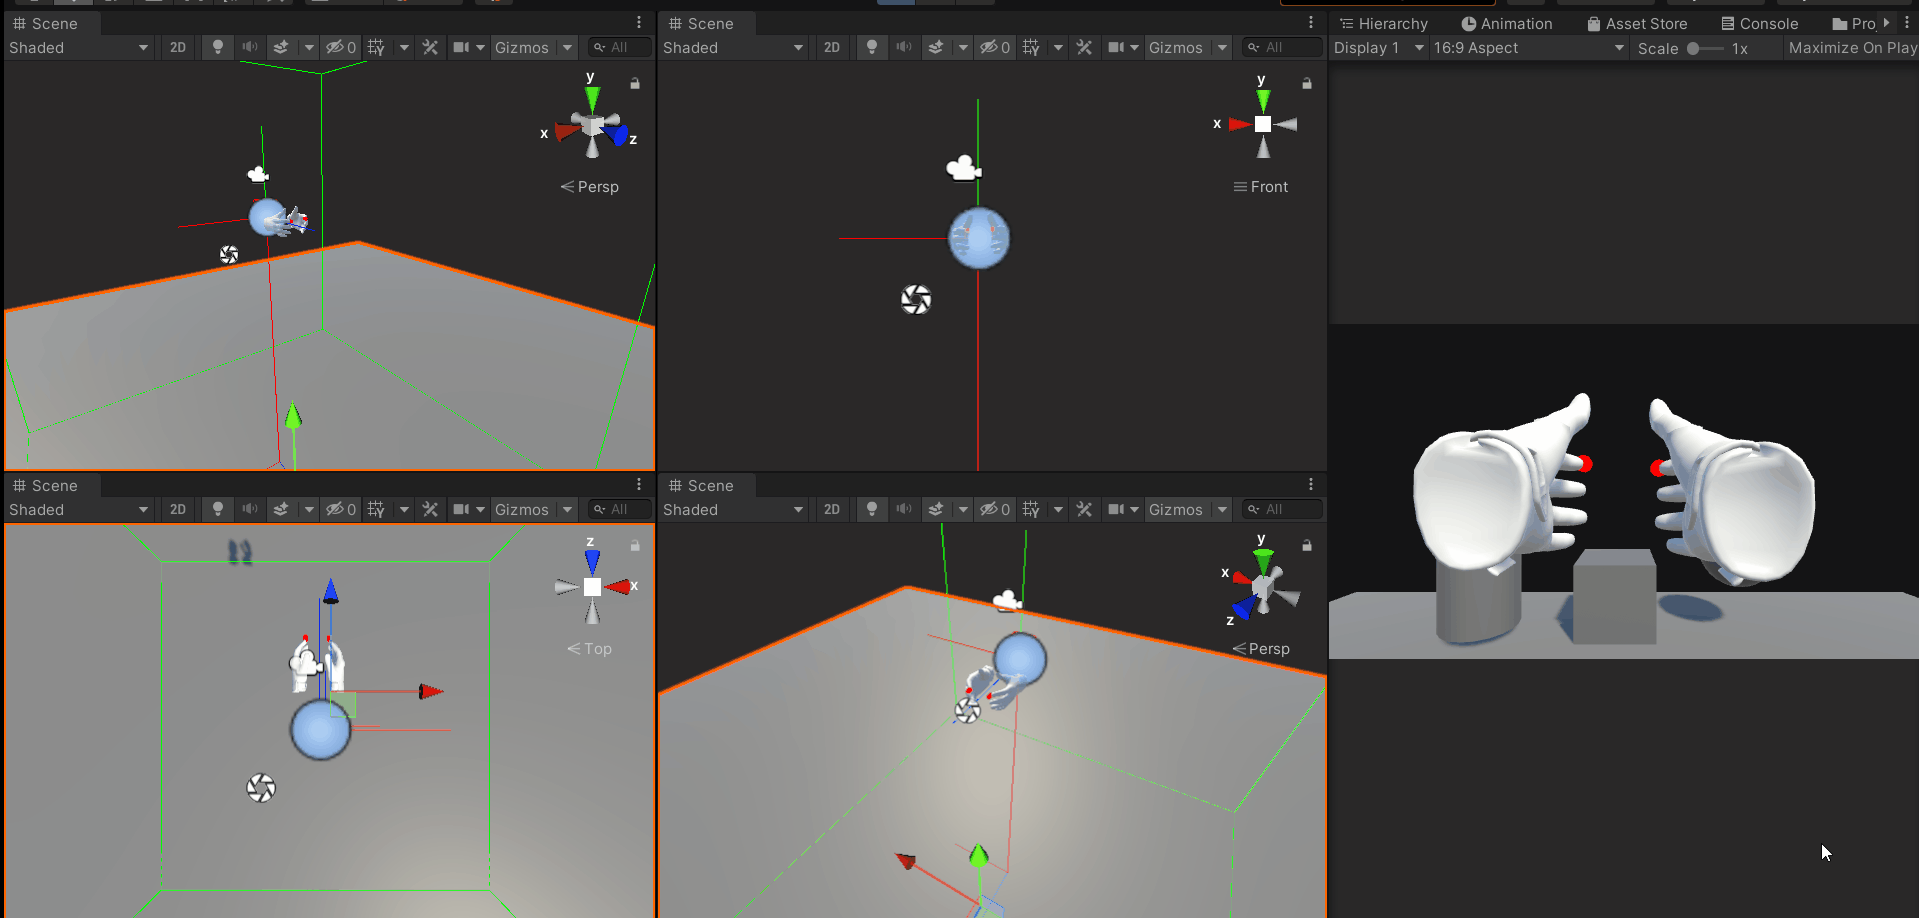
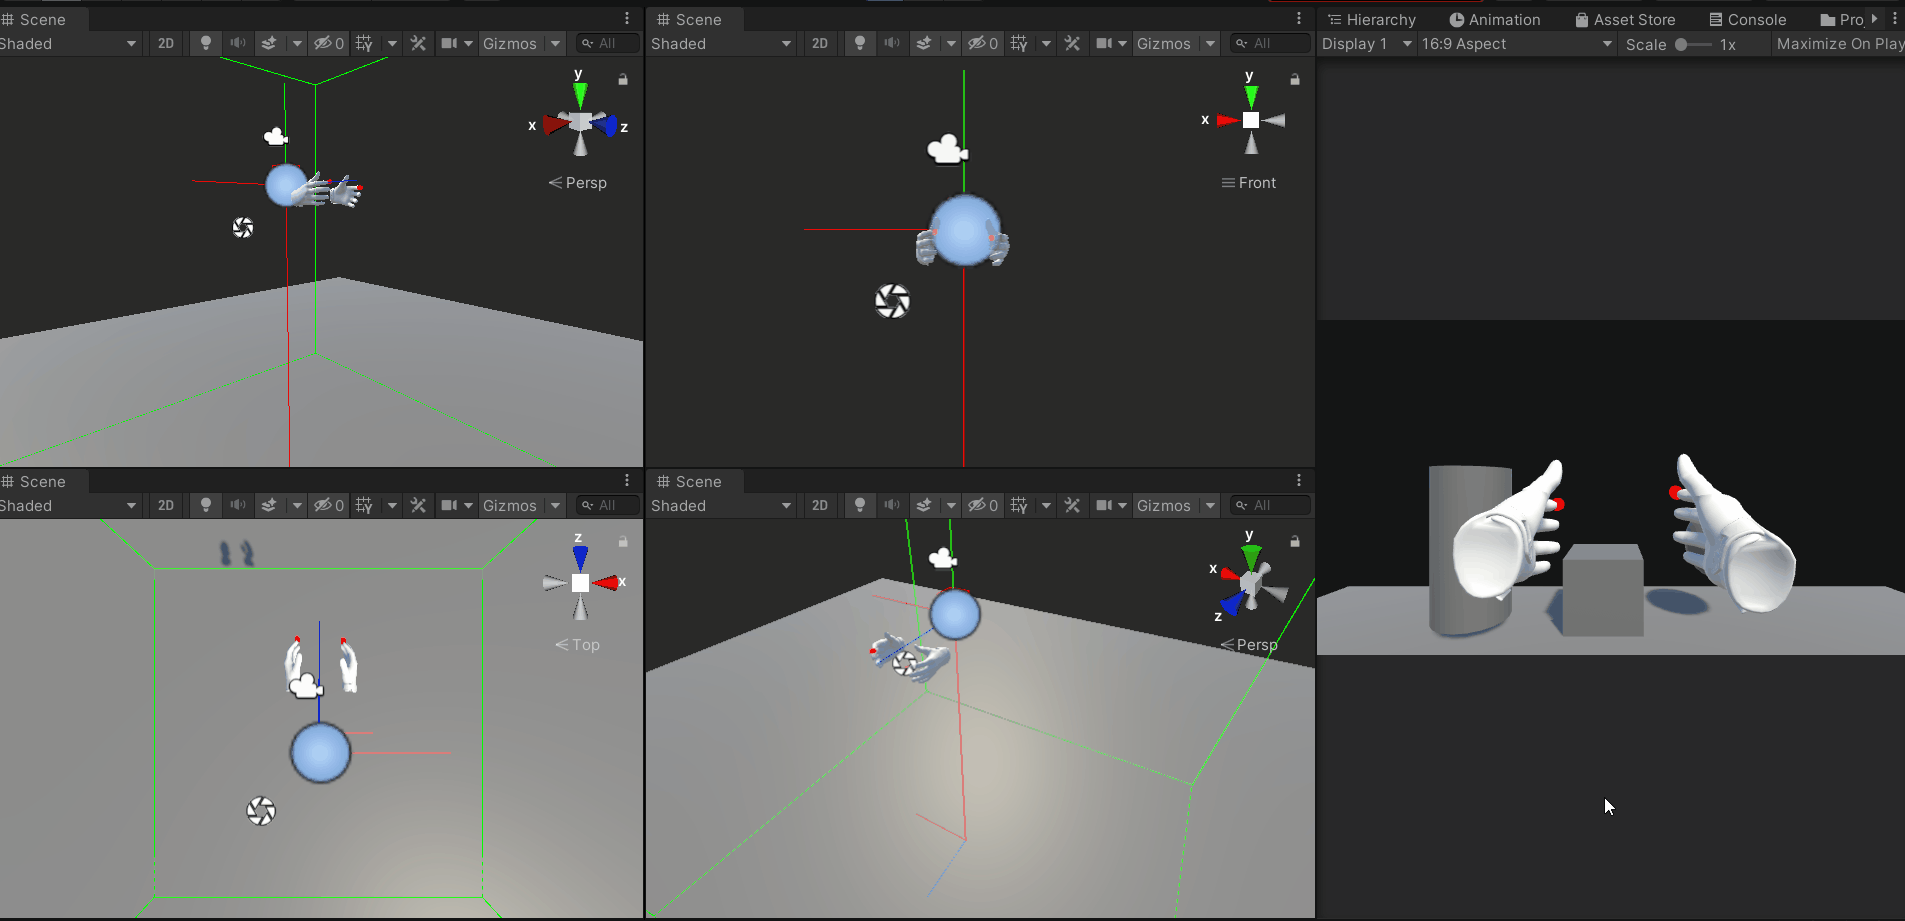
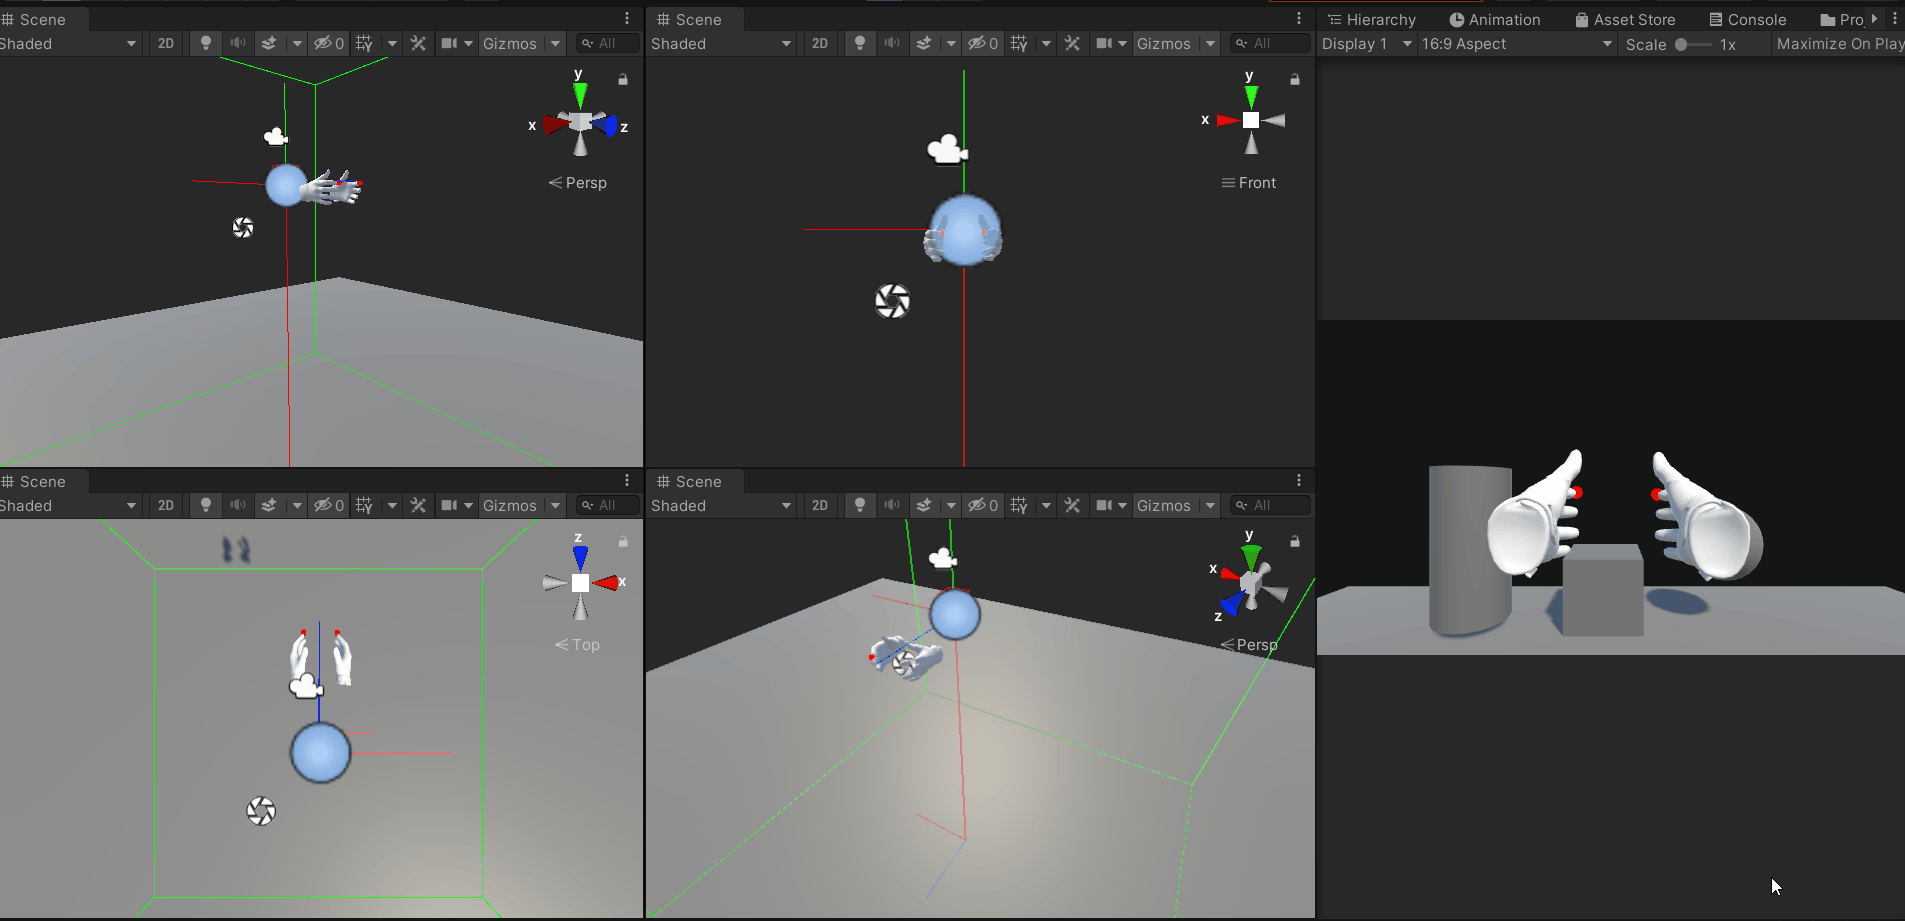
Controls for component selection
| Component | Selection | Deselection |
|---|---|---|
| Camera | The right-click button on the mouse selects the head/camera. | Releasing the click button will deselect the camera |
| Left hand | Method 1 (Toggle): Pressing and holding the right shift key selects the left hand | Method 1: Upon releasing the button, the left hand get deselected |
| Left hand | Method 2 (Press): Pressing the key T once will select the left hand. | Method 2: Pressing the key T once again will deselect the left hand |
| Right hand | Method 1 (Toggle): Pressing and holding the space bar selects the right hand | Method 1: Upon releasing the button, the right hand get deselected |
| Right hand | Method 2 (Press): Pressing the key Y once will select the right hand. | Method 2: Pressing the key Y once again will deselect the right hand |
- For the first method (toggle), holding the right shift key and the space bar at the same time will select both hands.
- For the second method (press), having pressed both the keys T and Y once will select both the hands
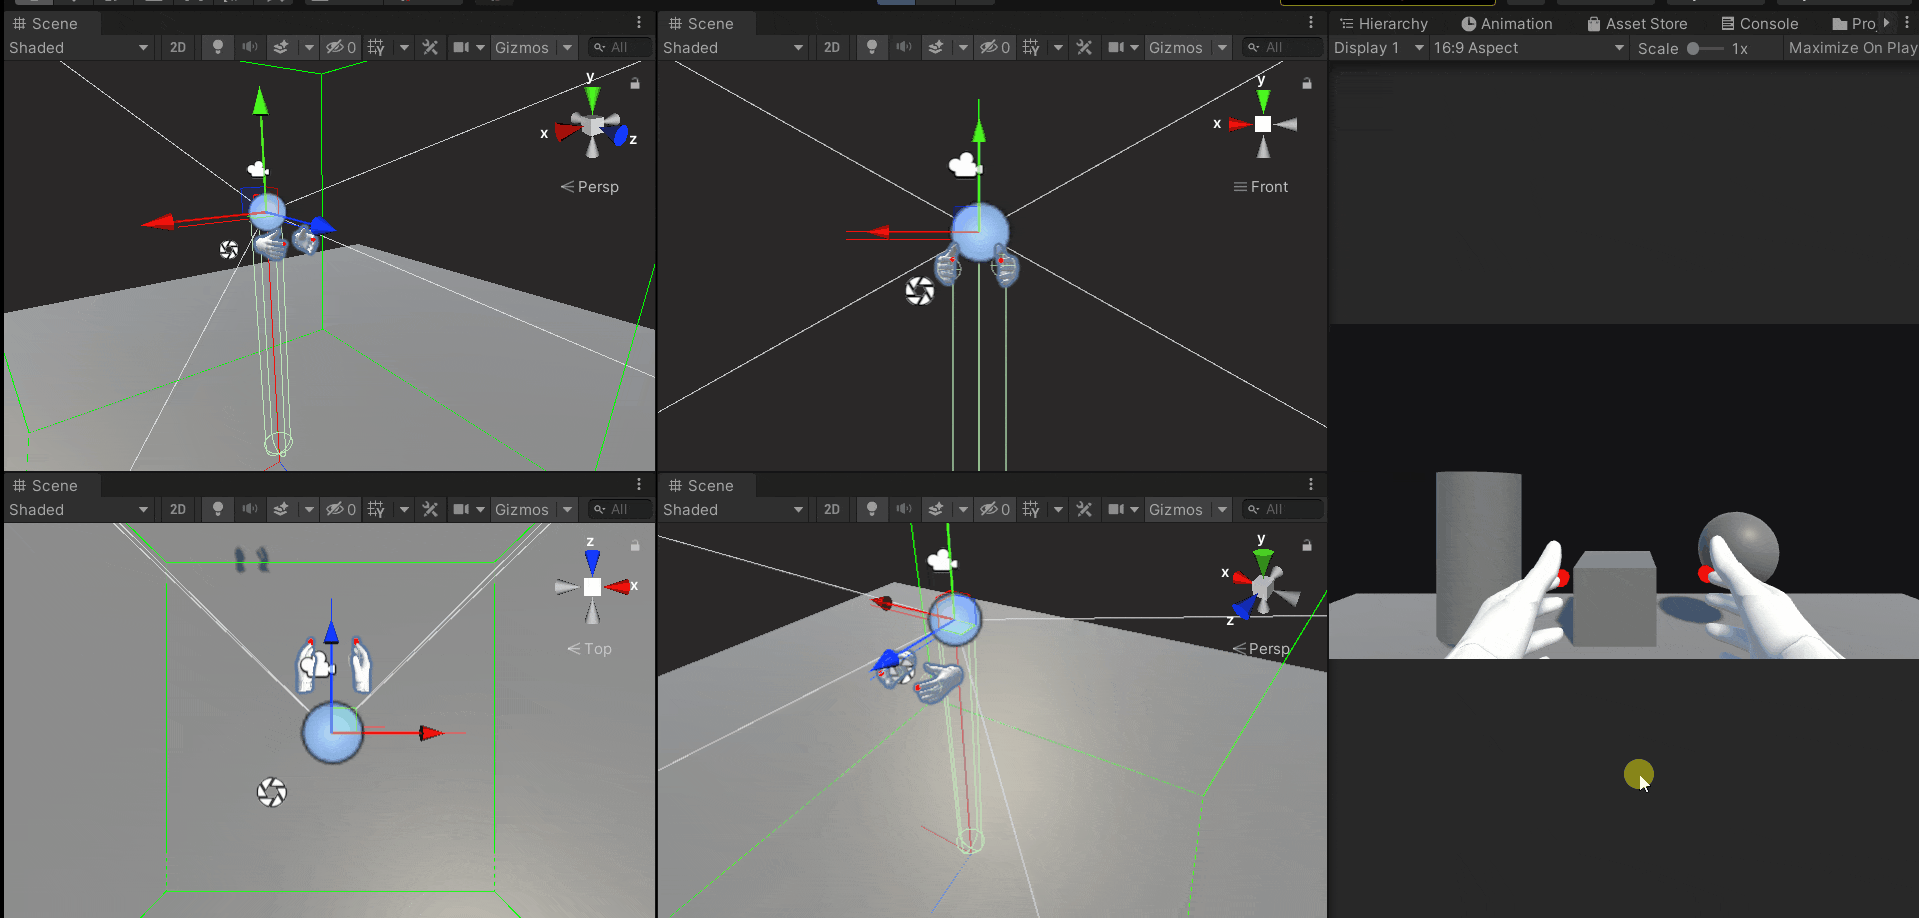
Controls for translational movement
- Move the mouse front and back to simulate the vertical movements i.e up and down.
- Move the mouse left and right to simulate the horizontal left and right movements.
- Scroll the wheel to simulate the horizontal front and back movements.
Controls for rotational movement
There are two ways of simulating rotational motion.
Method 1: Pressing down and holding on the scroll wheel will enable rotation mode. It changed back to translation mode when the scroll wheel is released.
Method 2: Pressing the key 'R' will change the mode to rotation. Pressing it once again will bring it back to translation mode.
Method 1: Pressing down and holding on the scroll wheel will enable rotation mode. It changed back to translation mode when the scroll wheel is released.
- Press down and hold the scroll wheel and move the mouse front and back to simulate the rotation about the local x-axis
- Press down and hold the scroll wheel and move the mouse left and right to simulate the rotation about the local y-axis
- Press down and hold the scroll wheel and scroll the wheel to simulate the rotation about the local z-axis
Method 2: Pressing the key 'R' will change the mode to rotation. Pressing it once again will bring it back to translation mode.
- Press the key R once + Move the mouse front and back to simulate the rotation about the local x-axis
- Press the key R once + Move the mouse left and right to simulate the rotation about the local y-axis
- Press the key R once + Scroll the wheel to simulate the rotation about the local z-axis
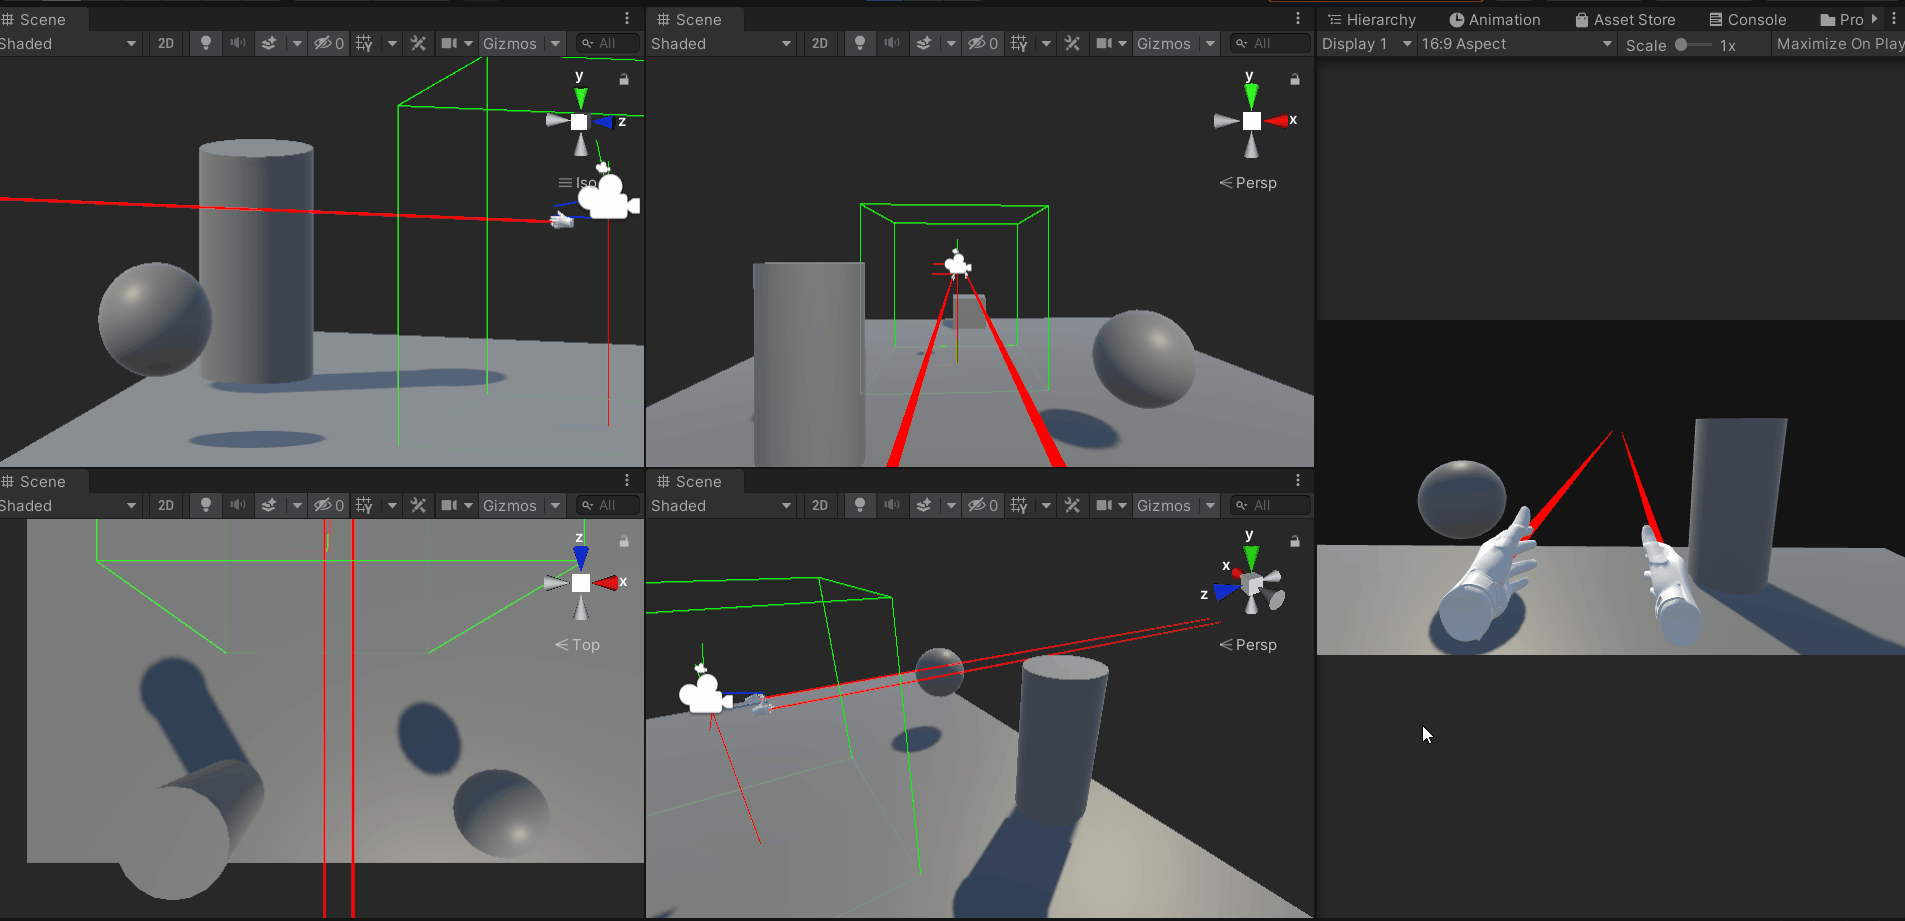
Controls for XR Rig movement
- Pressing down and holding the key W will move the rig forward along the local z-axis
- Pressing down and holding the key S will move the rig backward along the local z-axis
- Pressing down and holding the key A will move the rig to the left side along the local x-axis
- Pressing down and holding the key D will move the rig to the right side along the local x-axis
- Pressing down and holding the key Q will rotate the Rig towards the left about the local y-axis
- Pressing down and holding the key E will rotate the Rig towards the right about the local y-axis
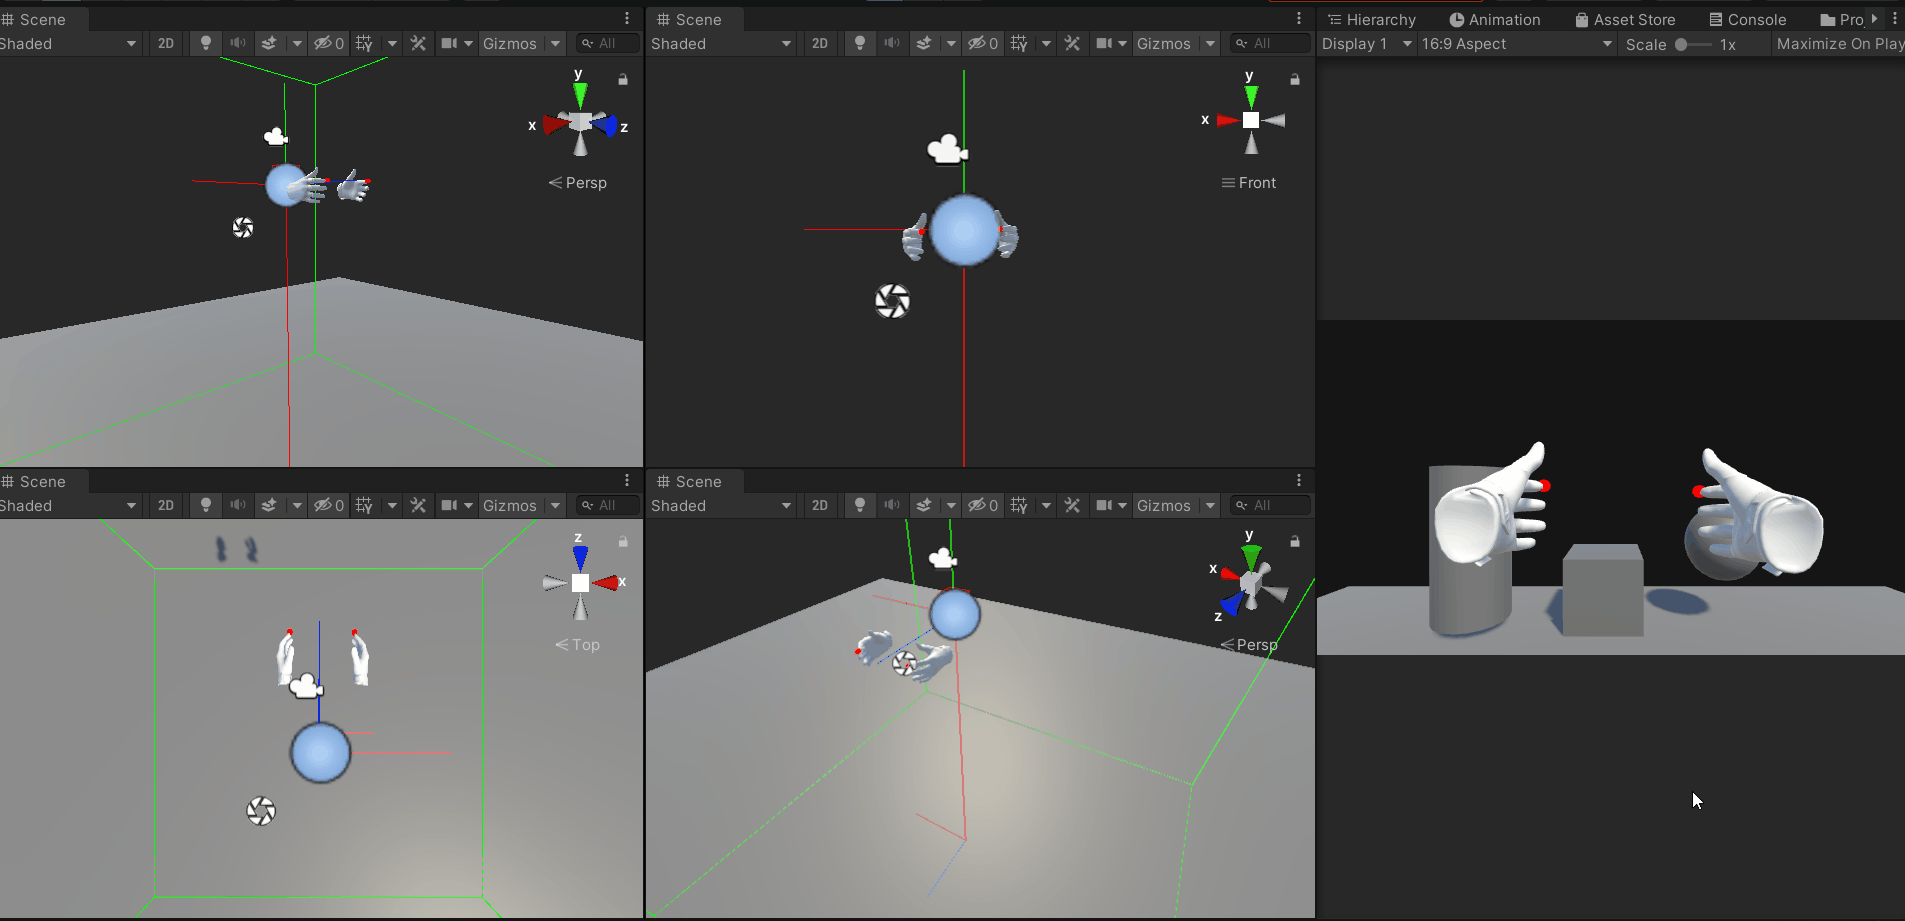
For the grab, trigger, primary and secondary buttons to work in the simulator either of the hands has to be selected first.
Interaction controls and other buttons
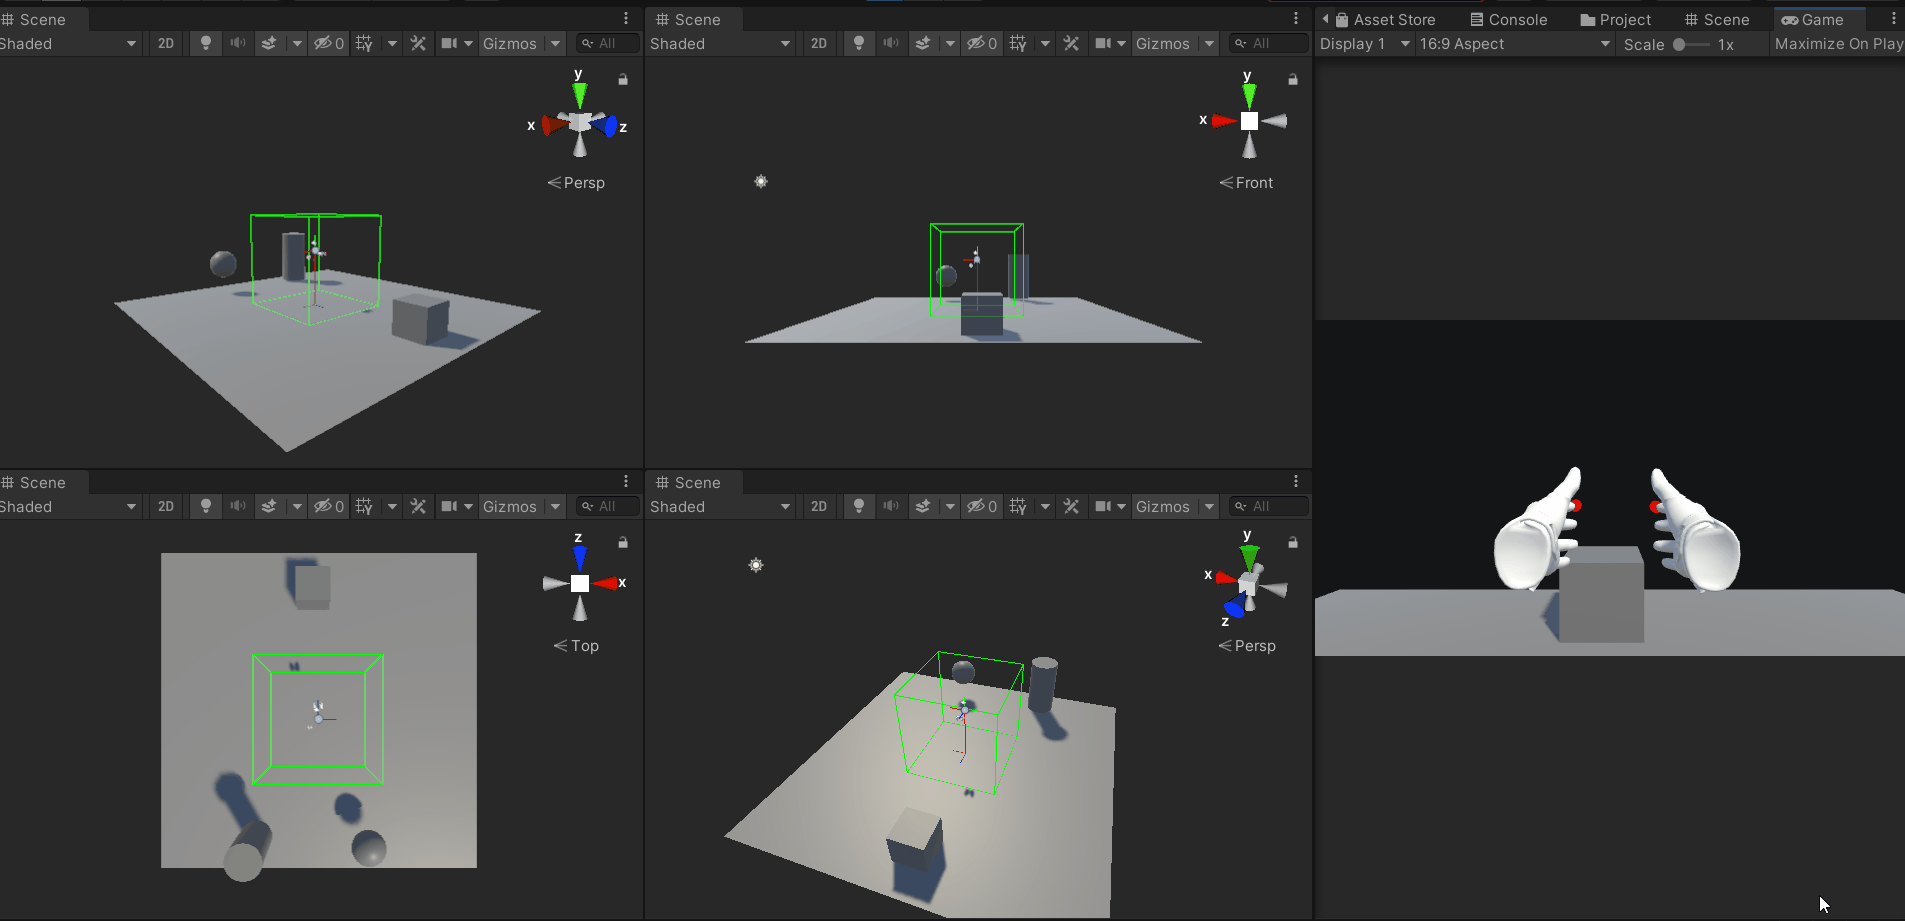
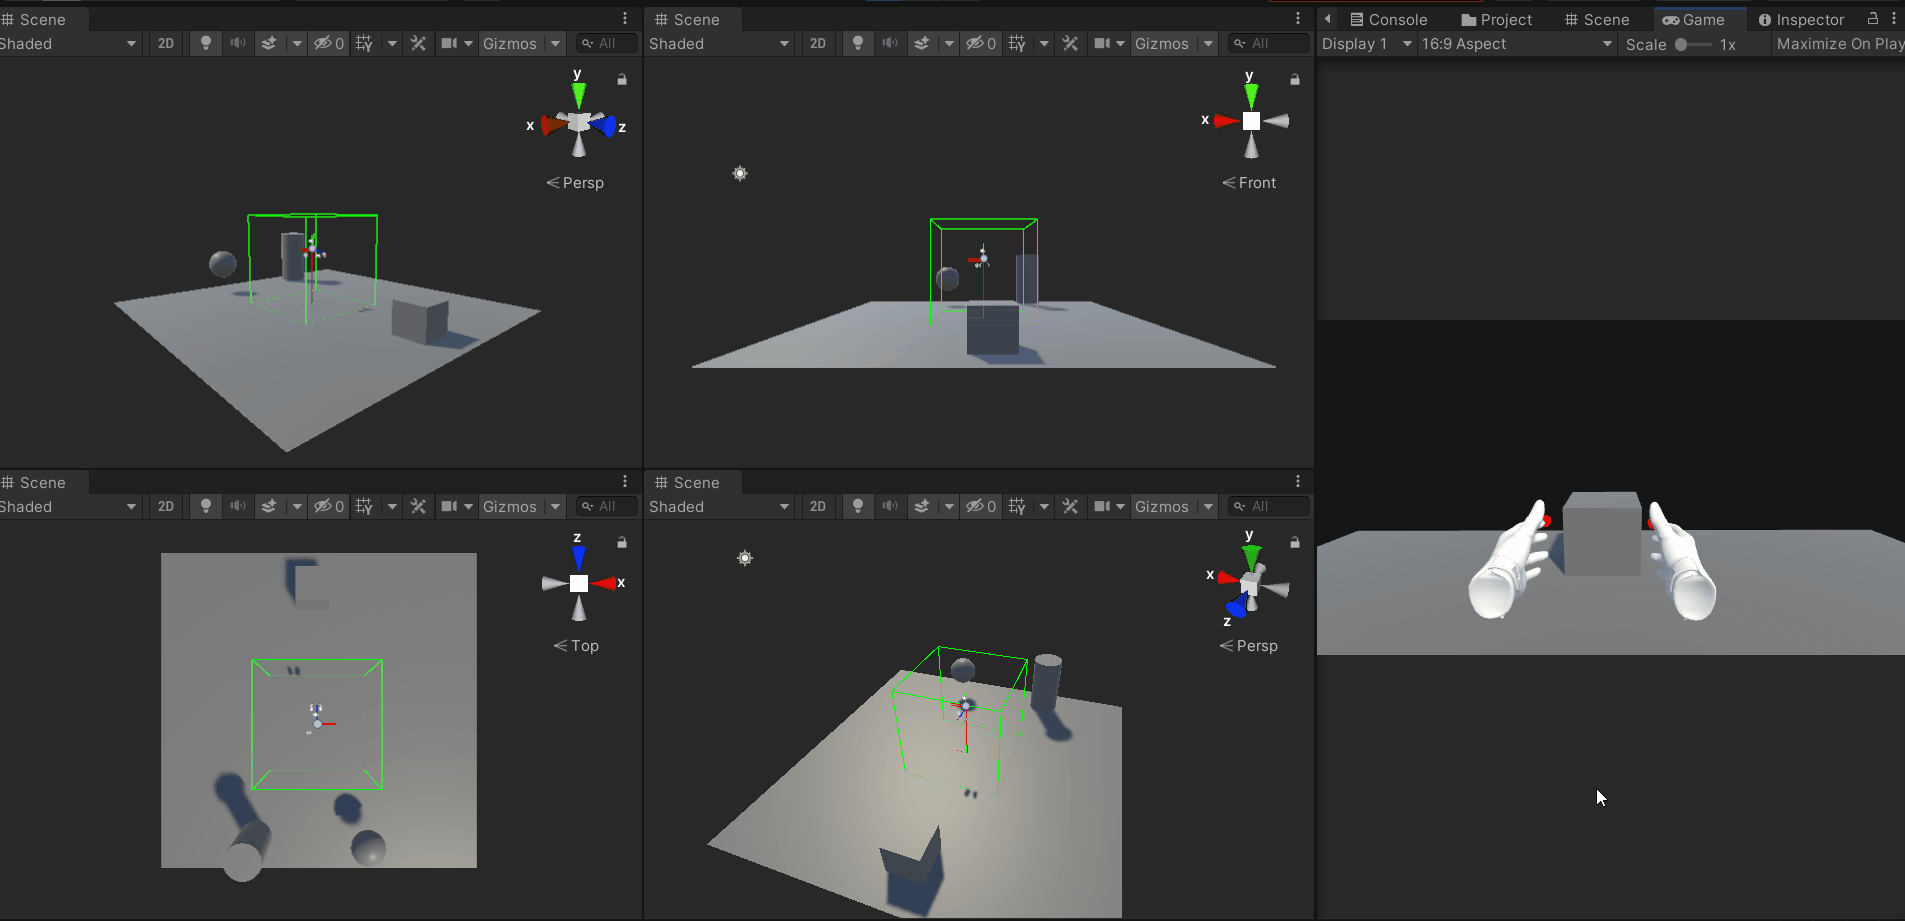
- Grab: Pressing down and holding the key G performs the grab action.
- Trigger: Left mouse click simulates trigger button action.
- Primary button: Press the key B once to simulate the action linked to the primary button.
- Secondary button: Press the key N once to simulate the action linked to the secondary button.
- Reset: Pressing the key V once resets the position and rotation of the component.
For the grab, trigger, primary and secondary buttons to work in the simulator either of the hands has to be selected first. After selecting either of the hands, camera, or all three components at once. Their position and rotation can be reset to their original position using the reset button.
Camera and hand movement
Translational motion
Camera / Head movement
The camera can be moved by pressing and holding the right-click along with the basic mouse movements.
- Press and hold right-click, and move the mouse front and back to simulate the vertical movement of the head i.e up and down.
- Press and hold right-click, and move the mouse left and right to simulate the horizontal left and right movement of the head.
- Press and hold right-click, and scroll the wheel to simulate the horizontal front and back movement of the head.
Hand movement
There are two ways of moving the hands, the basic mouse movements remain the same only the method of selection changes.
Left-hand movement: Method 1
- Press and hold the right shift key, and move the mouse front and back to simulate the vertical movement of the left hand i.e up and down.
- Press and hold the right shift key, and move the mouse left and right to simulate the horizontal left and right movement of the left hand.
- Press and hold the right shift key, and scroll the wheel to simulate the horizontal front and back movement of the left hand.
Left-hand movement: Method 2
- Press the key T once, and move the mouse front and back to simulate the vertical movement of the left hand i.e up and down.
- Press the key T once, and move the mouse left and right to simulate the horizontal left and right movement of the left hand.
- Press the key T once, and scroll the wheel to simulate the horizontal front and back movement of the left hand.

Right-hand movement: Method 1
- Press and hold the space bar, and move the mouse front and back to simulate the vertical movement of the right hand i.e up and down.
- Press and hold the space bar, and move the mouse left and right to simulate the horizontal left and right movement of the right hand.
Right-hand movement: Method 2
- Press the key Y once, and move the mouse front and back to simulate the vertical movement of the right hand i.e up and down.
- Press the key Y once, and move the mouse left and right to simulate the horizontal left and right movement of the right hand.
- Press the key Y once, and scroll the wheel to simulate the horizontal front and back movement of the right hand.
Movement of both hands together: Method 1
- Press and hold the right shift key, press and hold the space bar, and move the mouse front and back to simulate the vertical movement of the hands.
- Press and hold the right shift key, press and hold the space bar, and move the mouse left and right to simulate the horizontal left and right movement of the hands.
- Press and hold the right shift key, press and hold the space bar, and scroll the wheel to simulate the horizontal front and back movement of the hands.
Movement of both hands together: Method 2
- Press the key T once, press the key Y once, and move the mouse front and back to simulate the vertical movement of the hands i.e up and down.
- Press the key T once, press the key Y once, and move the mouse left and right to simulate the horizontal left and right movement of the hands.
- Press the key T once, press the key Y once, and scroll the wheel to simulate the horizontal front and back movement of the hands.
Rotational Motion
The camera can be rotated by pressing and holding the right-click along with the basic rotational movements.
Camera / head rotation: Method 1
- Press and hold the right-click, press down and hold the scroll wheel, and move the mouse front and back to simulate the nodding action of the head.
- Press and hold the right-click, press down and hold the scroll wheel, and move the mouse left and right to simulate the shaking of the head.
- Press and hold the right-click, press down and hold the scroll wheel, and scroll the wheel to simulate the tilting action of the head.
Camera/ head rotation: Method 2
- Press the key R once, press and hold the right-click, and move the mouse front and back to simulate the nodding action of the head.
- Press the key R once, press and hold the right-click, and move the mouse left and right to simulate the shaking of the head.
- Press the key R once, press and hold the right-click, and scroll the wheel to simulate the tilting action of the head.
Hand movement
There are two possible ways of rotating the hands. The hand selection and basic mouse movement remain the same, the way of selecting rotation mode changes.
Left-hand rotation: Method 1
- Press and hold the right shift / press the key T once, press and hold the scroll wheel, and move the mouse front and back to simulate the up and down movement of the left hand about the wrist (handshake action).
- Press and hold the right shift / press the key T once, press and hold the scroll wheel, and move the mouse left and right to simulate the sideways movement of the left hand about the wrist (slapping action).
- Press and hold the right shift / press the key T once, press and hold the scroll wheel, and scroll the wheel to simulate the rotation of the left hand about the wrist (flipping action).
Left-hand rotation: Method 2
- Press the key R once, press and hold the right shift / press the key T once, and move the mouse front and back to simulate the up and down movement of the hand about the wrist (handshake action).
- Press the key R once, press and hold the right shift / press the key T once, and move the mouse left and right to simulate the sideways movement of the hand about the wrist (slapping action).
- Press the key R once, press and hold the right shift / press the key T once, and scroll the wheel to simulate the rotation about the wrist (flipping action).
Right-hand rotation: Method 1
- Press and hold the space bar / press the key Y once, press and hold the scroll wheel, and move the mouse front and back to simulate the up and down movement of the right hand about the wrist (handshake action).
- Press and hold the space bar / press the key Y once, press and hold the scroll wheel, and move the mouse left and right to simulate the sideways movement of the right hand about the wrist (slapping action).
- Press and hold the space bar / press the key Y once, press and hold the scroll wheel, and scroll the scroll wheel to simulate the rotation of the right hand about the wrist (flipping action).
Right-hand rotation: Method 2
- Press the key R once, and press and hold the space bar / Press the key Y once, and move the mouse front and back to simulate the up and down movement of the hand about the wrist (handshake action).
- Press the key R once, and press and hold the space bar / press the key Y once, and move the mouse left and right to simulate the sideways movement of the hand about the wrist (slapping action).
- Press and hold the space bar / press the key Y once, and scroll the scroll wheel to simulate the rotation of the wrist (flipping action).
Rotation of both hands together: Method 1
- Press and hold the right shift / press the key T once, press and hold the space bar / press the key Y once, press and hold the scroll wheel, and move the mouse front and back to simulate the up and down movement of the hands about the wrist (handshake action).
- Press and hold the right shift / press the key T once, press and hold the space bar / press the key Y once, press and hold the scroll wheel, and move the mouse left and right to simulate the sideways movement of the hands about the wrist (slapping action).
- Press and hold the right shift / press the key T once, press and hold the space bar / press the key Y once, press and hold the scroll wheel, and scroll the wheel to simulate the rotation of the right hand about the wrist (flipping action).
Rotation of both hands together: Method 2
- Press the key T once, press the key Y once, and move the mouse front and back to simulate the vertical movement of the hands i.e up and down.
- Press the key T once, press the key Y once, and move the mouse left and right to simulate the horizontal left and right movement of the hands.
- Press the key T once, press the key Y once, and scroll the scroll wheel to simulate the horizontal front and back movement of the hands.
XR Rig movement
Continuous locomotion with continuous turn / snap rotation
Finally, just drag and drop the XR Device Simulator into the Hierarchy.
Select a hand using any of the methods mentioned above, and...
- ... press the key W to move the rig forward.
- ... press the key S to move the rig backward.
- ... press the key A to move the rig to the left side.
- ... press the key D to move the rig to the right side.
- ... press the key Q to rotate the rig towards the left.
- ... press the key E to rotate the rig towards the right.
⚠️ Note: Depending on the locomotion system that is selected, the same keys have different functionalities. The function of the key will also vary depending on which hand is selected and the configuration of that hand.

Teleportation locomotion with continuous turn / snap rotation
Select a hand using any of the methods mentioned above, and...
- ... press and hold the key W to enable teleportation ray. On release, the rig will teleport.
- ... press the key S to turn the rig by 180deg.
- ... press the key A to rotate the rig towards the left.
- ... press the key D to rotate the rig towards the right.
- ... press the key Q to rotate the rig towards the left.
- ... press the key E to rotate the rig towards the right.
⚠️ Note: The rig will only teleport if the teleportation area / anchor exists. Also, the function of the key will vary depending on which hand is selected and the configuration of that hand.

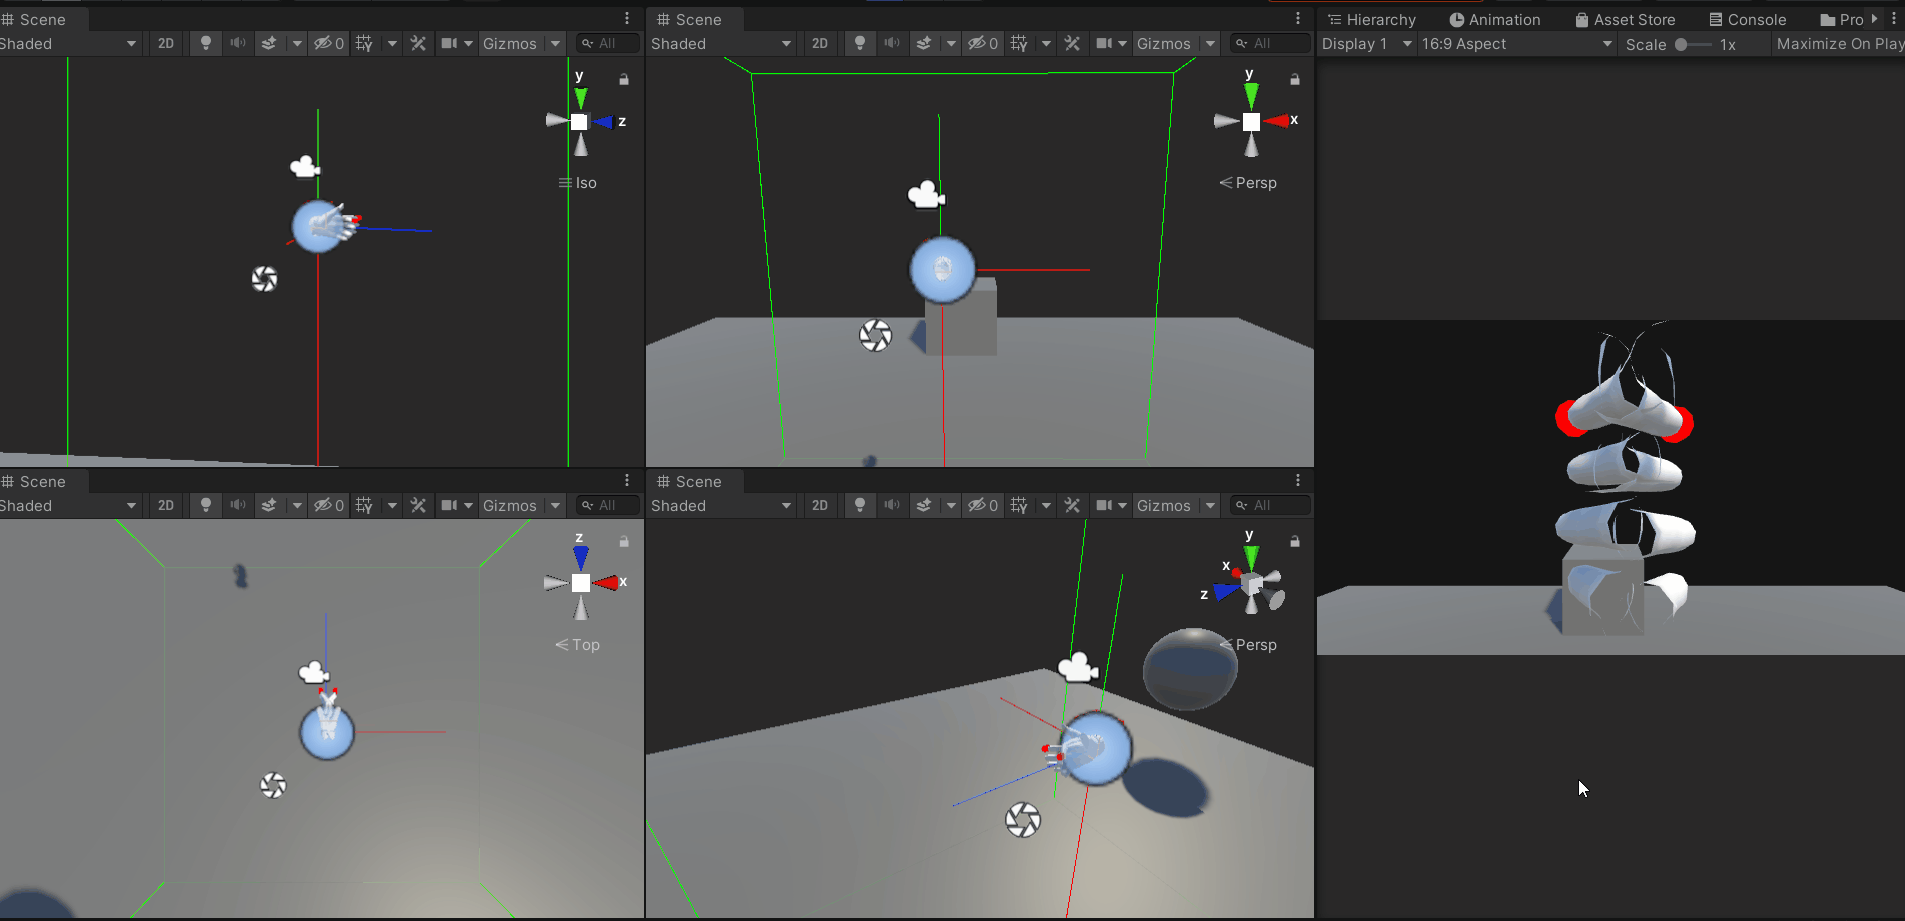
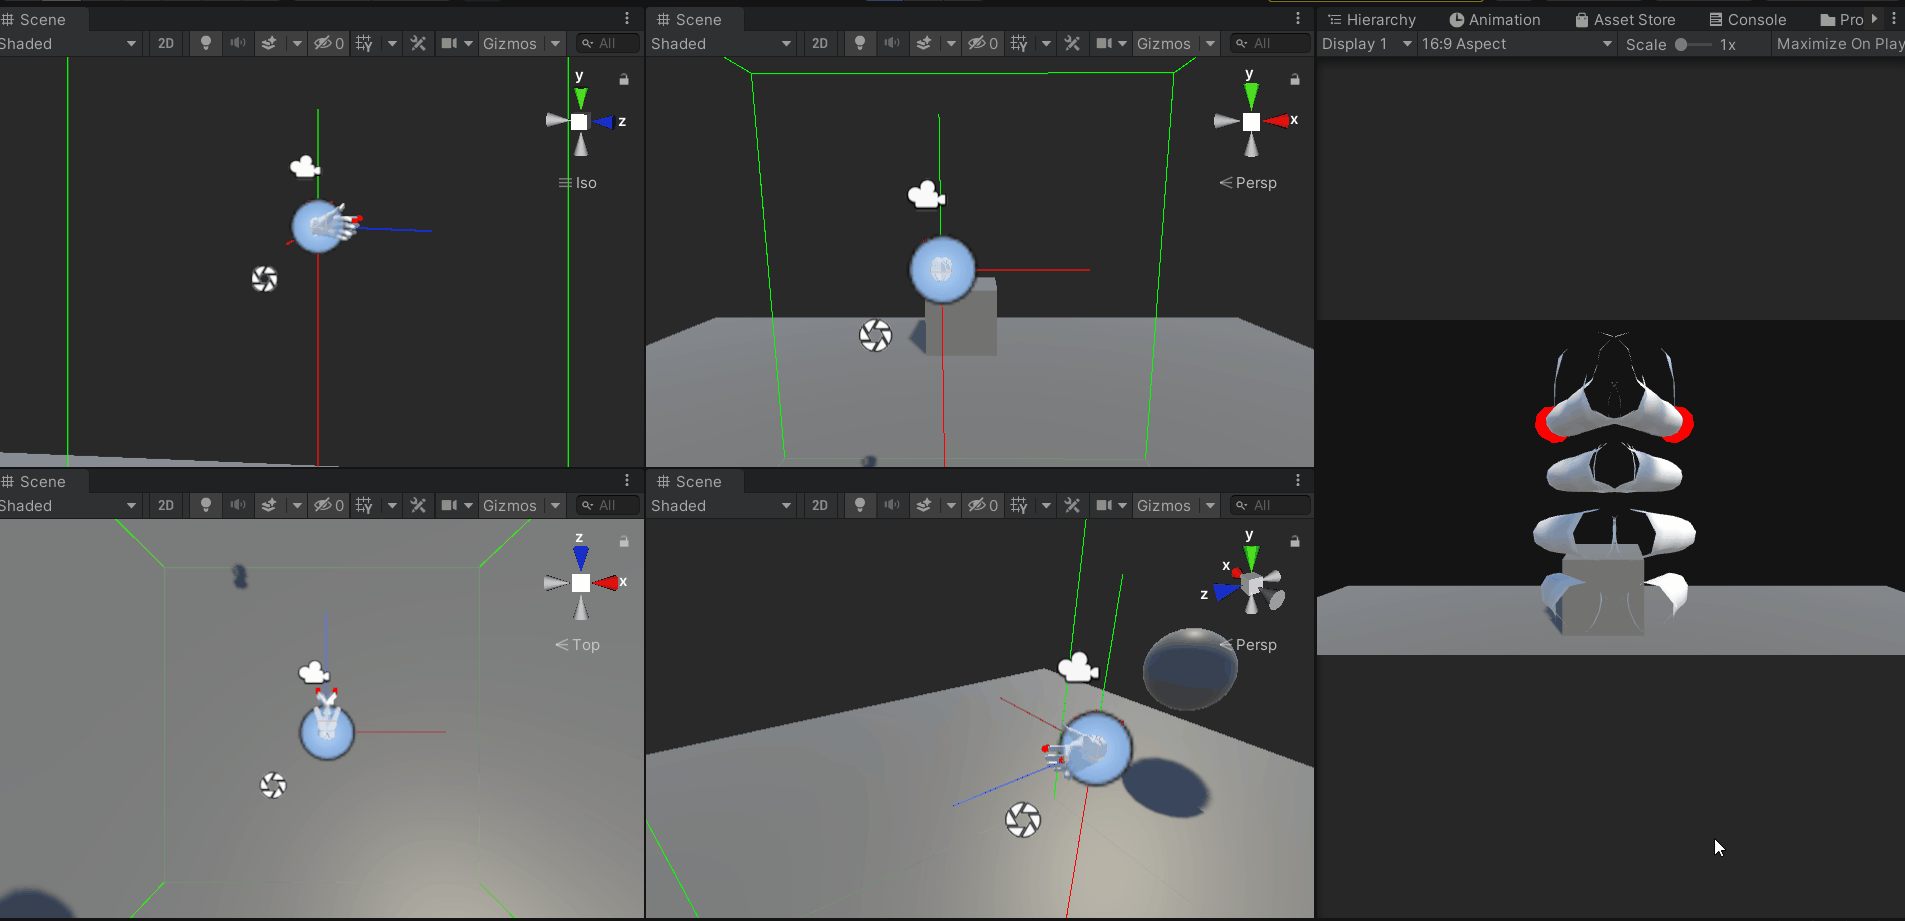
Grab and trigger interactions
Grab and trigger interaction using the UI ray
Select a hand using any of the methods mentioned above, and...
- ... point the ray at the grabbable object, and press and hold the key G to simulate the grab event.
- ... point the ray at the grabbable object, press and hold the key G, and press the key W to push the object away from the hand.
- ... point the ray at the grabbable object, press and hold the key G, and press the key S to bring the grabbed object closer to the hand.
- ... point the ray at the grabbable object, press and hold the key G, and left-click on the mouse to simulate the trigger event.
⚠️ Note: After grabbing the object, it will follow the hands' movement. If the hand is rotated, the object will rotate as well.
Resetting camera and hand transforms
Resetting camera and hand transforms
- Press and hold the right-click, and press the key V once to reset the camera to its original position.
- Select the left hand using any of the methods mentioned above, and press the key V once to reset the left hand to its original position.
- Select the right hand using any of the methods mentioned above, and press the key V once to reset the right hand to its original position.
Resetting the rotation
There are two ways or resetting the rotation. It is similar to the ways of choosing.
Rotation reset: Method 1
- Press and hold the right-click, press and hold the scroll wheel, and press the key V once to reset the camera to its original rotation.
- Select the left hand using any of the methods mentioned above, press and hold the scroll wheel, and press the key V once to reset the left hand to its original rotation.
- Select the right hand using any of the methods mentioned above, press and hold the scroll wheel, and press the key V once to reset the right hand to its original rotation.
Rotation reset: Method 2
- Press and hold the right-click, press the key R once, and press the key V once to reset the camera to its original rotation.
- Select the left hand using any of the methods mentioned above, press the key R once, and press the key V once to reset the left hand to its original rotation.
- Select the right hand using any of the methods mentioned above, press the key R once, and press the key V once to reset the right hand to its original rotation.
Conclusion
XR Simulator is a useful tool for all XR developers out there. Here are some of the advantages of the XR Simulator as opposed to testing it in actual hardware:
- Any adjustments can be easily made in the editor. With the headset on, it becomes difficult to tweak the editor to get the desired output.
- It speeds up the development process. New features can be tested quickly.
- Practically not all developers have a room setup dedicated for VR, and PC VRs require the base station to be set up. The simulator avoids that inconvenient process.
- Well, this might seem silly, but with the headset on, you will be prone to knock off objects that are in the way while testing. 😅
Most of my development is done using the simulator, it is only at the final stages that I use the headset to test and feel the UI/UX. I personally feel not having a VR headset should not stop you from developing apps / VR experiences.

Created with