Prerequisite
Make sure that you have the following prerequisite done before continuing to the next section:
- You need to have a Ready Player Me Avatar created. If you are not sure how that’s done then you can check our YouTube video or the first section of this blog.
- You need to have a Snapchat account so that you can log into Lens Studio Account.
- You need to have Lens Studio downloaded and installed. Also, makes sure you have logged in using the same account.
Downloading FBX file of the Avatar.
On the Ready Player Me website, you will be allowed to download the .glb file. You can either download that and convert it to .fbx format using any modeling software like Blender. But, if you are not familiar with that then, the easiest option we have is to link the Avatar to VR Chat which will allow us to download the .fbx file directly. So,
- Head over to your Ready Player Me hub → select the
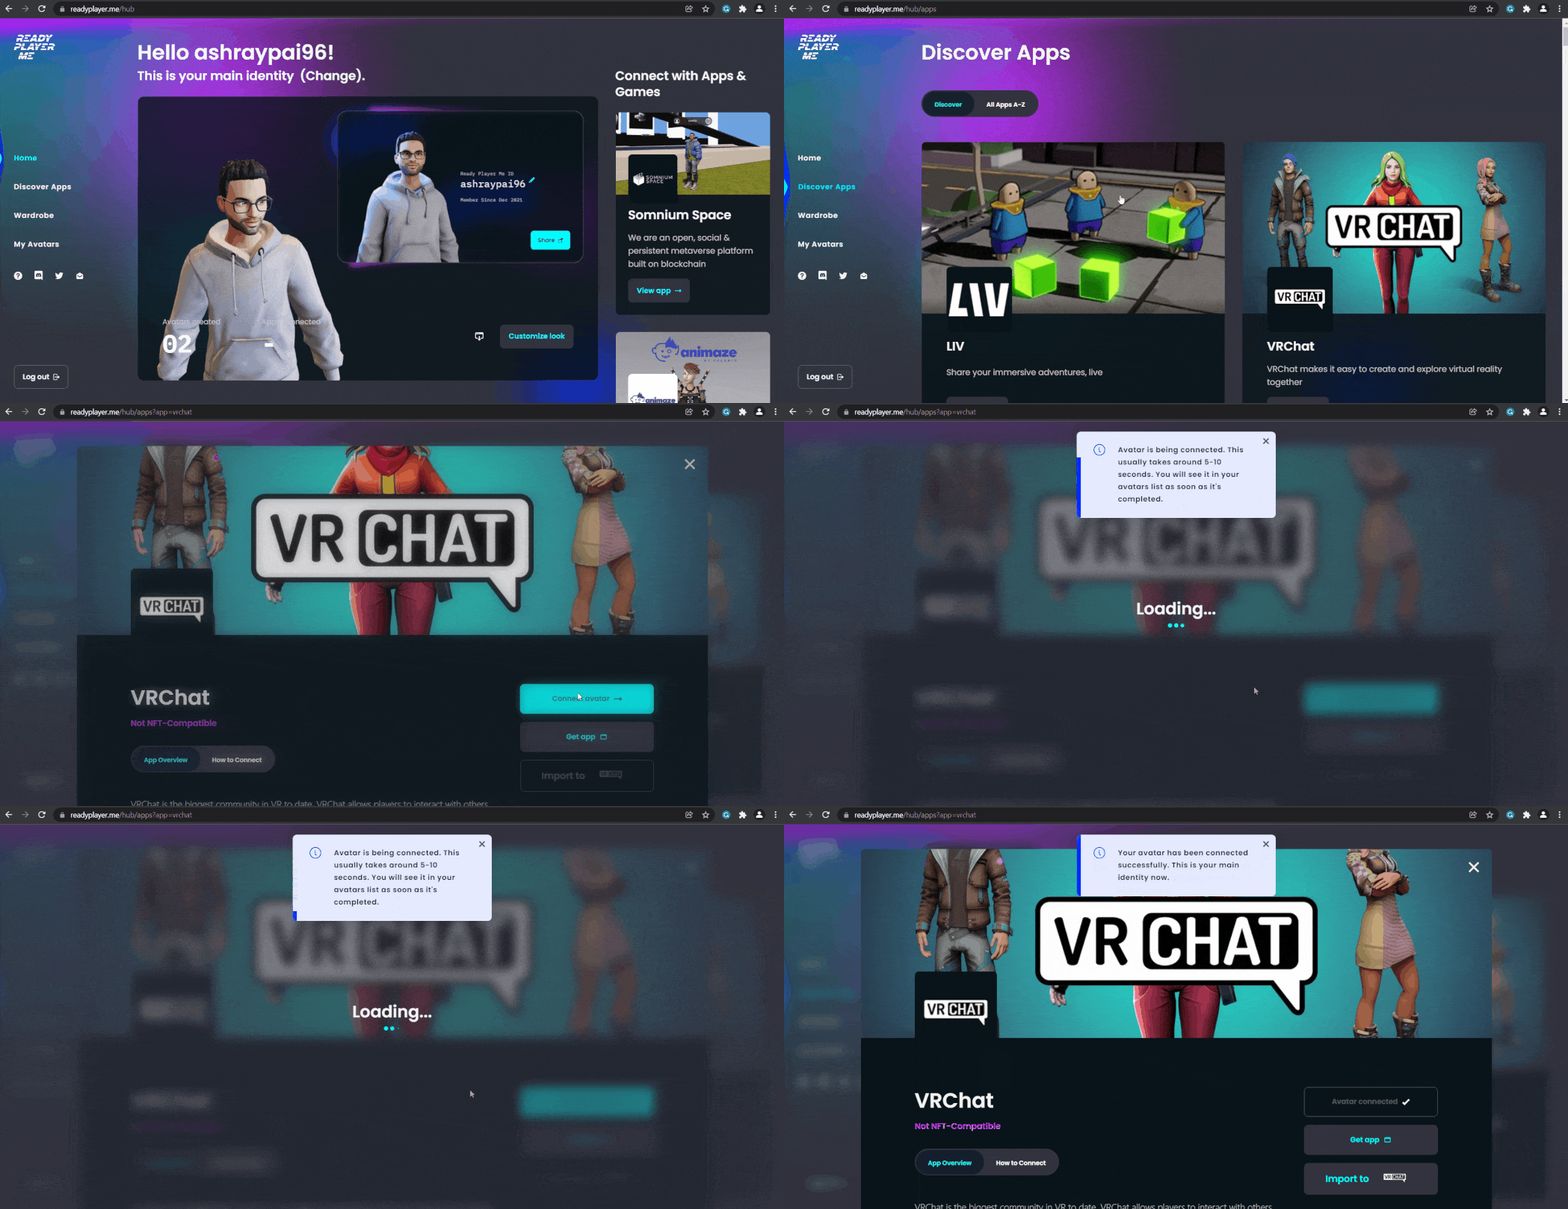
Discover Appstab → selectVRChat→ click onConnect Avatar→ choose your avatar. You will get a pop-up notifying you that it will take a few minutes.
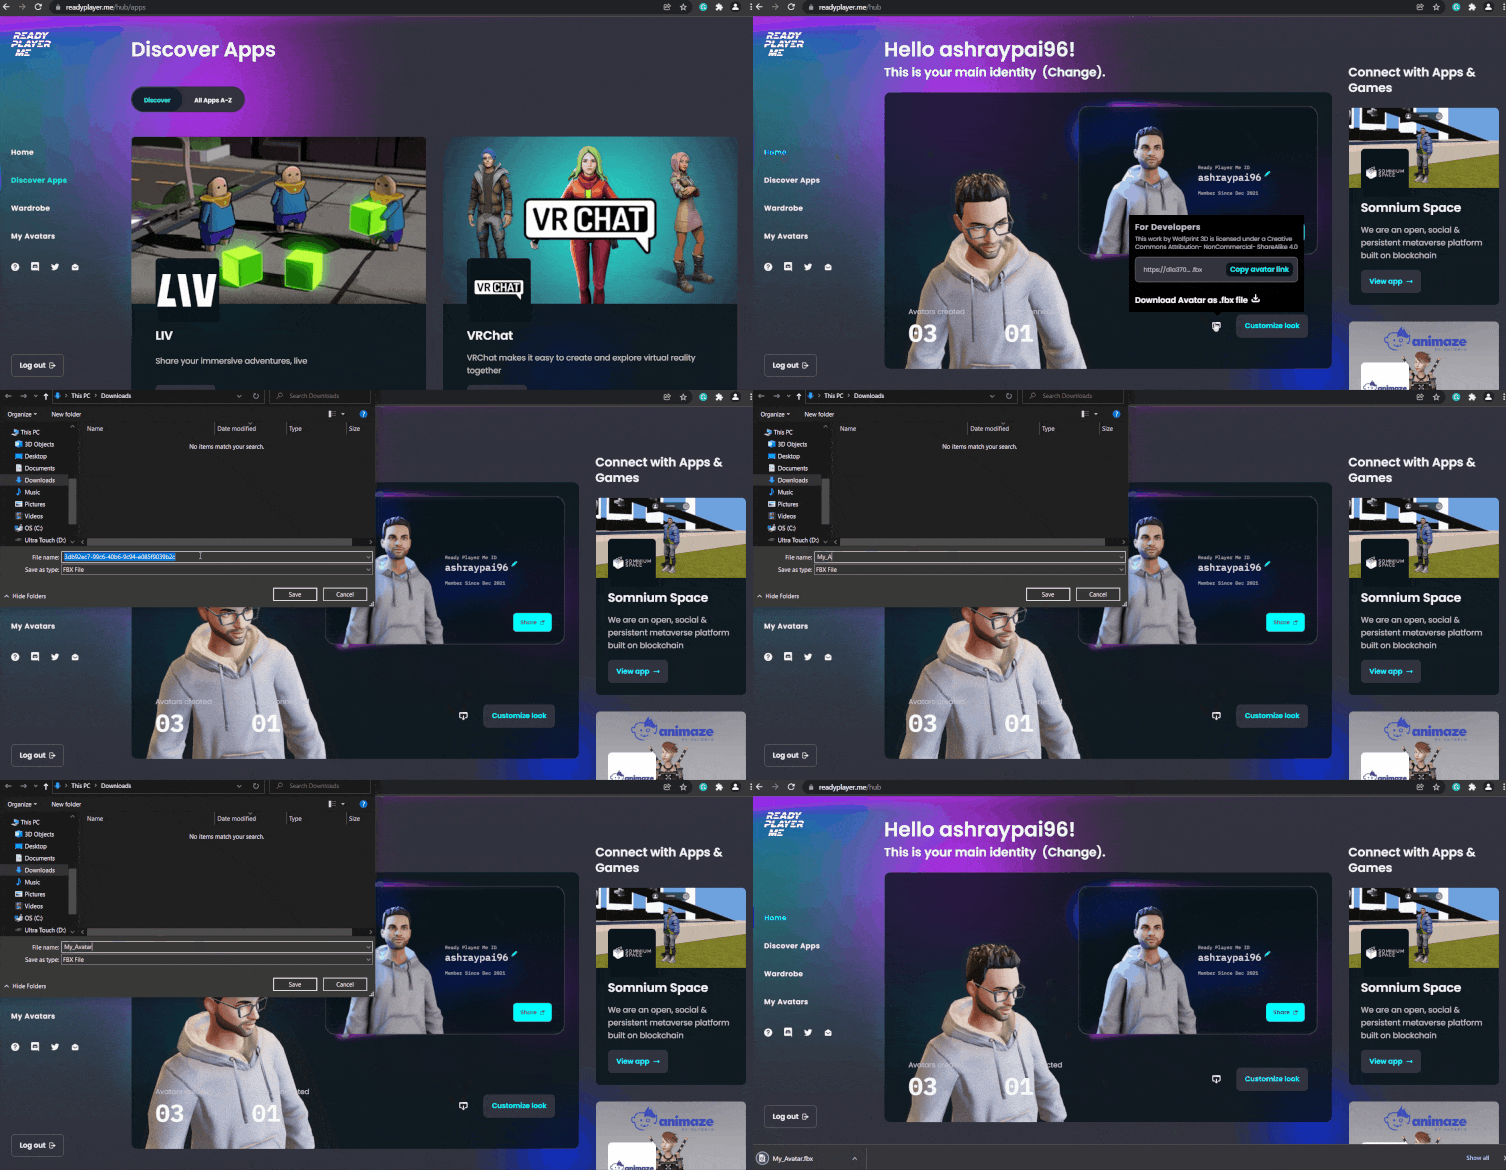
- Once it's connected you can go back to the Home tab → click on the download button next to Customize look → click on Download Avatar as .fbx file → rename the file and save it.
Importing to Lens Studio and Full Body Tracking
To have a good AR full-body tracking experience we need a good API and Snapchat has exactly that. The other thing that makes this development easier is that the Ready Player Me Avatar model comes with a full-body rig and with a single click this rig can be set up for AR. All we have to do is add the full-body tracking component, add the Avatar and assign the parts. So, within 5 minutes you would have created an AR version of your Avatar. Ready to see how that’s done?
- Open Lens Studio and click on
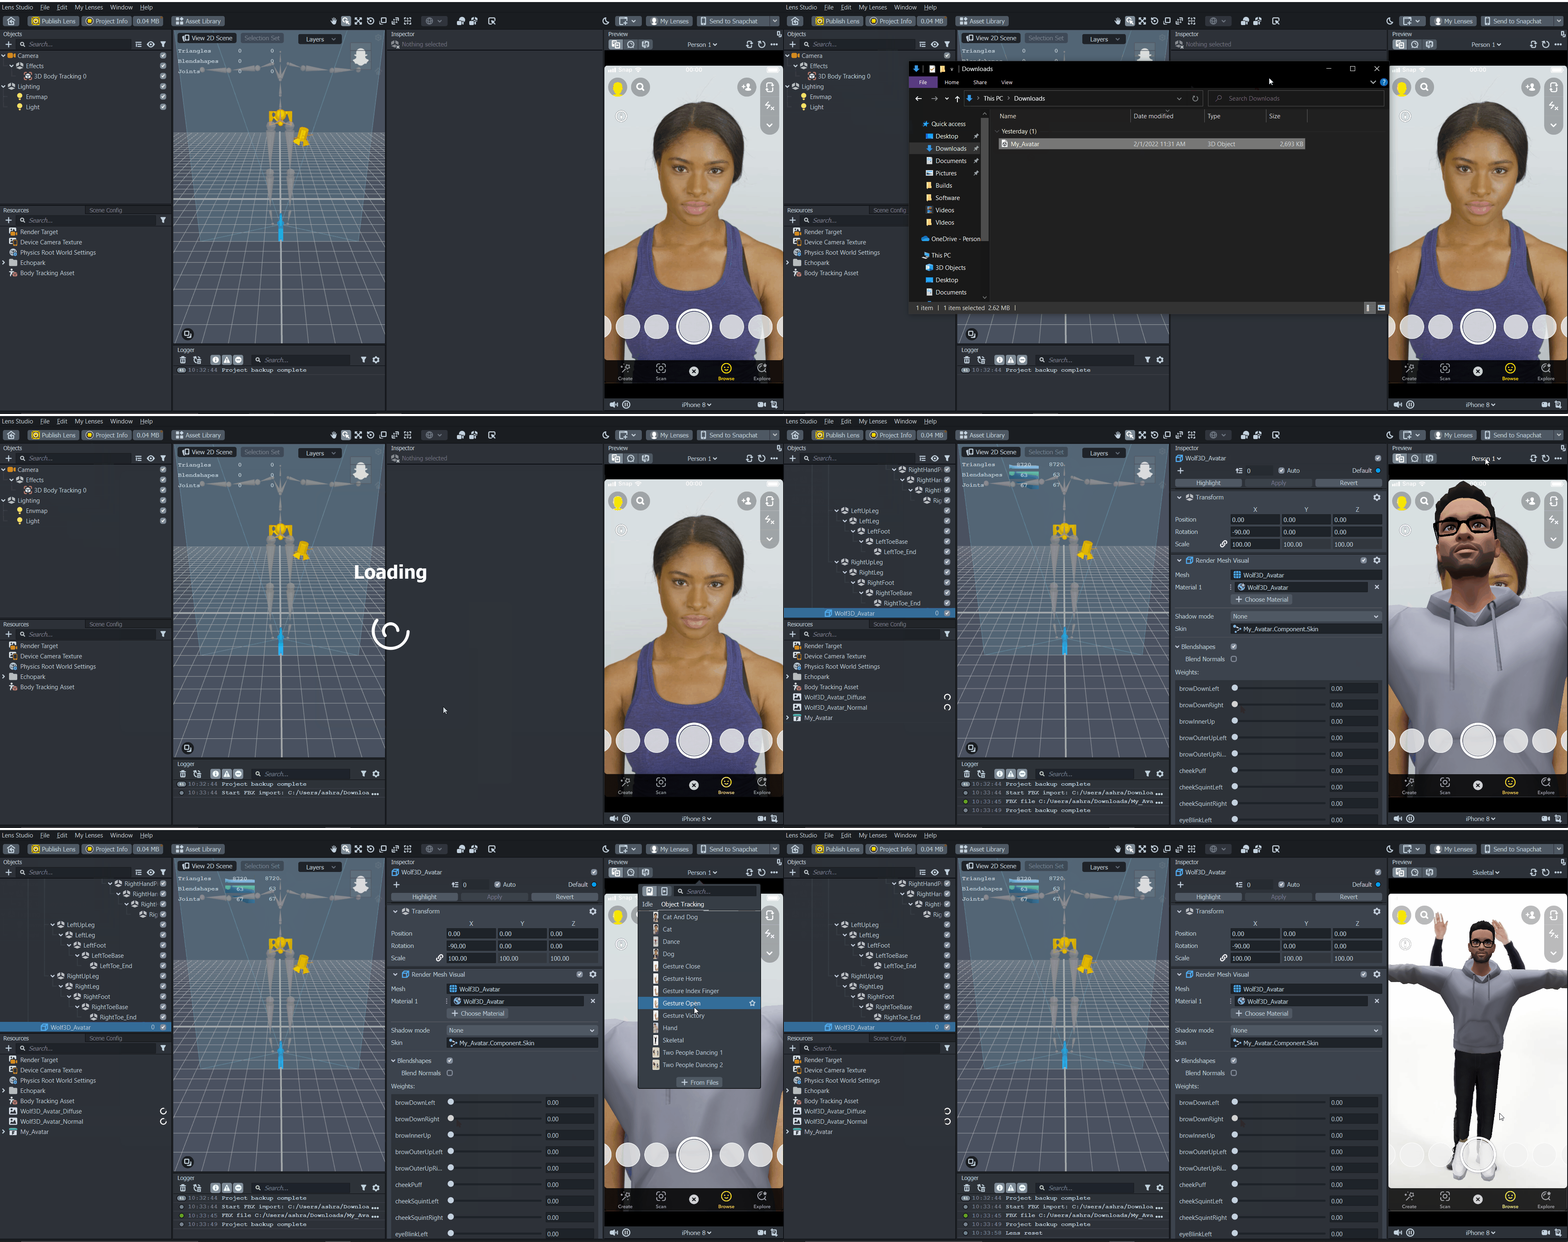
NEW PROJECT→ add a new object by clicking on thePlus sign ➕at the top left corner → fromObject Tracking 3DselectFull Body Tracking
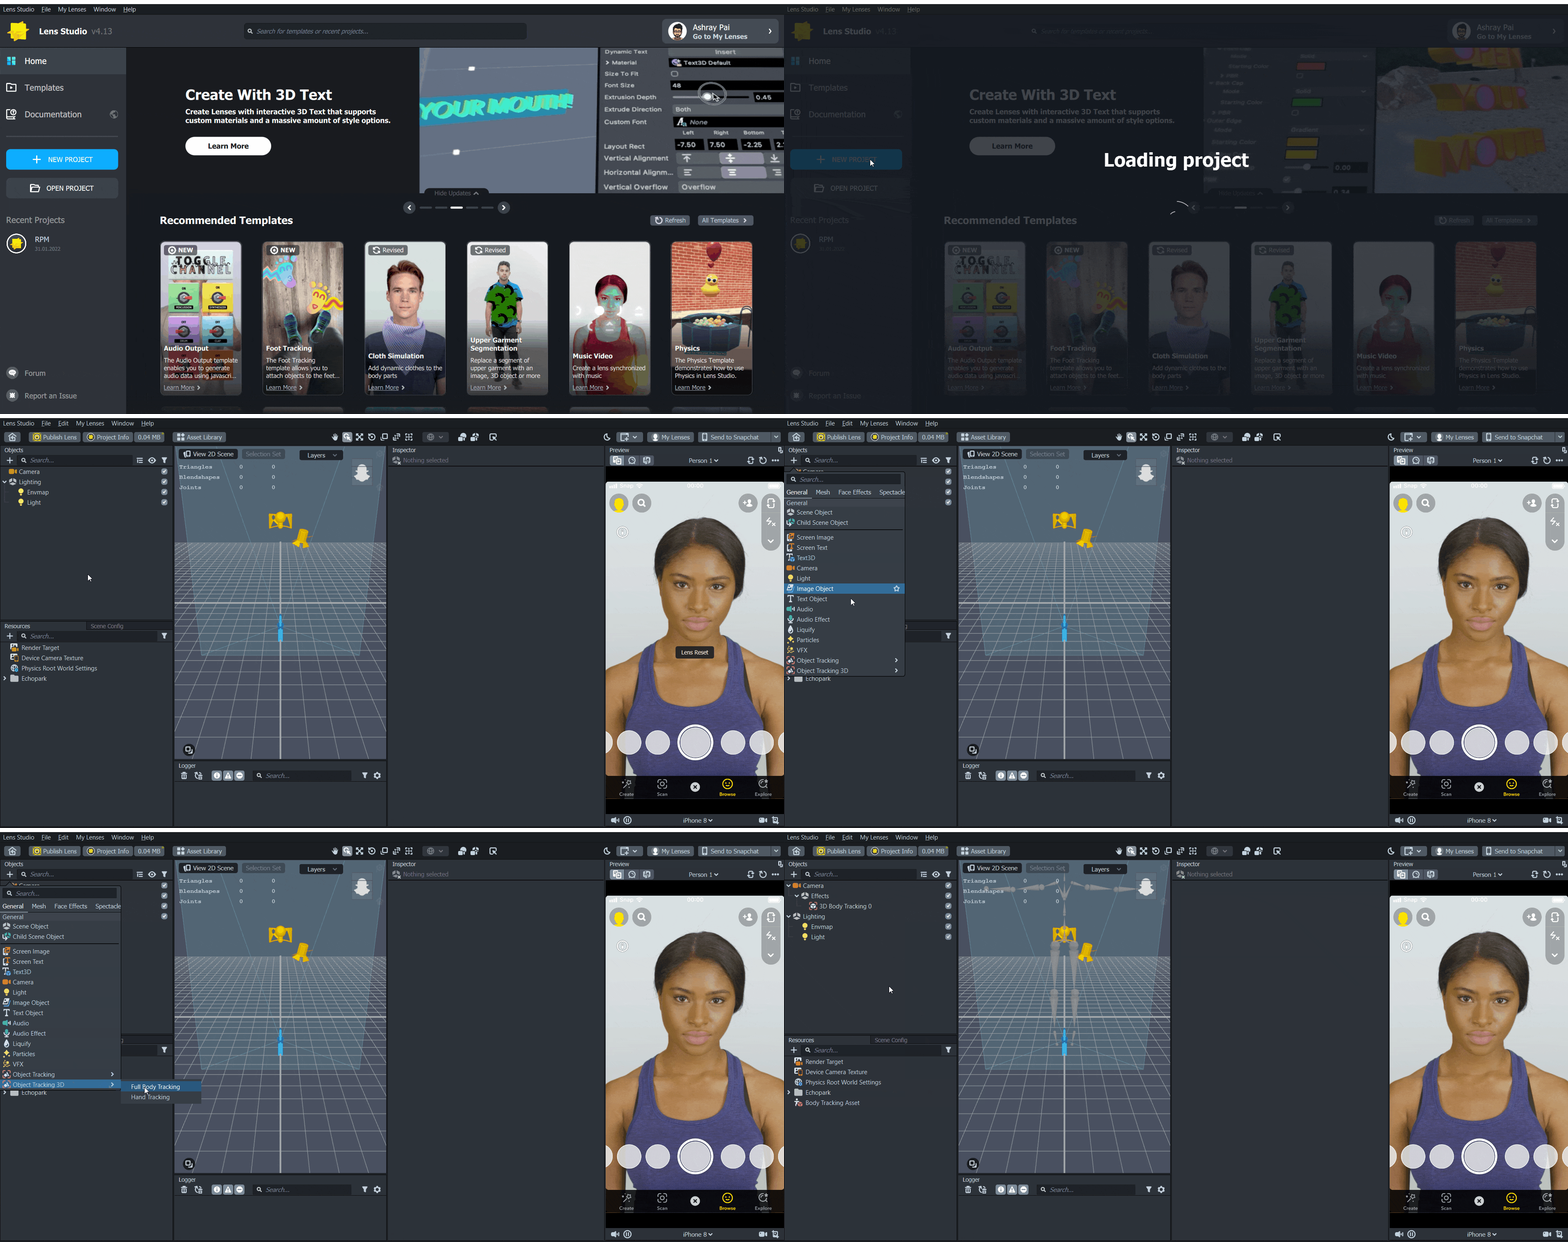
- Open the folder where you had saved the .fbx file, drag and drop it on the 3D Body Tracking 0 object → click on Import and wait till the Avatar loads onto the scene → in the preview window, change the preview image from Person 1 to Skeletal by clicking on the drop-down and choosing Skeletal.
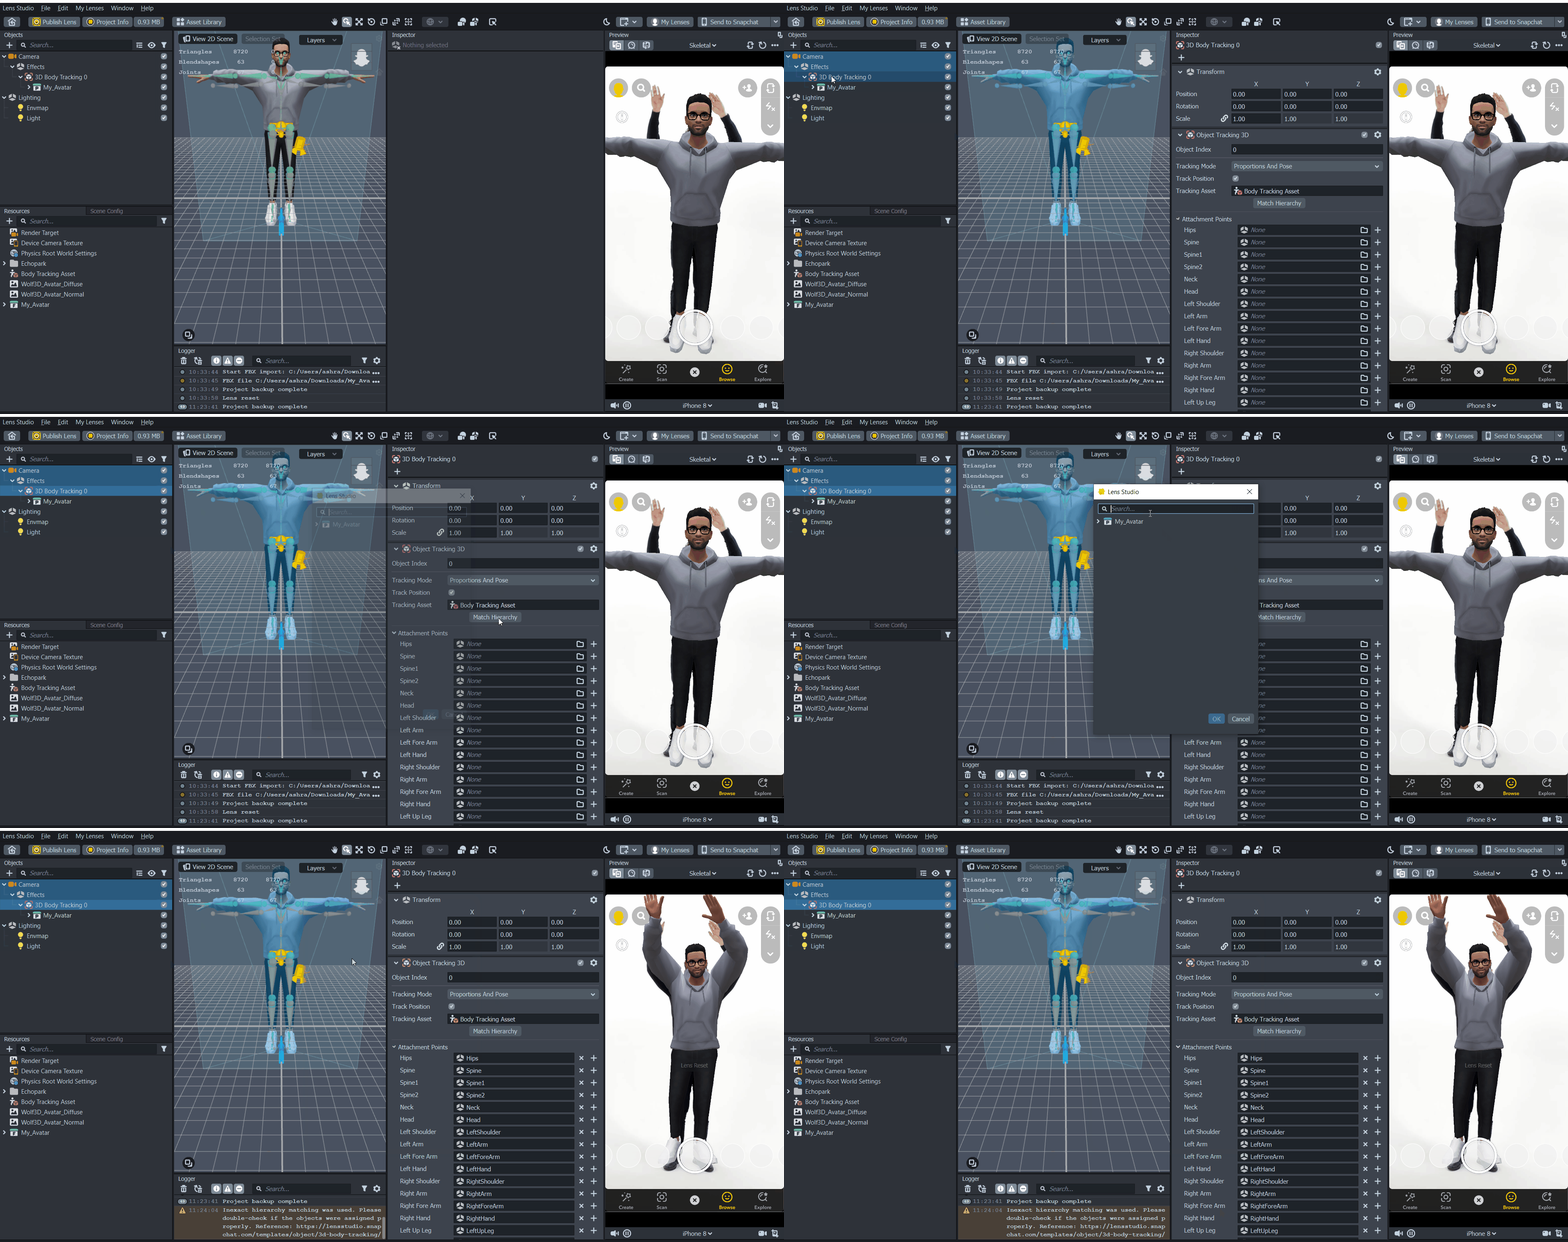
- Select the 3D Body Tracking 0 object → click on Match Hierarchy from the Inspector window and search for Hips → double click on Hips. This will automatically assign all the Avatar’s bones to the full-body tracking attach points.
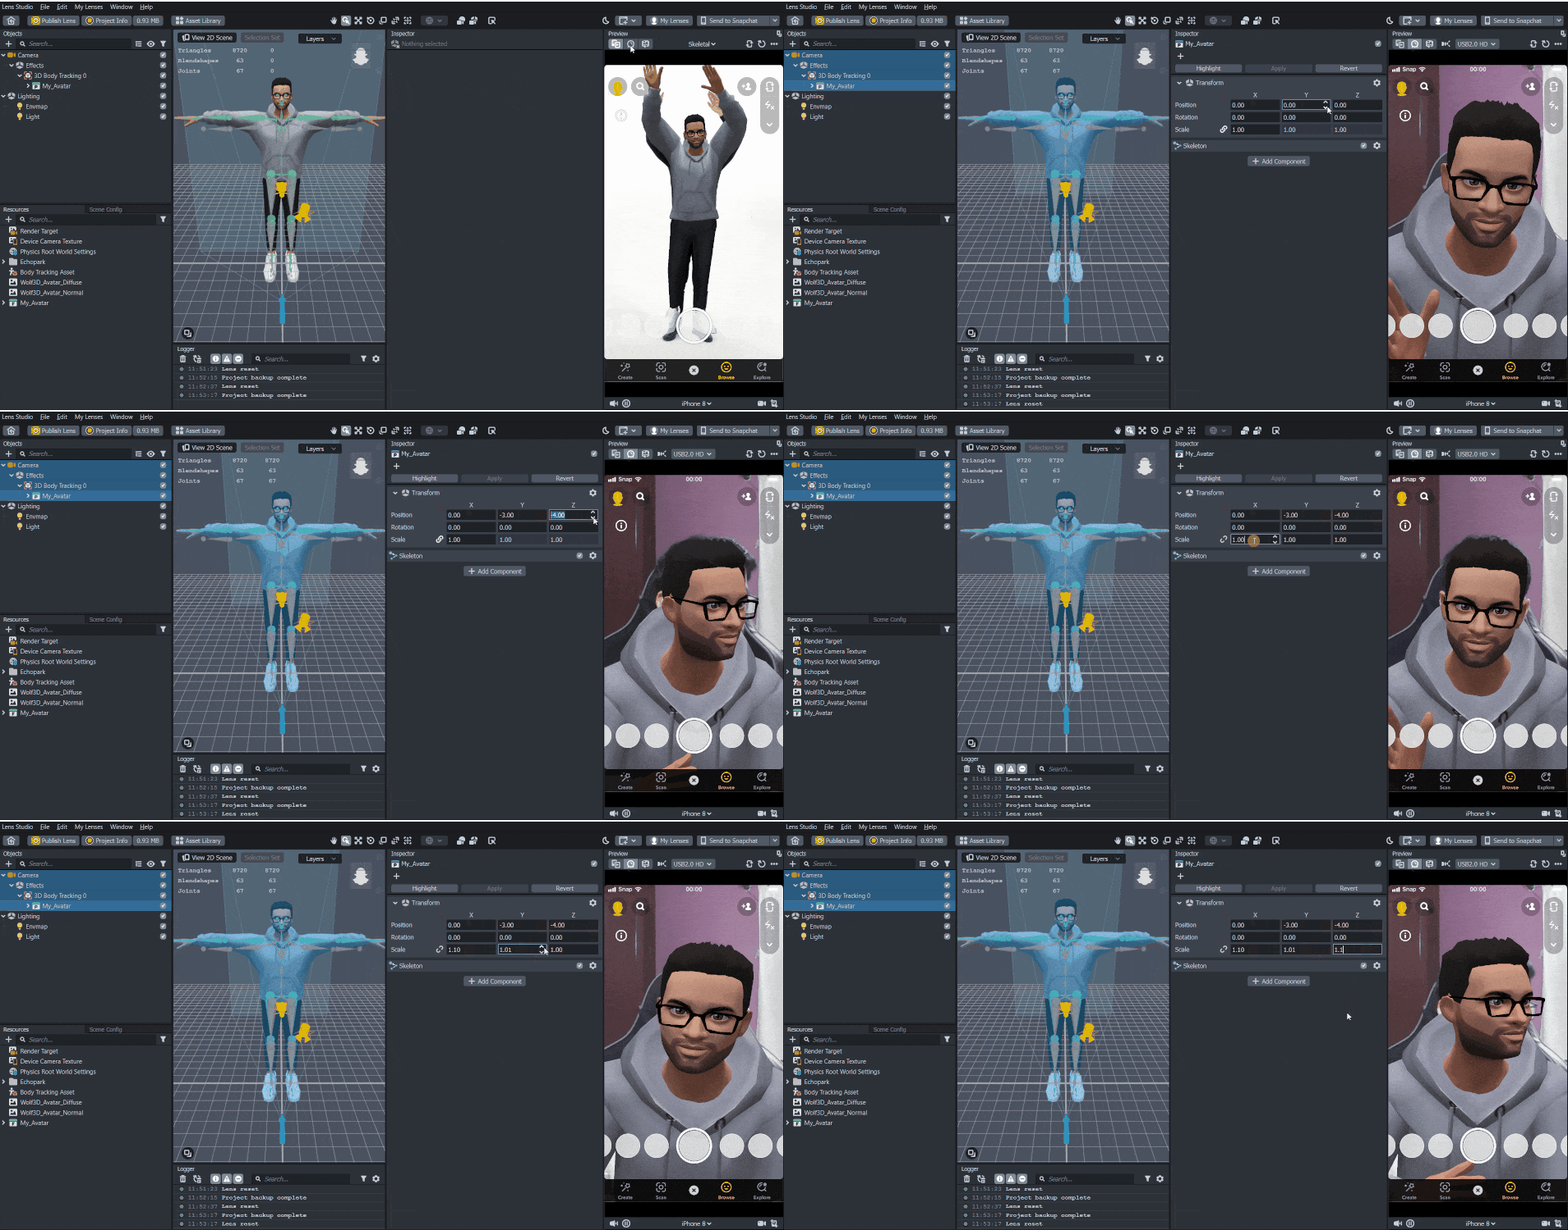
- Now you can test this by clicking on the webcam preview, which is the second icon at the top left corner of the Preview window. While testing you can tweak the Avatar’s transform values to what matches best for you.
Recording and Sharing
Lens Studio allows you to record the videos in two ways :
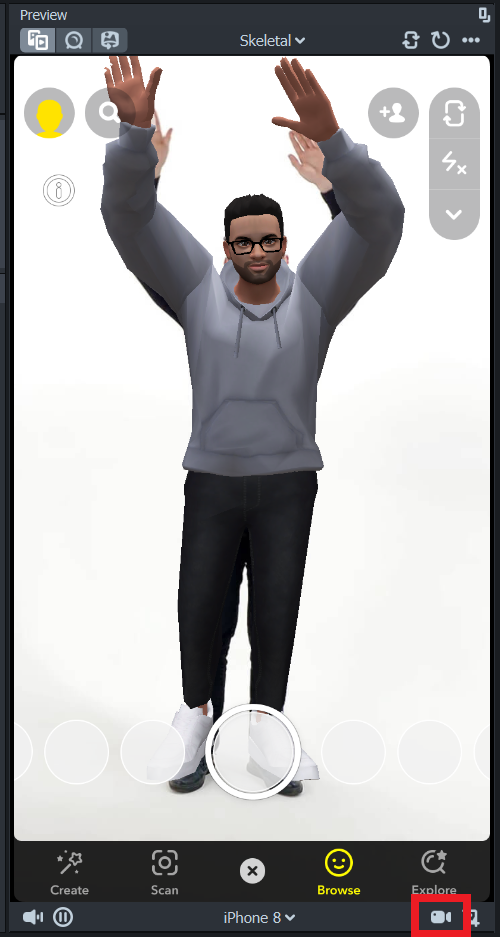
- Either by using the record feature in the
Previewwindow. You can find it at the bottom right corner of the window
- Or, by adding the lens to your Snapchat app on your mobile device. You can find Send to Snapchat button at the top right corner, above the inspector.
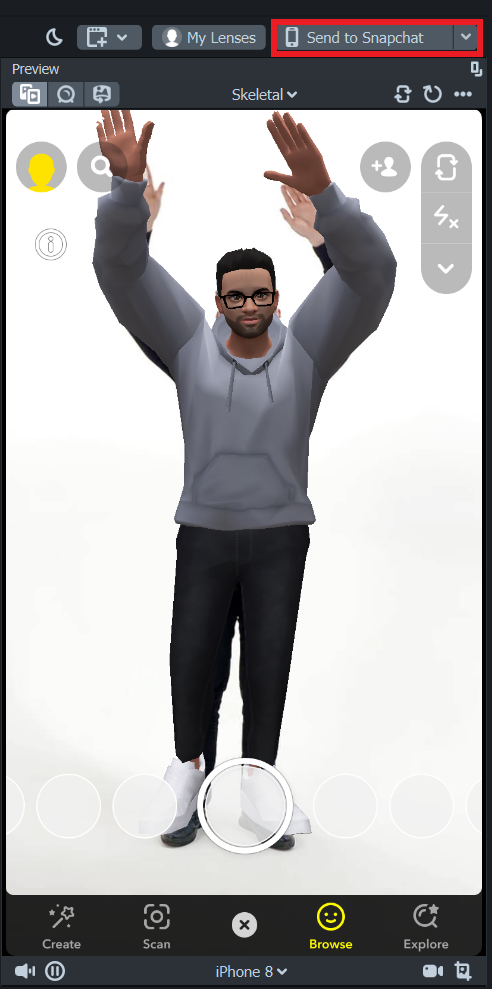
Now, to share the Lens with your friends you will have to publish the lens. To do that,
- Click on
Publish Lensbutton at the top left corner → enter a name for your lens, add a preview image/ video and icon for the lens if you want to → clickSubmit, wait till it gets uploaded and then click onDone.
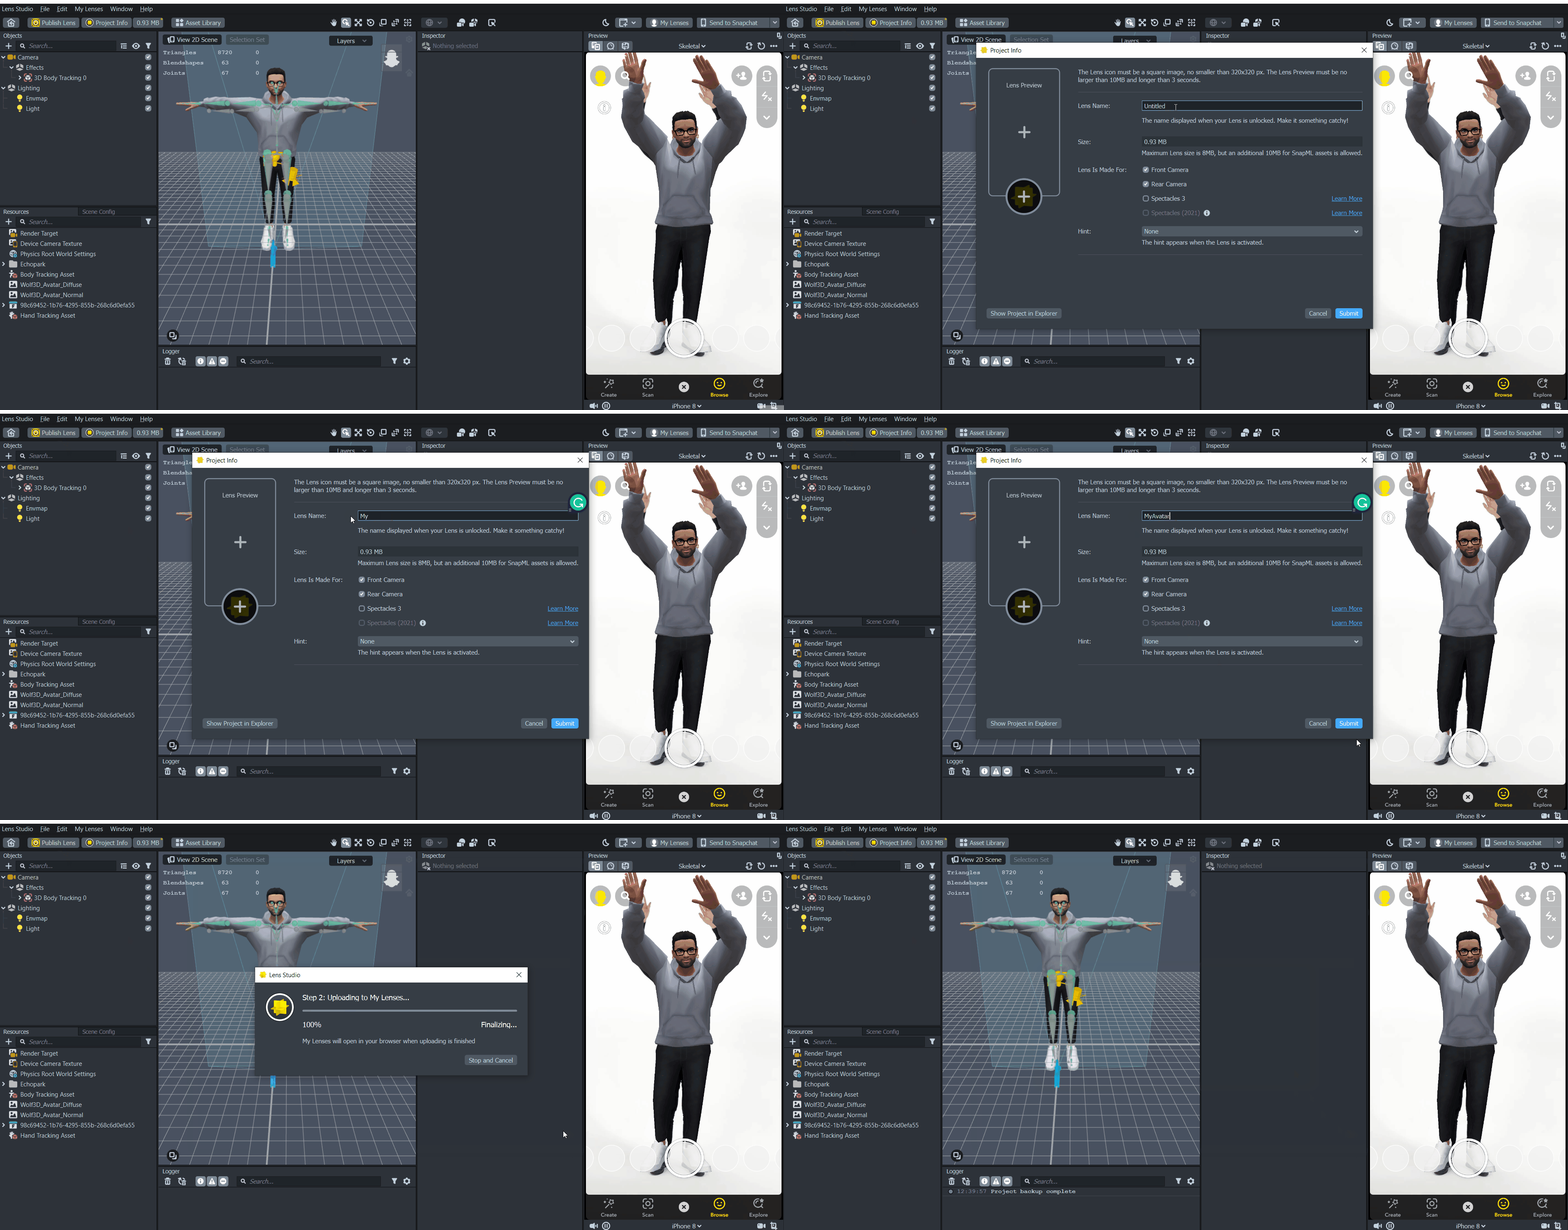
- A pop-up window will open in your web browser. Click on Submit New Lens → add relevant tags (this is not necessary) → click on Submit Lens . Snapchat will then review it and notify you once it's approved. It could take about 5 to 10 minutes.
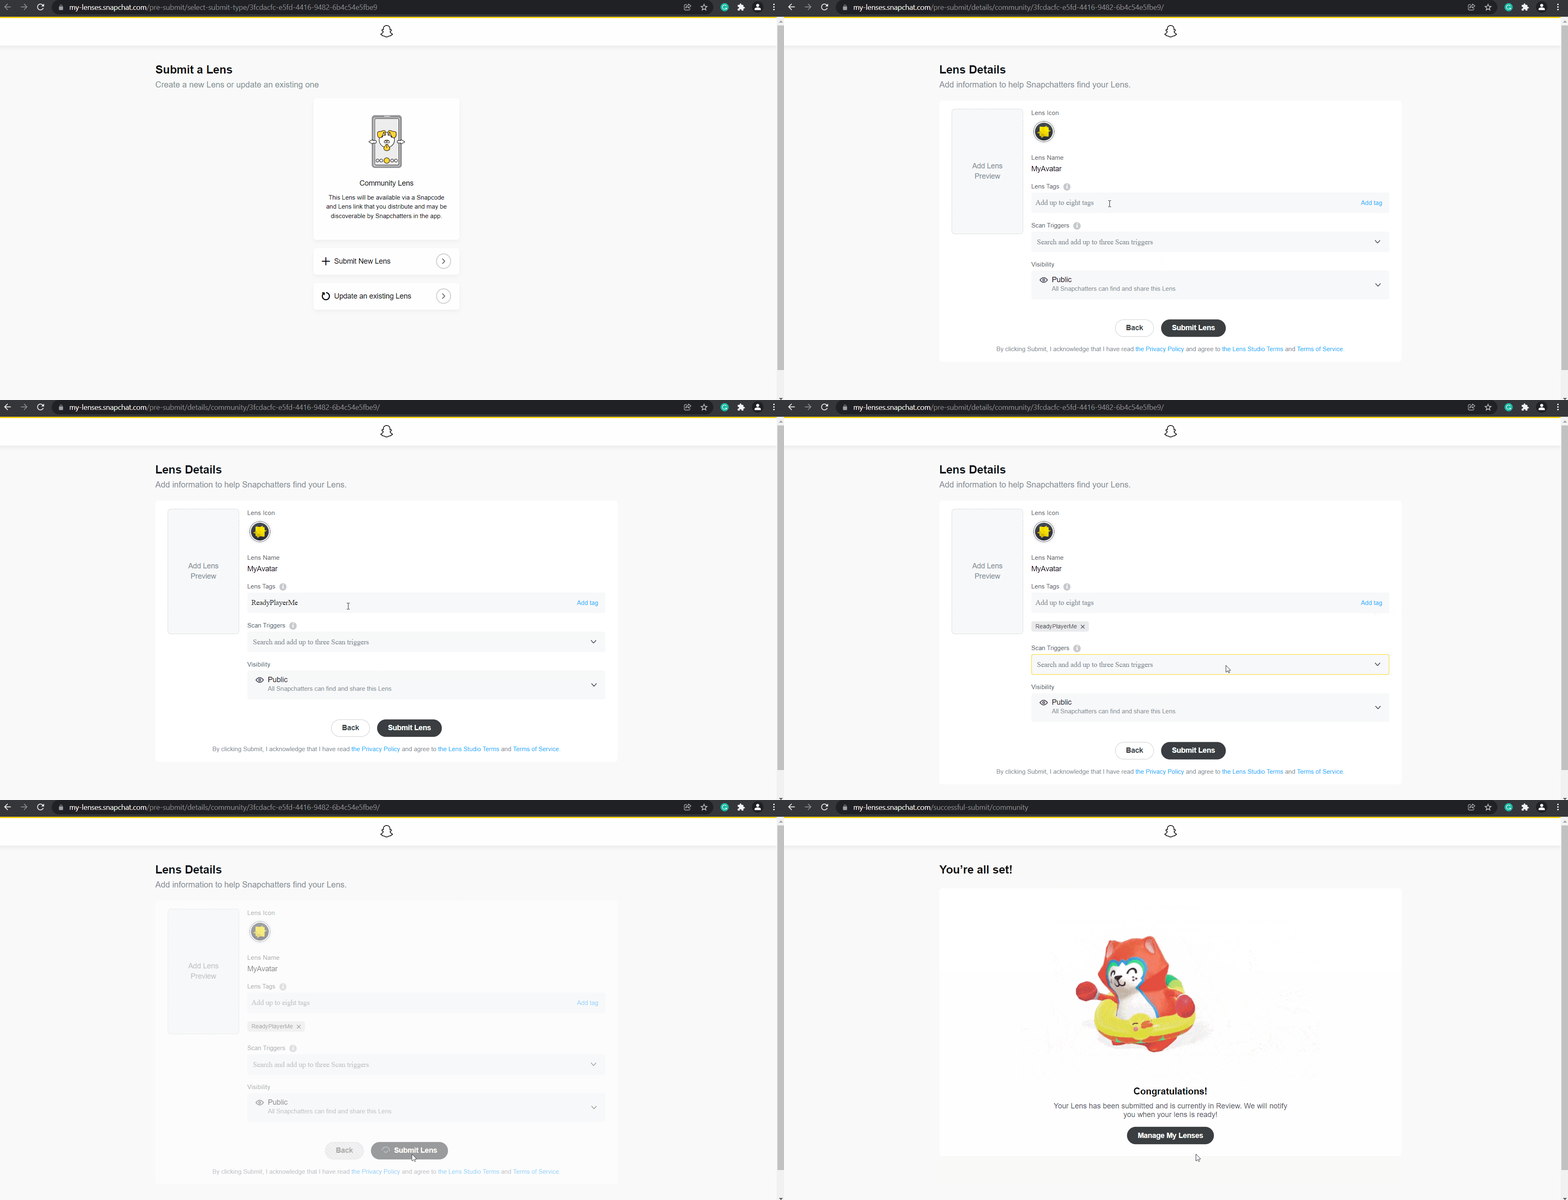
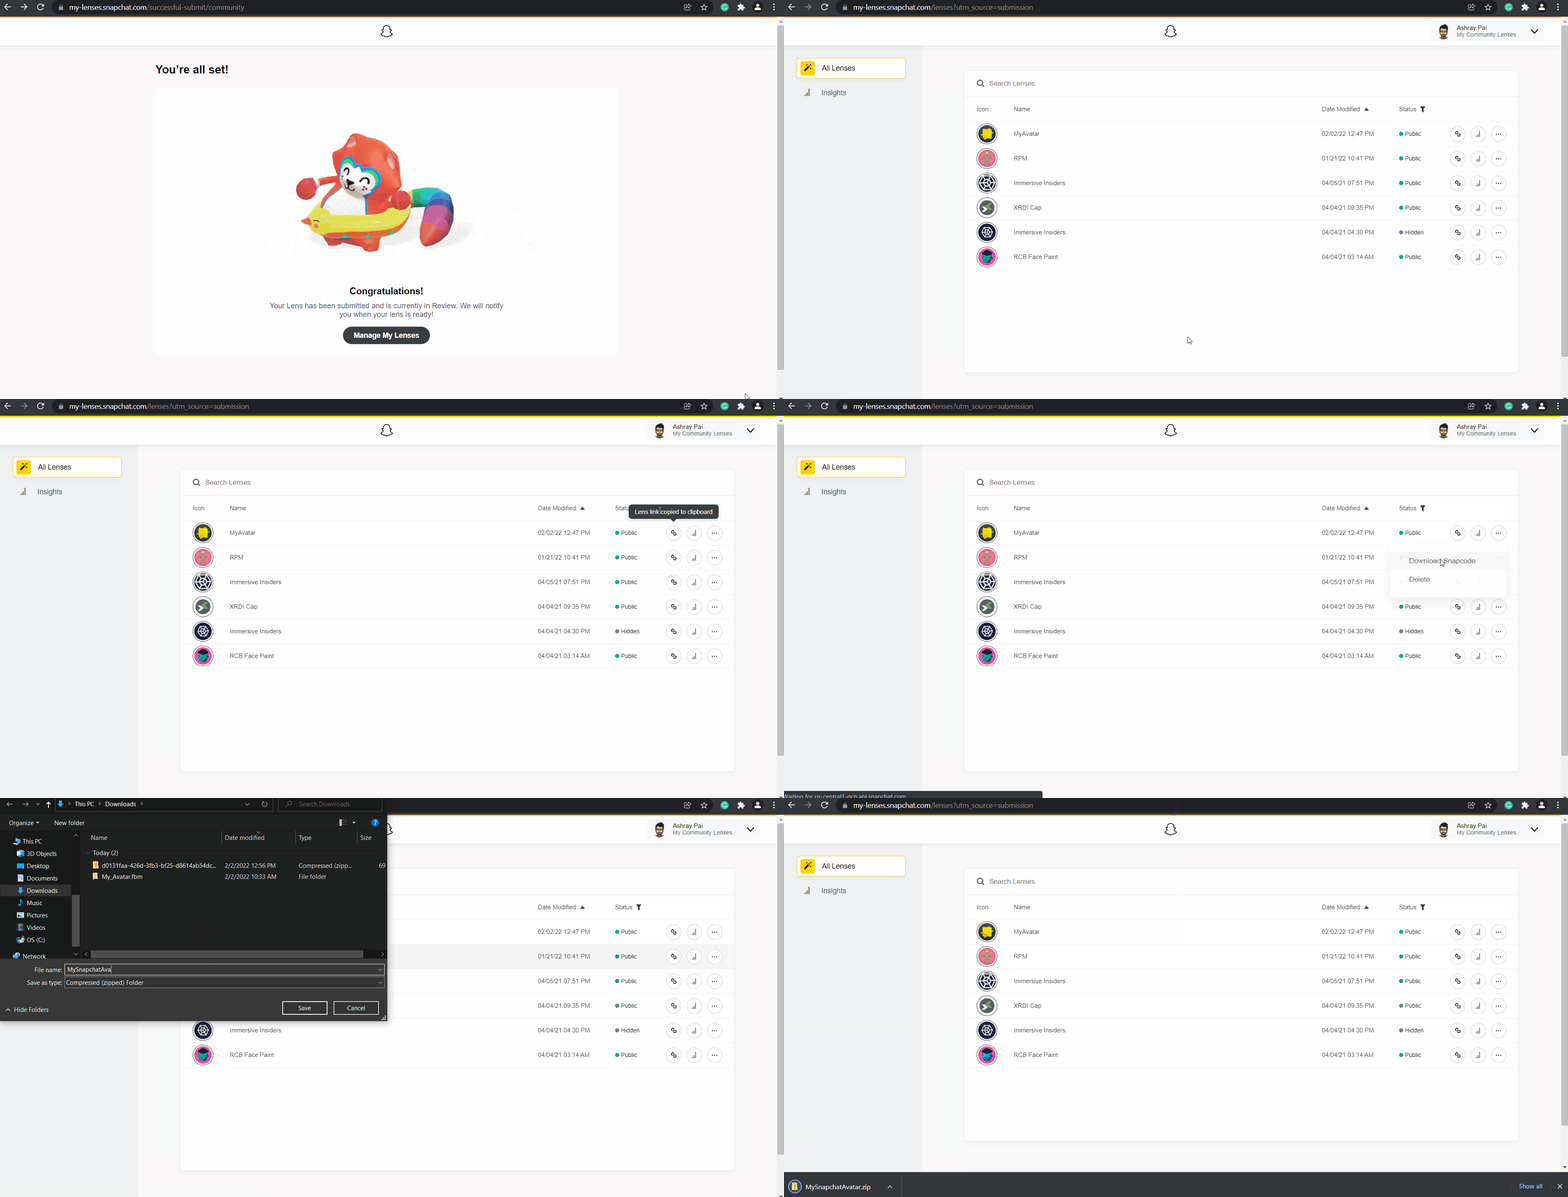
- Click on Manage lens and you will be able to see your lens. If the status is Public, it means that your lens has been approved and it is now available for sharing. You can either share the URL link or download the snapcode image and share that as well.
