When developing an experience, you often want to publish it on multiple platforms (Meta Horizon, Steam, etc.) without having to rebuild everything from scratch.
Here’s how Meta facilitates the process of adding haptics to your projects:
- Export Platform-Specific Files:
Haptics Studio allows you to export your files based on your target platform. It could be Quest Standalone, PCVR (HTC Vive/ Valve Index) or other platform that support it like Sony PlayStation or PICO.
- SDK Flexibility:
The Haptic SDK automatically detects the connected controllers, whether it's a Quest 2, Quest 3, or a PCVR controller, and applies the haptics accordingly.
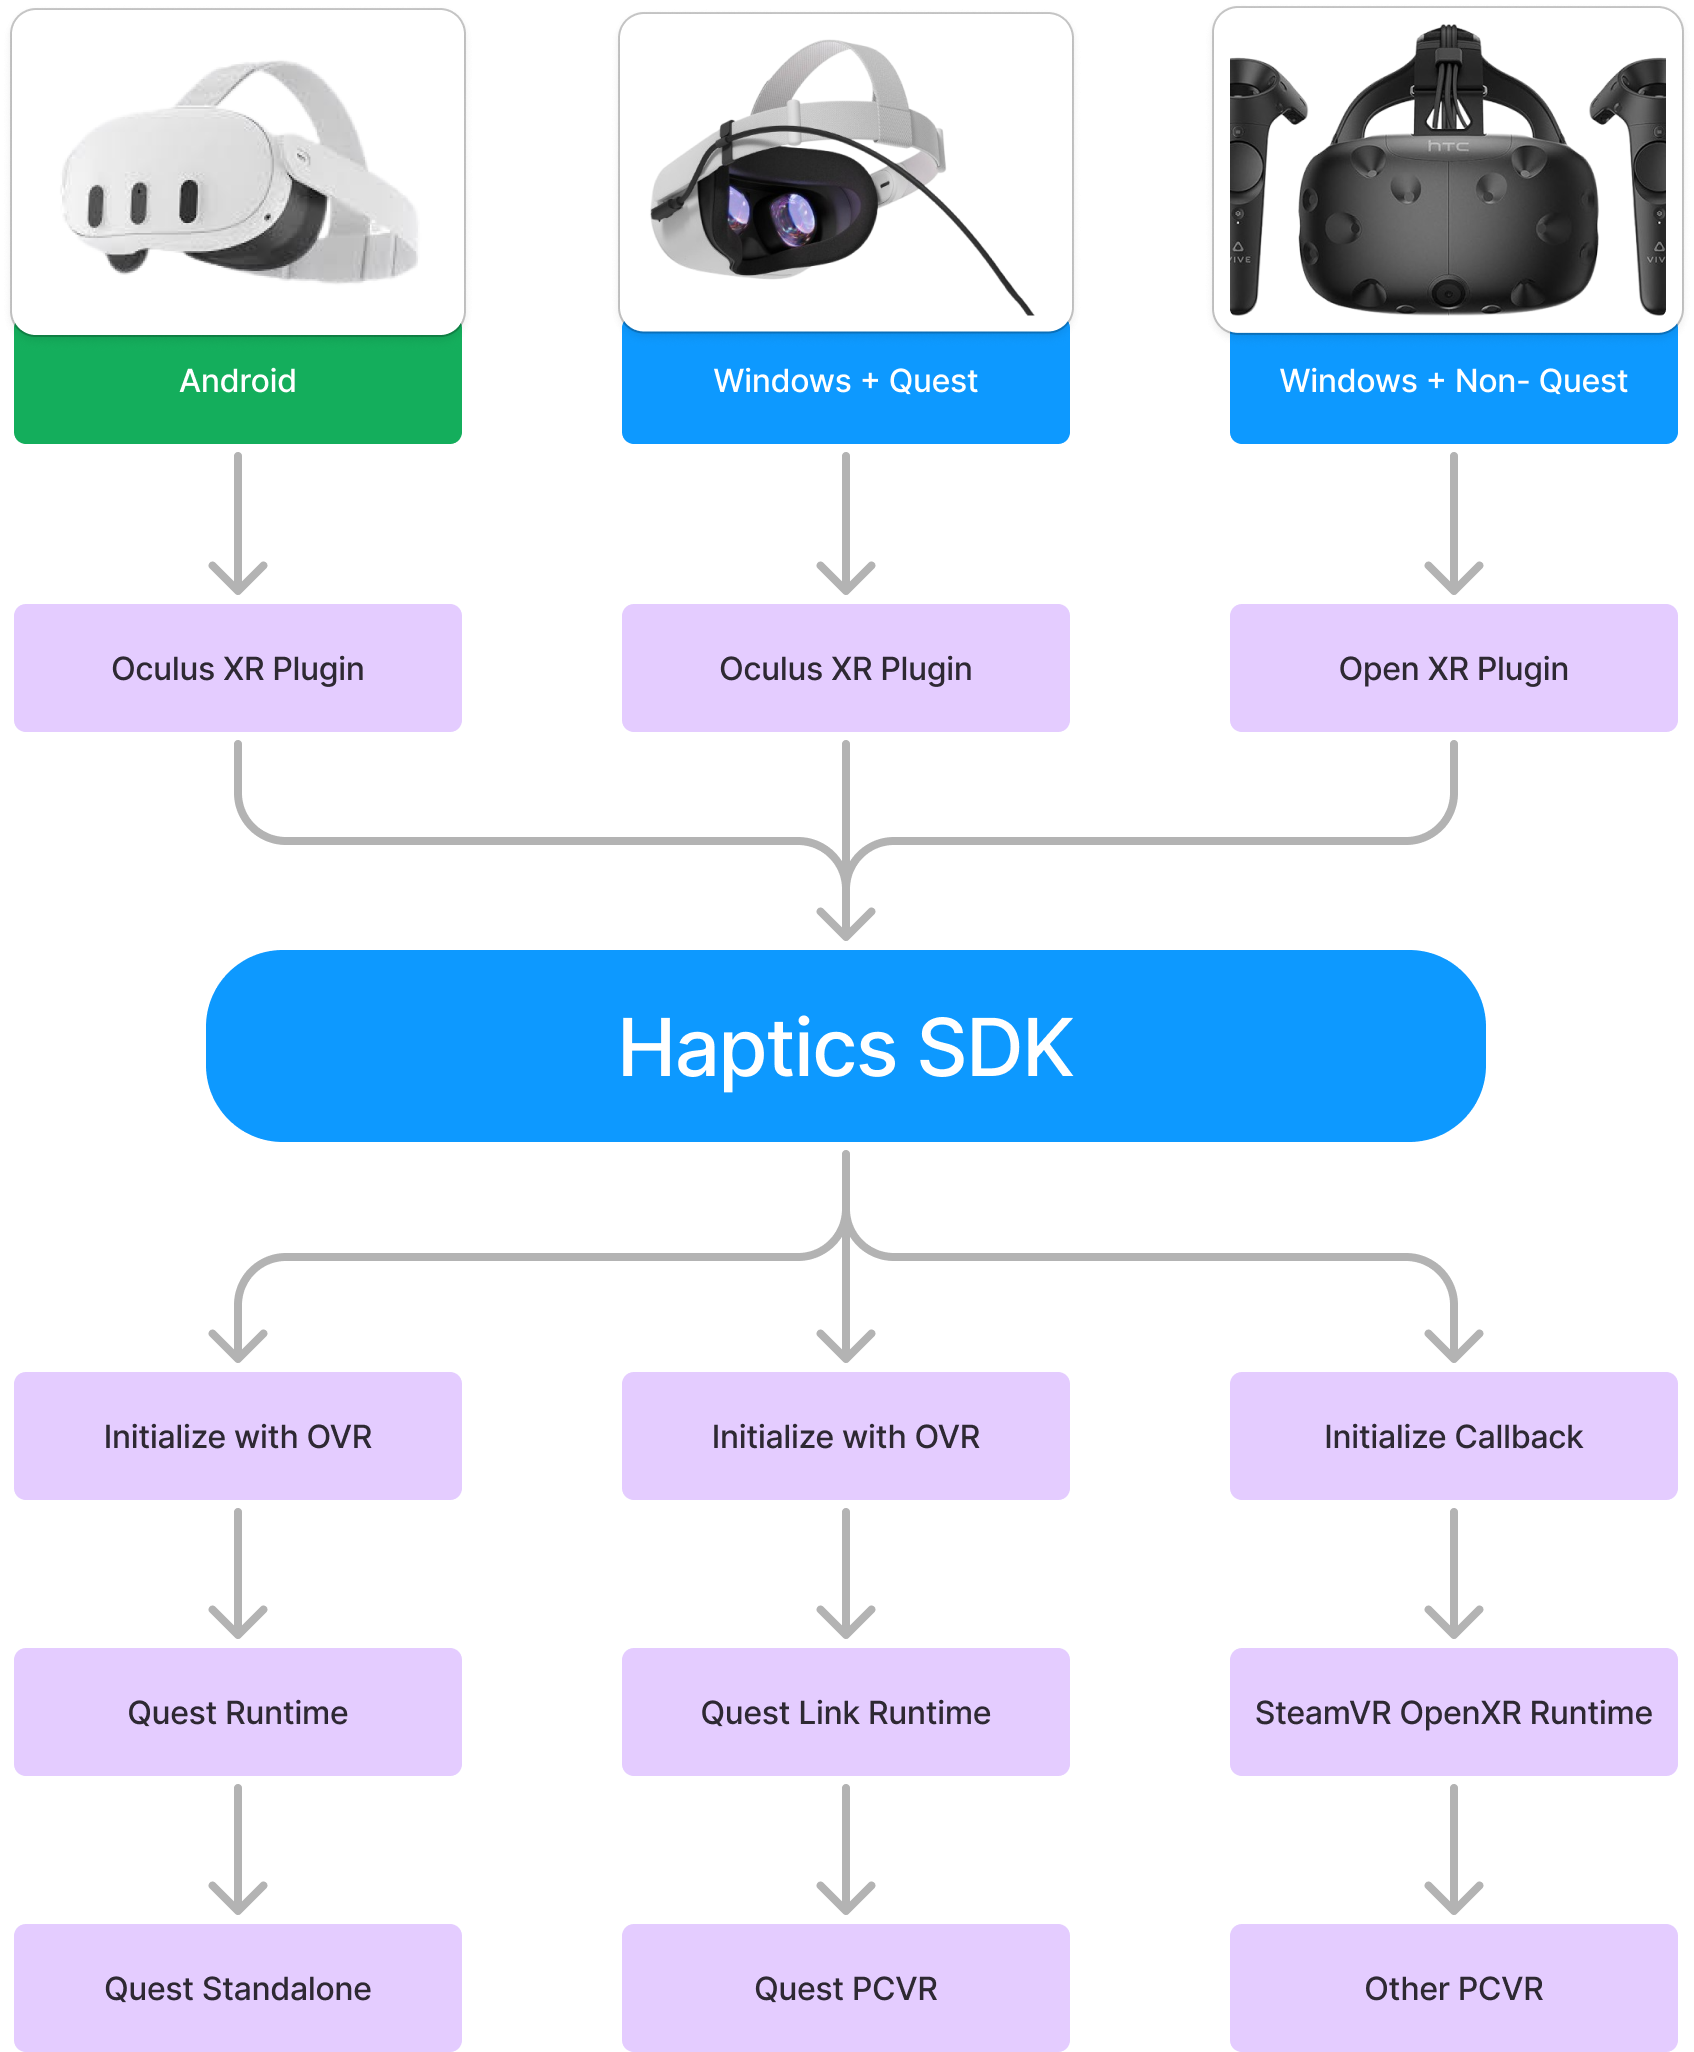
However, some small changes to project settings/scene are necessary before building for different platforms.
Don’t worry it’s very simple and we got everything covered in this blog, the three main areas we’ll look at are:
- Designing Haptics in Haptic Studio and integrating it in Unity with the Haptics SDK
- Building for Quest devices and other PCVR headsets
Before we dive in, we'd like to thank Meta for sponsoring and supporting this content! 🌟
To download Haptics Studio, head to the over to this link, select your OS, and download the software. Once installed, run the software.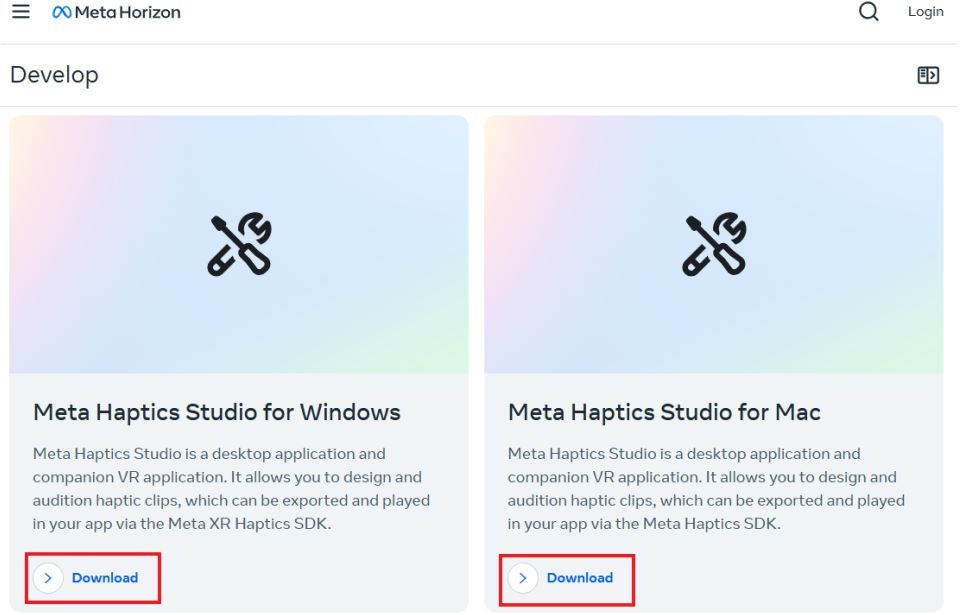
Next, to test the designed haptics we need a companion app, which, you can download from the Horizon Store.
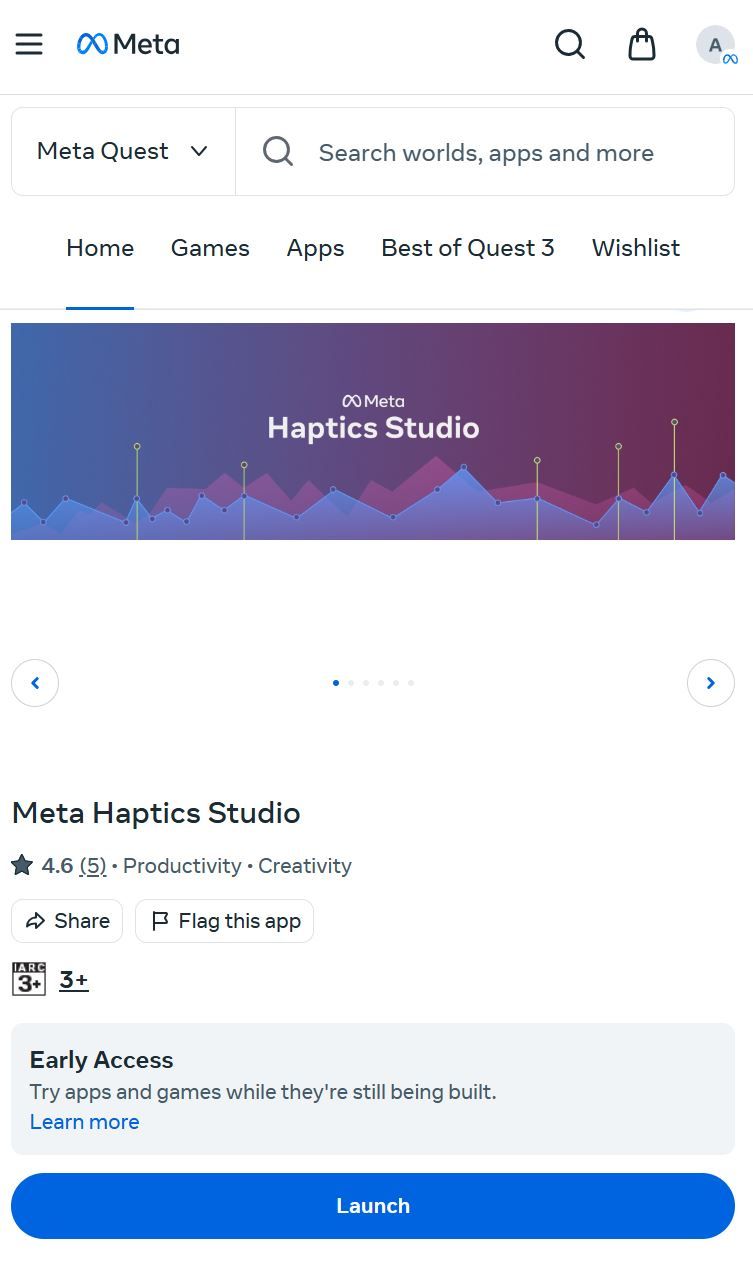
Now for pairing, make sure to connect both your computer and Quest to the same Wi-Fi. Put on your headset, open the app, and follow the on-screen pairing instructions.

Meta’s Haptics Studio offers three key ways to control vibrations:
-
Amplitude: which is nothing but the strength of the vibration over time whose value ranges from 0 to 1, with 1 being the strongest. Think of it like adjusting the volume of a speaker, you can make the vibration louder or softer by changing the amplitude.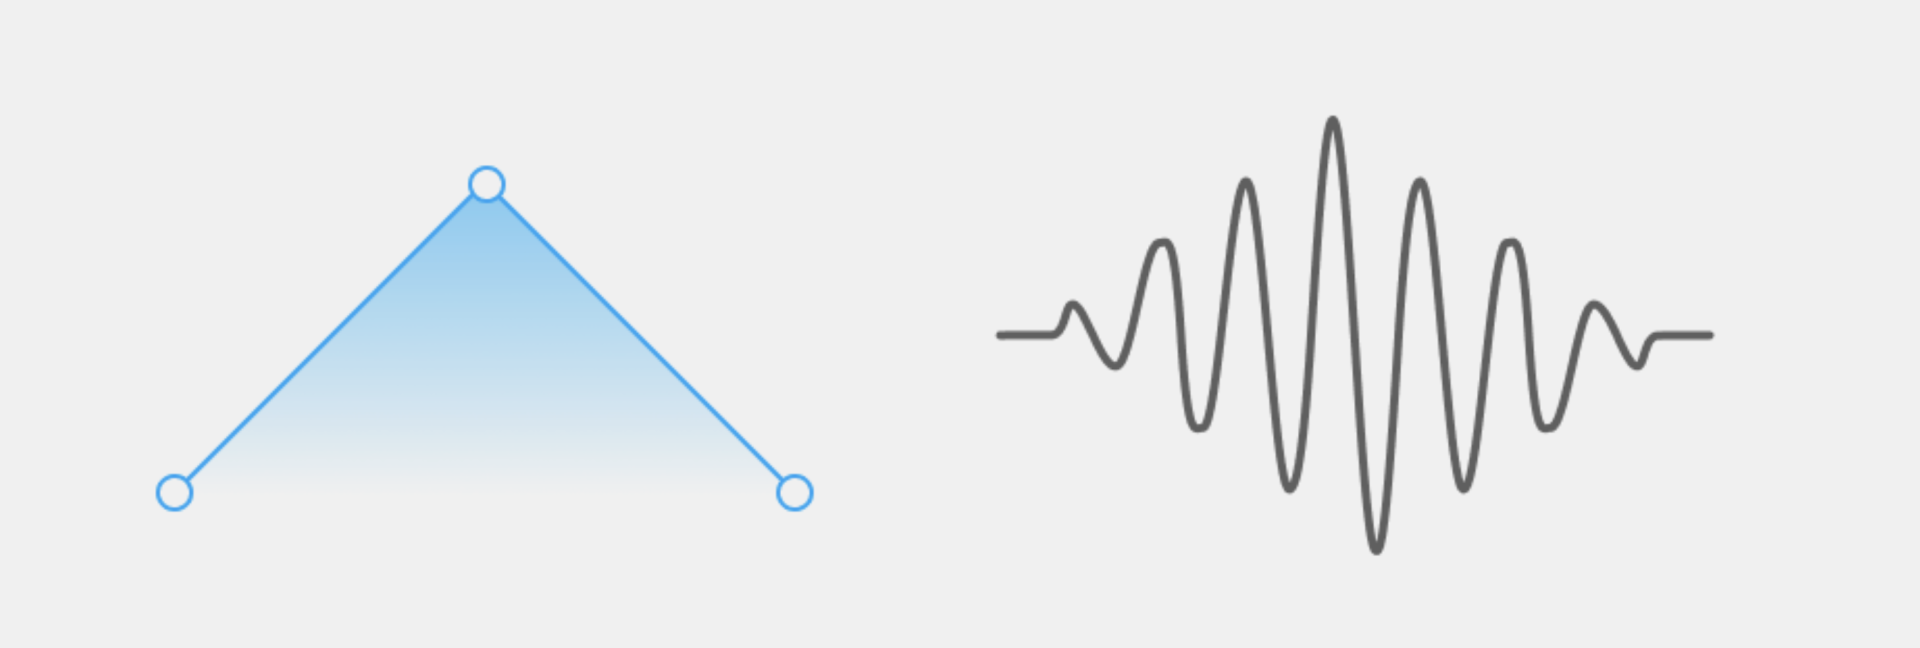
-
Frequency: which determines the speed of the vibration over time, whose value also ranges from 0 to 1, with 1 being the height frequency. Think of it like adjusting the pitch of a sound - you can make the vibration faster or slower by changing the frequency. Adjusting this parameter gives you significant power to change the texture or 'feel' of your haptic effect.
💡Quick note, Quest 2 and other PCVR device users will not feel the change in frequency as their controllers use a different actuator when compared to the Quest 3/Pro/3s
-
Emphasis: which is a short momentary haptic feedback. While the other parameter controls continuous vibration, emphasis lasts only for a 10th of a sec. The values of these also range from 0 to 1.

Now to create and design the haptics, we can start by importing audio files. But why audio files?
Because haptics are often paired with or inspired by sound effects and it also speeds up the design process.
-
Importing files is as simple as dragging and dropping the audio files into Haptics Studio and it will automatically generate corresponding haptic effects.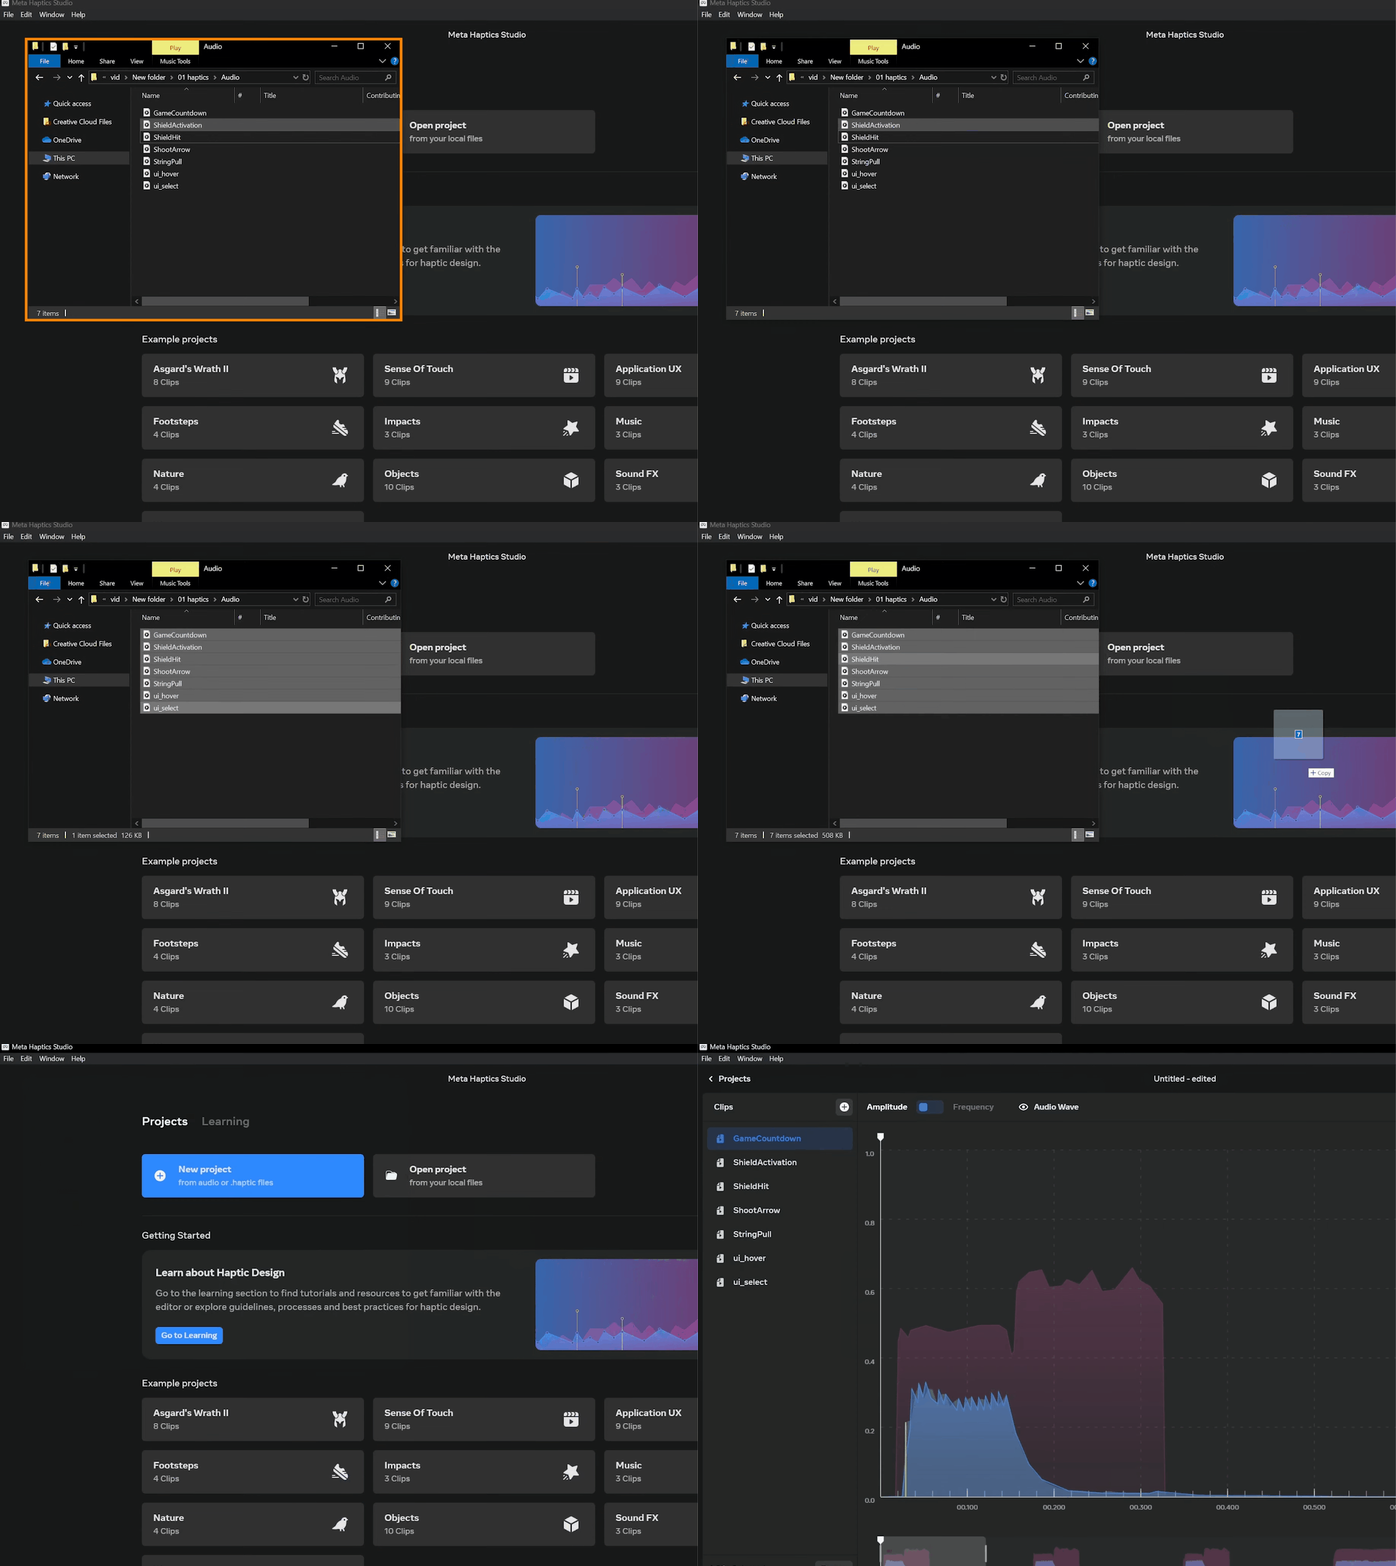
-
To test the Haptics, make sure your devices are paired → Put on your headset → select a haptic clip to play → press the UI play button or the B/Y buttons on your controllers.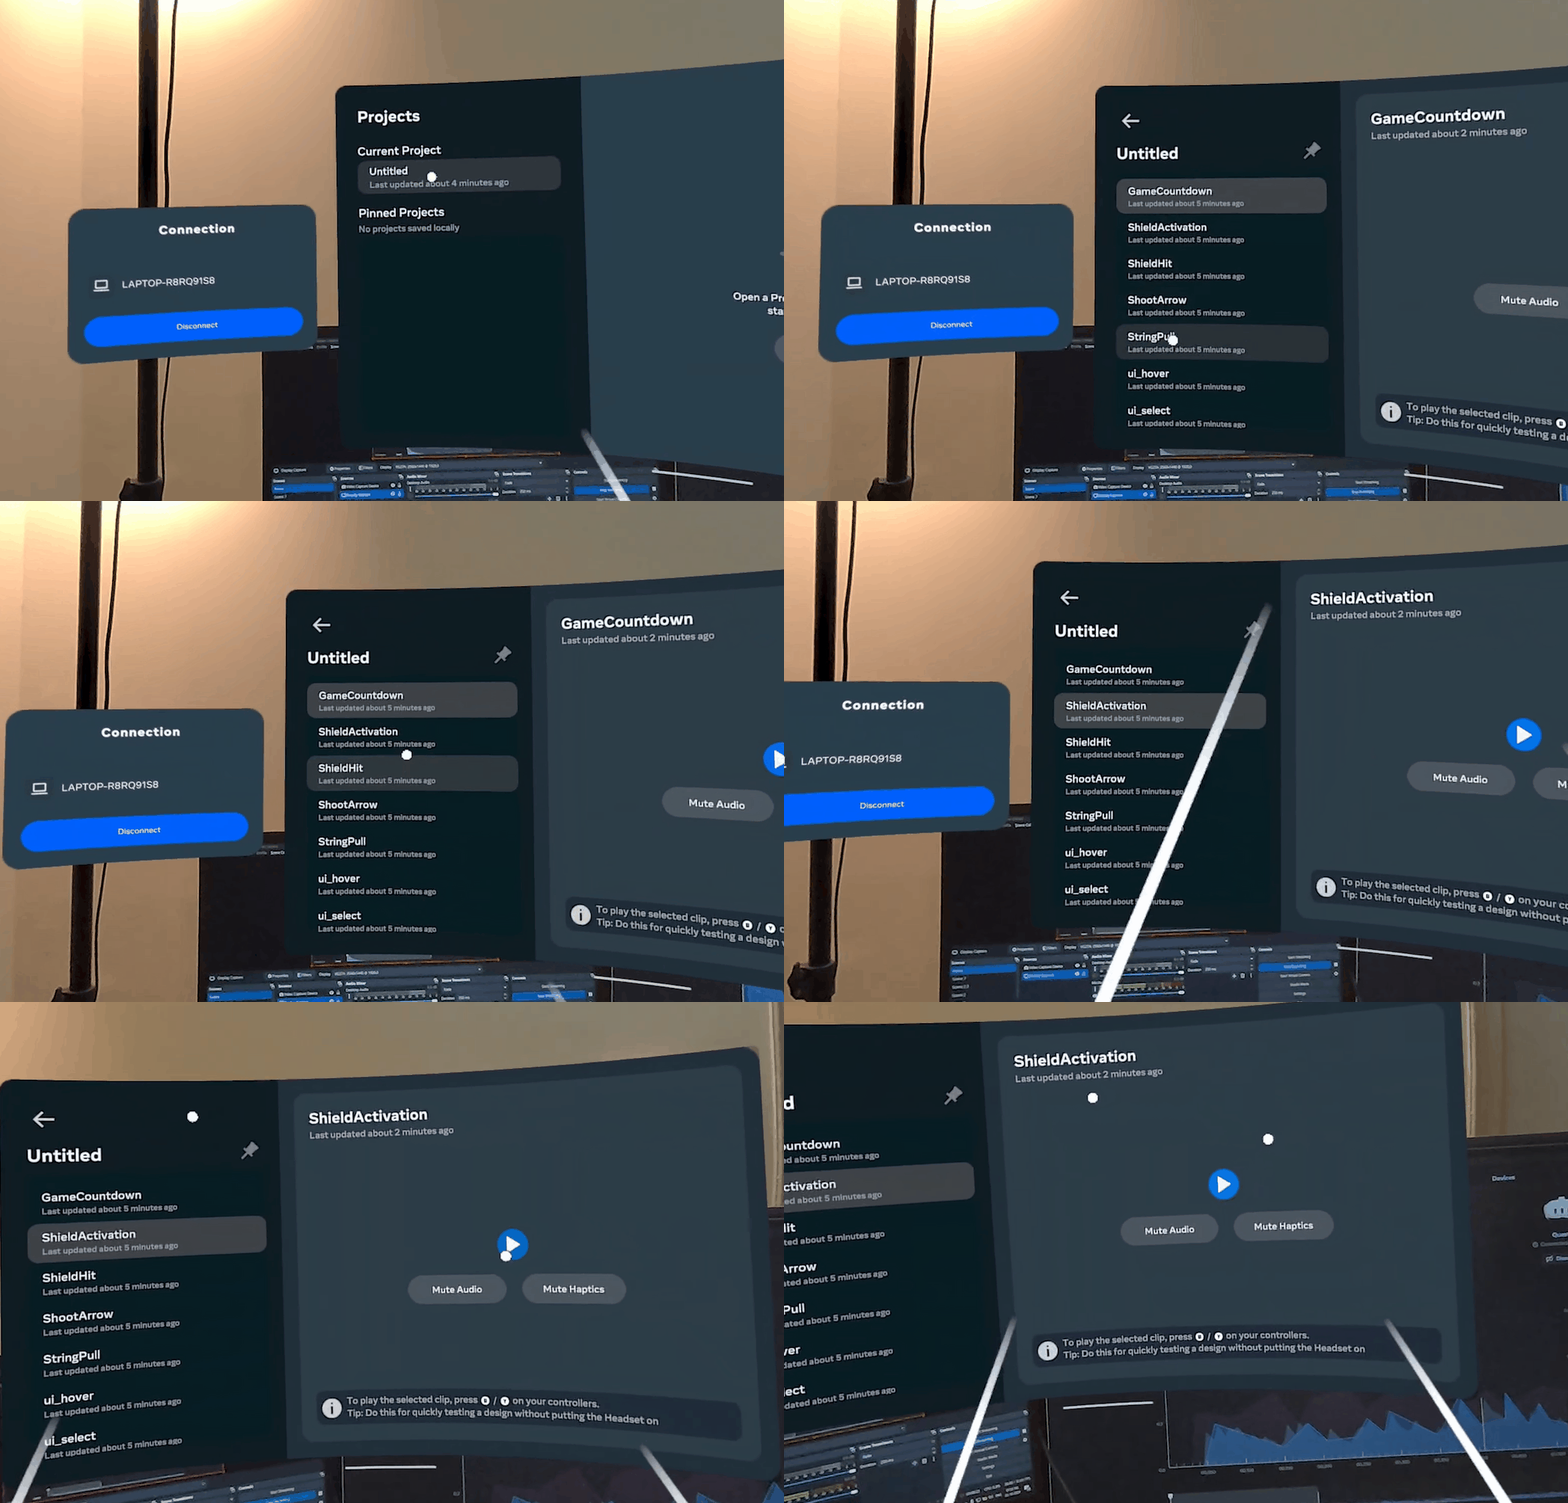
Most of the time the design generated by the software can be used as is. However, if you want to edit or fine-tune the design, you can do so by adjusting the parameters in the Design tab.
You can learn more about it here.
To export the haptics file, select all the clip and click on the Export button at the bottom left corner.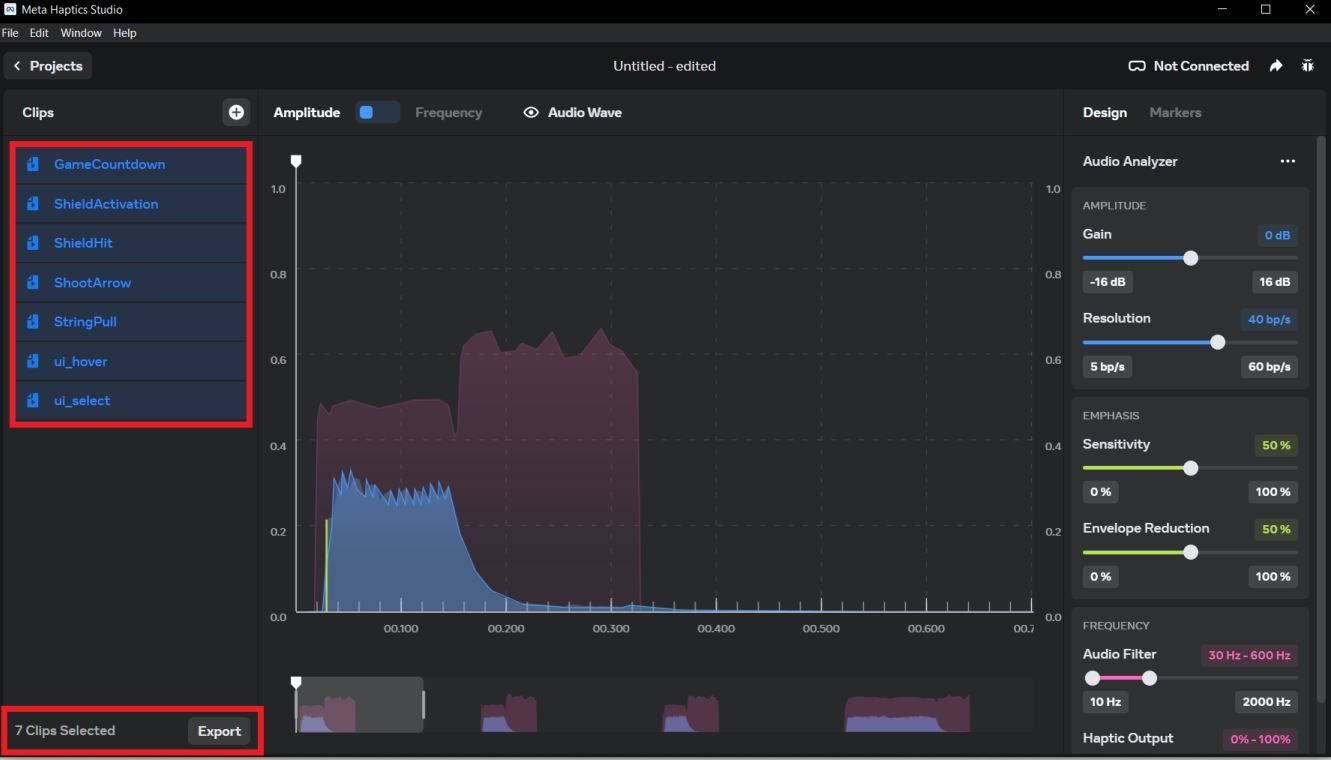
Here you get to choose the format in which you want to export the haptics design.
- .haptics for Quest and other PCVR devices.
- .ahap for iOS integration
- waveform for other platforms that support it like PSVR and Pico.
Since we are targeting Quest and other PCVR devices,Select .haptic file and export it.

-
Start by create a Unity Project, make sure you’re using Unity 2021.3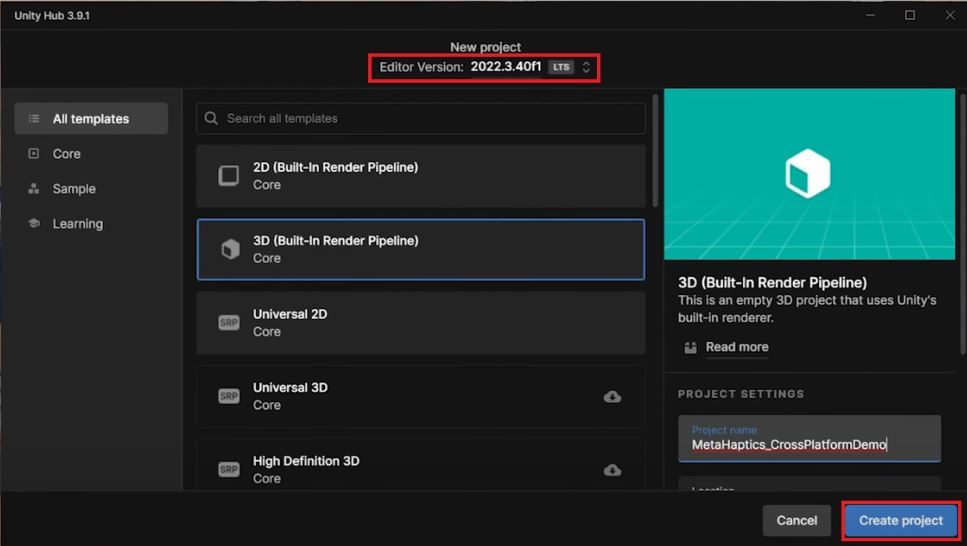
-
To install Haptics SDK, install Meta XR All-in-One SDK from Unity’s Asset Store. Once that’s done, you can see that the latest version of Haptics SDK is installed as well.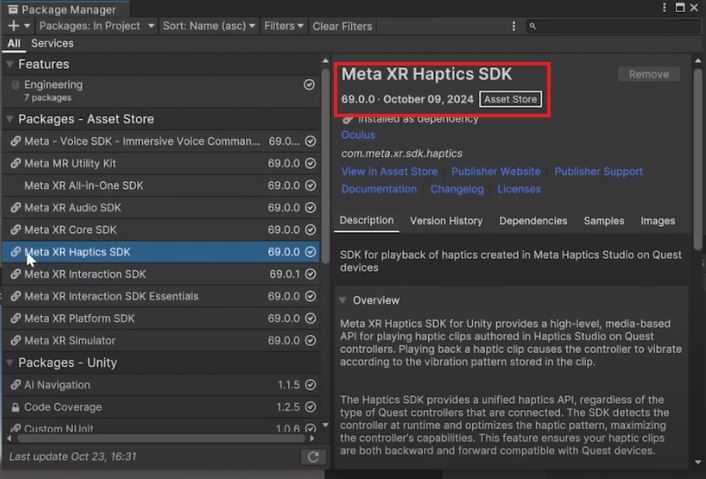
-
There’s one more package that we need and that's the XR Plugin Management. Which you can install from the Package Manager by navigating inside Unity registry.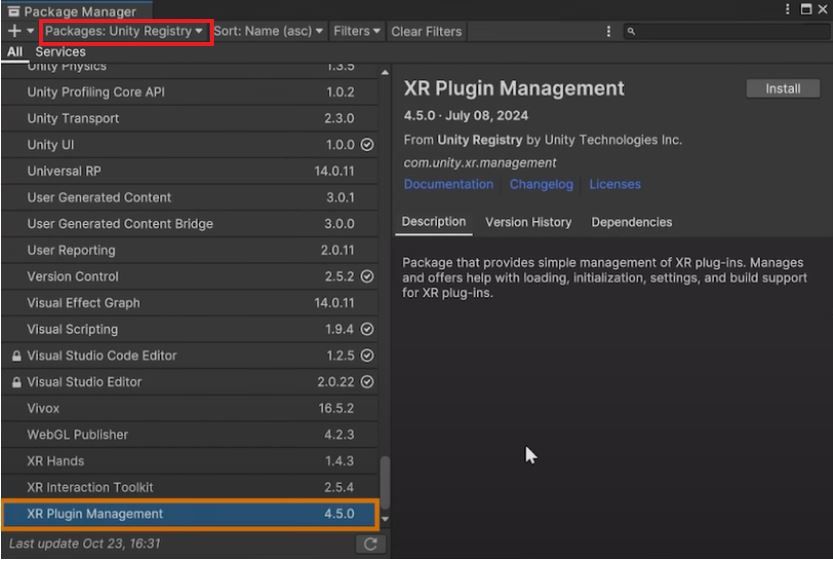
Since the Haptics SDK allows for cross platform integration, we'll first see how to set up our project for the Quest standalone devices and then we'll come back and set up our project for PCVR devices
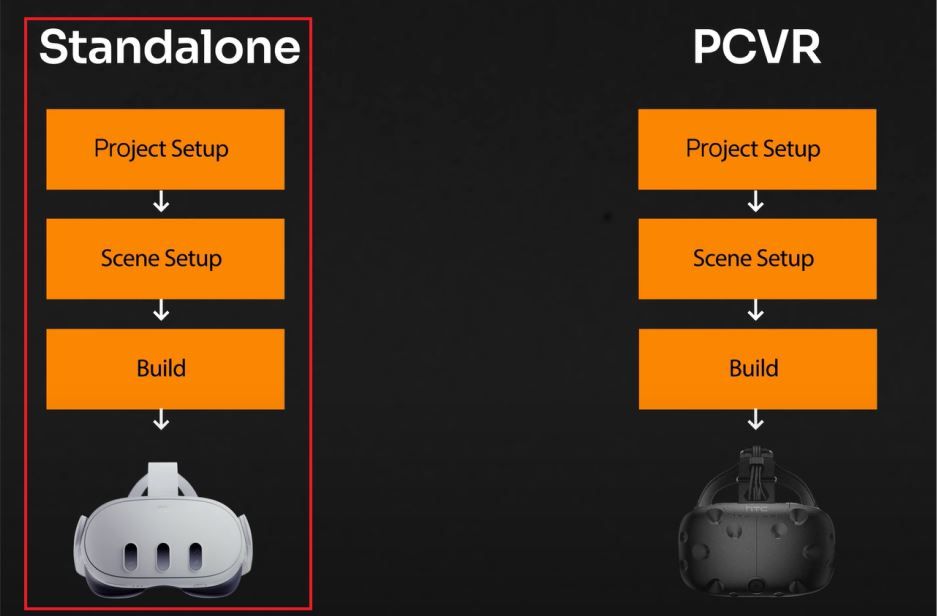
So to set it up for Quest Standalone,
-
Navigate inside File → Build Settings → select Android, and switch the platform.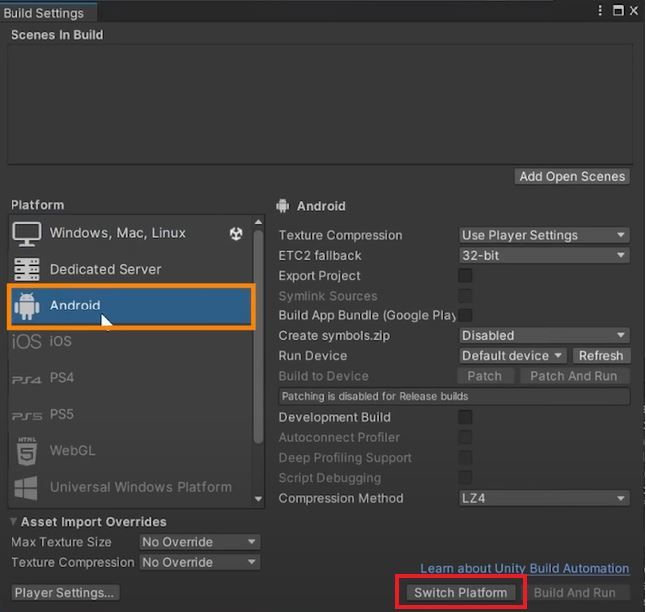
-
Then, navigate inside Player Settings → XR Plug-In Management → select Oculus as the plug-in provider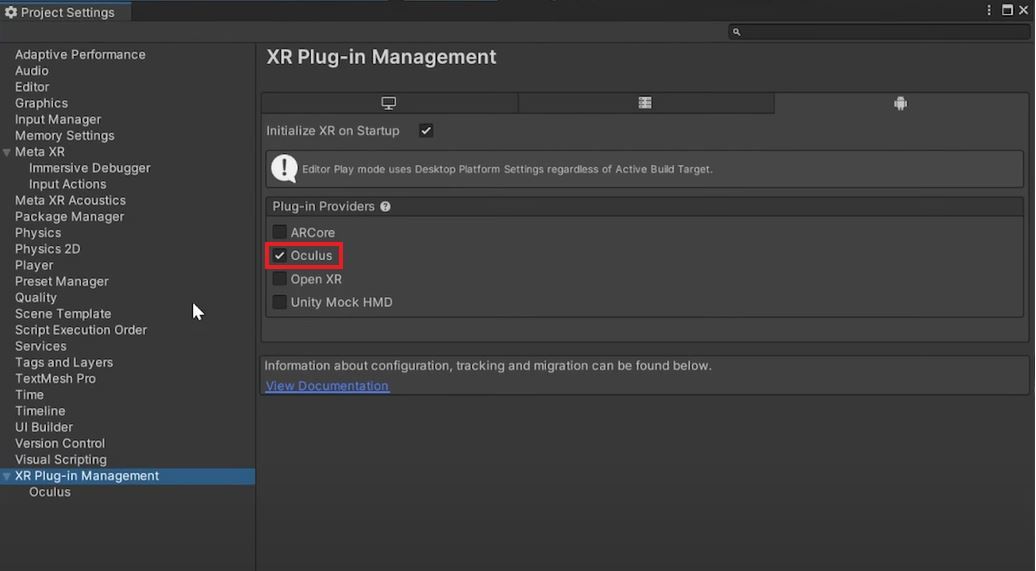
-
Next, navigate inside Meta XR and here it will give you a list of issues which you can fix by clicking on Fix All and it will also give you a list of recommended settings which you can apply by clicking on Apply All.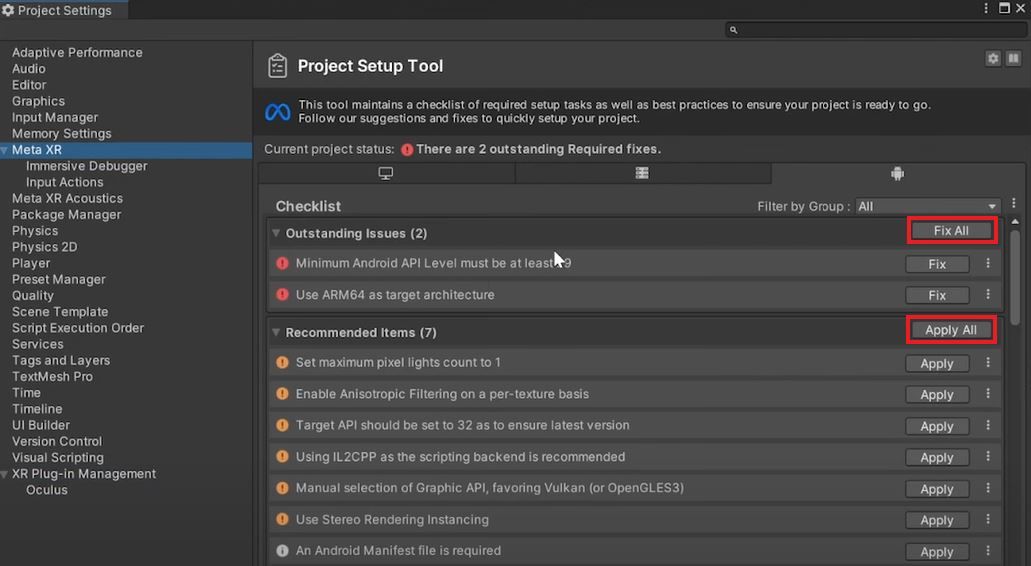
So with that we have our project setup!
Create an empty scene,
-
First select the main camera and delete it.
-
Then right click on your hierarchy navigate inside interaction SDK and add OVR Interaction Rig. Now this prefab comes along with all the components to track our headset, controllers and even read the input values from them.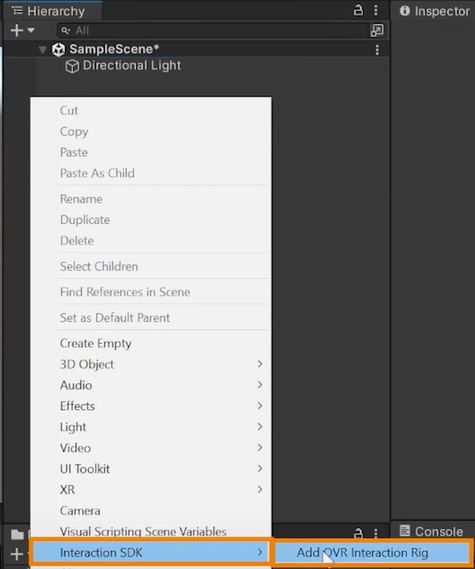
-
Next, download this package → import it into Unity → add it to the scene. This package includes a UI template for testing haptic effects. Select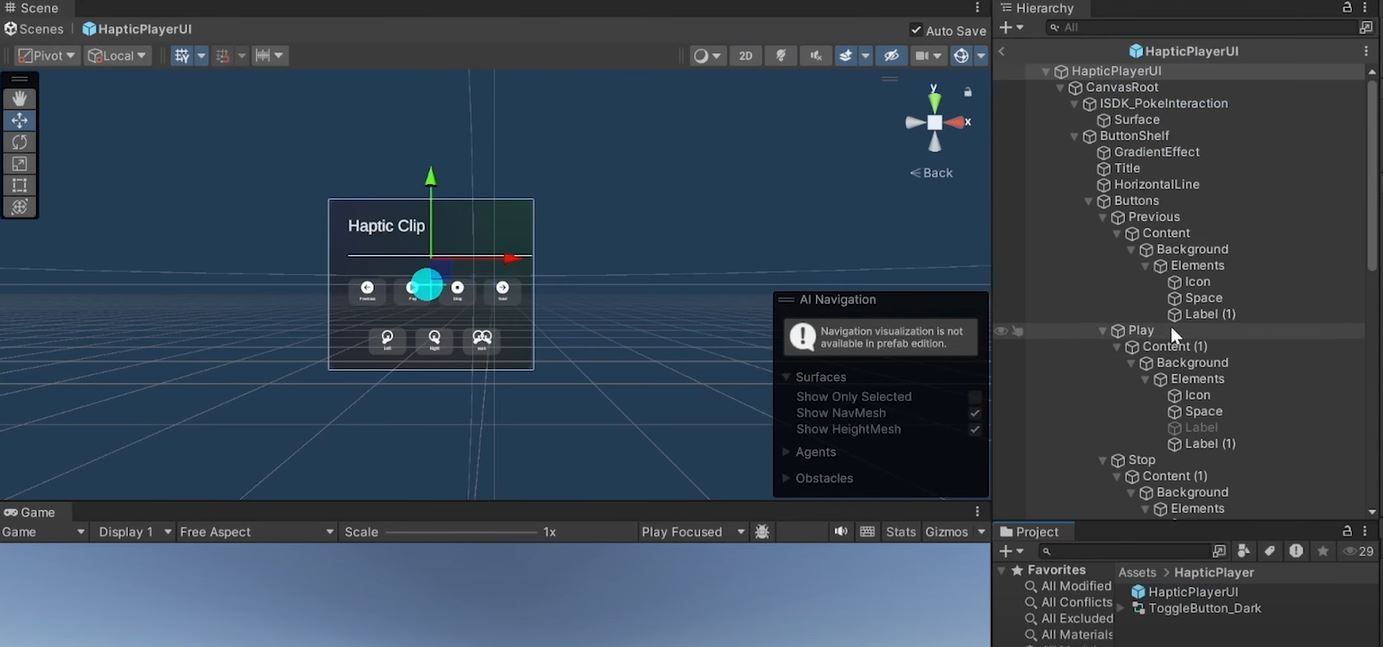
To play the haptic clips we need to write a script. So create a new C# script, name it HapticsDemo and copy the following code:
- The
HapticsDemo script is a Unity C# class that controls both audio playback and haptic feedback using the Oculus Haptics SDK package.
- It defines a list of
HapticNAudio structs, each containing an audio clip and a corresponding haptic clip.
- The script sets up a haptic player for each clip and plays either the audio, the haptic feedback, or both based on user input.
- The
SetupPlayer method initializes the audio source and haptic clip player for a specific clip.
- The
Play, Stop, PlayNextClip, and PlayPreviousClip methods handle the playback and navigation of these clips.
- There are also boolean variables,
leftController and rightController, that let the script determine which controller (left, right, or both) should receive the haptic feedback.
- Additionally, the script has toggle methods to update these controller preferences.
- The script interfaces with Unity’s
AudioSource and Oculus haptic feedback system to synchronize the haptic sensations with audio.
The last few steps here is to Assigning UI Functions.
-
Create an empty GameObject → name it Haptics Demo → add the HapticsDemo script to it.
-
Import the Audio and Haptics Files and reference it inside the Haptics Demo component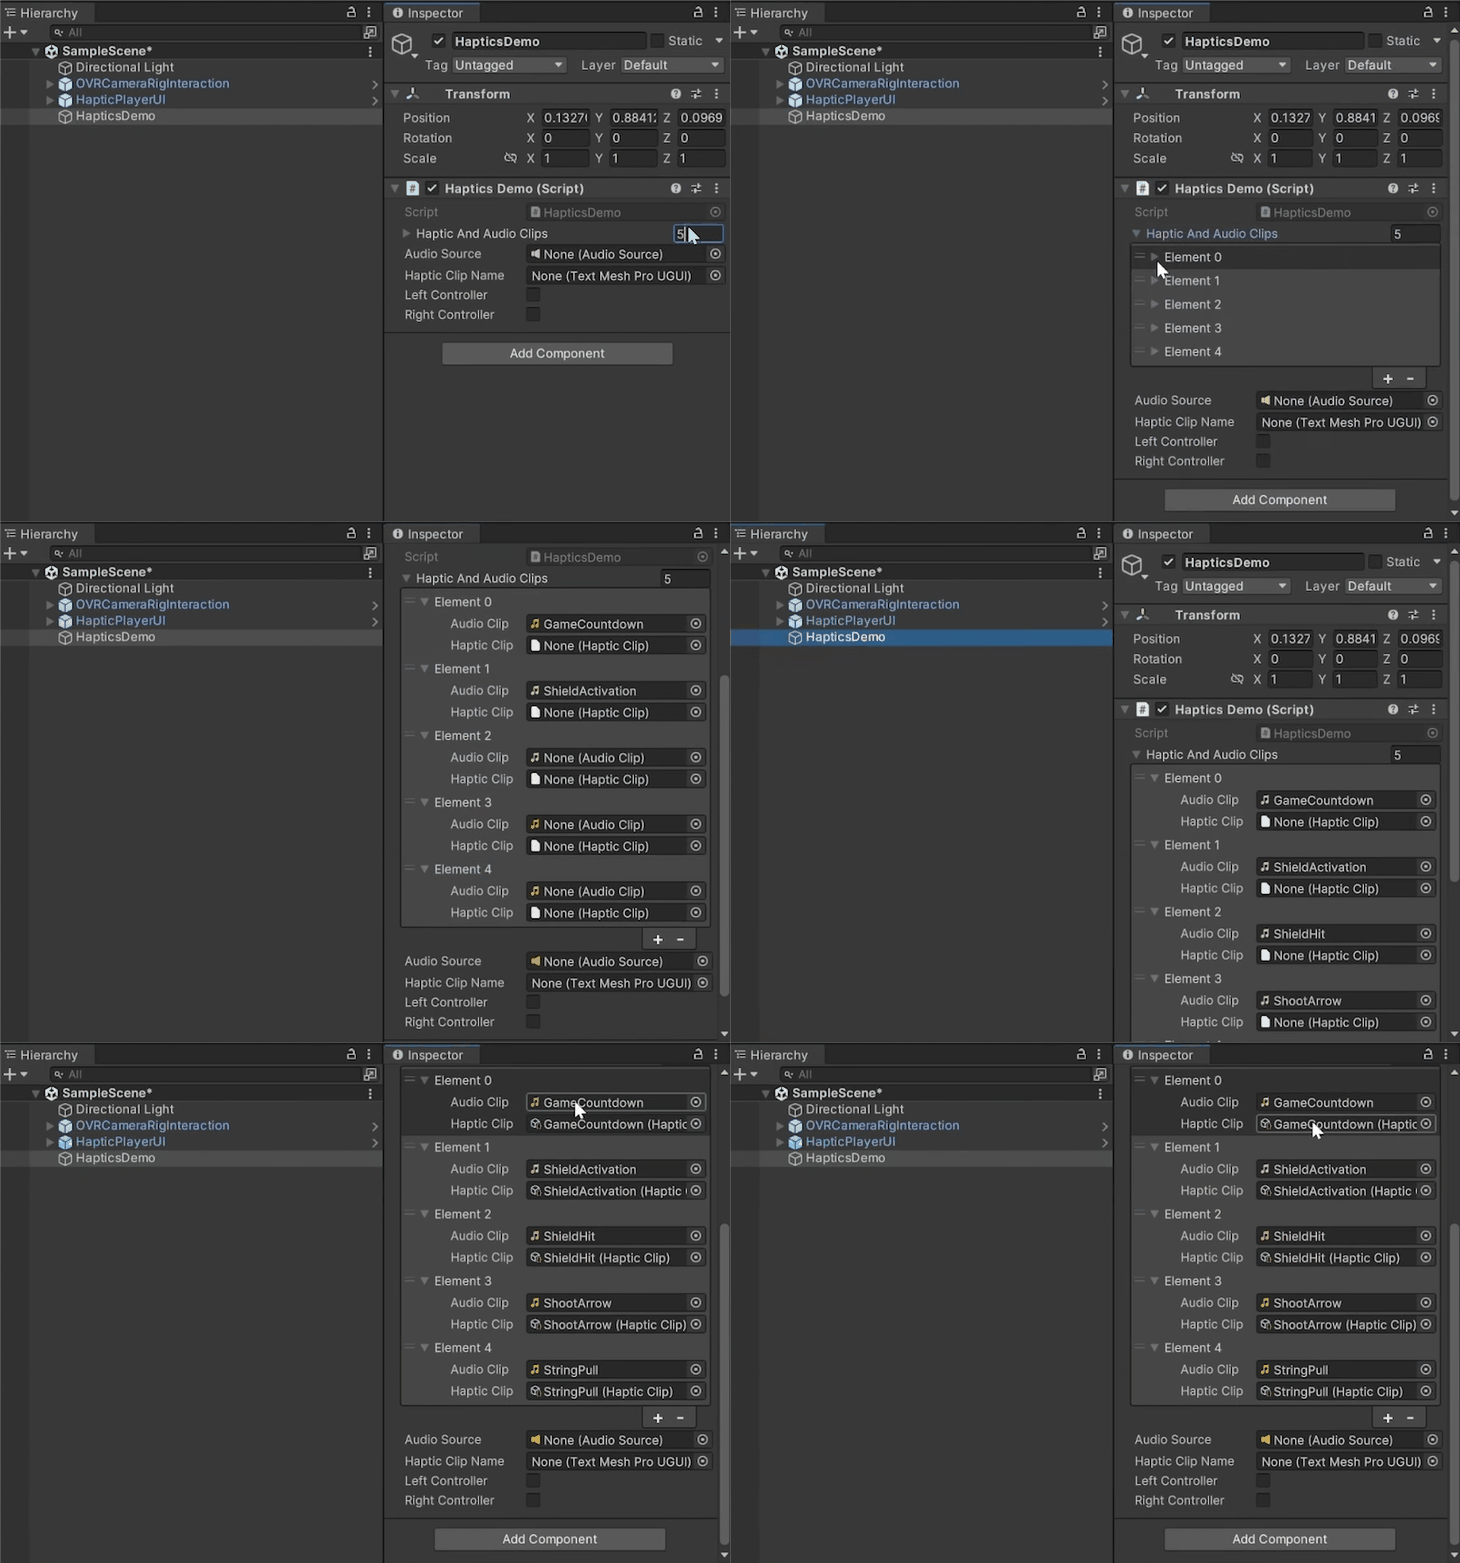
-
Add an Audio Source component and reference it inside the Haptics Demo component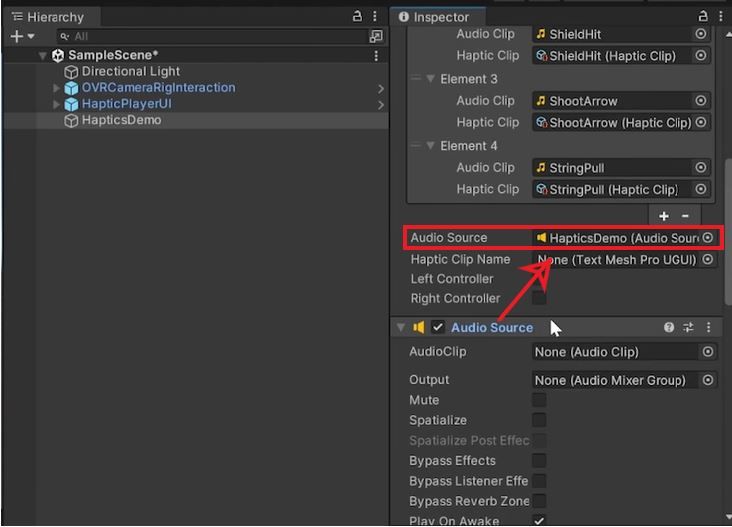
-
Navigate inside HapticPlayerUI → ButtonShelf → Buttons → select all the buttons → add an event to the On Click() event call back list → reference Haptics Demo gameobject.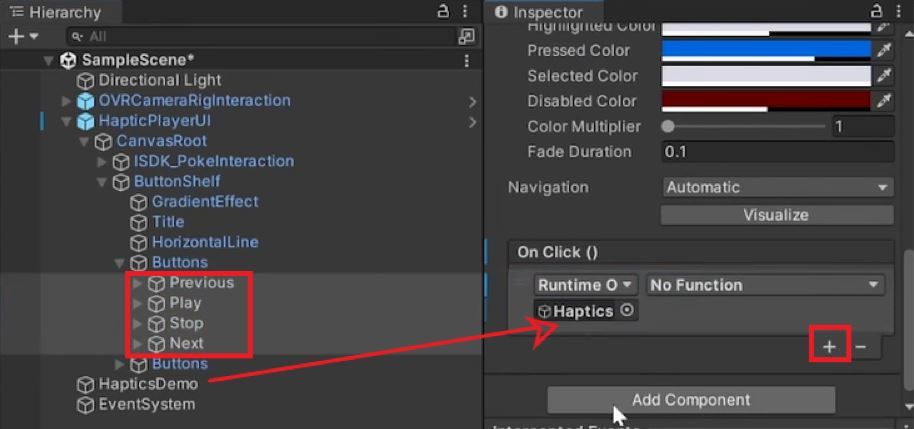
-
Now select each of the button individually and from the drop - down select haptics demo and assign the respective functions.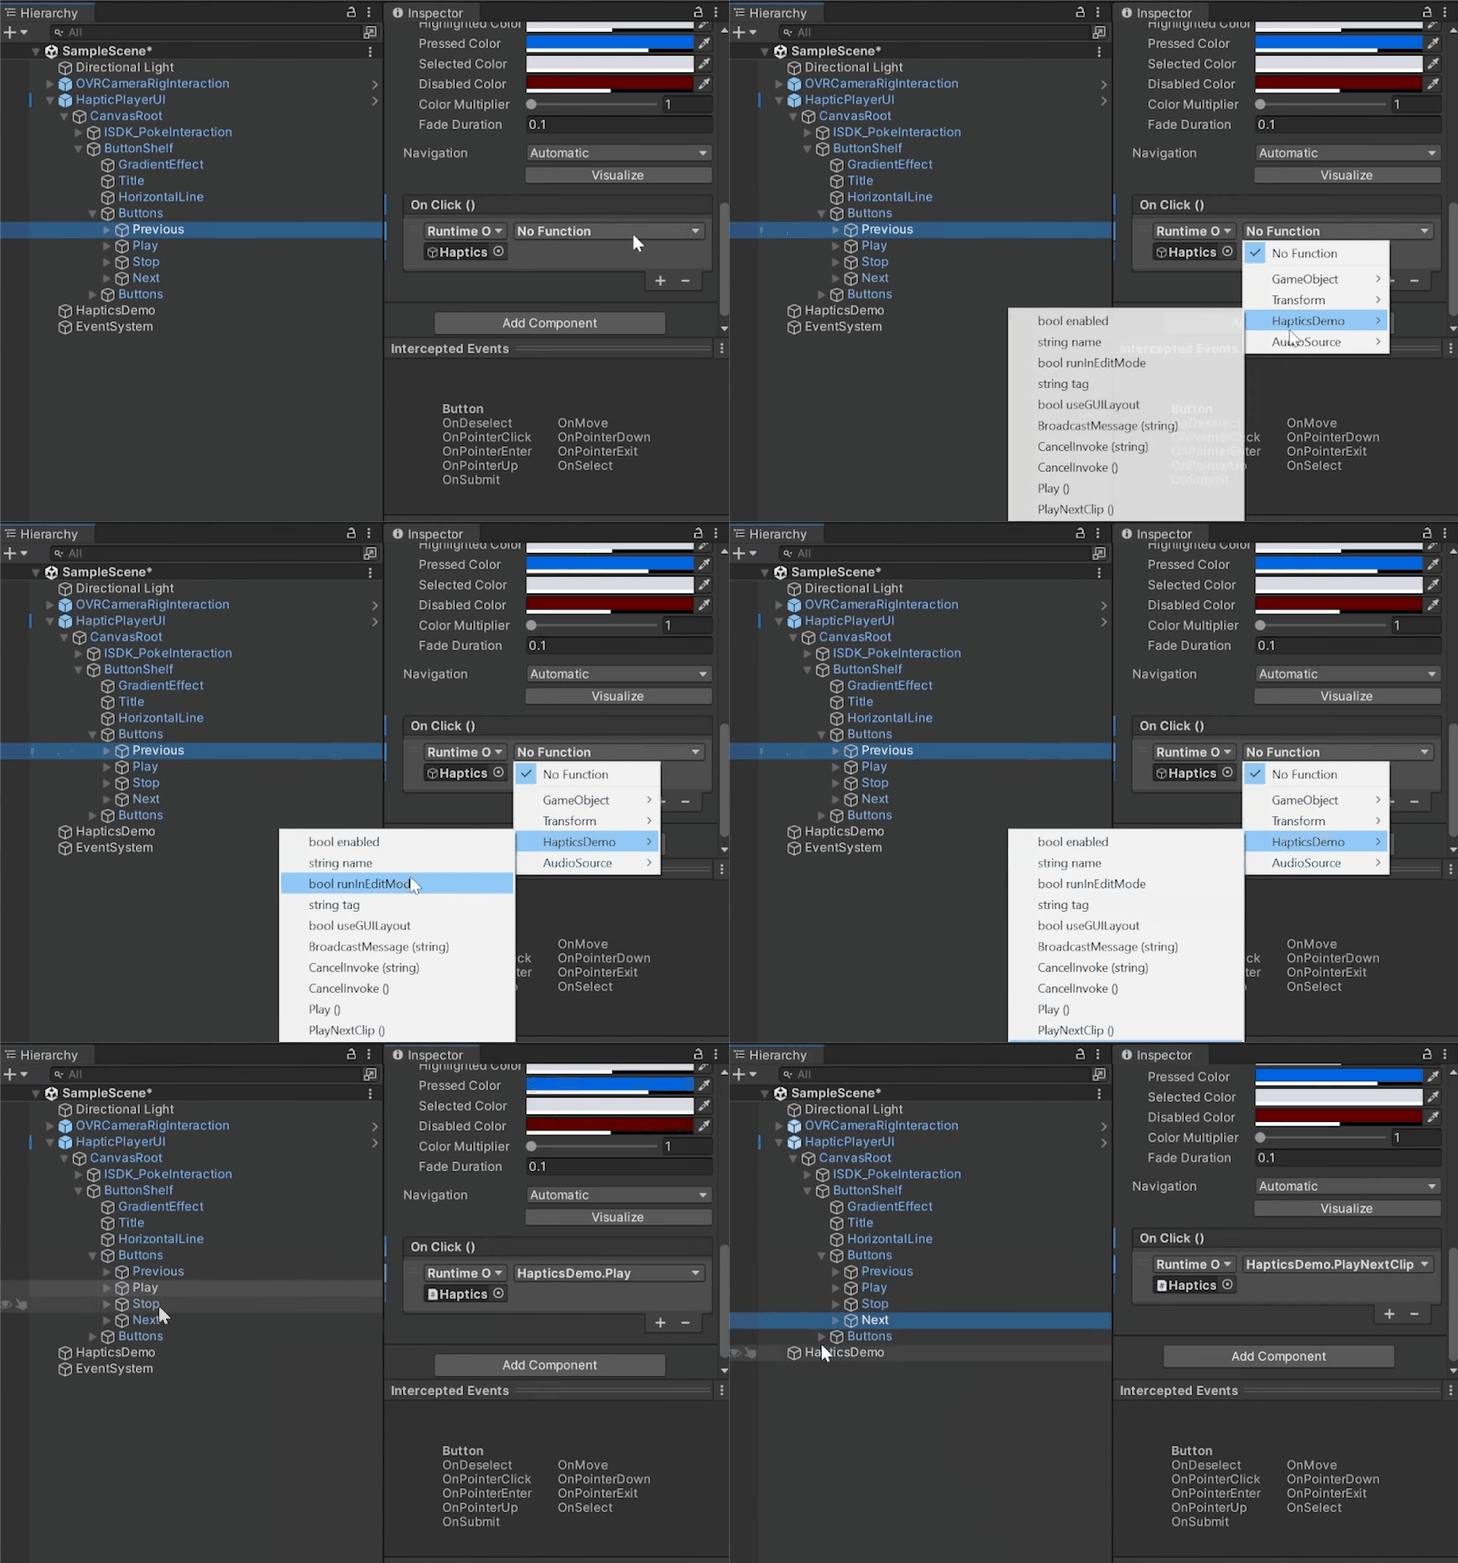
-
Then navigate inside the other Button → select just the Left and Right Controller Toggle buttons → add an event to the On Value Click() event call back list →reference Haptics Demo gameobject.
-
For the Left controller, from the drop-down select Haptics demo and select Toggle Left Controller. Similarly, for the right controller select Toggle Right Controller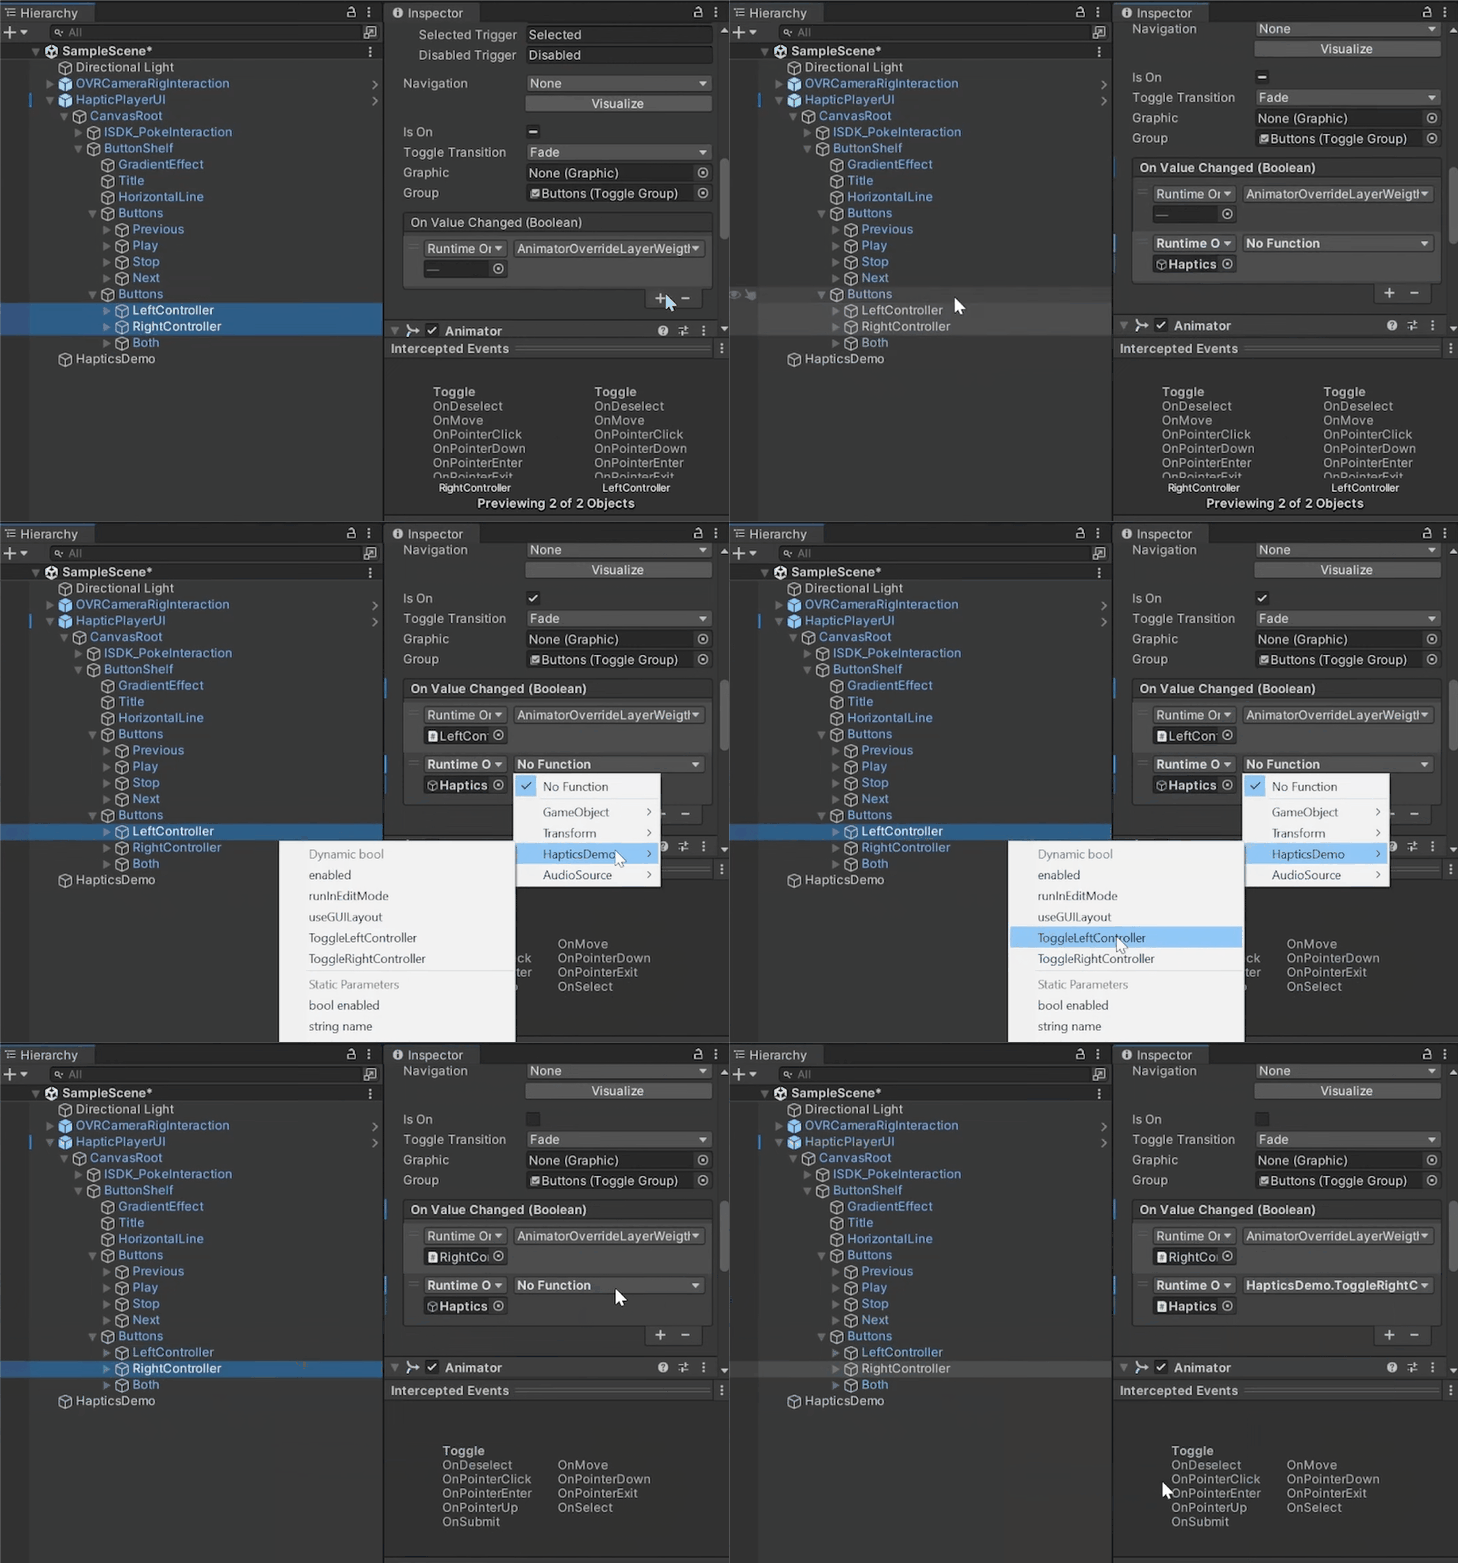
Now to make sure that you can interact with this canvas,
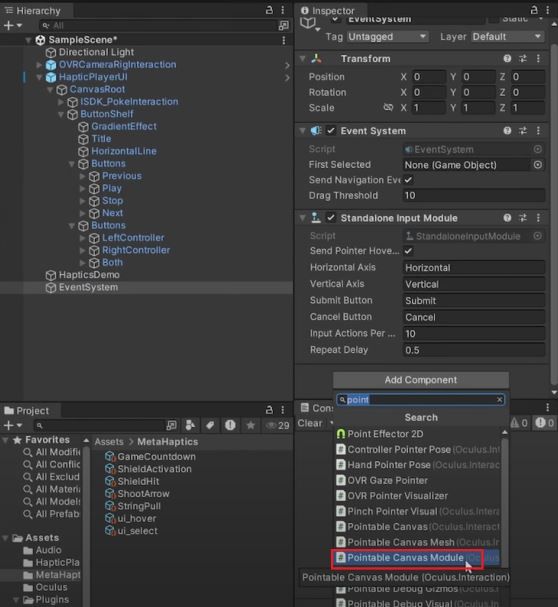
- Right-click on your hierarchy → navigate inside UI → add Event System.
- Then click on add component and add the Pointable Canvas Module component
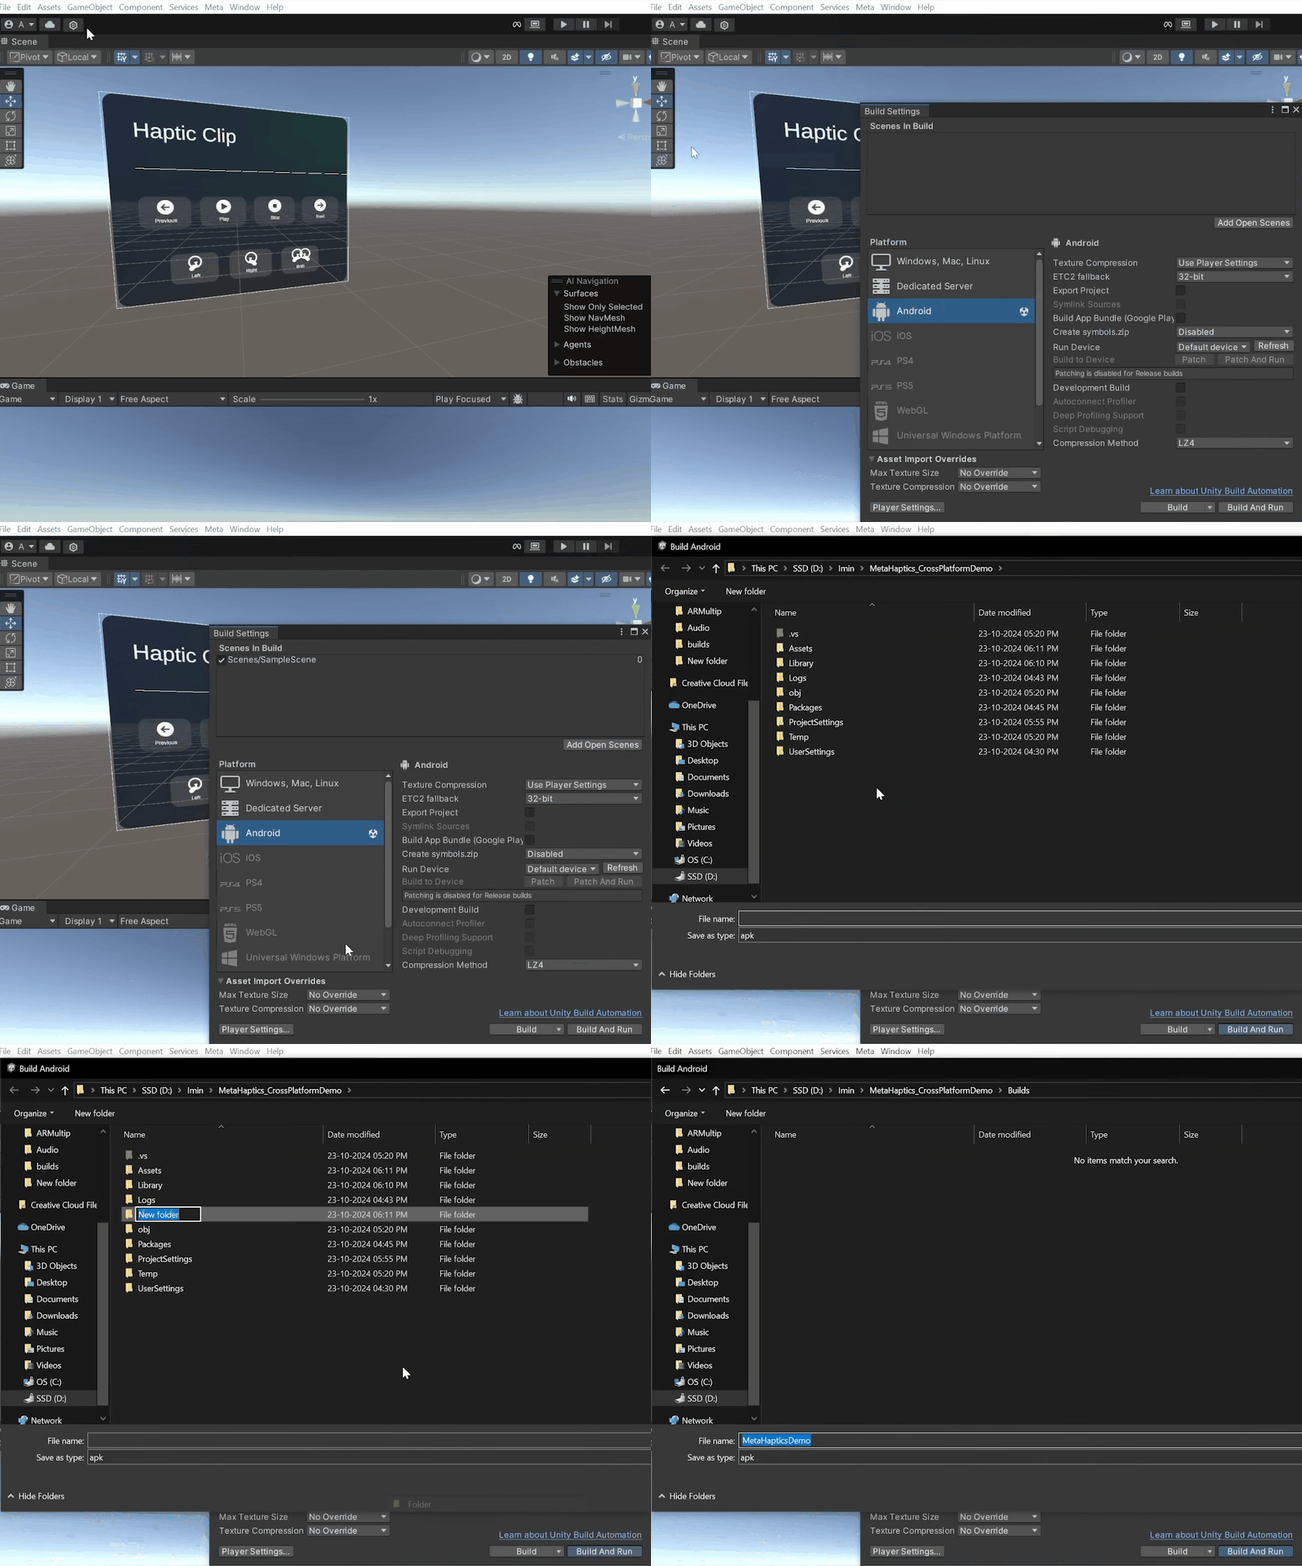
Make sure that your headset is connected to your computer using cable.
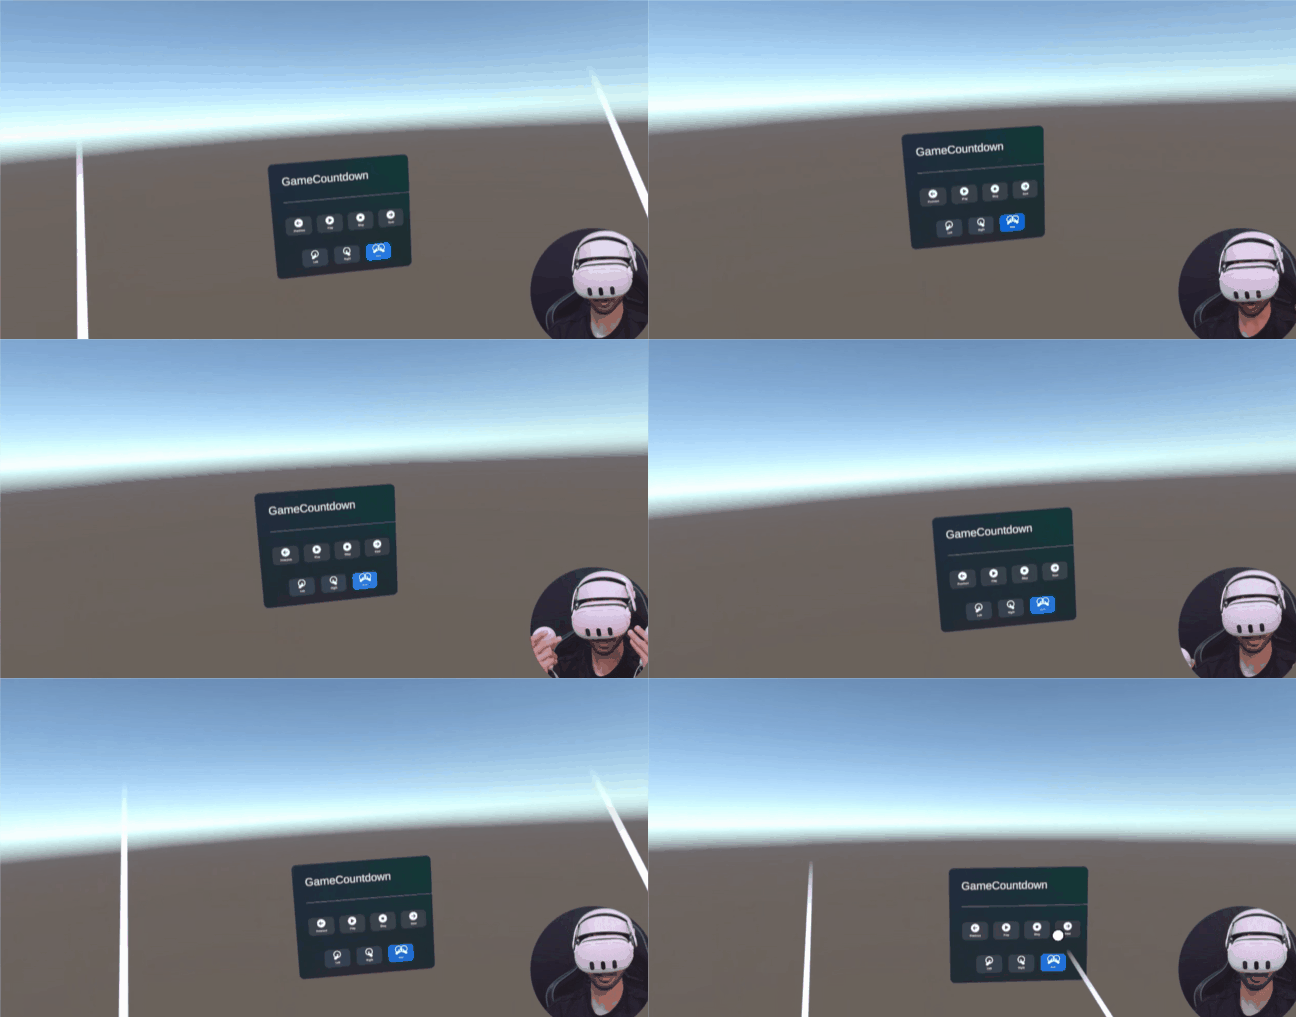
Once the app get’s successfully built onto your headset, test it by interacting with the UI buttons. I’m sure you’ll be able to feel the haptics on your controllers. It’s really amazing to see how well the audio and the haptic files are synced together
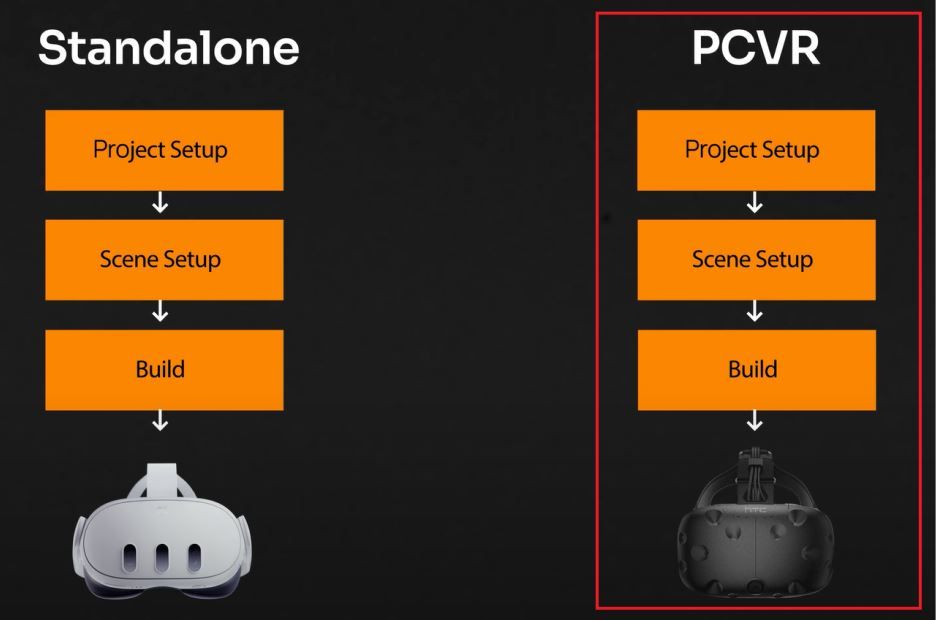
To build this scene for PCVR we don’t have to rebuild the whole experience or write a different scripts, we can just modify the existing project settings and scene.
-
First navigate inside Windows → Package Manager → select Unity Registry and scroll down till you find Oculus XR Plugin and remove it.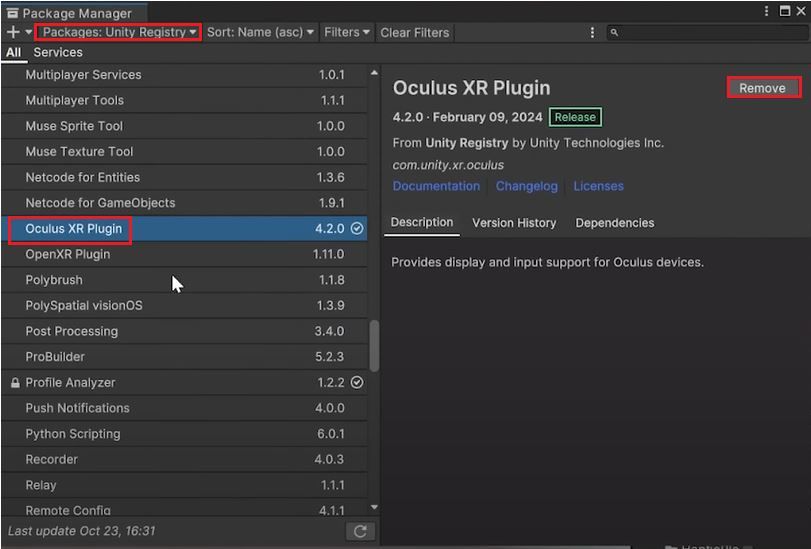
-
Then, select Open XR Plugin and install this package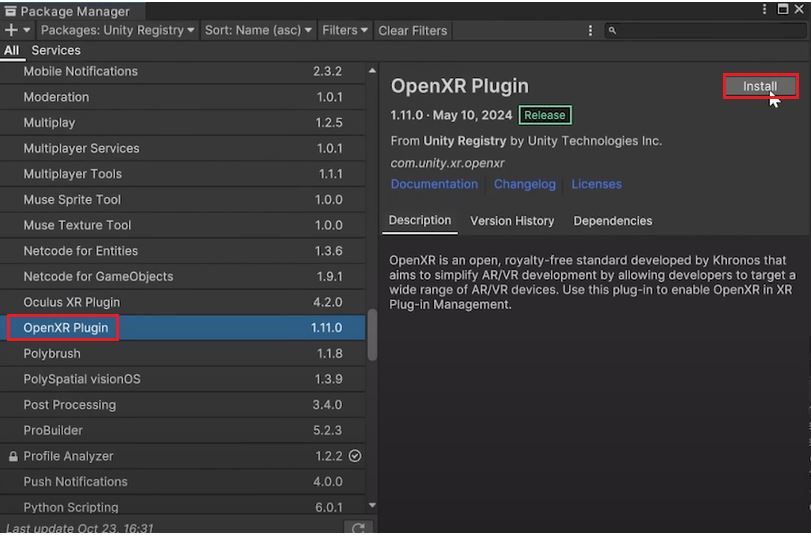
During installation you'll get a popup asking if you want to enable The Meta XR Feature Set click on Cancel .
-
Next, go to File → Build Settings → select Windows as the platform and switch the platform.
-
Then navigate inside Player Settings → XR Plugin Management and select Open XR as the plugin provider.
-
Select Open XR and add some of the interaction profiles like Oculus touch controller profile, Meta Quest Touch Pro Controller profile, HTC Vive controller profile and Valve Index Controller profile
-
Then, go inside the project validation tool, there you’ll see some of the recommended settings and issues which you can fix by clicking on Fix All.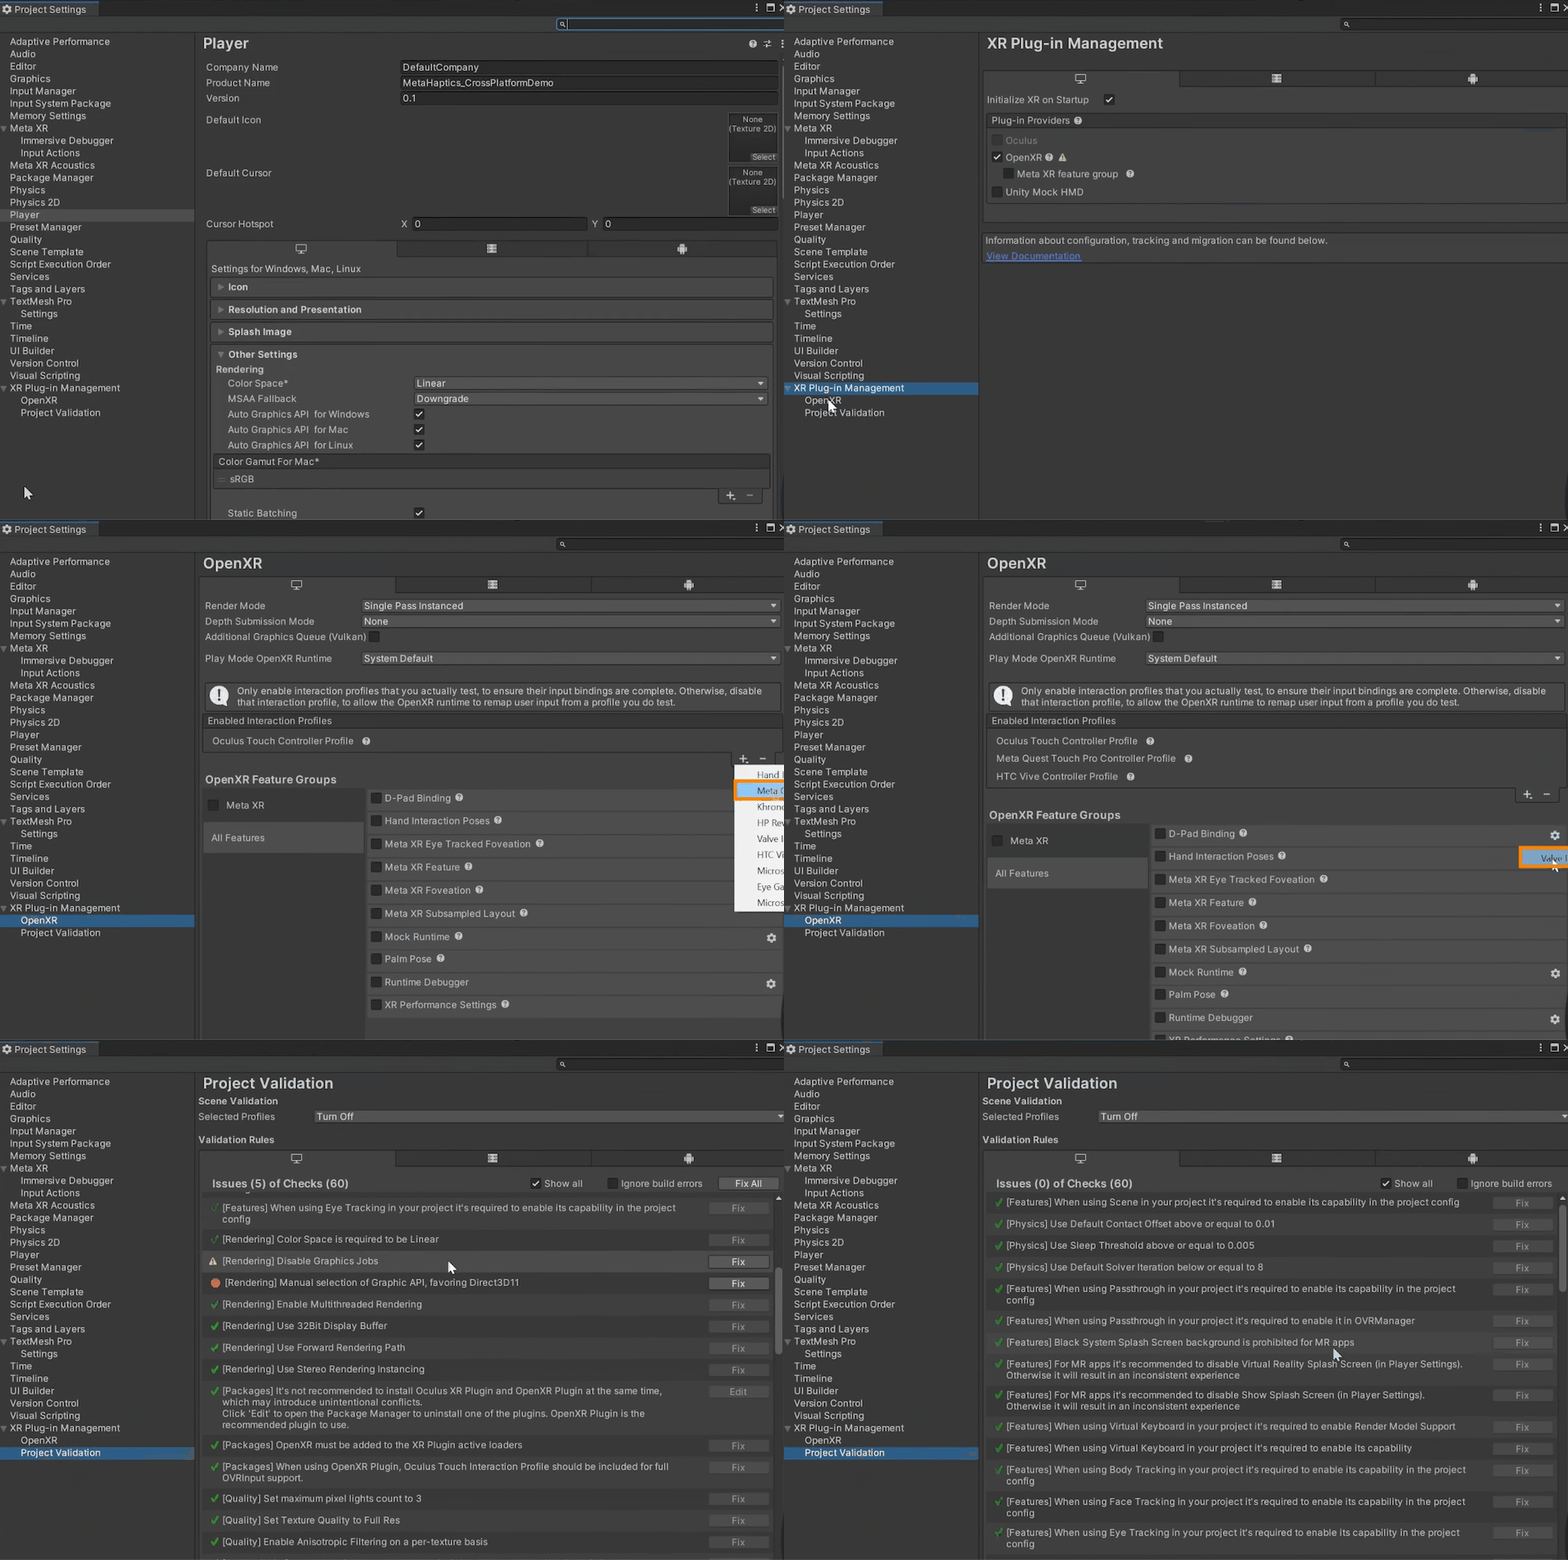
So with that we have set up our project for PCVR
For setting up the scene all you have to do is replace the Quest-specific OVR Interaction Rig with Unity’s XR Interaction Rig prefab.
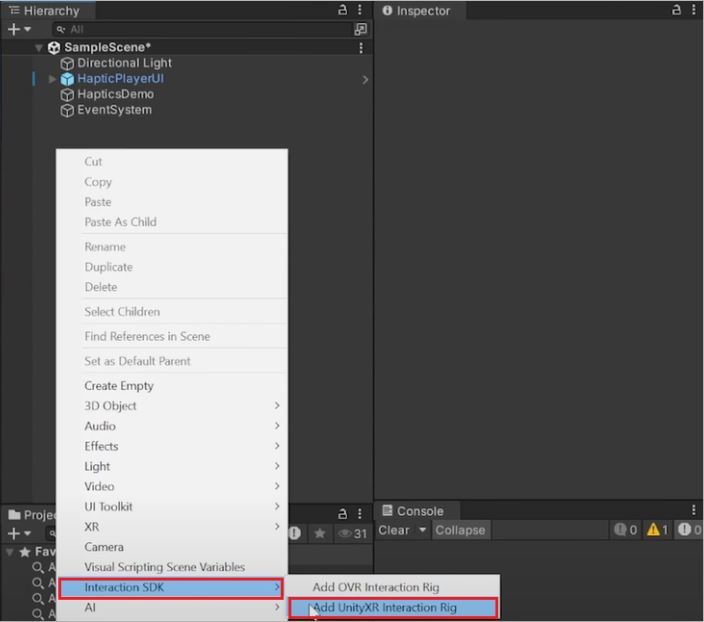
Now to build and test the application,
- Make sure you have you PCVR connected and setup with SteamVR.
- Then navigate inside
File → Build Settings → Add Open Scene → click on Build and Run.
- Create a new folder called as PCBuilds and select that folder as the build location.
Once it’s done building it’ll launch on your headset. You can test it by interacting with the UI buttons like before.
Also, as mentioned earlier, you’ll probably not feel the change in frequency but only the change in amplitude.
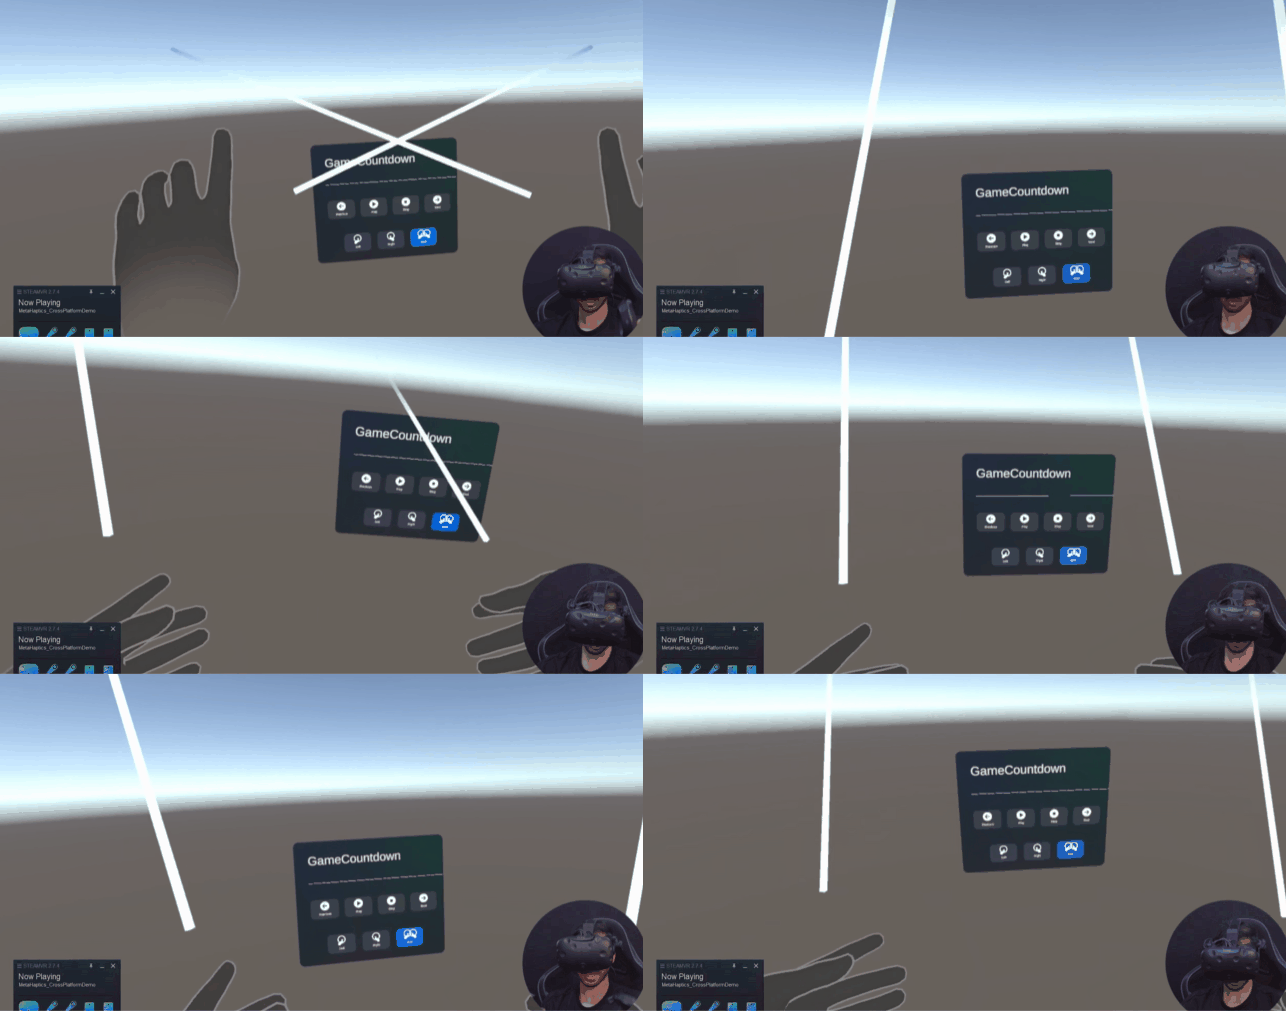
That wasn't so bad right?
You’ve just developed an experience with haptics that works seamlessly on both Quest and PCVR devices! Remember, this is just the beginning.
In the next blogs, we’ll use the Haptic SDK along with the Interaction SDK to create a mini-game.


