
You can now build experiences that work on various VR devices, including Quest devices and other PCVR devices like HTC Vive and Valve Index with just minor differences in the Build settings.
In this Blog, we’ll see how to set up various interactions like Poke, Ray and Grab interaction that work across different platforms.
Cross-Platform Interactions with Meta's Interaction SDK
Why Cross-Platform Matters
Imagine developing your VR experience once and deploying it across multiple platforms without starting from scratch each time for different platforms. For example, you can develop and app and publish on the Meta Horizon Store, and then with minor changes to your project settings, you can build and publish the on Steam as well.
Understanding the Meta Interaction SDK Packages
The Interaction SDK comes in two packages: the essentials, which support devices using OpenXR, and the Core package for Quest devices. This dual-package approach ensures you can build for a wide range of VR headsets while leveraging device-specific features like passthrough and hand tracking.
1.0 Developing for Standalone Quest Devices
1.1 Getting Started with Unity and Importing Packages
-
First things first, let's set up your Unity project. Make sure you're using the latest version of Unity Editor. For this blog, we are working with version
2022.3.40f1with the 3D Core Render Pipeline.
-
Once your project is ready, head over to Unity's Asset Store and search for
Meta Interaction SDK. Add it to your assets and install it in your project.
-
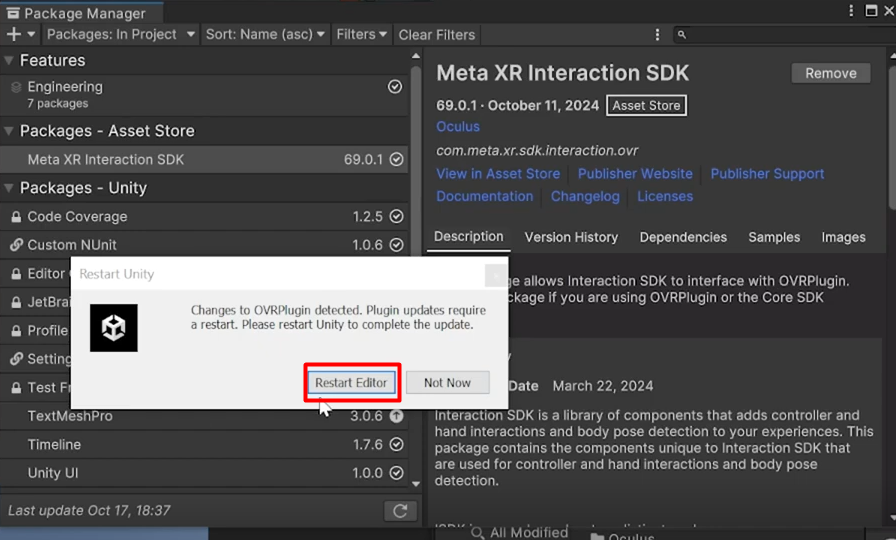
While importing you see a pop to restart the editor, restart the editor to add the detected changes.
-
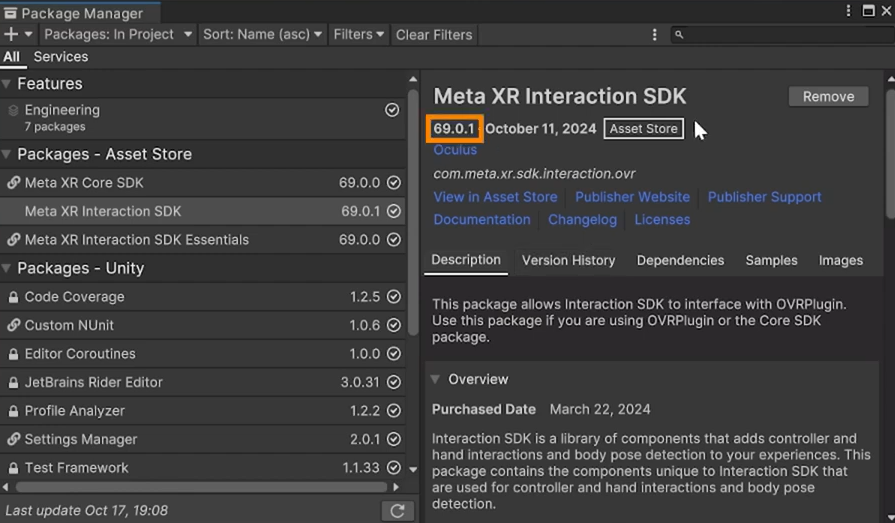
Once you install it and restart the editor, you will see the latest version of the Interaction SDK is installed, along with the essentials and core SDK
-
Next, we need to install one more package to manage the plugins, so navigate inside
Unity Registry→ selectXR Plugin Management→Install.
1.2 ISDK Package Folder Structure
Meta XR Interaction SDK Essentials→Runtime→Prefabs
In the Runtime folder, you'll find the Prefab folder for common VR interactions, such as hand models, controllers, and interactive objects. These prefabs simplify the development process by providing ready-to-use components that can be customized to fit your specific needs.Meta XR Interaction SDK Essentials→Runtime→Sample→Prefabs
If you are looking for the whole interactions like Poke Interaction and Menu or Poke ButtonsMeta XR Interaction SDK Essentials→Runtime→Sample→Objects
If you are looking for assets or prefabs of room environments or props
1.3 Configuring Project Settings
-
Navigate to
File→Build Settings→ SelectAndroid→Switch Platform
-
Go to
Player Settings→XR Plugin Management→ Make sure you are on theAndroidtab → InstallOculusfrom Plugin Providers -
Go to
Meta XR→Fix Allthe errors → thenApply Allthe changes
1.4 Setting Up the Scene
-
Go to
Meta XR Interaction SDK Essentials→Runtime→Sample→Objects→ drag and drop theLargeRoomPrefab into the Hierarchy window.Import TMP Essentialswhen prompted. -
Then go to
Meta XR Interaction SDK Essentials→Runtime→Sample→Materials→ drag and drop theSkyboxGradientMaterial into the Scene.
-
Then, delete the
Main Cameraand now there are two ways in which you can add theOVRCameraRig.-
Navigate inside
Meta XR Interaction SDK Essentials→Runtime→Prefabs→OVRCameraRigInteraction
-
The other way to do this would be to
Right Clickon the Hierarchy Tab →Interaction SDK→Add OVR Interaction Rig
The 2nd method was much simpler right? That’s a feature of the ISDK called “Quick Actions”. We’ll be making use of the quick actions to add various types of interactions later on.
-
-
Now the
OVR Interaction Righas been preconfigured with different type of interactors. So for use to be able to create an interaction, we just need to add the interactables.
Before that, navigate insideMeta XR Interaction SDK Essentials→Runtime→Sample→Objects→Props→ Add each of the following objects which we'll use for the creating various interactions:Grab Interaction(Mug)Ray Grab Interaction(Guitar)Distance Grab Interaction(Key)
1.5 Grab Interaction
Now we are going to add the interaction on the object and for Grab Interaction we are using the Mug
-
Right Clickon the Mug in theHierarchytab →Interaction SDK→Add Grab Interaction
-
The Grab Wizard appears and you can choose different configurations such as, how to interact with the interactors, which grabs types you would like to use and generates colliders if they are missing.
-
You can also add all the required components like
Rigidbodyand Target Transform usingFix All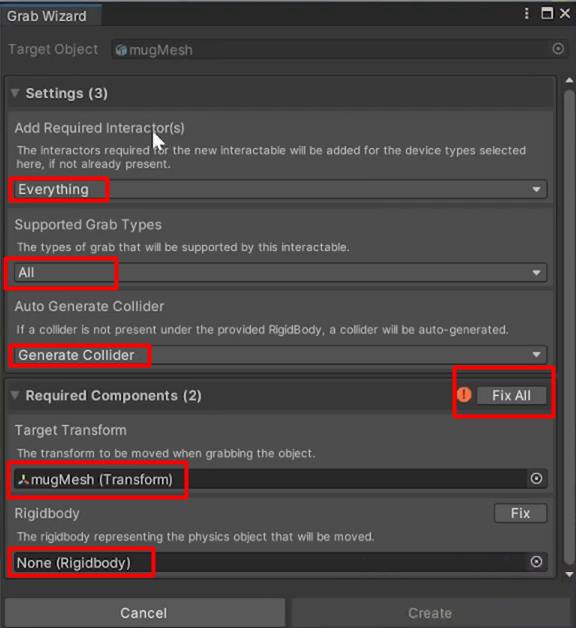
-
Nex, click on the Create button and this will create a new GameObject named
ISDK_HandGrabInteractionwith all the components required for grabbing.
Note: To add physics to the object → Select the Object →
Box Collider→ Uncheckis Trigger→RigidBody→ CheckUse Gravity→ UncheckIs Kinematic
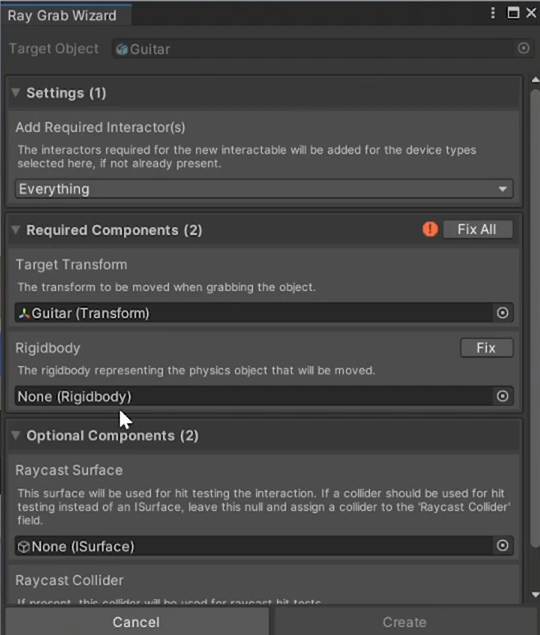
1.6 Ray Grab Interaction
Now to add Ray Grab Interaction,
-
Right Clickon the Guitar in theHierarchytab →Interaction SDK→Add Ray Grab Interaction
From the Grab Wizard you can choose different configurations once again.
-
Note that there is an error at the top regarding the collider but if you click on Fix, it will add a box collider which is not suitable for the Guitar’s curves and structure, therefore, we use Select the Guitar →
Add Component→Mesh Collider.
-
When you click on Create , it creates a new GameObject named
ISDK_RayGrabInteractionwith all the components and references.
Differences between Ray Grab Interaction and Distance Grab Interaction:
- Visual Feedback: Ray grab typically involves a visible ray, whereas distance grab might not show a direct line but uses visual cues like highlighting or outlines.
- User Experience: Ray grab can feel more like remote controlling, while distance grab provides a more direct, tactile interaction experience, as you can grab the object and once you leave it, it returns back to its original position.
- Applications: Ray grab is often used for UI and precise selections, while distance grab is favored for immersive and interactive environments.
1.7 Distance Grab Interaction
Now we are going to add the interaction on the object and for Distance Grab Interaction we are using the Key
-
Right Clickon the Key in theHierarchytab →Interaction SDK→Add Distance Ray Grab Interaction
-
The Grab Wizard appears and you can choose different configurations as how to interact with the interactors, which grabs types you would like to use and generates colliders if they are missing. There is also Optional Components like Time Out Snap Zone which snaps the object back to its original position when ungrabbed.
-
Click on Create and it creates GameObject named
ISDK_DistanceHandGrabInteractionwith all the components and references.
1.8 Interacting with UI Elements using UI Ray Interaction
Now we see how to interact with UI elements using Ray Interaction:
-
First we need to create a canvas →
Right Clickon theHierarchyTab →UI→Canvas→Render Mode=World Space→ Reset its position toX=0,Y=1.1,Z=0.8→ Scale it toX=0.001,Y=0.001,Z=1
-
Next we add a panel to the canvas,
Right Clickon theCanvasin theHierarchyTab →UI→Panel, then we change its color slightly darker and increase itsAlpha Channel
-
To add the UI Elements, we go to
Packagesin theProjectTab →Meta XR Interaction SDK Essentials→Runtime→Sample→Objects→UISet→Prefabs→Button→ Then we choose some buttons, drop down list and slider
-
To interact with these elements, first we can use
UI Ray Interaction→Right Clickon the Canvas in theHierarchytab →Interaction SDK→Add Ray Interaction to Canvas→ There is a component missing calledPointCanvasModule→ Click onFixto add it to the scene in theEventSystem→ clickCreate
-
Now when you click on create it creates a new GameObject named
ISDK_RayInteractionwith all the components and references.
1.9 Interacting with UI Elements using Poke Interaction
-
To interact with the canvas created above using Poke Interaction,
Right Clickon the Canvas in theHierarchytab →Interaction SDK→Add Poke Interaction to Canvas→ clickCreate.
-
Click on the create button and this creates a new GameObject named
ISDK_PokeInteractionwith all the components and references. -
We just need to move the canvas a little bit forward to be in arms-reach for poke interaction, then we save and play the scene
1.10 Building the Scene for Standalone Applications
To build it as a standalone application, we navigate to File → Build Settings→ Add Open Scenes → Build and Run → Create a folder called Builds → Name your project → Save
2.0 Developing for PCVR
2.1 Setting Up the Project Settings
-
Navigate to F
ile→Build Settings→ SelectWindows→Switch Platform -
Go to
Player Settings→XR Plugin Management→ Make sure you are on theWindowstab → UncheckOculusand CheckOpenXRfrom Plugin Providers -
When you get an option to enable feature set →
Cancel -
In the Project Validation Tab, you'll see a caution not to use OpenXR and Oculus XR Plugin at the same time, so to fix that click on Edit →
Remove Oculus XR Plugin→ Return to the project validation→FIX ALL
-
Next, head to
OpenXR→ Add some of theInteraction Profileslike:Oculus Touch Controller ProfileMeta Quest Touch Pro Controller ProfileValve Index Controller ProfileHTC Vive Controller Profile
2.2 Setting Up the Scene
- First, we delete the OVR Camera Rig.
Right Clickon the Hierarchy Tab →Interaction SDK→Add UnityXR Interaction Rig
2.3 Building for PCVR
To build it for PCVR , we navigate to File → Build Settings → Add Open Scenes → Build and Run → Create a folder called Builds → Name your project → Save

3.0 Hand Interaction
Hand Interaction can still be done across platforms but since HTC Vive does not support hand interaction we are only doing it on Quest 3 in this project.
- Navigate to
file→Build Settings - Go to
Player Settings→XR Plugin Management→ Check theMeta XR Feature Group - In
OpenXR→ AddHand Interaction Profile→ AddFeature GroupsHand Interaction PosesHand Tracking SubsystemMeta Hand Tracking Aim
- Head to the scene →
UnityXRCameraRigInteraction→UnityXRInteractionComprehensive→ DisableUnityXRControllerHands - Navigate to
File→Build Settings→Add Open Scenes→Build and Run→ Create a folder calledBuilds→ Name your project →Save
- Open
SteamVR→ Make sure you are using the latest version →Launch→Settings→Current OpenXR Runtime = SteamVR→Meta Plugin Compatibility = ON
Then, open the Steam Link in the Quest → Link it to your laptop → now you can use Hand Interaction in your app when you launch it.
Conclusion
With Meta's Interaction SDK, developing cross-platform VR experiences has never been easier. By following these steps, you can create interactive and immersive content that works seamlessly across various devices. Don't forget to explore the SDK's samples and try building them yourself to deepen your understanding.
Thank you for joining us on this journey to mastering cross-platform interactions. Stay tuned for more tutorials, and happy developing!
