
Want to watch the video instead?
1. Prerequisites
There are only two things you need to make sure of:
- The minimum version of Unity has to be 2019.4.x (tested with 2020.3.32f1)
- The firewall on your machine has to be disabled or you can open the firewall for the TCP port 9999.
2. Setting Up Project For AR
2.1 Downloading and Installing Toolkit
Let’s begin by downloading and installing MRTK in our project as it supports HoloLens 2.
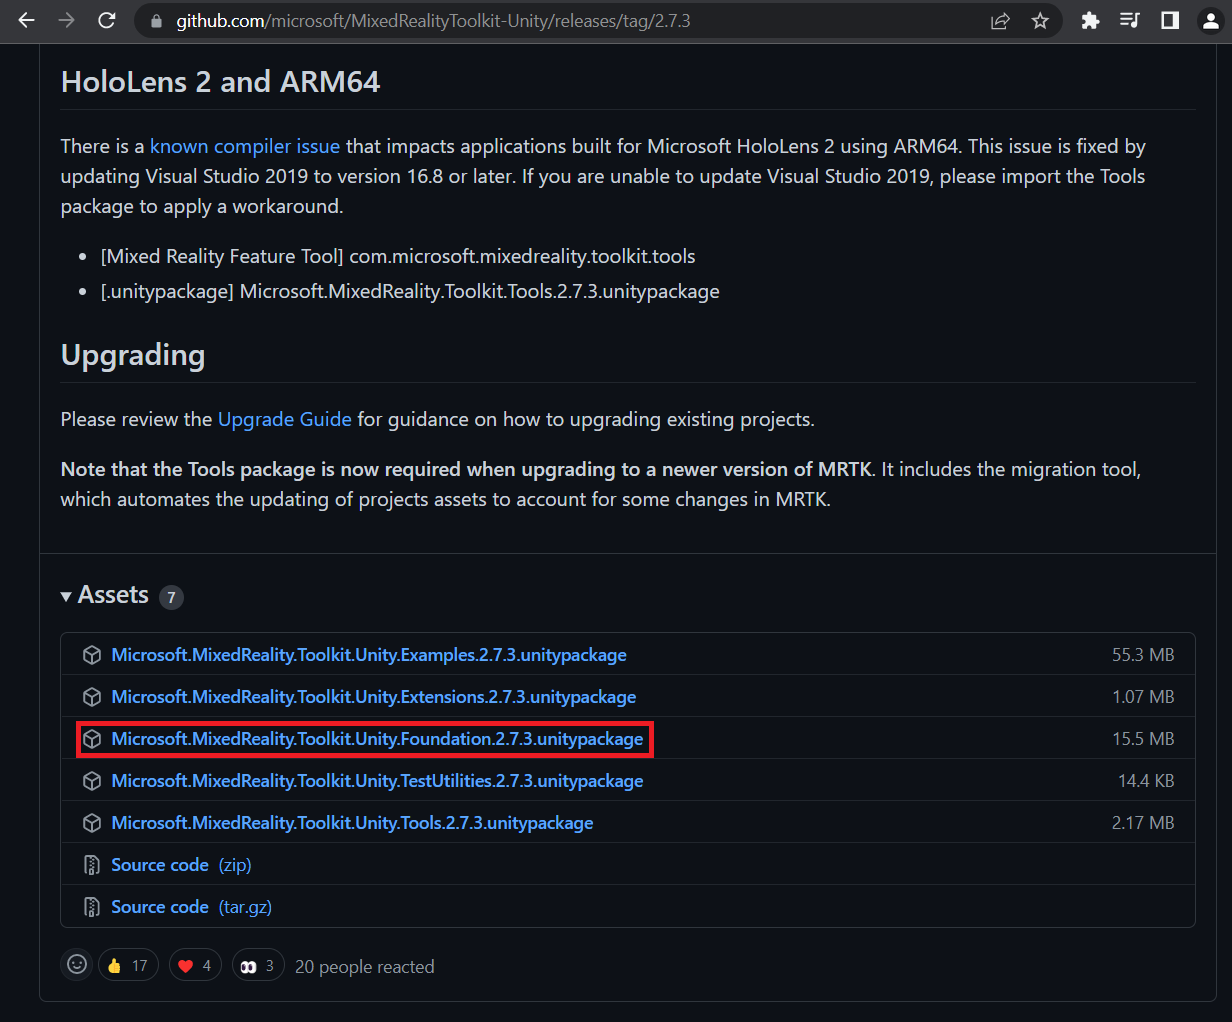
- To download MRTK, visit the GitHub page and scroll to the bottom and click on
Microsoft.MixedReality.Toolkit.Unity.Foundation.2.7.3.unitypackage→ Once downloaded move it to a location of your choice.
- To import, open your Unity project → just drag and drop the downloaded file into the Project window → click on Import.
2.2 Downloading and Installing ISAR SDK
Downloading and installing the ISAR SDK is simple. You can either download it from Unity’s Asset Store or you can download it from their Git repository. As the Git repository has the latest version, we’ll use that for now
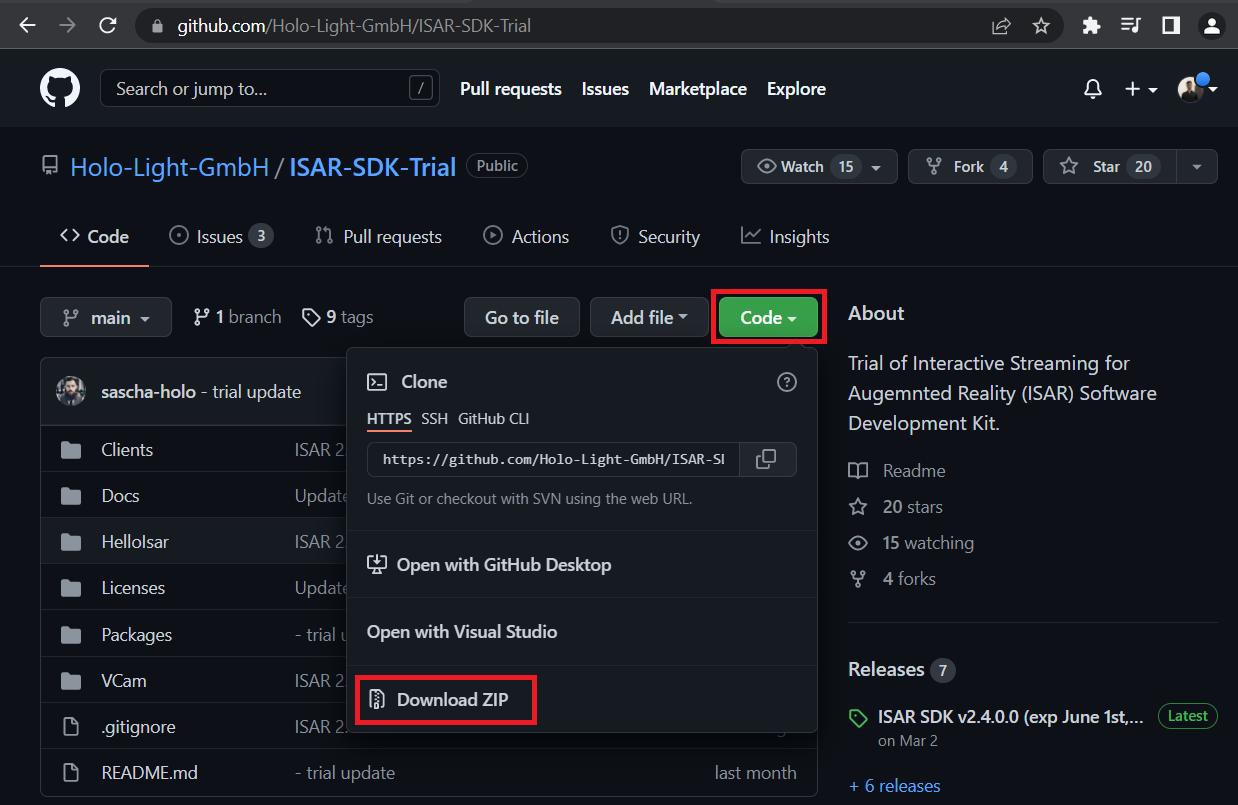
- To download the SDK, visit the GitHub page and click on
Code→Download ZIP. Once downloaded unzip the folder and place it at a location of your choice.
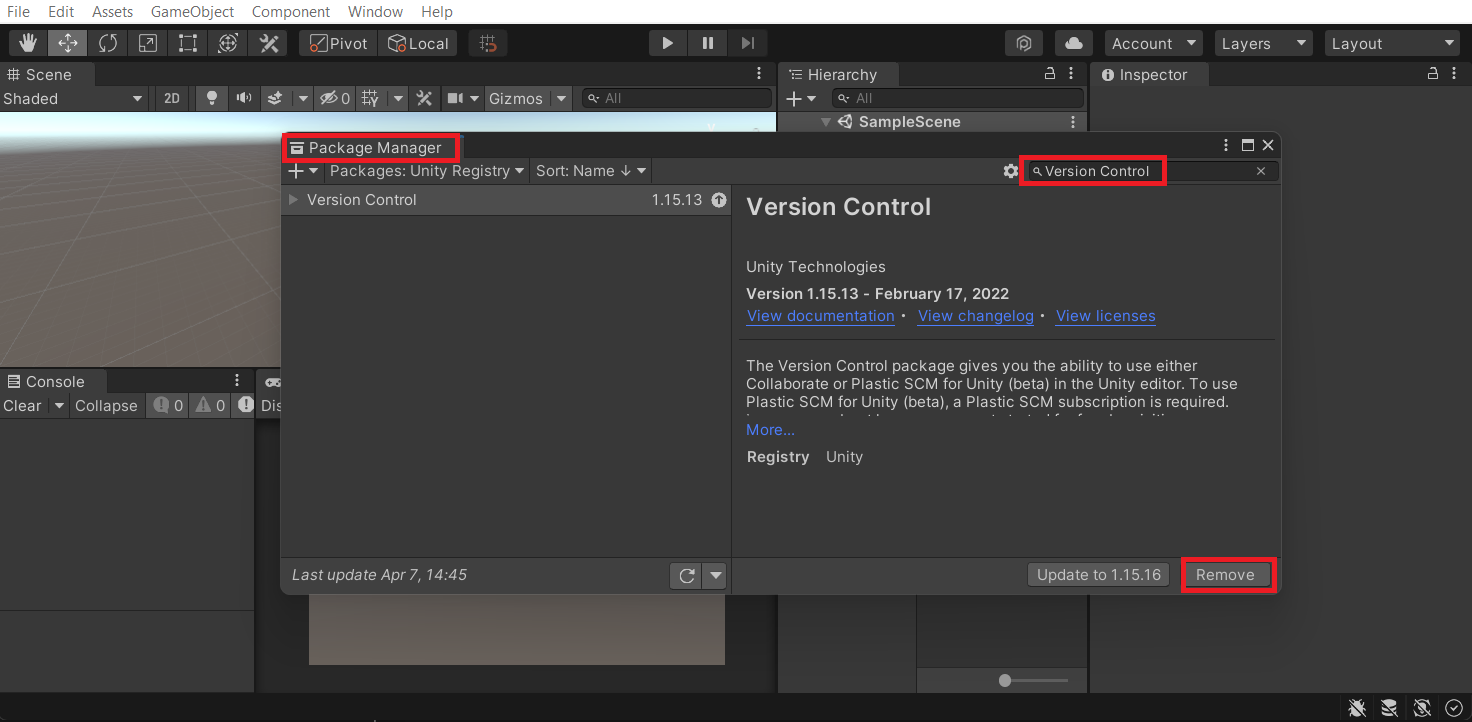
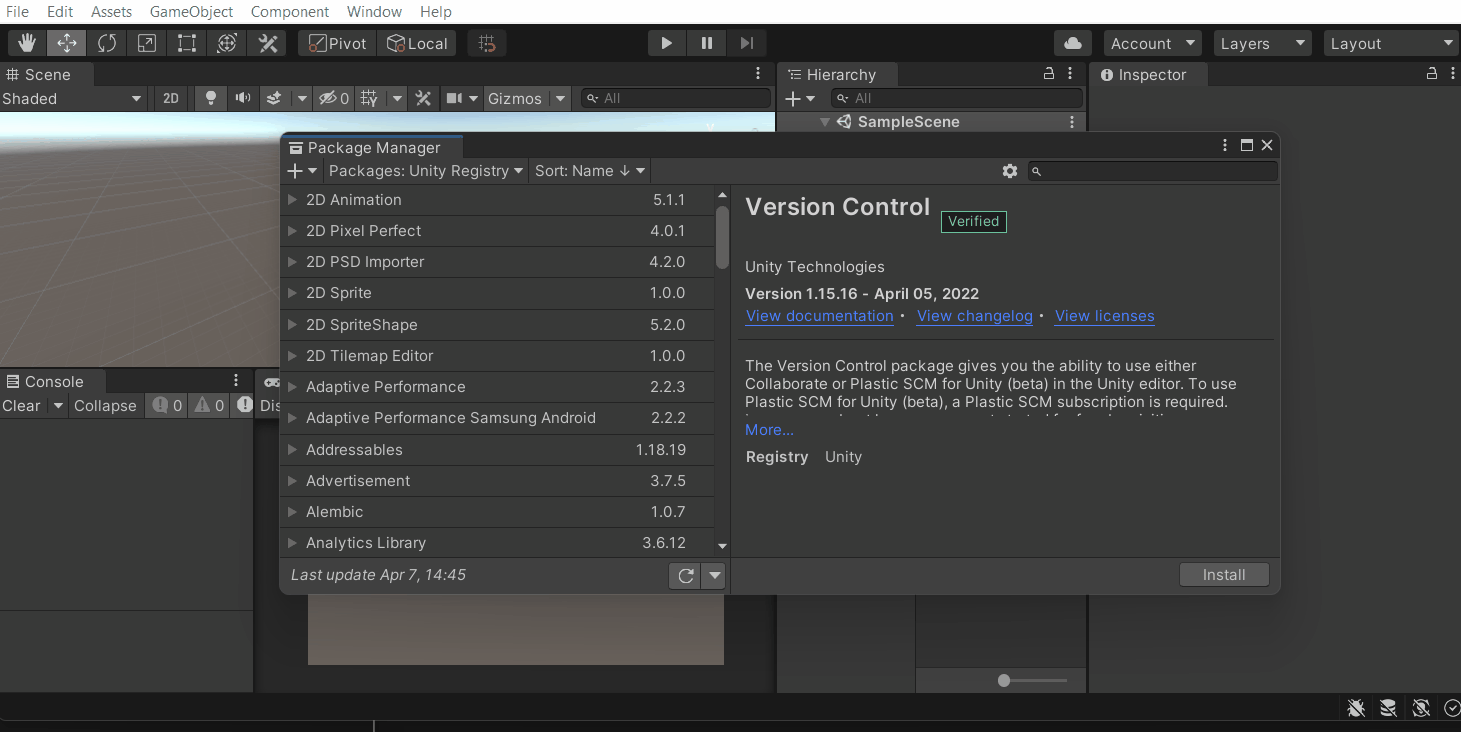
- Before installing the package we’ll have to remove the Version Control package to avoid any conflicts that could happen while importing the ISAR SDK. So, in your Unity project navigate to Windows → Package Manager → search for Version Control and click on Remove.Once you have your project downloaded, open it up and go to File → Build Settings → switch the platform to Android.
- To import the SDK into Unity:
- In the Package Manager window click on the plus symbol ➕ → select
Add packaged from disk.. - In the ISAR-SDK folder, navigate to
Packages→com.hololight.isar→ select the package JSON file **and click onOpen.
- In the Package Manager window click on the plus symbol ➕ → select

If you get a warning message on your Console window, you can ignore it.
- Once again click on the plus symbol ➕ on the Package Manager window → select
Add packaged from disk... - In the ISAR-SDK folder, navigate to
Packages→com.hololight.isar.mrtk→ select the package JSON file **and click onOpen.
2.3 Setting up the Unity Project
For the SDK to work as intended we’ll have to set up a few things.
- Go to
File→Build Settings→Player Settings→XR Plug-in Management→ check the box ✅ forISAR XR.
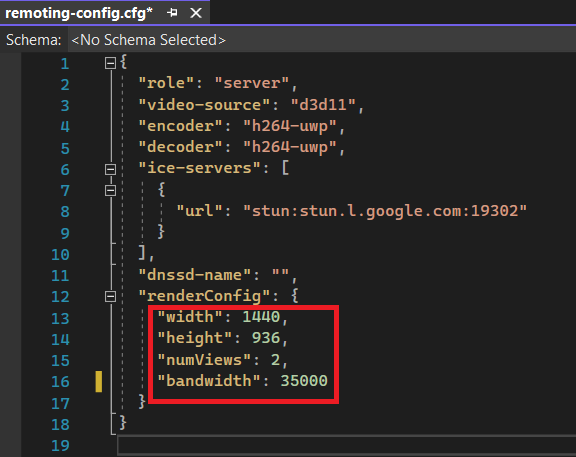
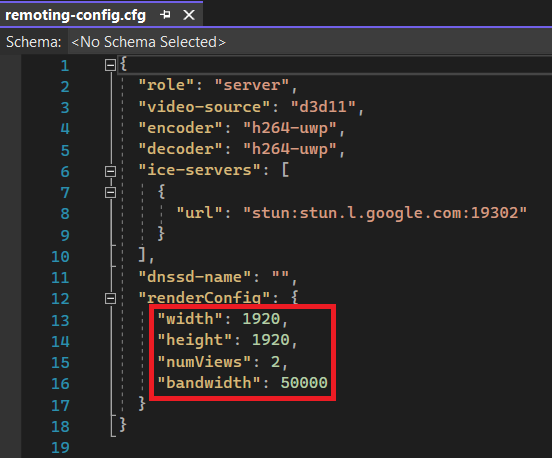
- In the Project window, navigate to Packages → ISAR Core → Runtime → Resources → open the remoting-config file.
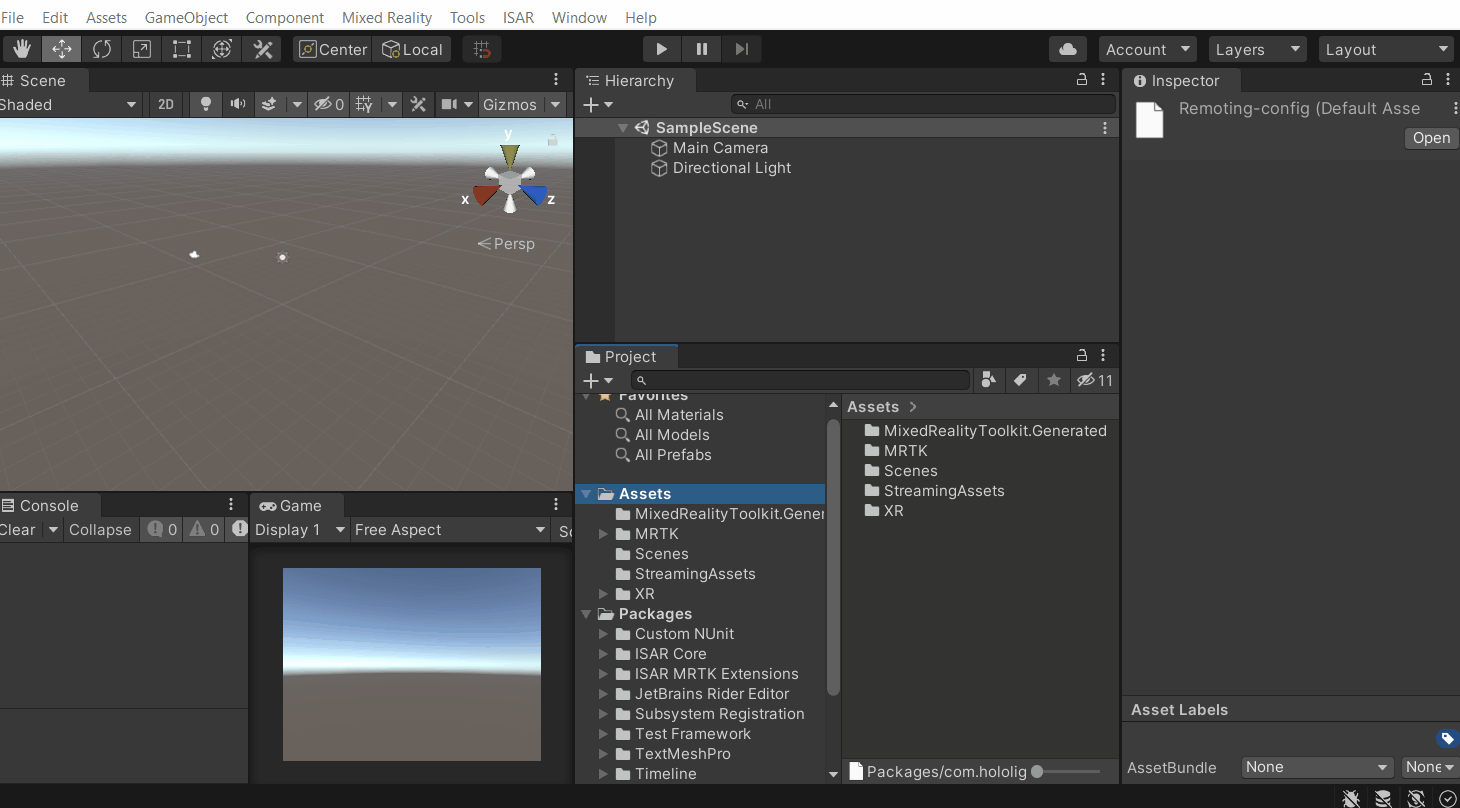
- Based on the documentation, different clients (HoloLens 2, Quest 2, Android) have different configurations. The width and the height represent the resolution of the device, the numViews represent the number of views and bandwidth represents the internet speed (which can be varied based on our internet speed).
Since we are building for HoloLens 2, change/ensure the configurations are as follows:
2.4 Setting Up Scene
Now let’s set up our scene with MRTK and add a high poly model that we want to stream.
- Configuring ISAR SDK with MRTK is simple, select
ISAR→Configure MRTK. This will add the necessary GameObjects to the scene and configure it as well.
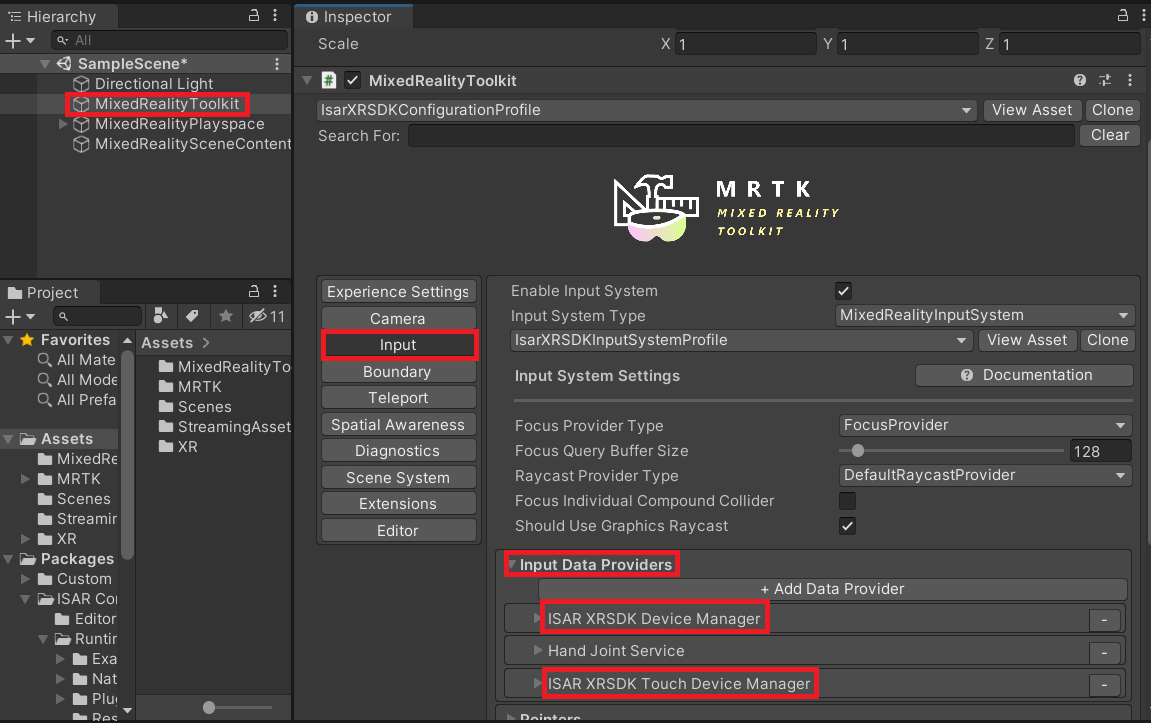
- To confirm that the scene has been configured correctly, select the
MixedRealityToolkitGameObejct and make sure that:- Under the
Cameratab, the Camera Settings Providers parameter contains XR SDK Camera Settings.
- Under the
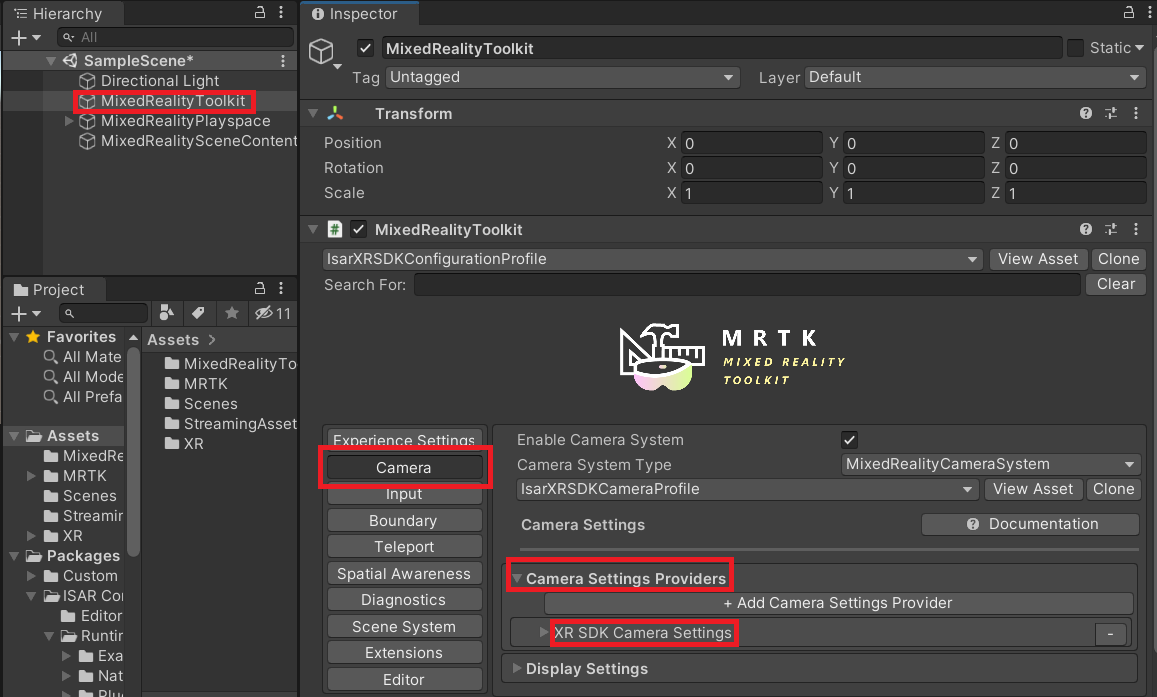
- Under the Input tab, the Input Data Providers parameter contains ISAR XRSDK Device Manager and ISAR XRSDK Touch Device Manager
- Now, let’s add a high polygon model to our scene. You can download and use any model of your choice or use the same one as I did from here. The model I am using has 508.7k polygons.
- Import the asset into Unity by dragging and dropping it into the Project window. Then, you can move the prefab into your scene.
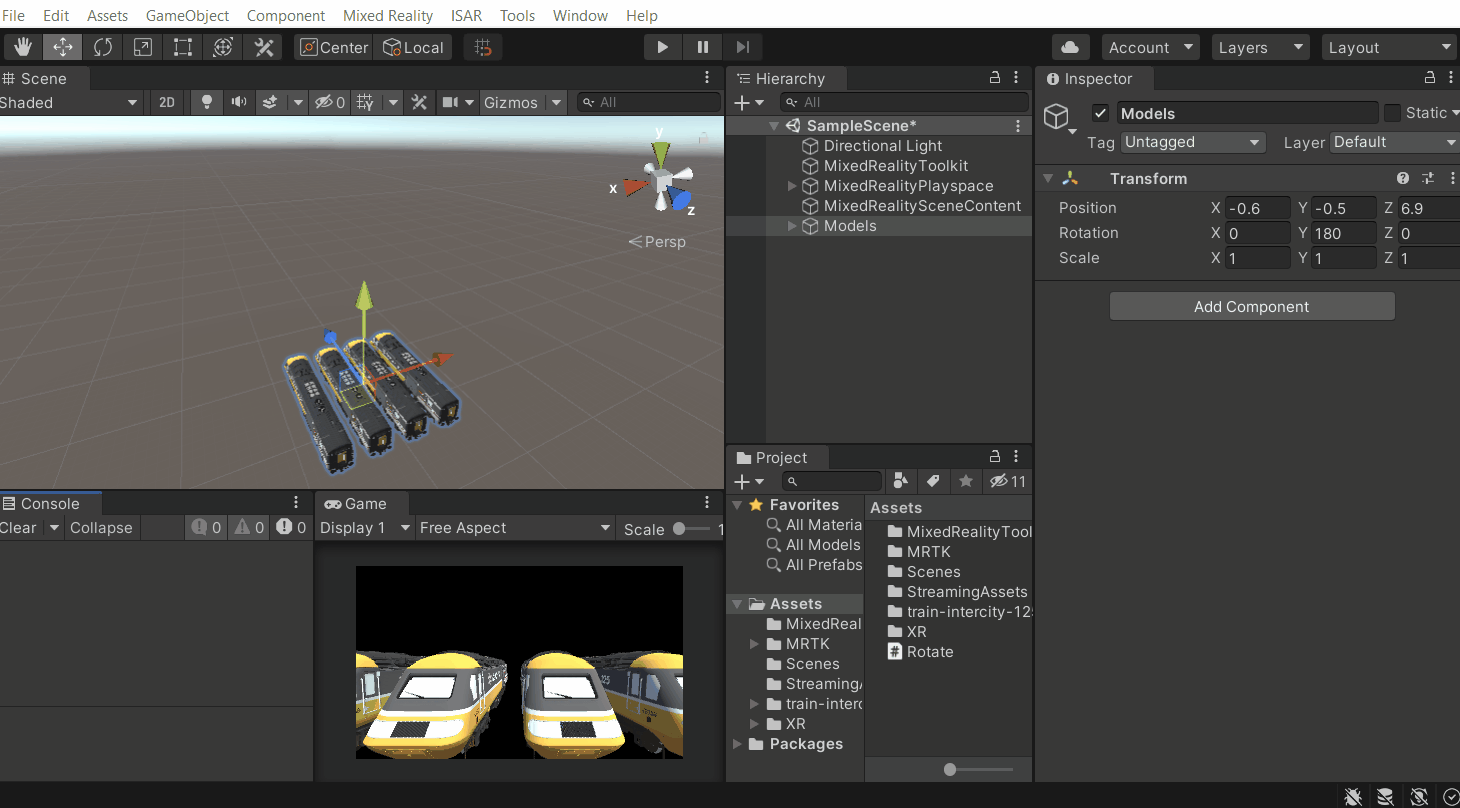
- We’ll duplicate the prefab three times so that we have more polygons being rendered at a time → position them one beside the other → create an empty GameObject and name it as Models → move all the four prefabs into this GameObejct.
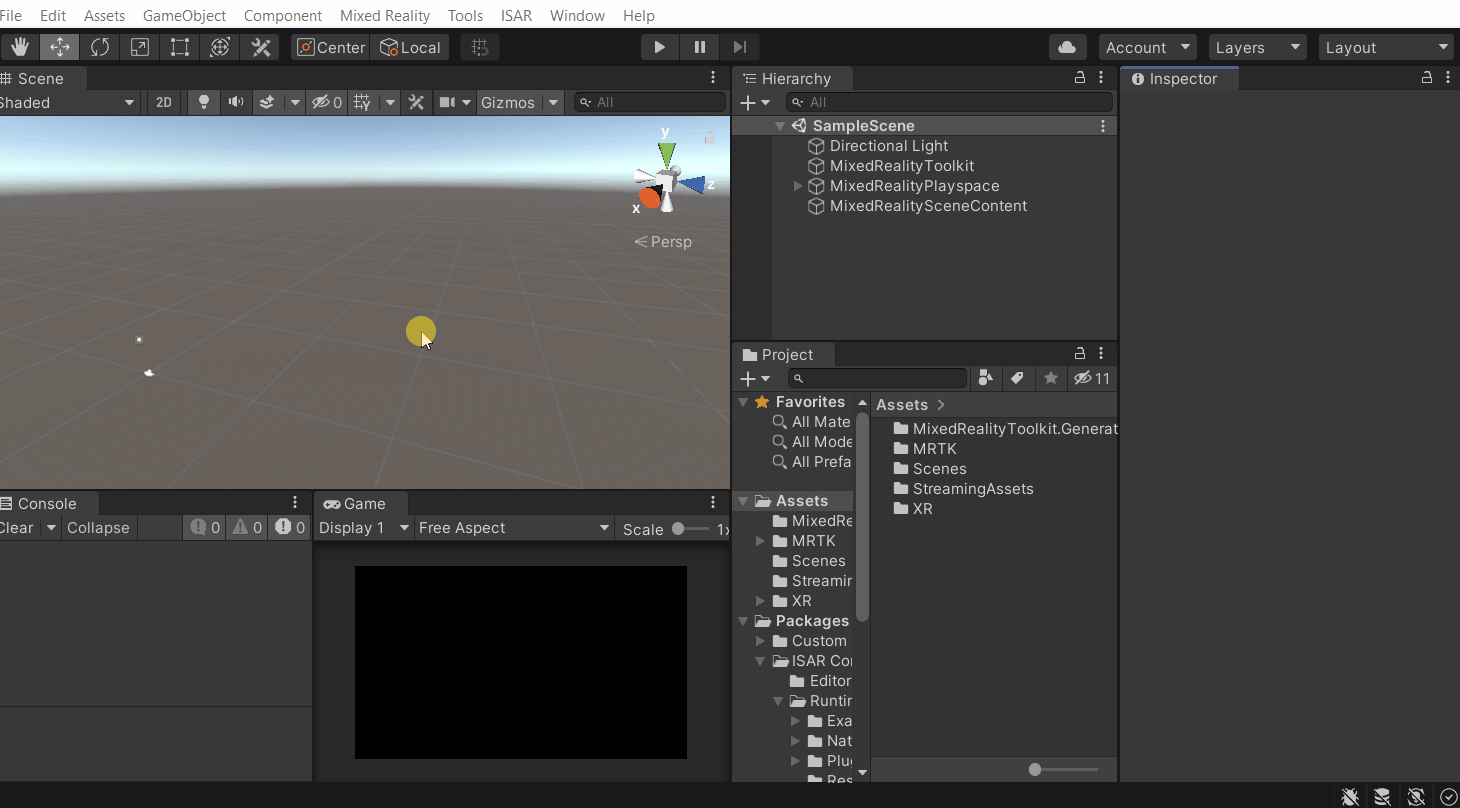
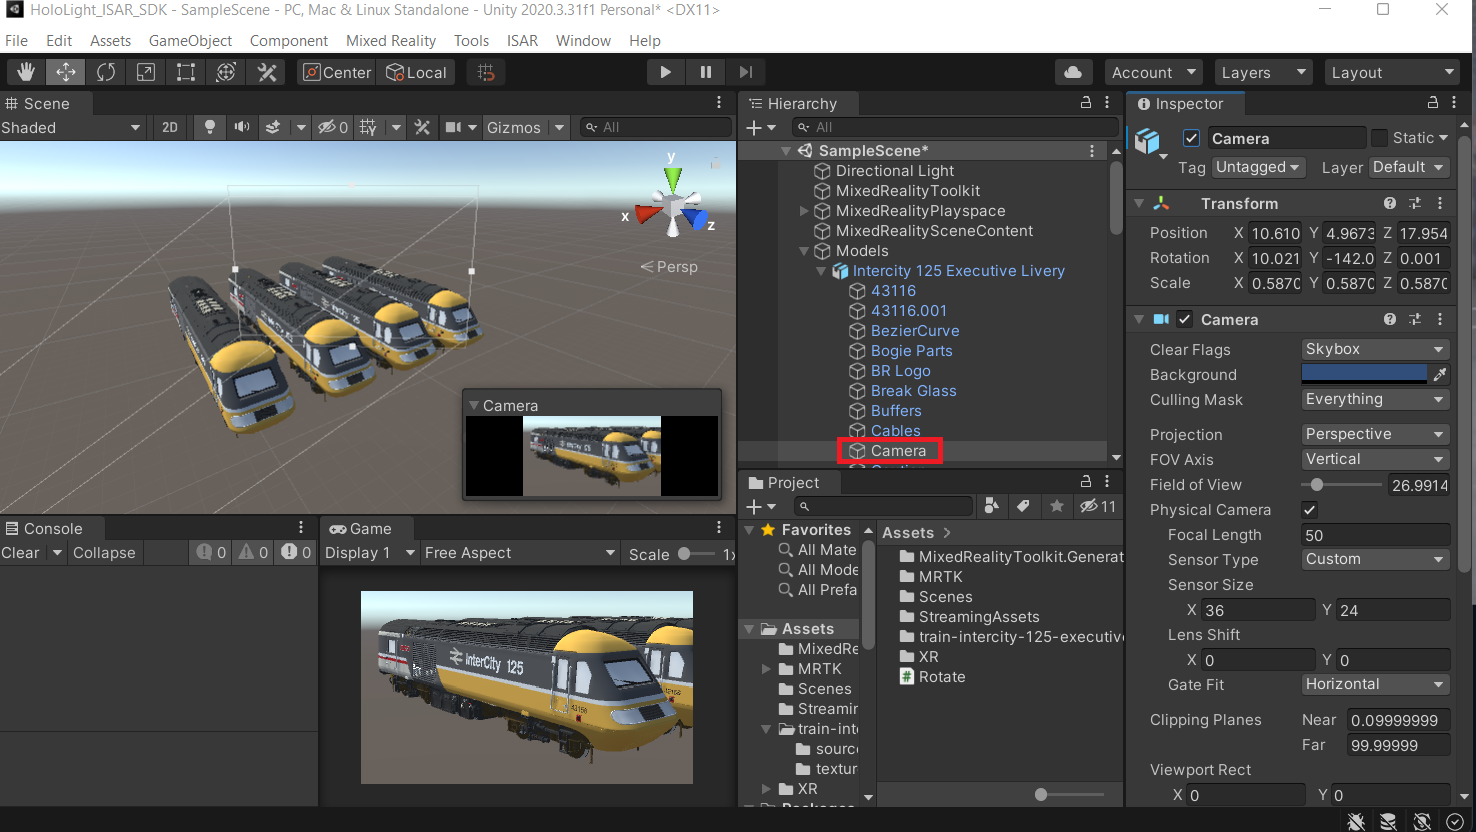
- Finally, we’ll add a script that will rotate the models. Create a new C# script, name it Rotate and copy the following code:
- Add the script to the Models GameObject and hit play to test it.
2.5 Installing ISAR Client
There are two ways by which we can install the ISAR Client on HoloLens 2. We can either install the app package contained in the repository or install it from the Microsoft store.
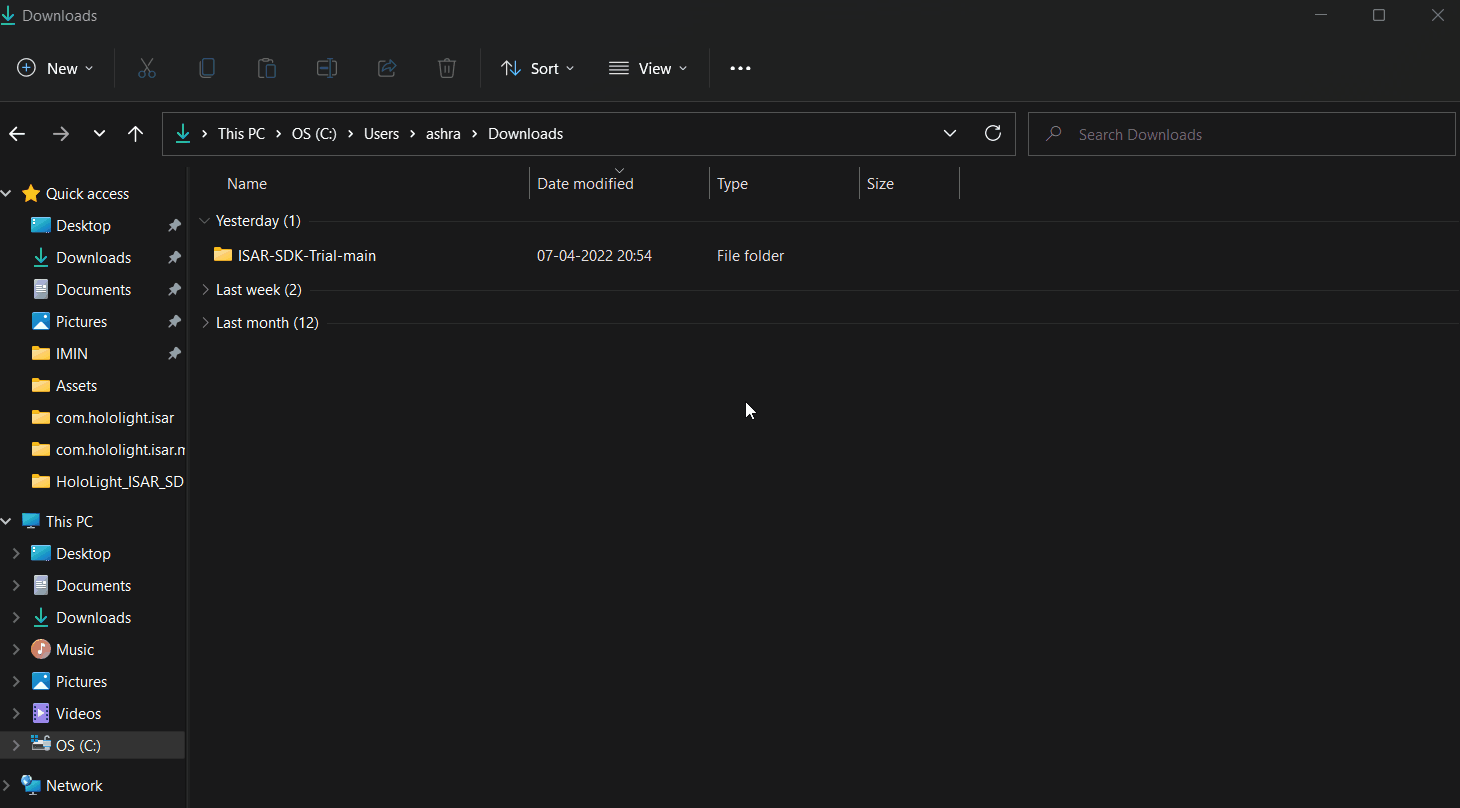
- You can find the app package by opening your file explorer and navigating to ISAR-SDK-Trial-main\Clients\ISARClient_HoloLens2. If you are not sure as to how to install the package from pc then you can check out this video.
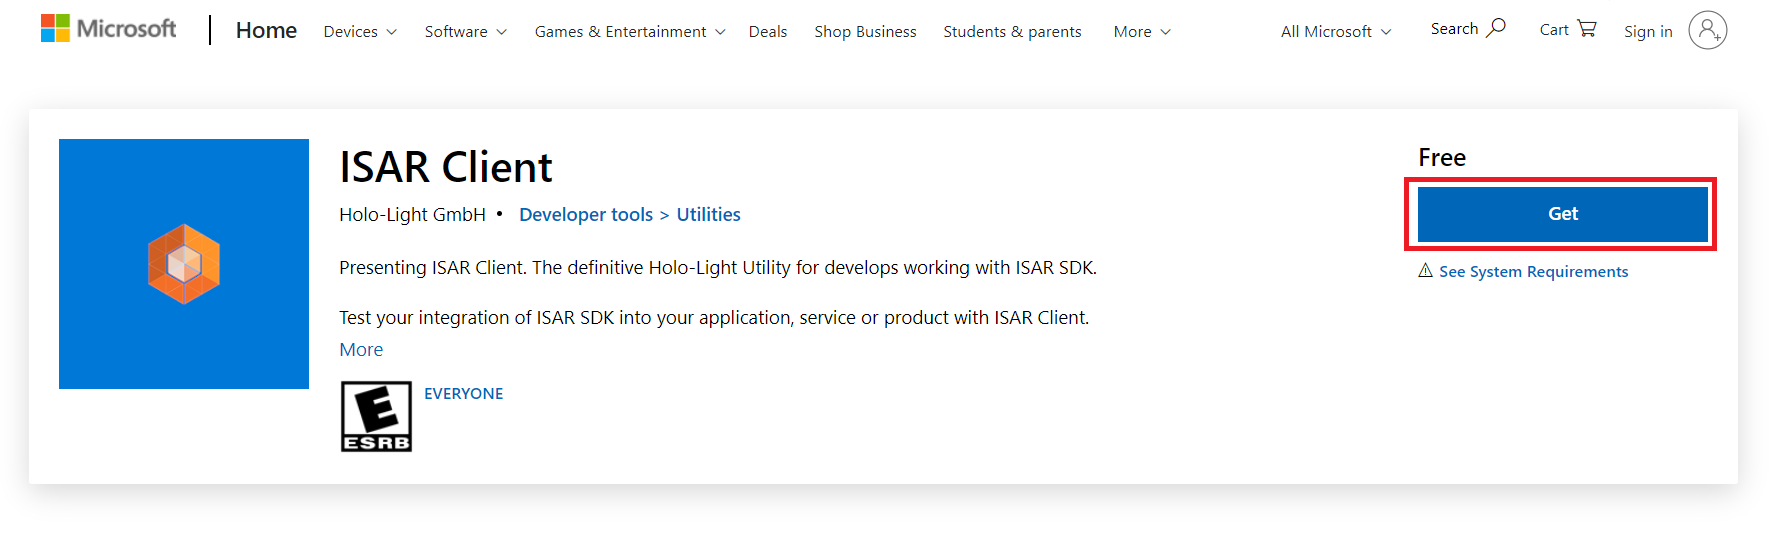
- The easier way would be to download and install the client from the Microsoft store. All you need to do is select Get and select your HoloLens2 device
2.6 Streaming The Scene
To stream the scene from our machine to the client, we need to first disable the firewall. Then we can play the Unity scene and stream it into the client.
- To disable the firewall on your machine:
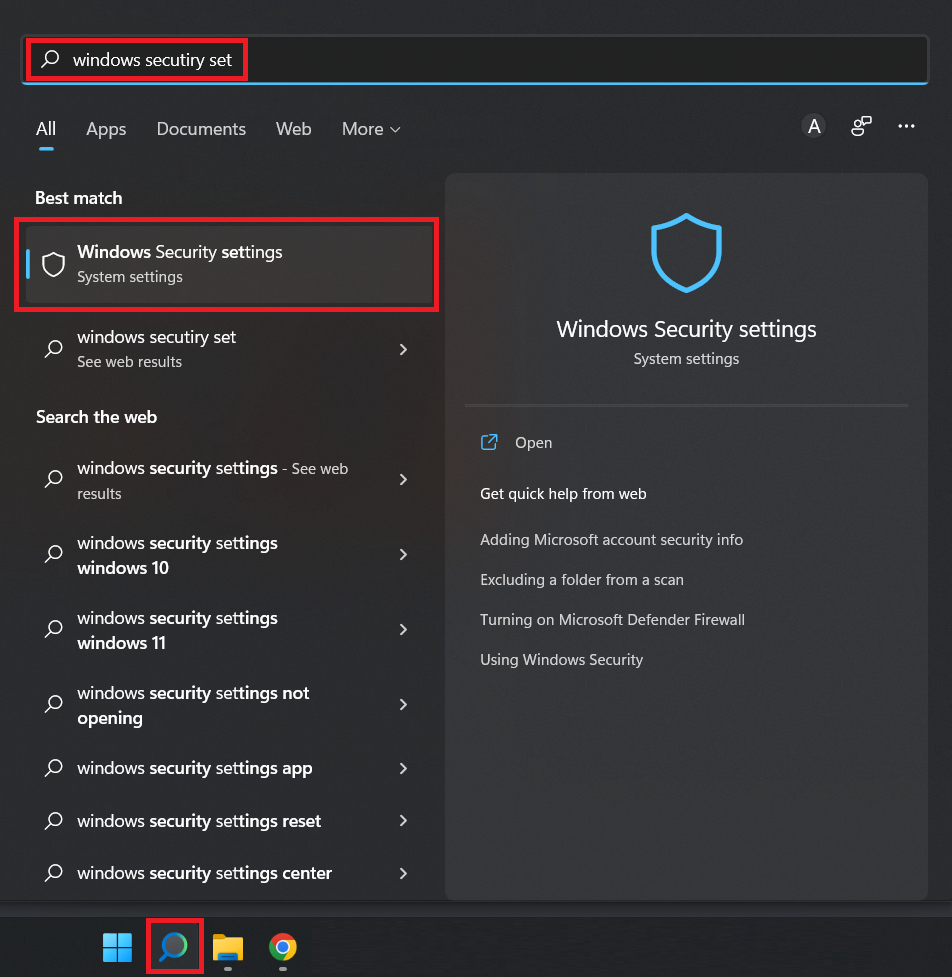
- Search for Windows Security Settings and open it.
- Click on Firewall & network protection → Public network → click the Microsoft Defender Firewall toggle to turn it off

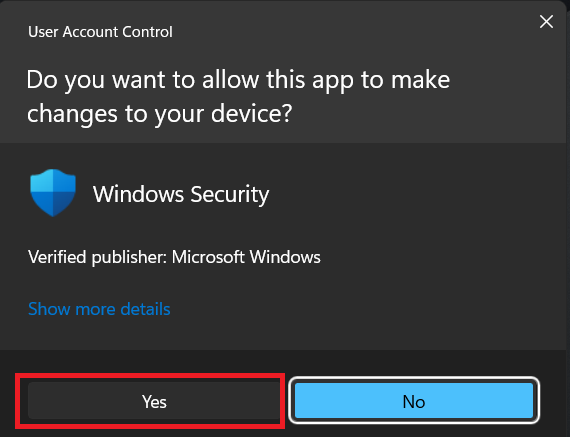
- You will get a popup asking if you want to allow the app to make changes, click on Yes.
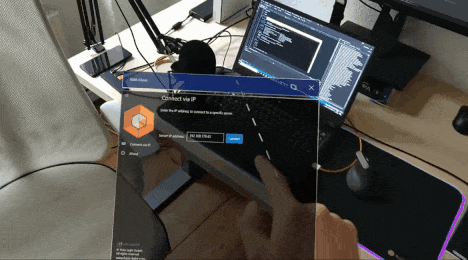
- Once we have the firewall disabled you can hit the play button ▶️ on the Unity Editor and open the ISAR client application on your HoloLens 2.
- On the ISAR client app, key in your local IP address and click on
Connect. If you are not sure how to find your IP address you can check this out.
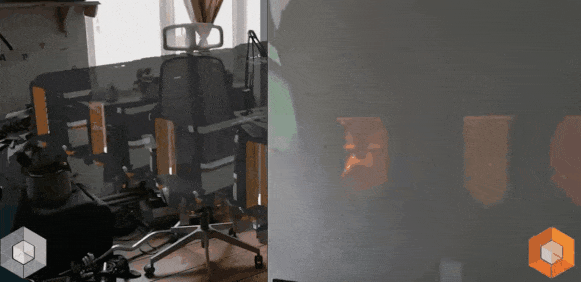
2.7 Comparison
3. Setting Up Project For VR
3.1 Using MRTK
The setup using MRTK is the same as setting up for AR( follow the same steps in section 2), but there is just one difference! And that’s the values entered in the remoting-config file.
- In the Project window, navigate to
Packages→ISAR Core→Runtime→Resources→ open theremoting-configfile. - Based on the documentation, change/ensure the configurations are as follows for Quest 2:

- Also, we’ll have to install the client on our device either through Oculus App Lab or by sideloading the APK file. You can find the app package by opening your file explorer and navigating to ISAR-SDK-Trial-main\Clients\ISARClient_OculusQuest2. If you are not sure how to sideload APKs into Quest 2 then check this out.
You can now hit the play button → launch the client on Quest 2 → enter your local IP address and view the streamed assets.
3.2 Using XRTK
The setup using XRTK is almost the same as setting up for AR but there are a few difference so lets see how it’s done from the top.
- Open a new Unity project and install the XRInteraction toolkit from the package manager. If you are not sure how to download and set up the toolkit, then this tutorial will help you out.
- To import the ISAR SDK into Unity:
- In the Package Manager window click on the plus symbol ➕ → select
Add packaged from disk.. - In the ISAR-SDK folder, navigate to
Packages→com.hololight.isar→ select the package JSON file **and click onOpen.
- In the Package Manager window click on the plus symbol ➕ → select
If you get a warning message on your Console window, you can ignore it.
- To set up the scene you can follow the same steps mentioned in section 2.4 .
- In the Project window, navigate to
Packages→ISAR Core→Runtime→Resources→ open theremoting-configfile. - Based on the documentation, change/ensure the configurations are as follows for Quest 2:
- To install the client on Quest 2 you can either install it via Oculus App Lab or by sideloading the APK file. You can find the app package by opening your file explorer and navigating to ISAR-SDK-Trial-main\Clients\ISARClient_OculusQuest2. If you are not sure how to sideload APKs into Quest 2 then check this out.
- To stream the assets you can follow the same steps mentioned in section 2.6.
4. Updating the ISAR SDK
In the future, when the SDK gets updated we’ll have to first remove the existing SDK and then reimport the latest one.
To remove previous versions of ISAR SDK from the project
- Open Package Manager in the Unity editor by clicking on
Window→Package Manager. - Search for the ISAR Core package and click on
Remove - Similarly, search for the ISAR MRTK Extensions package and click on
Remove.
To add import the latest SDK follow the same steps mentioned in section 2.2.
5. Conclusion
