Writing the Tap To Place Script
As we are continuing from the previous blog, we have already set up the scene for Plane Detection. Now, all we have to do is write a script that will place an object on the detected plane based on the tapped location.
Want to watch the video instead?
The Code
In this section, we’ll create a new script and write the code.
- In the Project window create a new C# script by right-clicking→ Create→ C# Script → name it as ARTapToPlace.
- Copy and paste the following script. Don’t worry if you didn’t understand the code right away, we have explained it in the next section.
- using System.Collections.Generic;
Code Explained
In this section, we’ll understand how the code works. Feel free to skip to the next section if you understood the program already.
Declaration
- Since we’ll be using the API methods from the AR Foundation and AR Subsystems packages, we’ll be declaring those libraries using the statements using UnityEngine.XR.ARFoundation; and using UnityEngine.XR.ARSubsystems;
- As we’ll be instantiating the ARRaycastManager class later on, we need to make sure the game object has the ARRaycastManager component attached as well. To ensure this, we use the line of code [RequireComponent(typeof(ARRaycastManager))]
The variables are described below:
| Variable Name | Type | Use |
| prefabObject | GameObject | To store the prefab of the object that has to be spawned |
| spawnedObject | GameObject | To store the instance of the spawned object. |
| touchPosition | Vector2 | To store the position where the finger touches the screen of the device |
| _arRaycastManager | ARRaycastManager | To make use of Raycasting and its methods |
| hits | ARRaycastHit | To store hit information when the raycast hits different objects |
Initialization
The function Awake() is always called before any Start functions and also just after a prefab is instantiated. (If a GameObject is inactive during start up Awake is not called until it is made active.) So, on Awake, the variables _arRaycastManager is initialized to get the ARRaycastManager components.
Update and Calculation
The function Update() is called every frame when the GameObject is enabled.
So, when his function is called:
So, when his function is called:
- We’ll first check if there is anything touching the screen.
- If something is touching the screen then we’ll take the first touch position. Consider a scenario where you touch the screen with three fingers, but we want just one touch point i.e whichever finger touches first we want to focus on that touch point.
- After we get that touch point we’ll check if the Touch Phase is in the Began Phase.
- If that’s true as well, then we’ll store the value of that touch point in the touchPosition variable.
- Now we can make use of the Raycast API call of the ARRaycastManager and shoot a ray starting from the touch position. If the ray hits an object which has a TrackableType as PlaneWithinPolygon, then all the hit information such as its position is stored in the variable hits.
- There is a possibility that there are two planes that are overlapping each other, and the ray will intersect both planes and store the information in the variable hits as a list. In such a case we want to consider only the position of the first hit point.
- Once we have the hit position, for the first time we’ll instantiate the prefab at the hit point and store it in the spawnedObject variable. From the next time onwards, we’ll just move the already spawned object to the new hit point.
So now that you know how the code works, let’s move on to the next section.
Scene Setup
Now we’ll have to set up our scene to make this work.
- We’ll have to first create a prefab that gets spawned. For now, we’ll make use of a 3D cube. Later that can be replaced with any object of your choice.
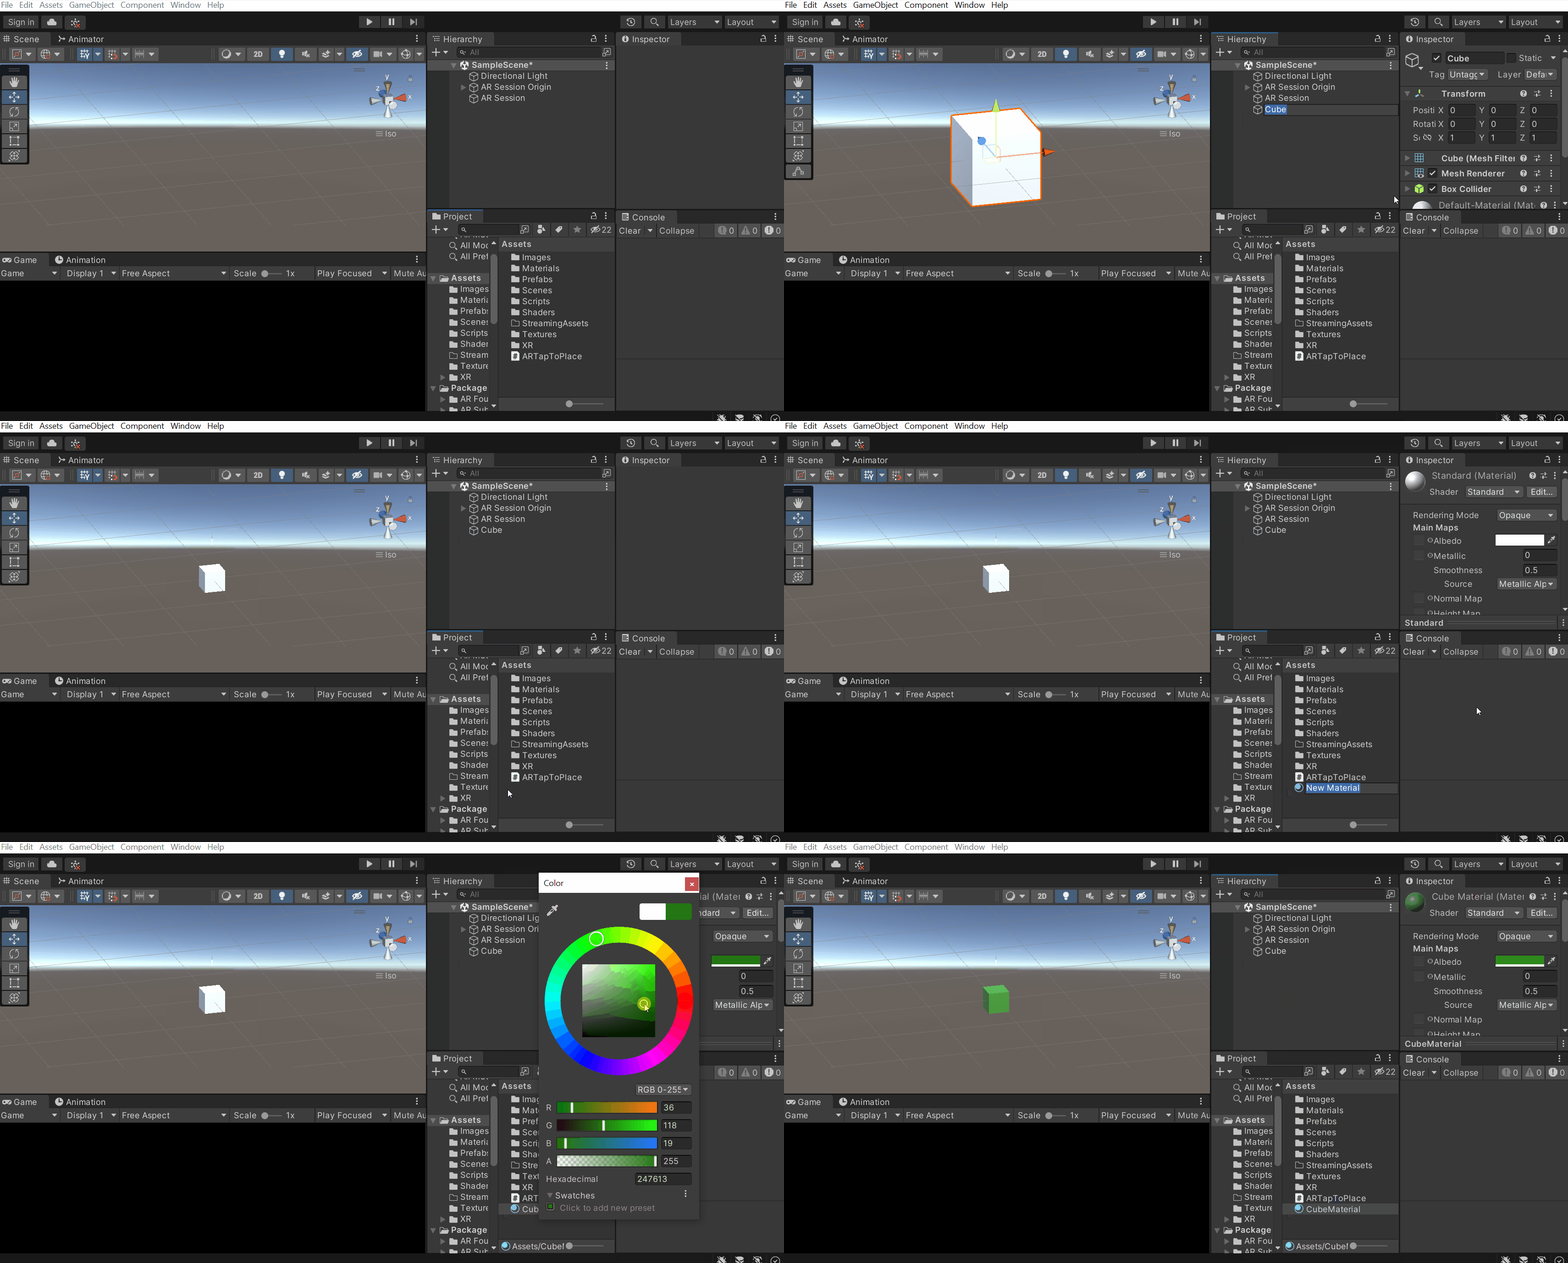
- To create a cube prefab, right-click on the Hierarchy window and select 3D Object → Cube → scale it down to a size you would like to have.
- Let’s now create new material and use it for the Cube GameObject. To create a new material, right-click in the Project window and select Create→ Material→ name it as CubeMaterial → change its color to any color of your choice.
- Now drag and drop this CubeMaterial into the Cube GameObject and it’ll automatically add it to the Mesh Renderer component of the cube.

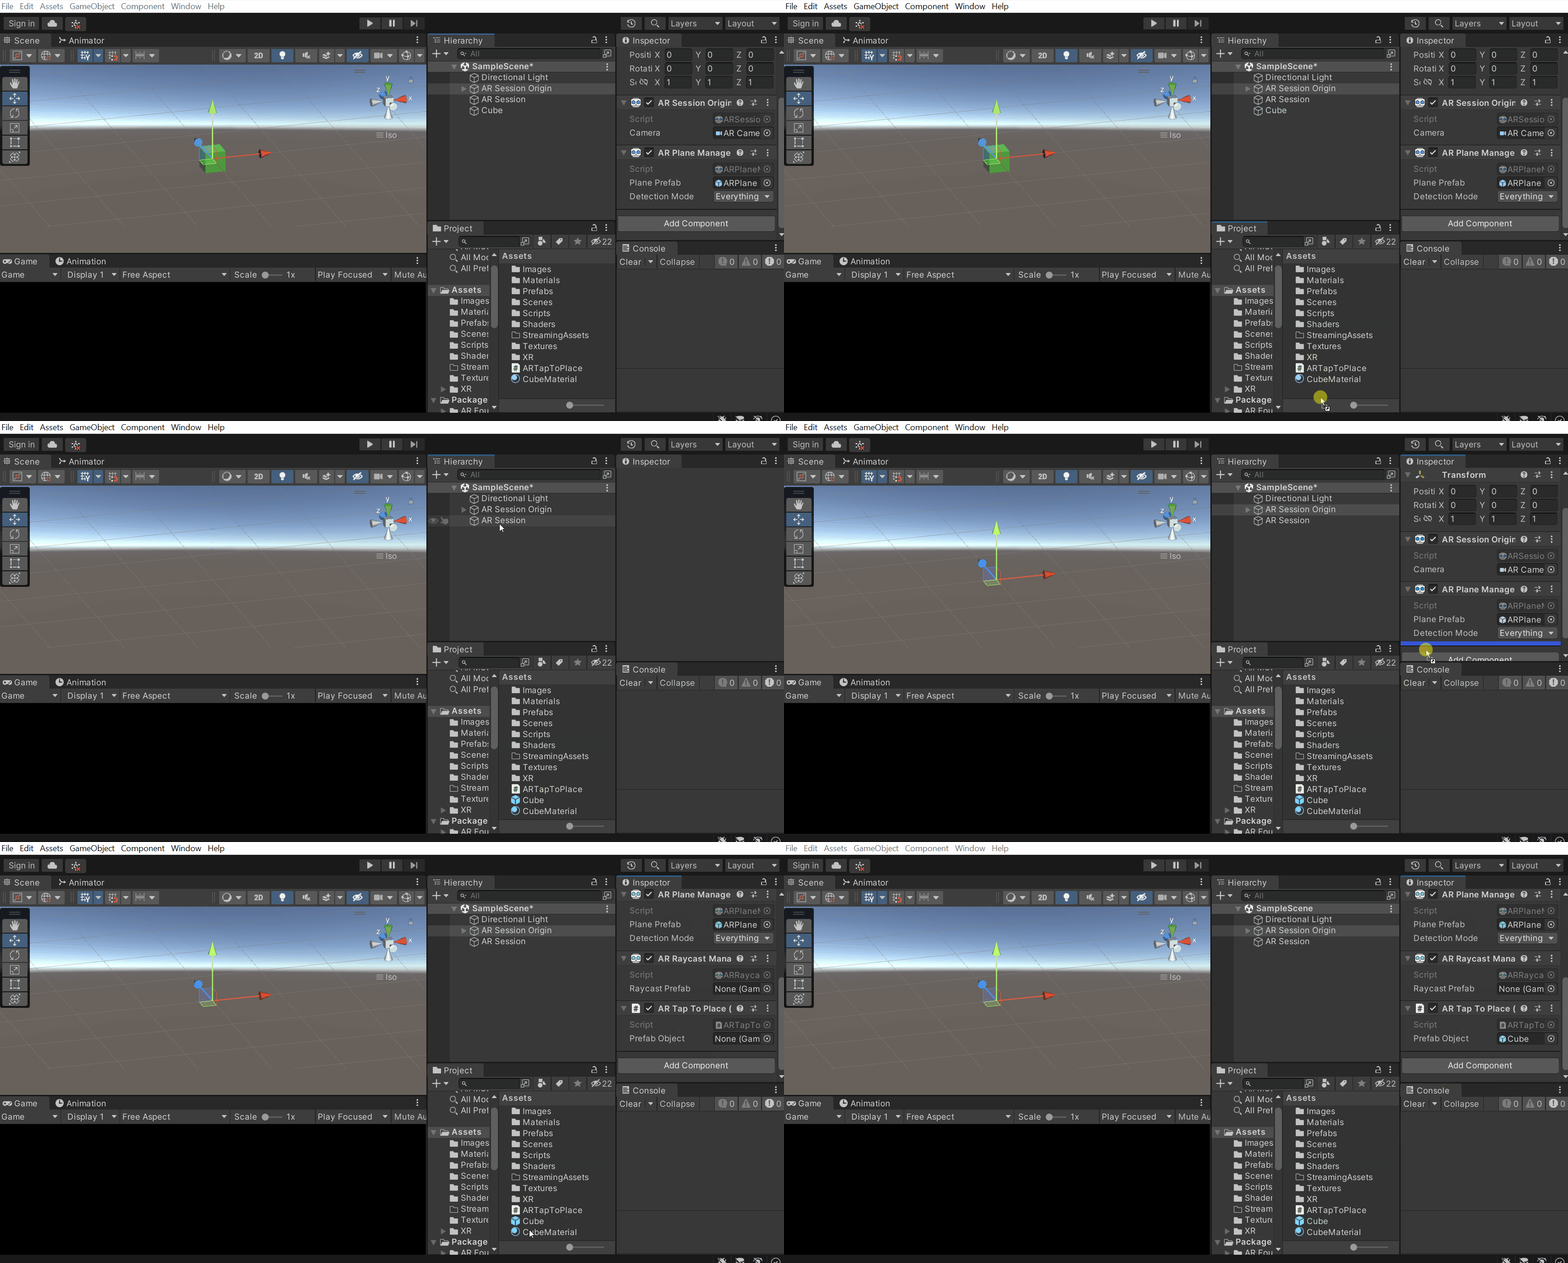
- We can now drag and drop the Cube GameObject into the Project window to convert it into a prefab. Also, we can now get rid of the cube from the scene
- Next, select the AR Session Origin GameObject and add the ARTapToPlace script. This will automatically add the ARRaycastManager component too.
- Finally, drag and drop the Cube Prefab into the Prefab Object parameter of the AR Tap To Place component and save your scene.

With that, we have set up our scene and now it’s time to test it out! So, build the application on your android device by going to File → Build Settings → Build and Run. Make sure that you have connected your device to the machine before building it.
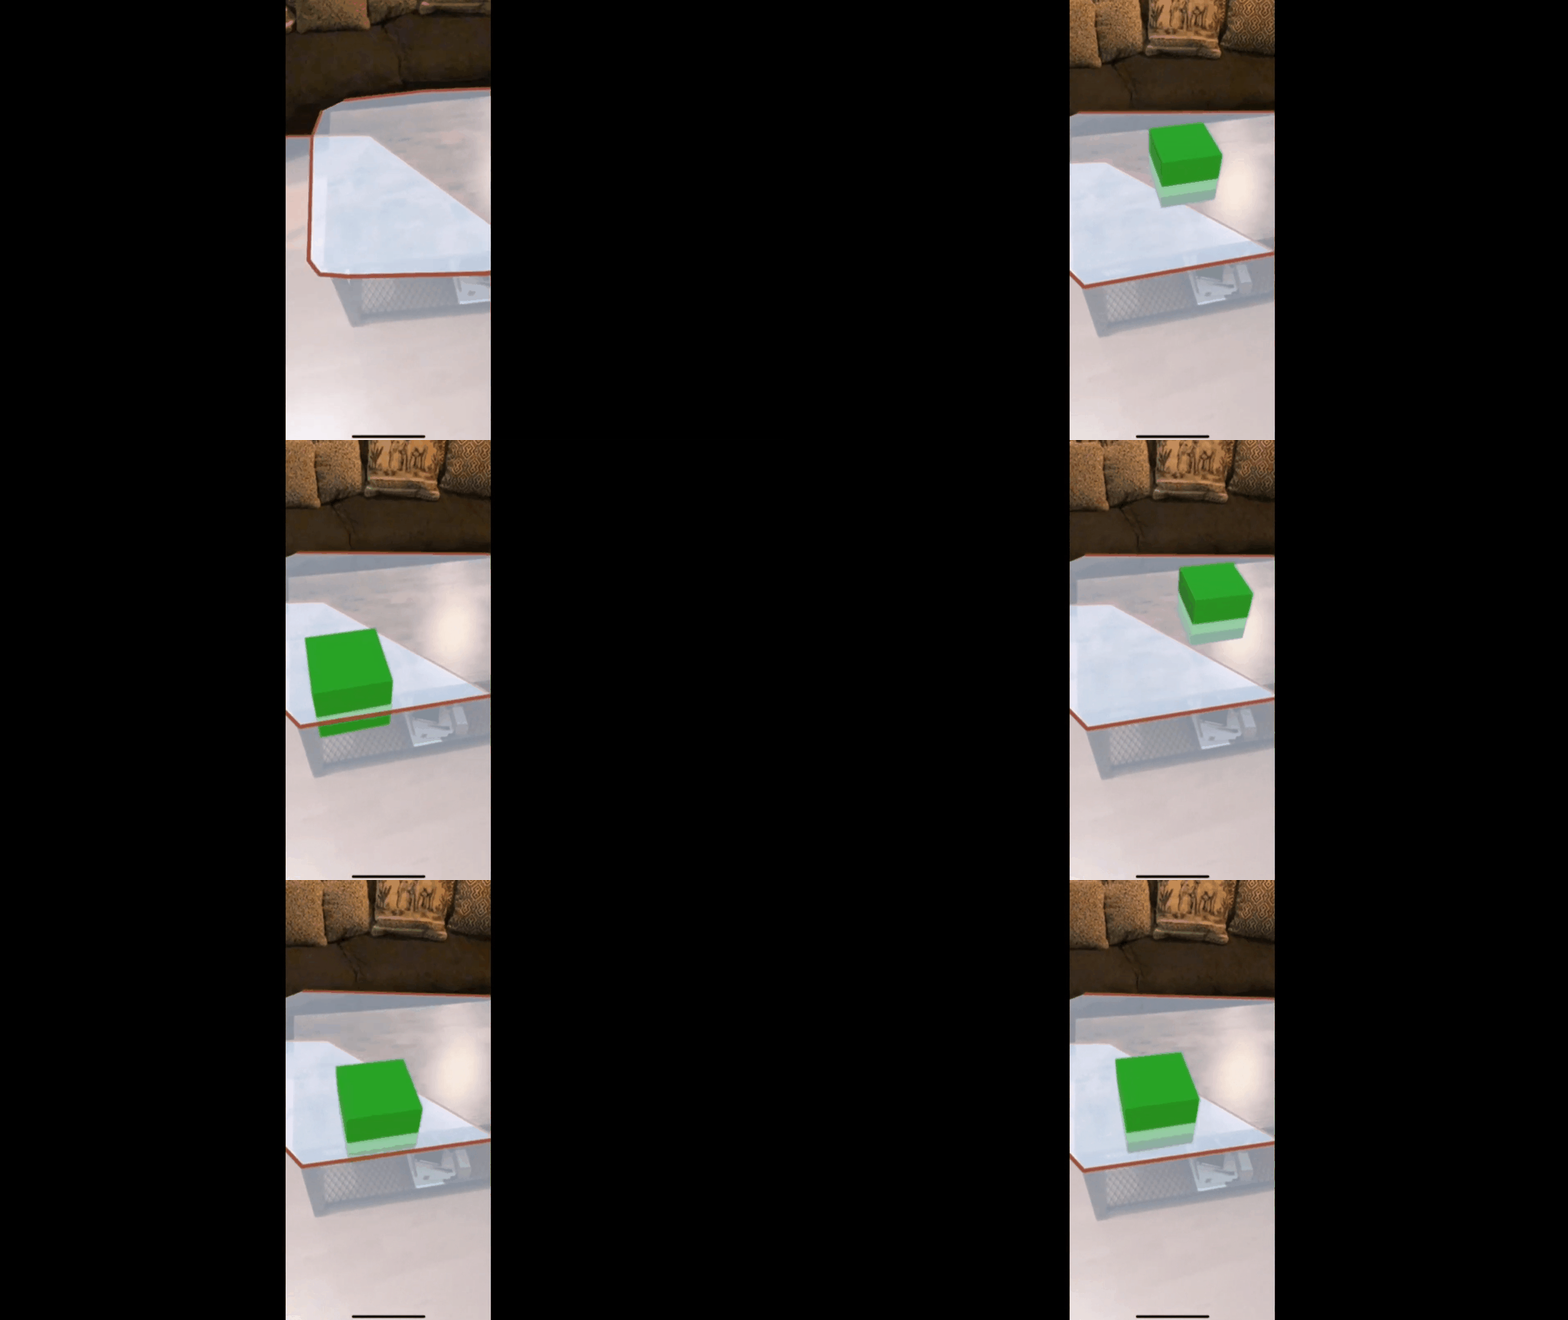
Once it’s built, it’ll launch on your device. Then, you can scan the floor and tap to place the object and move it around.
Once it’s built, it’ll launch on your device. Then, you can scan the floor and tap to place the object and move it around.

Conclusion
Now you know how to use Raycasting to place objects on the detected surface. Apart from Plane Detection and Image Tracking, AR Foundation has other features too, like Face Detection. That's what the next blog post will be about. Stay tuned!


