Previously we saw how to set up our Unity project for AR and Android deployment. If you haven’t checked it out already, then do it before continuing with this blog as it’s a prerequisite. In this blog, we’ll learn about face detection, where we’ll use the device’s front camera to scan a face and add material to it.
Want to watch the video instead?
Scene Setup
Let’s start by setting up our scene for face detection:
- Create a new scene and get rid of the MainCamera GameObject.
- Right-click on the Hierarchy window and select XR → AR Session Origin.
- Once again right-click on the Hierarchy window, and select XR → AR Session.

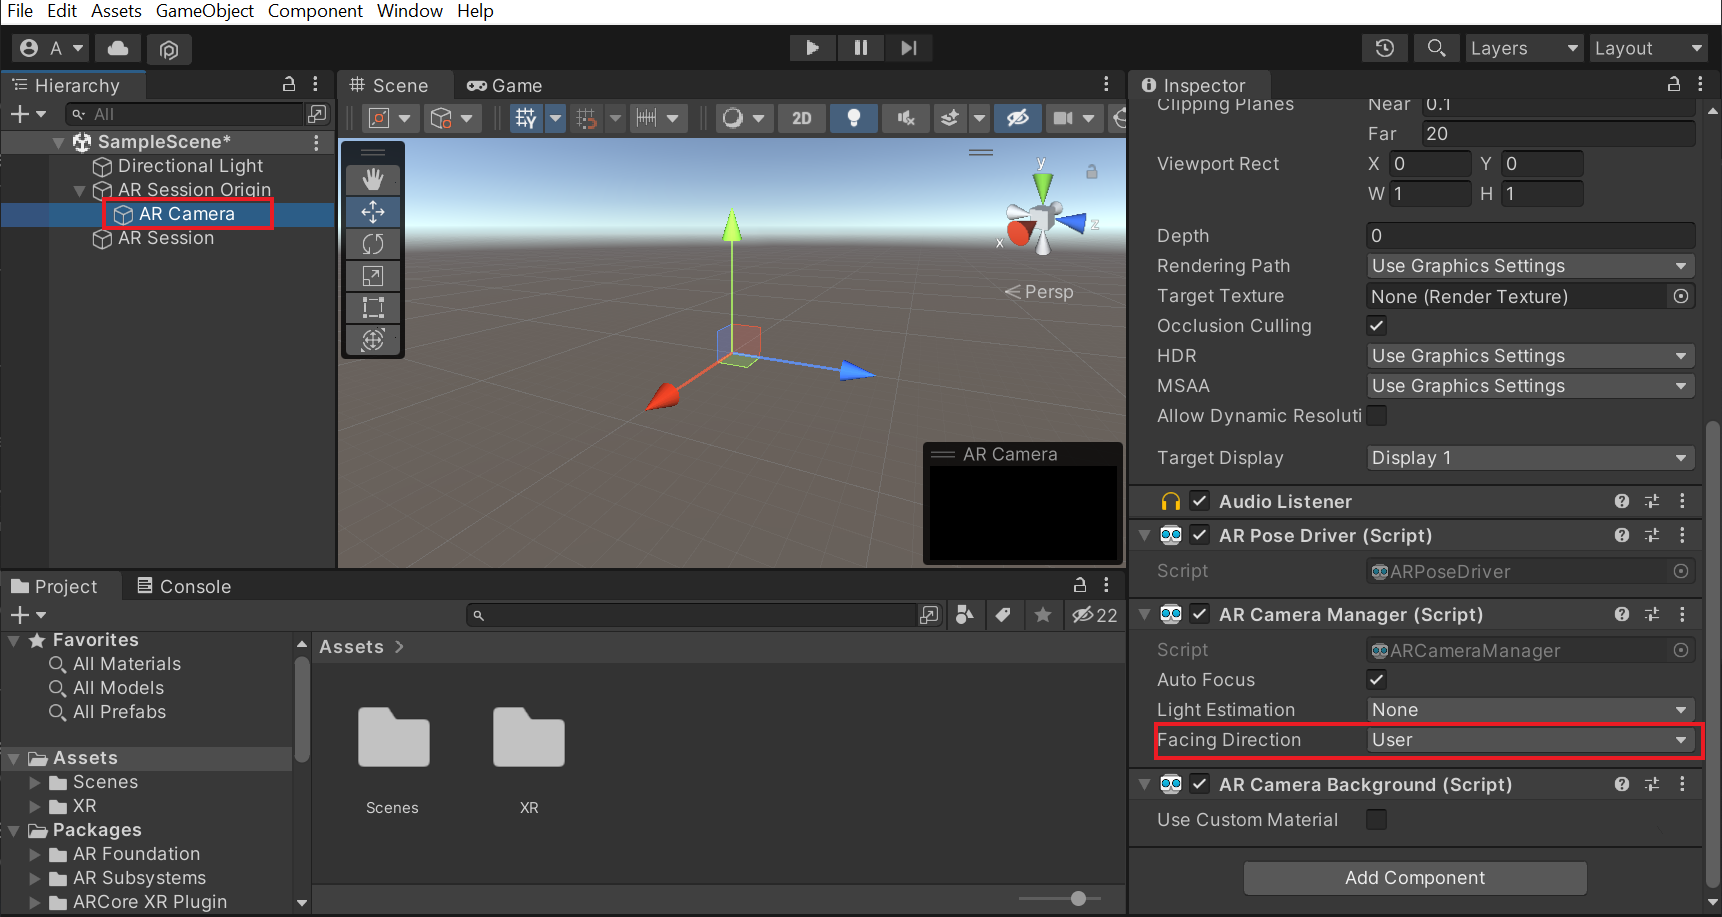
- Open the child of AR Session Origin and find the AR Camera GameObject → find the AR Camera Manager component and change the Facing Direction parameter to User.
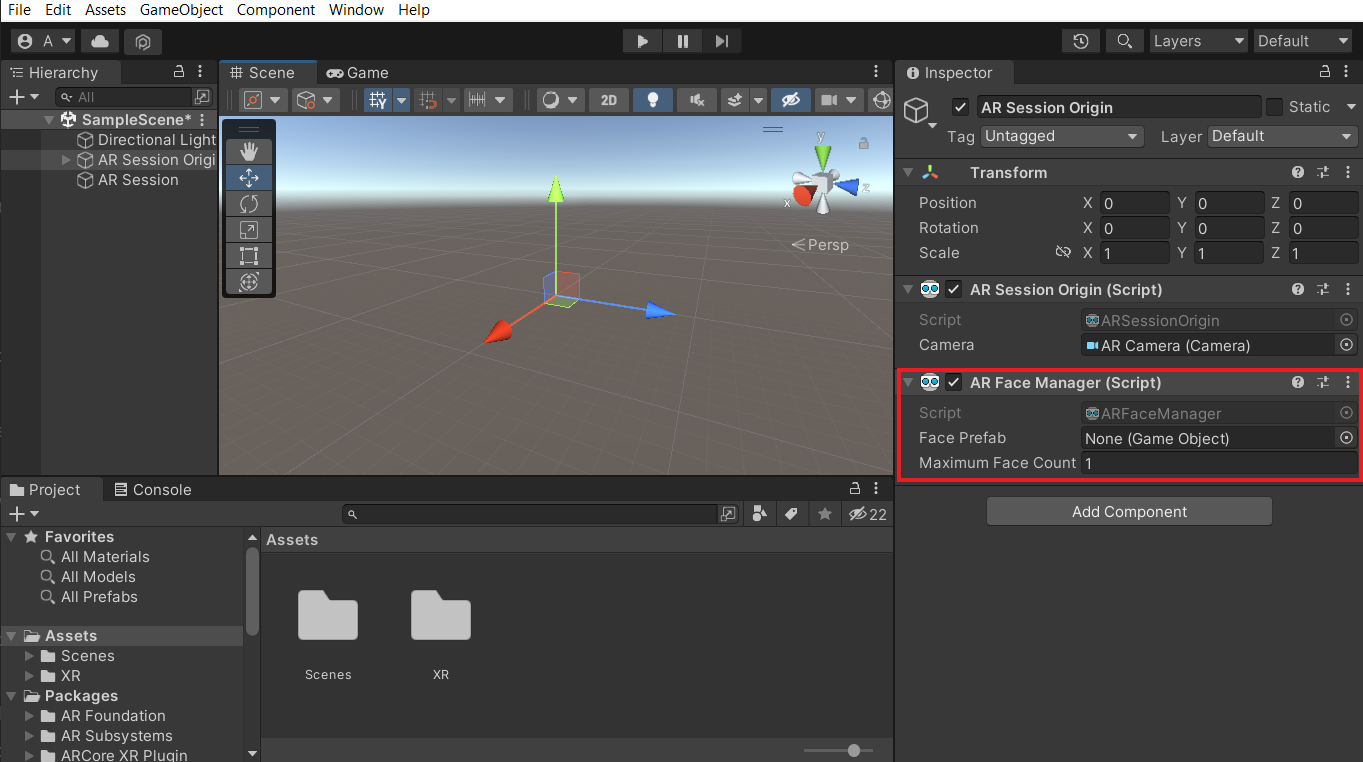
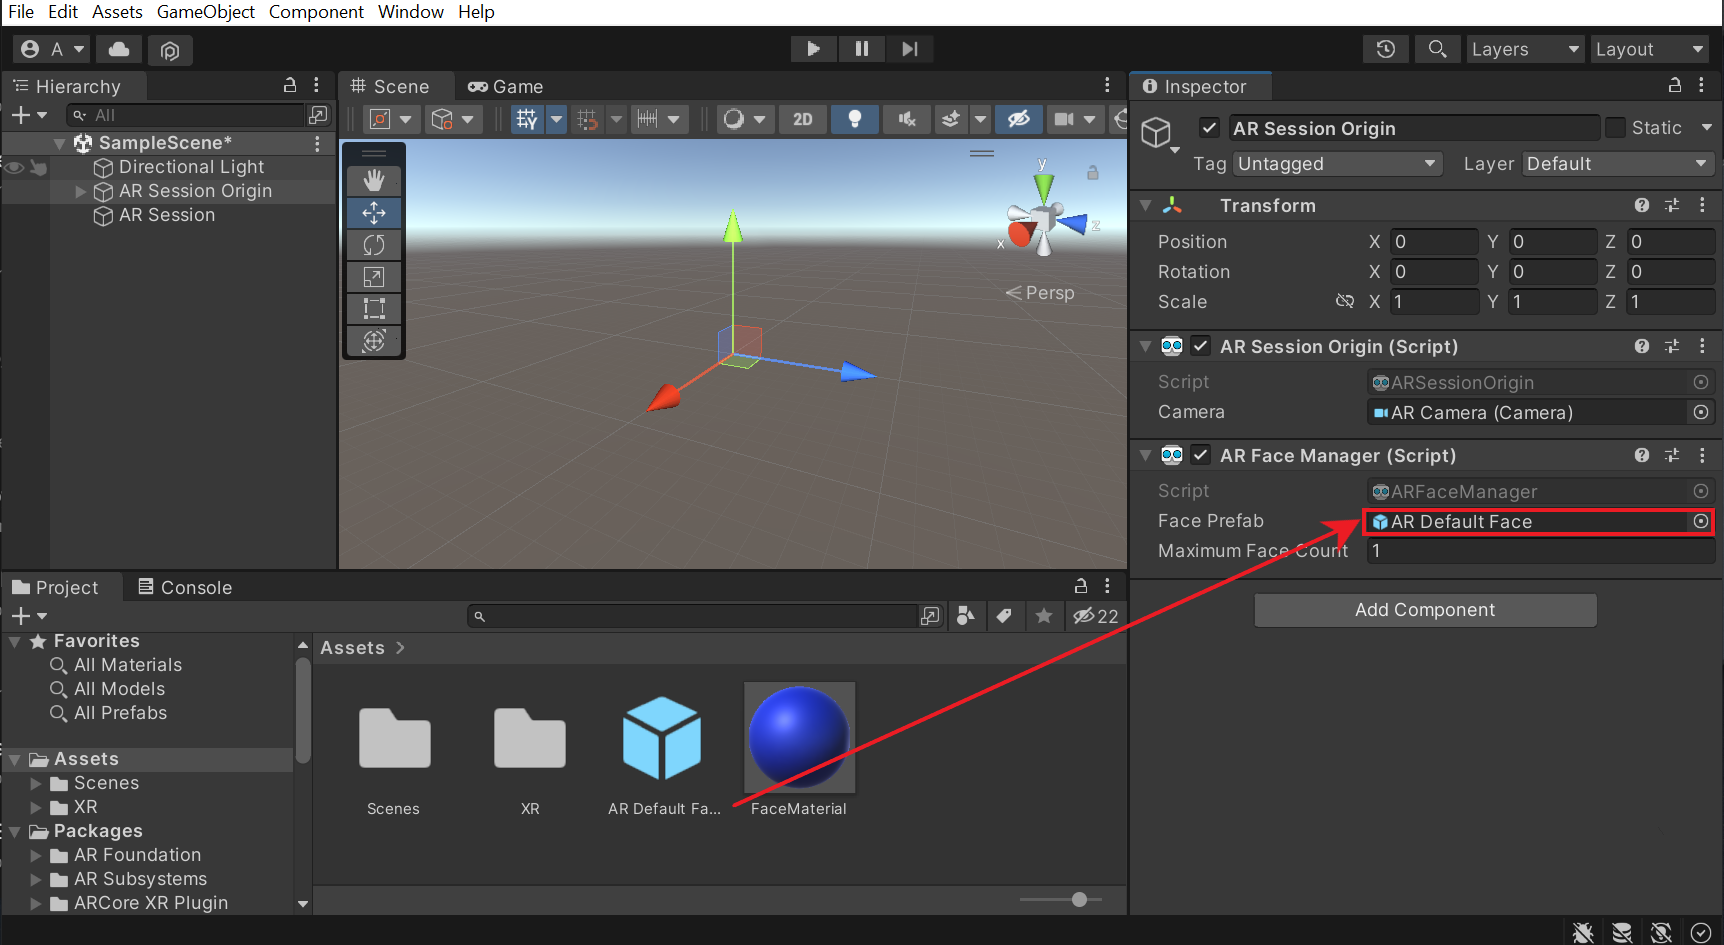
- Select the AR Session Origin GameObject and click on Add Component → add the AR Face Manager component. This component will create a Face Prefab for each detected face based on the value in the parameter Maximum Face Count.
The component requires us to add a Face Prefab. So, let’s see how to create and add it.
Creating Face Prefab
We can create a Face Prefab in just two steps:
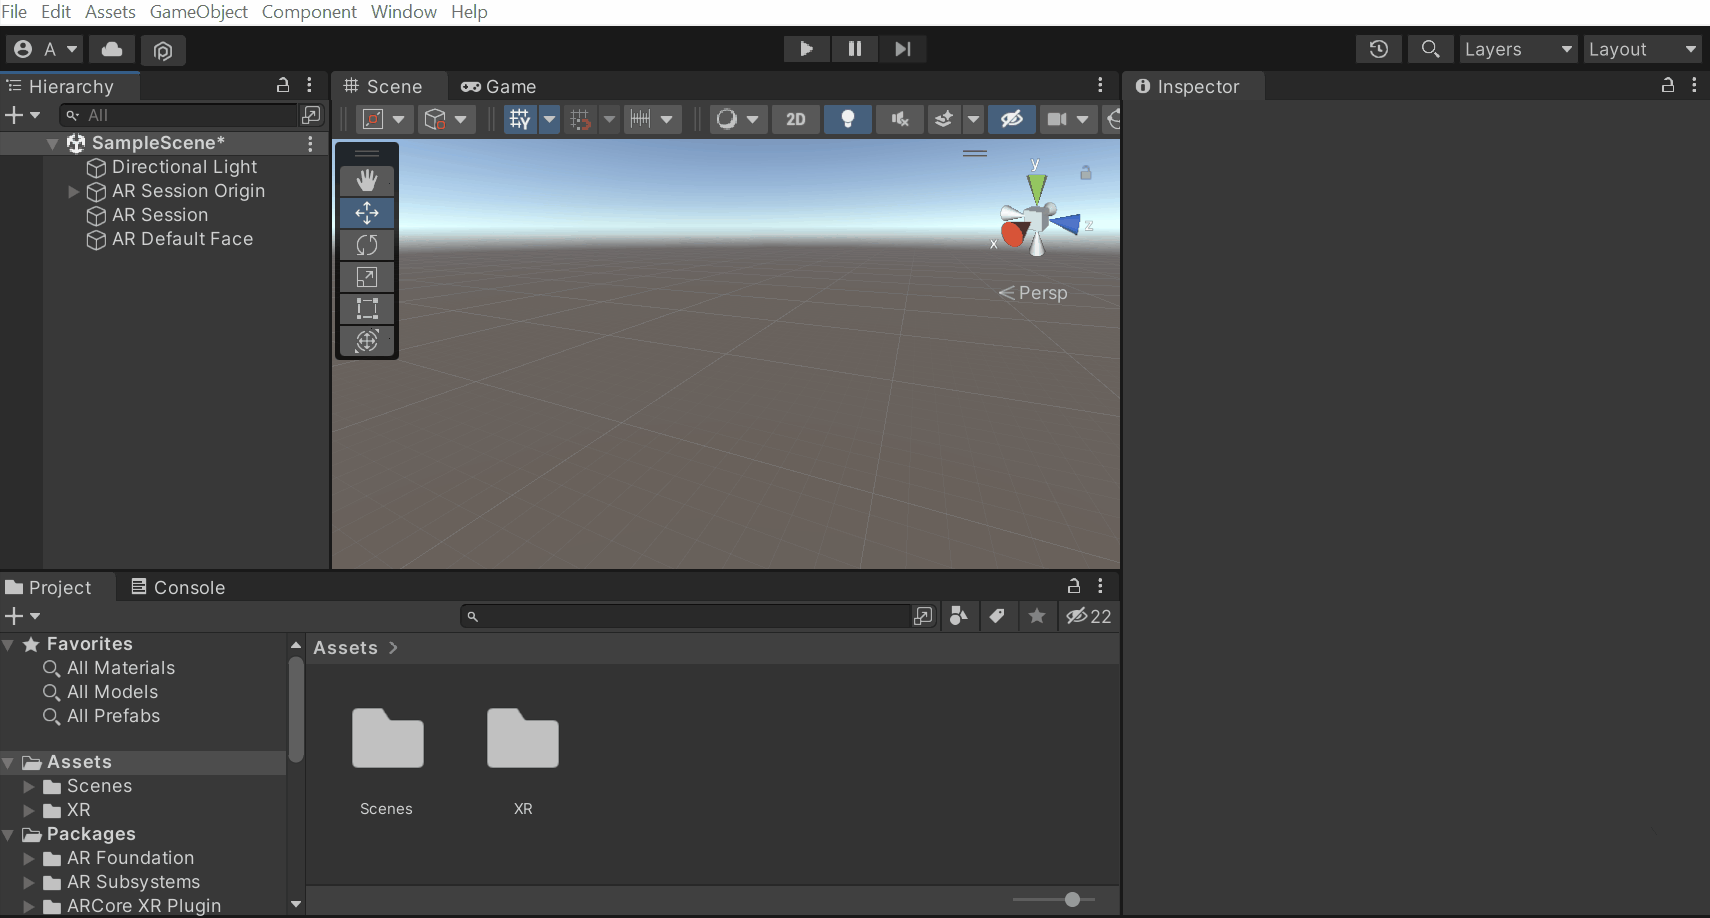
- Right-click on the Hierarchy window and select XR→ AR Default Face. This will create a GameObject named AR Default Face with the following components attached to it:
- AR Face: it represents a face detected by an AR device and contains all the data about a detected face like the eye position, the number of triangles in the mesh, etc.
- ARPFaceMeshVisualizer: this component generates a Mesh from the vertices, normals, indices, and UV(texture coordinates) data exposed by the AR Face and updates the MeshFilter if present. So, if this component is missing we’ll not be able to visualize the detected face.
- MeshCollider: it takes a Mesh (generated by ARFaceMesh Visualizer) *and builds a Collider based on that Mesh. It is more accurate for collision detection than using primitives for complicated Meshes.
- MeshFilter: it holds a reference to a Mesh. It works with a Mesh Renderer component on the same GameObject to visualize the mesh.
- Mesh Renderer: renders the mesh that the Mesh Filter references.

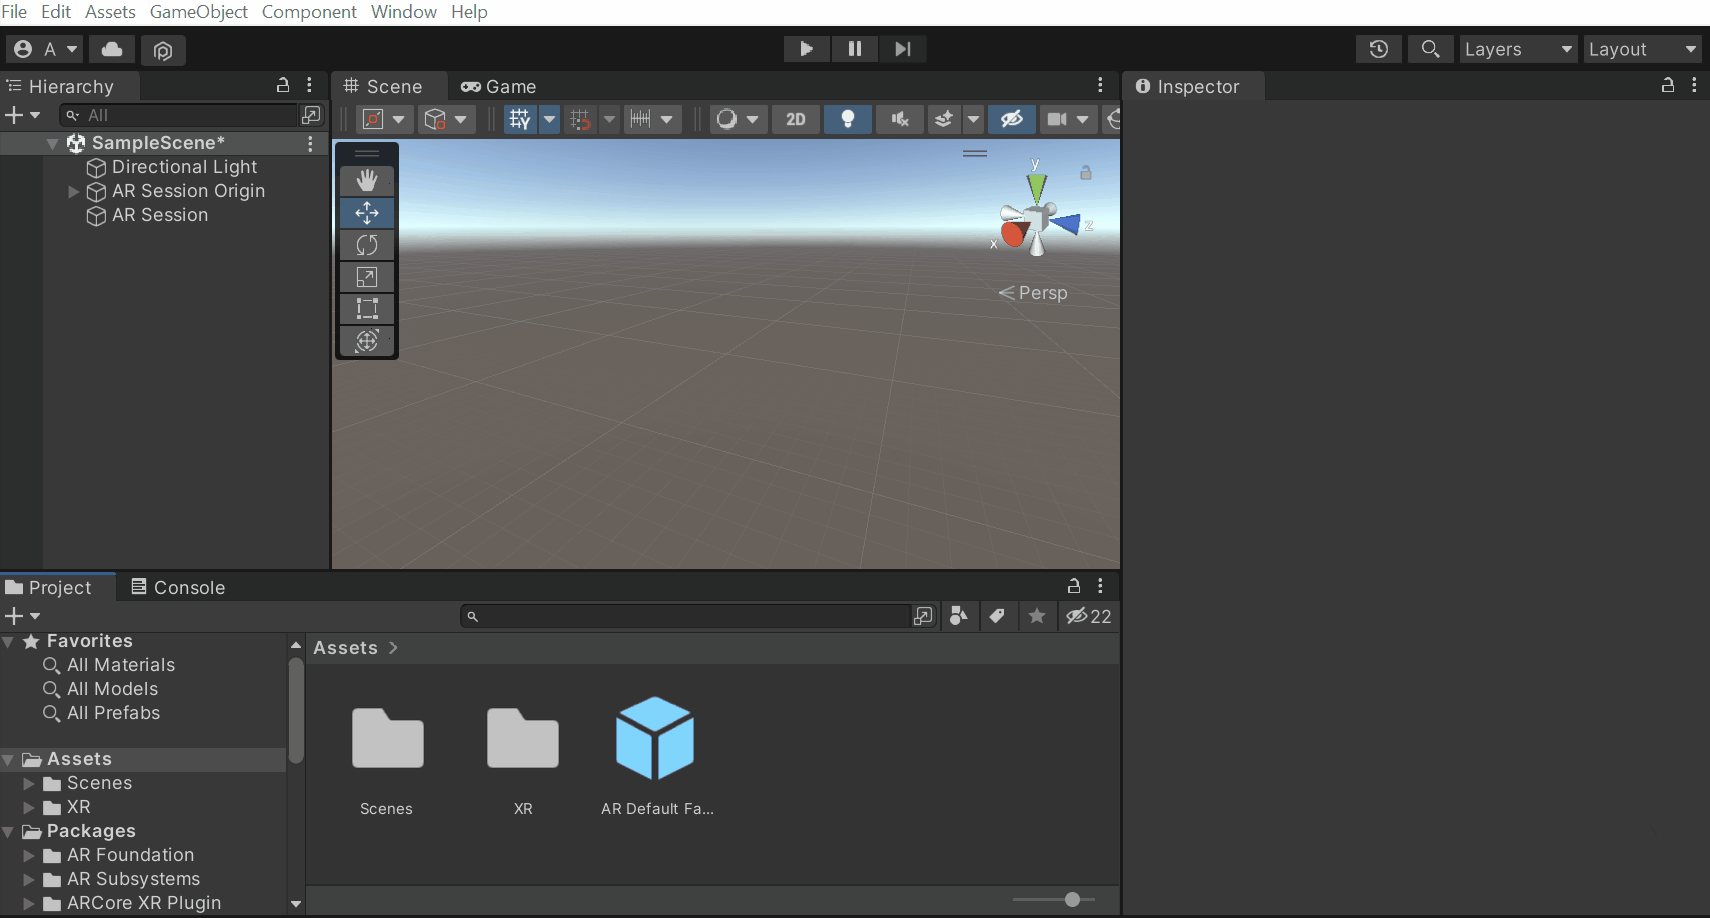
- Next, drag and drop the AR Default Face GameObject into the Project window to convert it into a prefab. Finally, delete it from the scene.
With that, we have created a Face Prefab. But the mesh renderer has a default material which is orange in color. If you are not a fan of that color then we can change it in just a few steps.
- Right-click on the project window, select Create→ Material → name the material as FaceMaterial.
- Select the FaceMaterial, select the Albedo parameter and choose the color of your choice. Also, if required we can reduce the alpha value so that we’ll be able to see the face through the material.
- Select the AR Default Face prefab, find the Mesh Renderer component and replace the DebugFace material with the FaceMaterial.
Before we build and test the application, there is one more step to do. That’s referencing the Face Prefab. To do that, select the AR Session Origin GameObject from the Hierarchy window → drag and drop the AR Default Face prefab into the Face Prefab parameter of the AR Face Manager component.
Testing
Now, let’s build and test the application.
Once it’s built, the application will run on the device and we can test it. Since we chose the camera facing as User the front camera will be activated and it will detect the face. When the face gets detected the FaceMaterial gets rendered on top of it and it gets updated based on the facial movements as well.
- Click on File → Build Settings. This will open the build settings window.
- Make sure that the device is connected. Also, the right scene and the Android platform are selected. Then click on Build and Run.
- Give an appropriate name for the application and click on Save.
Once it’s built, the application will run on the device and we can test it. Since we chose the camera facing as User the front camera will be activated and it will detect the face. When the face gets detected the FaceMaterial gets rendered on top of it and it gets updated based on the facial movements as well.

Conclusion
Right now there is no concrete way of using face detection but there are a few cool things we can do. We can play videos on top of the detected face or even make objects follow the detected face. In the next blog, you’ll learn exactly that! We can also use it to make an application like Snapchat that will allow users to try different filters on their faces.

Created with